How to Add Watermarks to Your Appsmith Apps
Goal
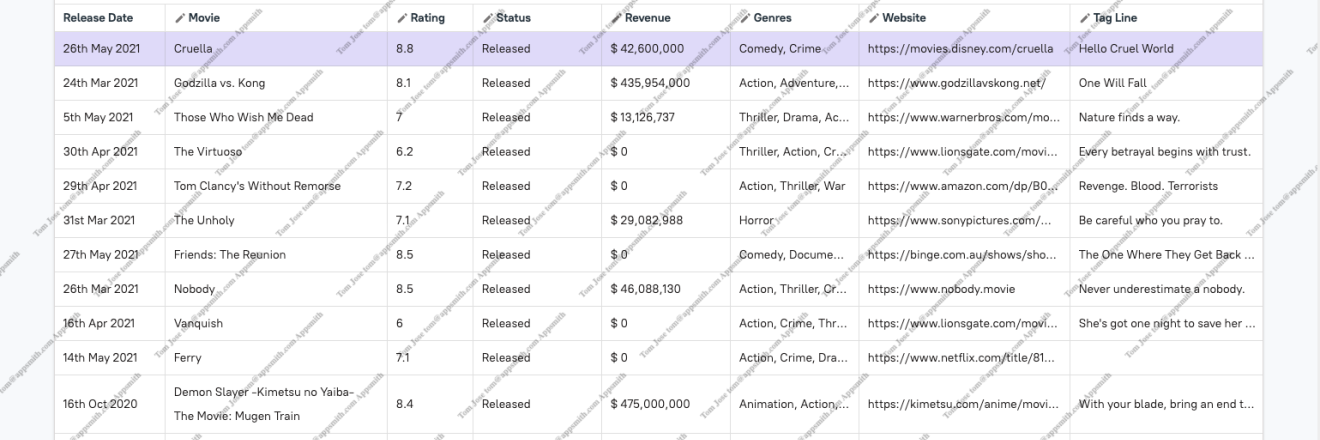
Many users develop applications that handle sensitive data. One common concern is the risk of users taking screenshots or pictures of the application and sharing this information without context, potentially leading to data leaks.
To address this, usually a watermark is added to the application, displaying key data like Company or name, email of the person who viewed the data. This not only discourages unauthorized sharing but also helps track the source if such an incident occurs.
In this tutorial, we will guide you on how to add a watermark layer on top of your Appsmith Apps to safeguard sensitive data.
Prerequisites
An Appsmith App
A website to embed the Appsmith App
Overview
In this tutorial, we will cover the following steps to add a dynamic watermark to your Appsmith App:
- Embedding Your Appsmith App
- Template of the Parent HTML Page
- Customizing the Watermark
- Dynamically Updating the Watermark
Embed your Appsmith App
- Navigate to Edit Mode: Open the Appsmith App you want to add a watermark to in edit mode.
- Get the Embed URL: Click the Share button at the top right corner. This will open a modal.
- Copy the Embed URL: Go to the Embed tab in the modal, and copy the Embed URL.
You'll be embedding this URL in an iframe on a hosted HTML page where you'll add the watermark layer.
Parent HTML Page
- Host an HTML Page: Host an HTML page, preferably on the same domain as your Appsmith App if you're self-hosting Appsmith.
- Embed the Appsmith App: In your HTML, add an iframe element with the
srcset to the Embed URL you copied in the previous step.
Here's a sample HTML where the Appsmith App is embedded in an iframe, and a watermark layer is added using SVG and CSS:
<!DOCTYPE html>
<html lang="en">
<head>
    <meta charset="UTF-8">
    <meta name="viewport" content="width=device-width, initial-scale=1.0">
    <title>Appsmith App</title>
    <style>
        body {
            font-family: Arial, sans-serif;
            margin: 0;
            height: 100vh;
            display: flex;
            justify-content: center;
            align-items: center;
            background: #f0f0f0;
        }

        .iframe-container {
            position: relative;
            width: 80%;
            height: 80%;
            overflow: hidden;
        }

        .watermark {
            position: absolute;
            top: -200px;
            left: 0;
            width: 100%;
            height: 150%;
            background-repeat: repeat;
            background-position: center;
            background-size: 200px 100px;
            background-attachment: fixed;
            opacity: 0.3;
            transform: rotate(-45deg);
            pointer-events: none; /* Allow clicks to pass through the overlay */
            z-index: 1;
        }

        iframe {
            width: 100%;
            height: 100%;
            border: none;
            position: relative;
            z-index: 0;
        }
    </style>
</head>
<body>
    <div class="iframe-container">
        <iframe src="https://company.appsmith.com/app/my-application/home-66a901bacdafd24297a58594?embed=true"></iframe>
        <div class="watermark"></div>
    </div>
    <script>

    document.addEventListener("DOMContentLoaded", function() {
        const watermarkDiv = document.querySelector('.watermark');
        const base64Text = btoa(`
            <svg xmlns="http://www.w3.org/2000/svg" width="200" height="50" viewBox="0 0 200 50">
                <text x="0" y="10" fill="#000000" font-size="10" font-weight="bold">Name: Tom, email: tom@appsmith.com</text>
            </svg>
        `);
        watermarkDiv.style.backgroundImage = `url('data:image/svg+xml;base64,${base64Text}')`;
    });
</script>
</body>
</html>
Here we are adding a
divelement as a sibling to theiframeelement. Thedivis styled to appear exactly on top of theiframe, slanted and repeating across the page.We have added a script to dynamically add the CSS
background-imageto thedivelement using the base64 encoded value of an SVG. You can customize the SVG element's height, width, and content details as required. In this example, I am using my name, email id, and company name.Dynamic Watermark based on Appsmith App
For Business Editions and higher, your embedded Appsmith App can communicate with the parent HTML using postMessage.
This allows your Appsmith App to share details like the logged-in user’s name and email, which the parent app can use for the watermark.
Here’s the updated script to be added in the parent HTML to listen for watermark changes from the embedded App:
<script>
    document.addEventListener("DOMContentLoaded", function() {
        const watermarkDiv = document.querySelector('.watermark');

        function updateWatermark(text) {
            const base64Text = btoa(`
                <svg xmlns="http://www.w3.org/2000/svg" width="200" height="50" viewBox="0 0 200 50">
                    <text x="0" y="20" fill="#000000" font-size="10" font-weight="bold">${text}</text>
                </svg>
            `);
            watermarkDiv.style.backgroundImage = `url('data:image/svg+xml;base64,${base64Text}')`;
        }

        // Initial watermark
        updateWatermark('Appsmith');

        // Listen for postMessage event to change the watermark
        window.addEventListener('message', function(event) {
            if (event.data.type === 'Change Watermark') {
                updateWatermark(event.data.text);
            }
        });
    });
</script>
Below is an example of the JavaScript function to be run onPageLoad from the Appsmith App to update the watermark in the parent HTML. Use the following JSObject function:
async onPageLoad() {
	postWindowMessage({
		type: "Change Watermark",
		text: `${appsmith.user.name} ${appsmith.user.email} Appsmith`
	}, "window", "*")
}
Conclusion
Adding a watermark to your Appsmith App involves embedding the app within an iframe on a parent HTML page and layering a watermark on top using SVG and CSS.
There are no security concerns with this iFrame approach, as the Appsmith App embedding can be made private and will continue to use the existing login system, ensuring that access is restricted to authorized users only
For users of the Business Editions and higher, the ability to dynamically update the watermark based on the logged-in user's or other information enhances the personalization and security of your app. Leveraging the postMessage API allows for seamless communication between the embedded Appsmith App and the parent HTML page, enabling real-time updates to the watermark.
By following the steps outlined above, you can overlay a customizable watermark on your embedded Appsmith App.


