We recently added 15 new integrations in Appsmith, including Gmail and several other Google services. With the Gmail integration, you can search, create and manage emails and contacts easily, using a dropdown to select the method.
In this guide, we'll be taking a closer look at the Get Email By Id method, and how to work with the Base64Url response data.
This guide will cover:
- Creating a Gmail datasource
- Searching emails using labels, folders, keywords, etc
- Fetching one email by ID
- Base64 vs Base64Url
- Decoding Base64Url body to HTLM or plain text
- UTF-8 Encoding vs raw 8-bit data
- Displaying decoded email body
Let's get to it!
Creating a Gmail Datasource
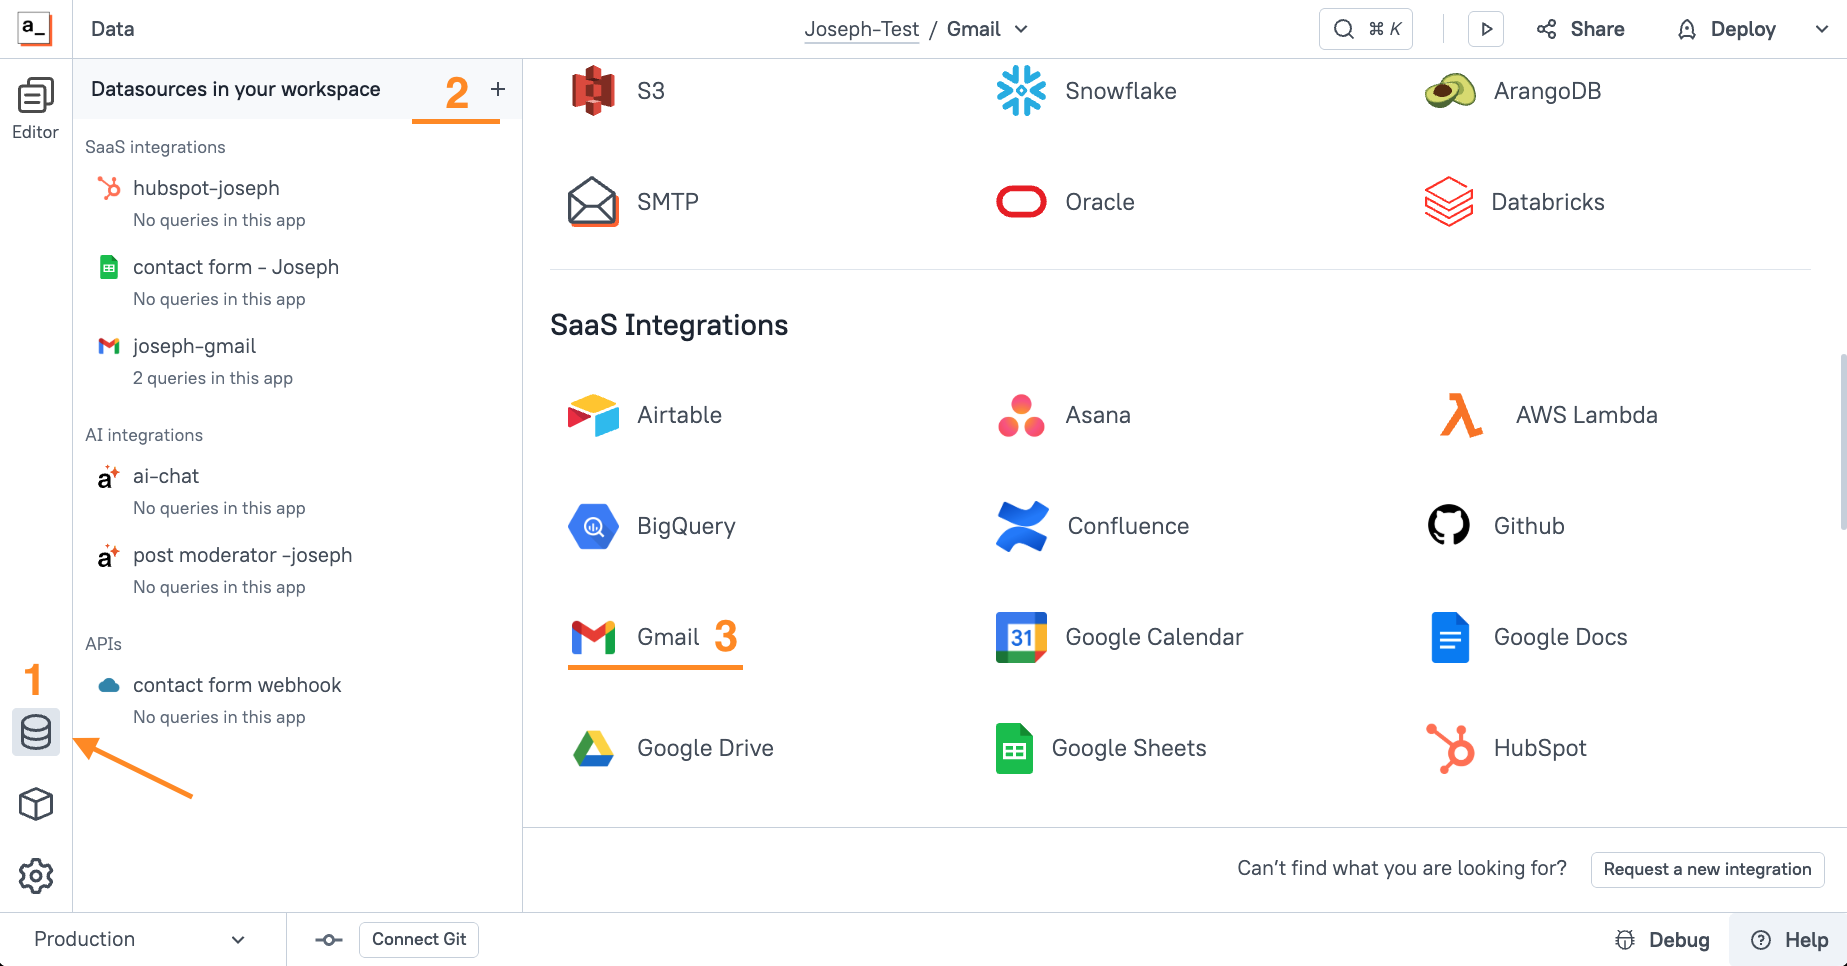
Start out by clicking the Datasource icon on the left sidebar. Then click the [+] to add a new datasource and select Gmail from the integrations list.
On the next screen, choose Connect with OAuth, then login and authorize access to your Gmail account.
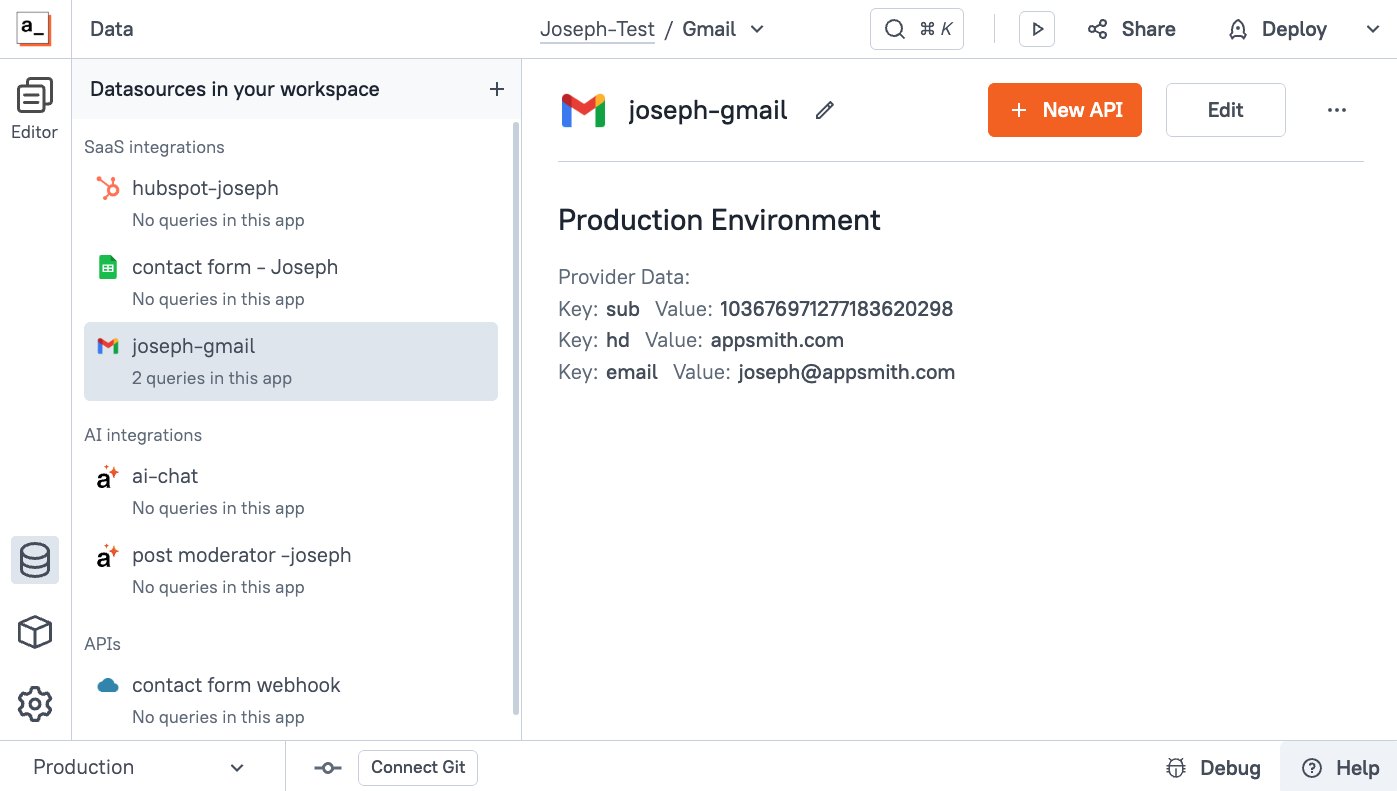
Optional (recommended): Give the datasource a descriptive name to help you and your team reference for use in other apps.
Searching emails using labels, folders, keywords, etc
With the datasource selected, click the + New API button to add your first API and name it SearchEmail.
Or, from the Query tab, you can click the [+] then select your new datasource to add a new API.
Choose Search For Emails from the Commands list, then click Run.
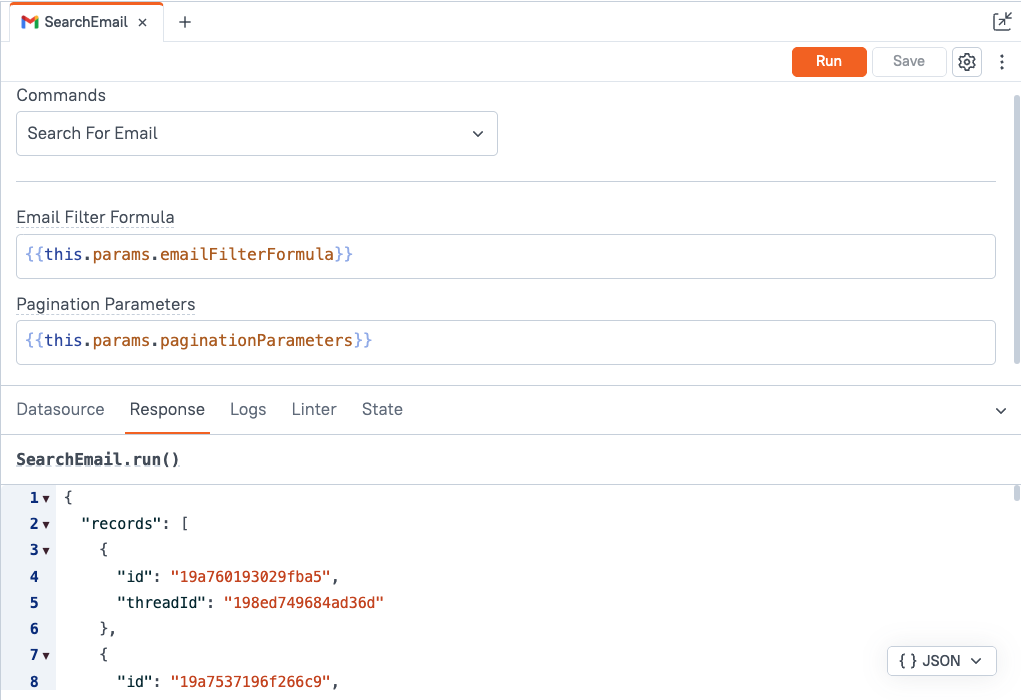
You should get back an object with a records array of email and thread IDs. There's no subject, body, or any other info- just the IDs that can be used to look up the other data.
Notice how the Email Filter Formula and Pagination Parameter both have {{this.params.PROPERTY_NAME}} placeholders by default. This lets you pass in parameters at runtime, but you can also hard code values here if you want the same filter every time.
To add a fallback value to test the API from the Query pane, use the || (OR) operator. Here's an example that searches for emails in the inbox with the label Marketing, if no filter is passed in at runtime.
{{this.params.emailFilterFormula || 'in:inbox label:Marketing'}}For more info on the Filter Formula syntax, see the Refine Searches in Gmail docs.
Create a filter that returns just a few emails to use for your test. Run it, and you should get back your filtered results now instead of the full list of emails.
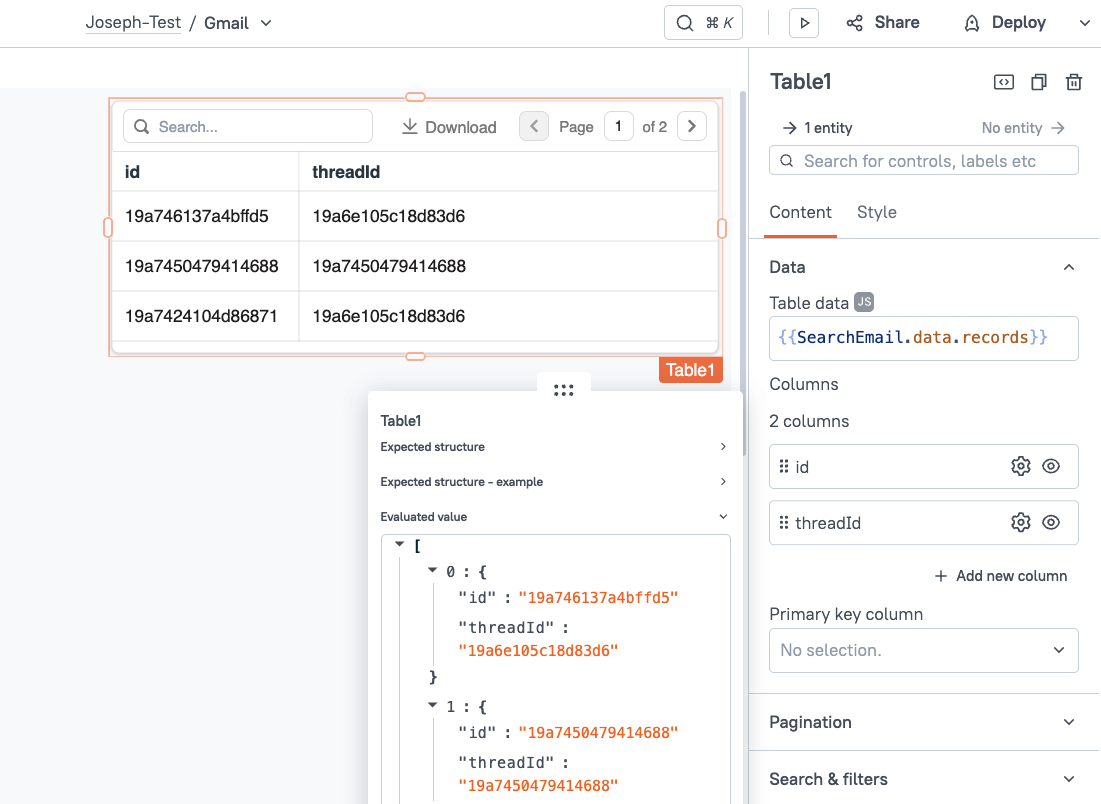
Next, go to the UI tab and drag in a table widget. Then set the Table data to {{SearchEmail.data.records}} (click the JS button to switch dropdown to text input).
Since the API only returns the IDs, you'll have to do a separate API call to fetch the subject, sender, body, and other details for each record. If you want, you can loop through the IDs and fetch all the data, then join it with the table to display them all at once.
For this tutorial, we're going to focus on displaying the Base64Url data from one email. If you'd like to see another guide on bulk-fetching and joining the email data with the IDs from the search, drop a comment below!
Fetching one email by ID
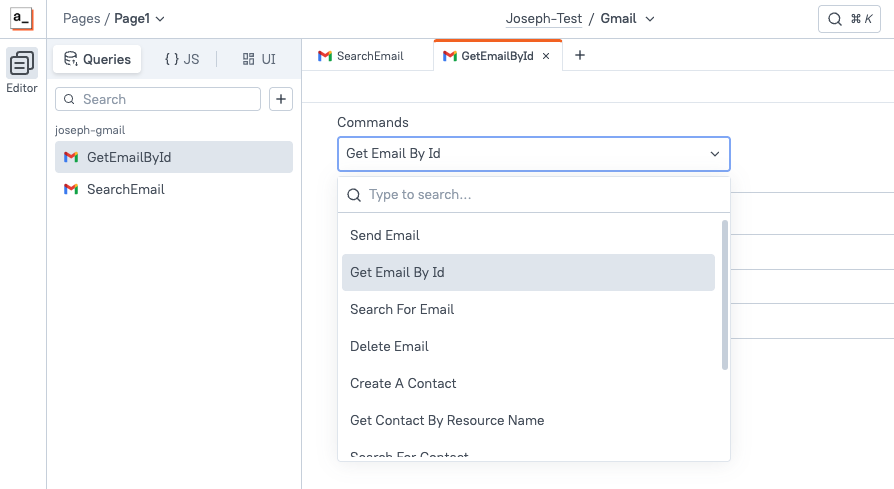
Next, create a new API under the Gmail datasource and select Get Email By Id from the Commands list. Name it GetEmailById.
Now head back to the UI tab and select the table. Under Row selection, set the onRowSelected action to run the GetEmailById.run API. Expand the parameters section, and pass in the messageId using the Id from the selected row.
{{
{
  "messageId": Table1.selectedRow.id
}
}}
Ok, now each time a row is selected it should fetch the data for that email. Next, head back to the Query tab and view the response after selecting a row.
The Gmail API returns the body as text/plain and text/html, but both are encoded as Base64Urls.
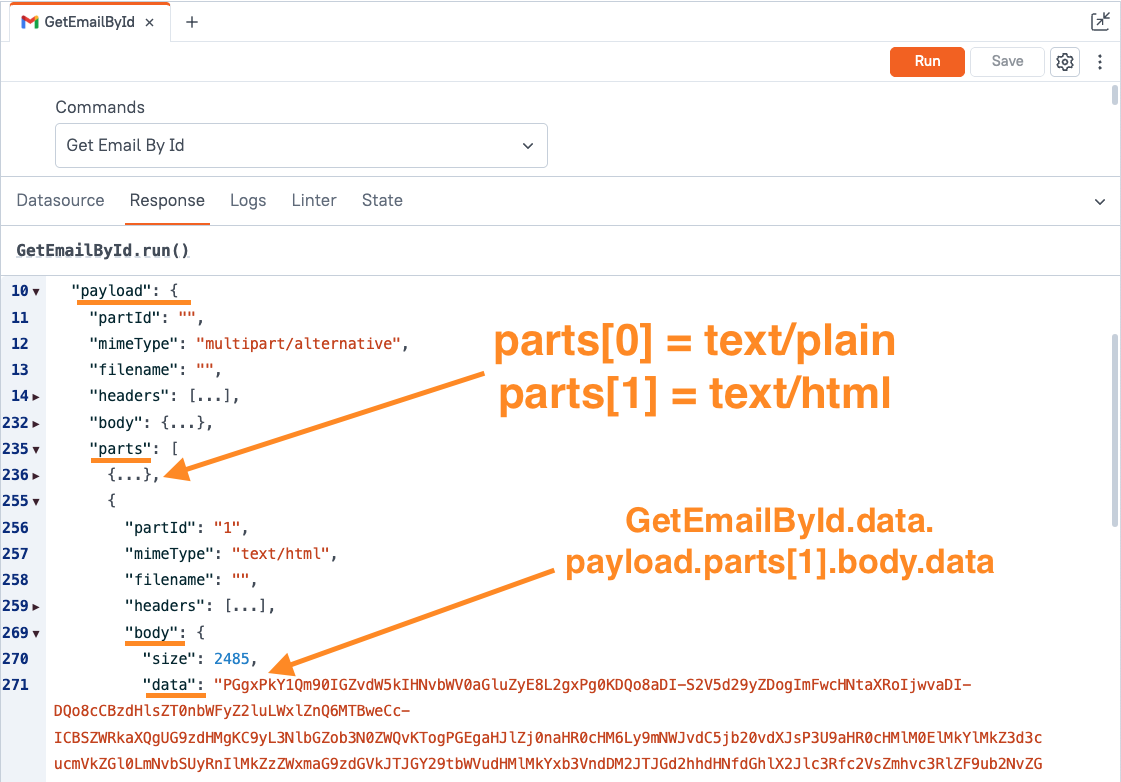
The actual email body is at GetEmailById.data.payload.parts[1].body.data. This is the value we need to convert in order to display the HTML. But before we tackle that, let's take a minute to review Base64Urls.
Base64 vs Base64Url
Base64 is a common encoding method used to transmit data. It uses ASCII characters to represent bytes of data. The 64 comes from using the letters A to Z (upper and lower case = 52 char.), numbers 0-9 (62 char.), and the plus (+) and forward slash (/) to make 64 characters. Equals signs (=) are also used for padding at the end, to ensure the string is a predictable length (divisible by 4) for easier parsing.
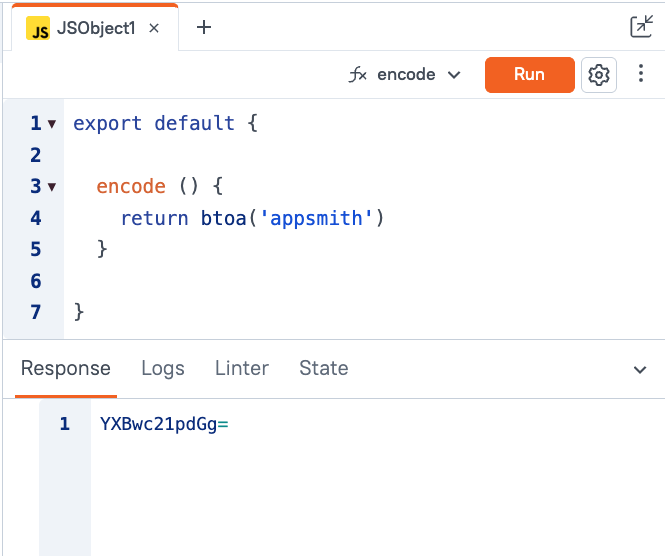
JavaScript provides the atob() method to decode the data into ASCII, and btoa() method to encode binary to ASCII. You can use these anywhere in the Appsmith editor to convert between formats.
However, Base64 is not the same as a Base64Url, and the atob() method will fail to decode if you try on a Base64Url like the Gmail API response.
Base64Urls are designed to work in an actual URL of the browser, and browsers already have a special use for pluses and slashes. The plus serves as a space, and the slash is used for directories. So to make the Base64 string URL compatible, they are replaced with minus (-) and underscore (_).
Decoding Base64Url body to HTLM or plain text
Before a Base64Url can be decoded with atob(), you have to replace these characters with their original plus and slash characters.
	decode () {
		const b64Url = GetEmailById.data.payload.parts[1].body.data;
		const b64 = b64Url.replace(/-/g, '+').replace(/_/g, '/');
		return atob(b64)
} 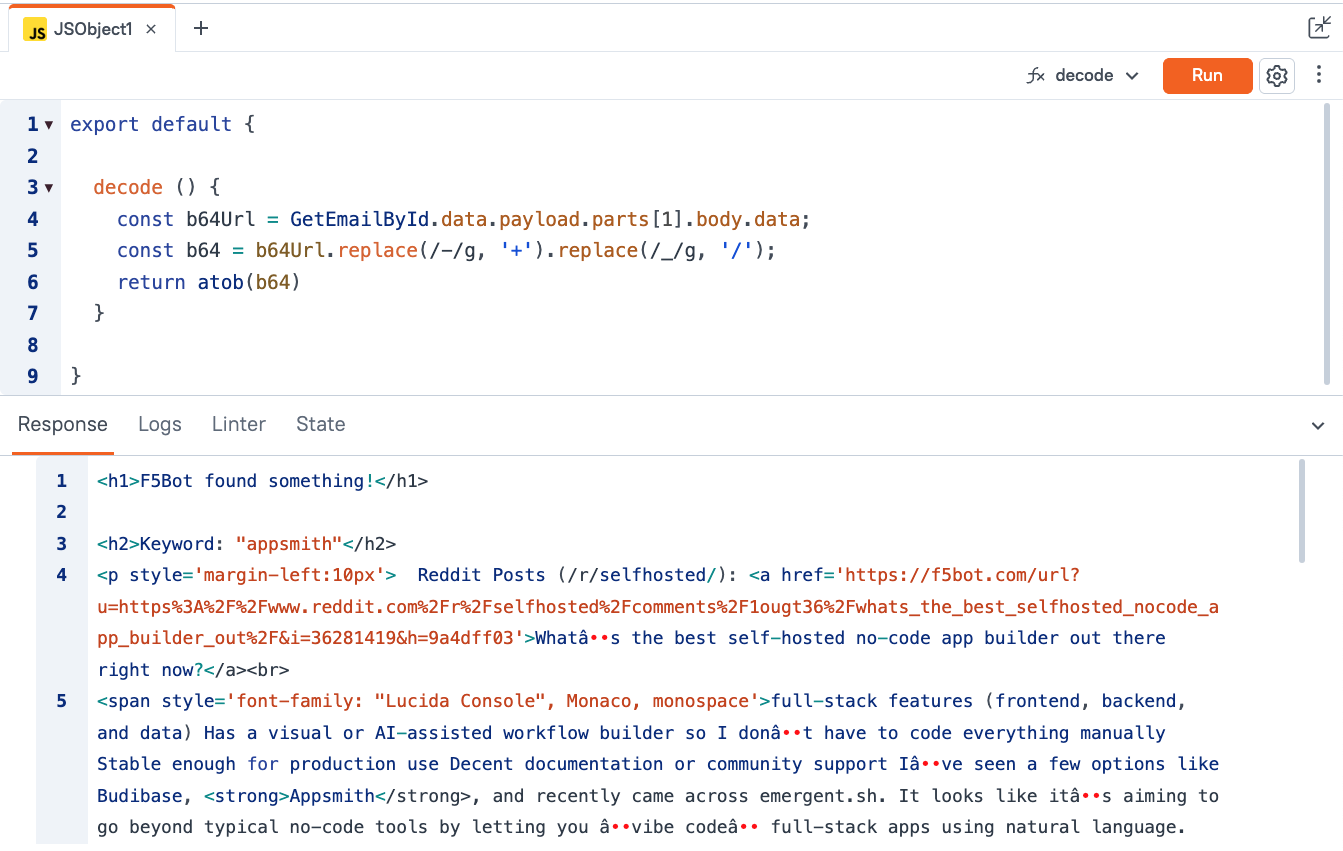
Ok, now it's starting to look like something we could display in an iframe. But notice the weird characters like â with the line over it, and the red dots ⋅⋅.
UTF-8 Encoding vs raw 8-bit data
Most of the decoded data looks correct, but certain characters didn't convert properly. This is because the data we're decoding was actually encoded TWICE! The Base64Url encoding is needed for URL compatibility. But character encoding is also needed to support modern characters like emojis that have variable lengths instead of the fixed length like pure ASCII characters.
This decoding step is a bit more involved. First we need to add the extra equals signs for padding, then create a Unit8Array from the character code for each byte. Then, that array can be used in a new TextDecoder.
Create a new JSObject and add a function to decode the Base64Url.
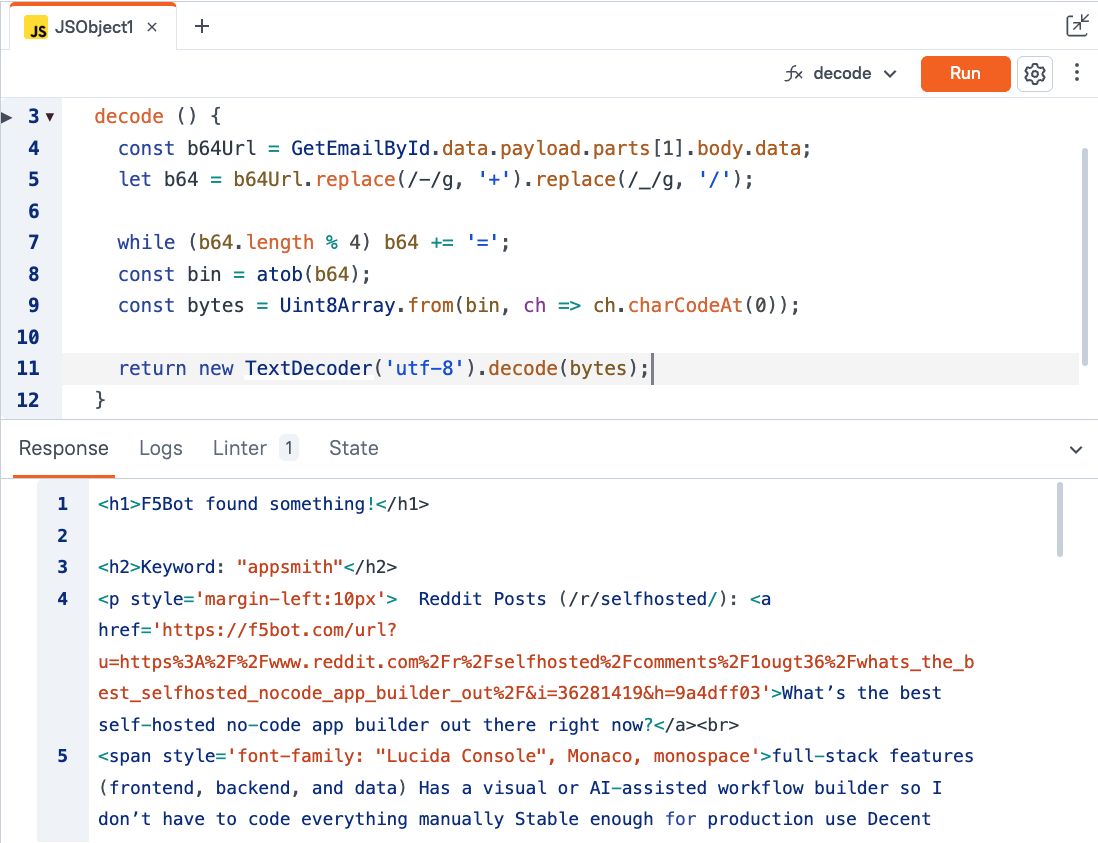
	decode () {
		const b64Url = GetEmailById.data.payload.parts[1].body.data;
		let b64 = b64Url.replace(/-/g, '+').replace(/_/g, '/');

		while (b64.length % 4) b64 += '=';
		const bin = atob(b64);
		const bytes = Uint8Array.from(bin, ch => ch.charCodeAt(0));

		return new TextDecoder('utf-8').decode(bytes);
	}
Now all of the characters convert properly! Time to display it in an iframe.
Note: You may see a warning from the linter that TextDecoder is not defined. It should still run fine- it's just a missing term in the auto-complete of the editor, and it should be fixed soon!
Displaying decoded email body
Lastly, drag in an iframe widget and bind the SrcDoc property to the output of the new function.
{{JSObject1.decode()}}
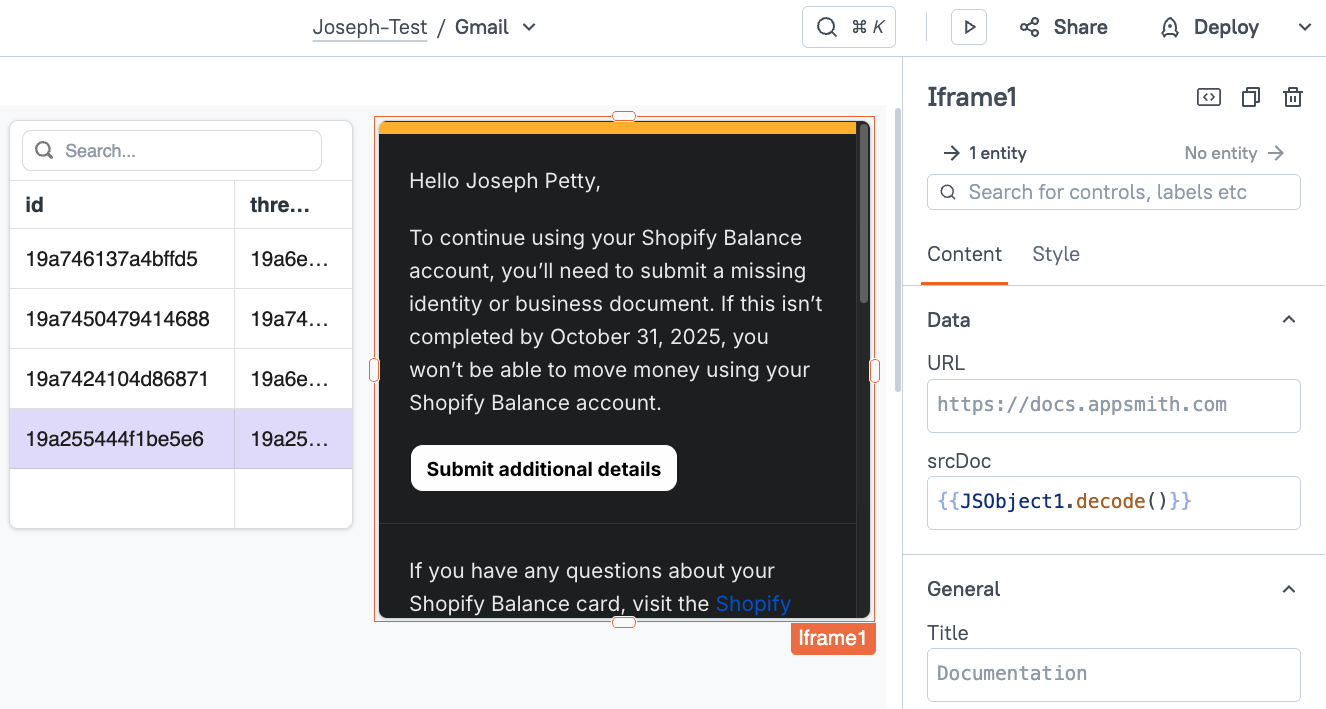
Now, as you select different emails from the table, the iframe should update with the HTML body of the email.
Conclusion
Appsmith's new Gmail integration makes it easy to integrate with the Gmail API to create and manage emails and contacts. You can also display emails in Appsmith, but there are a few important steps needed to convert the API response before it can be viewed. This guide covers the Base64Url decoding, as well as the character set decoding, to ensure the body is displayed correctly with all characters converted properly.