

Displaying an array of data in Appsmith can easily be done with a Table or List widget. The Table Widget is more powerful, with features like inline editing and built-in search and filter tools. And the List Widget is more flexible, allowing you to add any other widget inside each row of the List, including other List Widgets! However, neither option supports drag-and-drop to reorder the rows. So today, we're going to build a Custom Widget that does, using SortableJS.
The SortableJS library makes it easy to build lists with drag-and-drop features to reorder rows, swap positions, drag values between two lists, clone items from one list to another, etc. It also adds class names to elements as they are being dragged around, so you can add your own css and target items while the drag is occurring. This guide will cover the basics of using SortableJS in a Custom Widget. Then you can adjust the config as needed to add any other features needed for your use case.
Let's get started!
SortableJS - Basic Usage
Start out by dragging in a new Custom Widget and click Edit source. Clear out the code from all 3 tabs of the Custom Widget Editor.
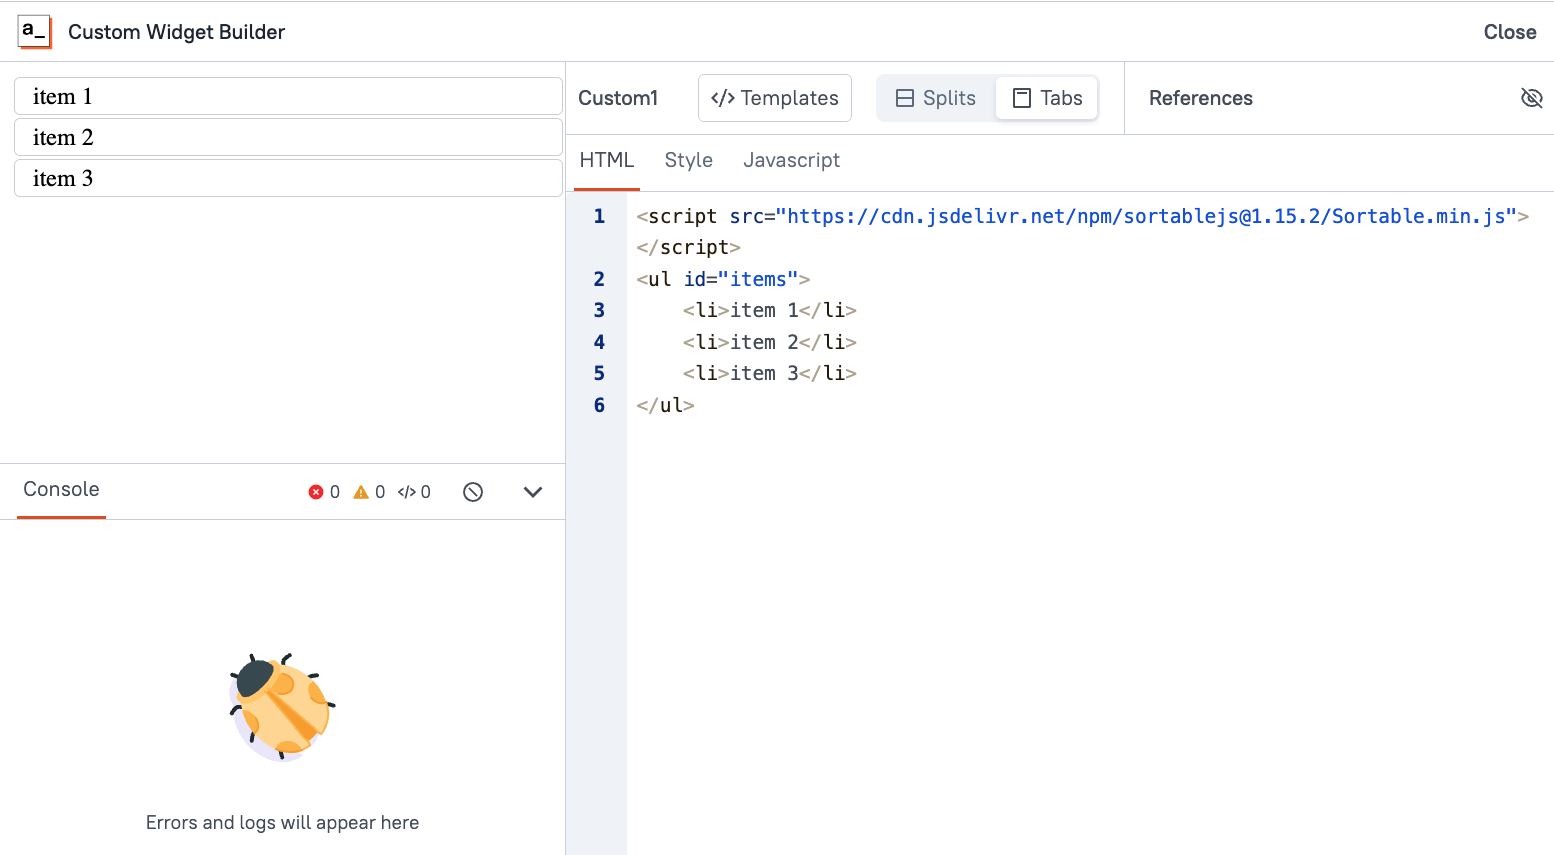
Next, import the SortableJS library and add a List element with a few List Items to sort, by pasting this in the HTML tab:
<script src="https://cdn.jsdelivr.net/npm/sortablejs@1.15.2/Sortable.min.js"></script>
<ul id="items">
   <li>item 1</li>
   <li>item 2</li>
   <li>item 3</li>
</ul>
Then add some CSS to make it look more like a draggable list.
body{
    margin: 10px
}
li{
    border: solid 1px lightgrey;
    padding: 4px 12px;
    border-radius: 4px;
    margin-bottom: 2px
}
You should now have a list that looks something like this:
Next, enter this in the JavaScript tab:
var el = document.getElementById('items');
var sortable = Sortable.create(el);
The list should now be sortable! Give it a try and you should be able to reorder the items.
Appsmith.onReady() Function
So the SortableJS library is working, and the list is reorderable. But there's a warning in the console:
Missing appsmith.onReady() function call. Initiate your component inside 'appsmith.onReady()' for your custom widget to work as expected.
You can get a few things to work in a Custom Widget without an onReady() function, but if you want to pass in data, you'll have to run your code inside the onReady() method. It's best to write your code as a separate function first, and then call that function inside the onReady().
So now we have:
appsmith.onReady(loadList);

function loadList(){
    var el = document.getElementById('items');
    var sortable = Sortable.create(el);
}
This should resolve the Missing appsmith.onReady() warning. It's also required before you can pass in data from outside the Custom Widget.
Generating <li> elements from Data
First, remove the <li> elements from the list on the HTML tab, leaving just the empty unordered list: <ul id="items"></ul>.
Next, add in some sample Tasks data at the top of the JavaScript tab:
const tasks = [
 {"title": "Task 1", "priority": 3, "color": "red", "status": "in-progress"},
 {"title": "Task 2", "priority": 1, "color": "blue", "status": "completed"},
 {"title": "Task 3", "priority": 5, "color": "green", "status": "not-started"},
 {"title": "Task 4", "priority": 2, "color": "orange", "status": "in-progress"},
 {"title": "Task 5", "priority": 4, "color": "purple", "status": "not-started"}
]
Then update the loadList function to loop over the data and add <li>'s to the list before initializing it.
appsmith.onReady(loadList);

function loadList() {
  const el = document.getElementById('items');

  tasks.forEach(t => {
    const li = document.createElement('li');
    li.textContent = t.title;
	li.style.color = t.color
    el.appendChild(li);
  });

  const sortable = Sortable.create(el);
}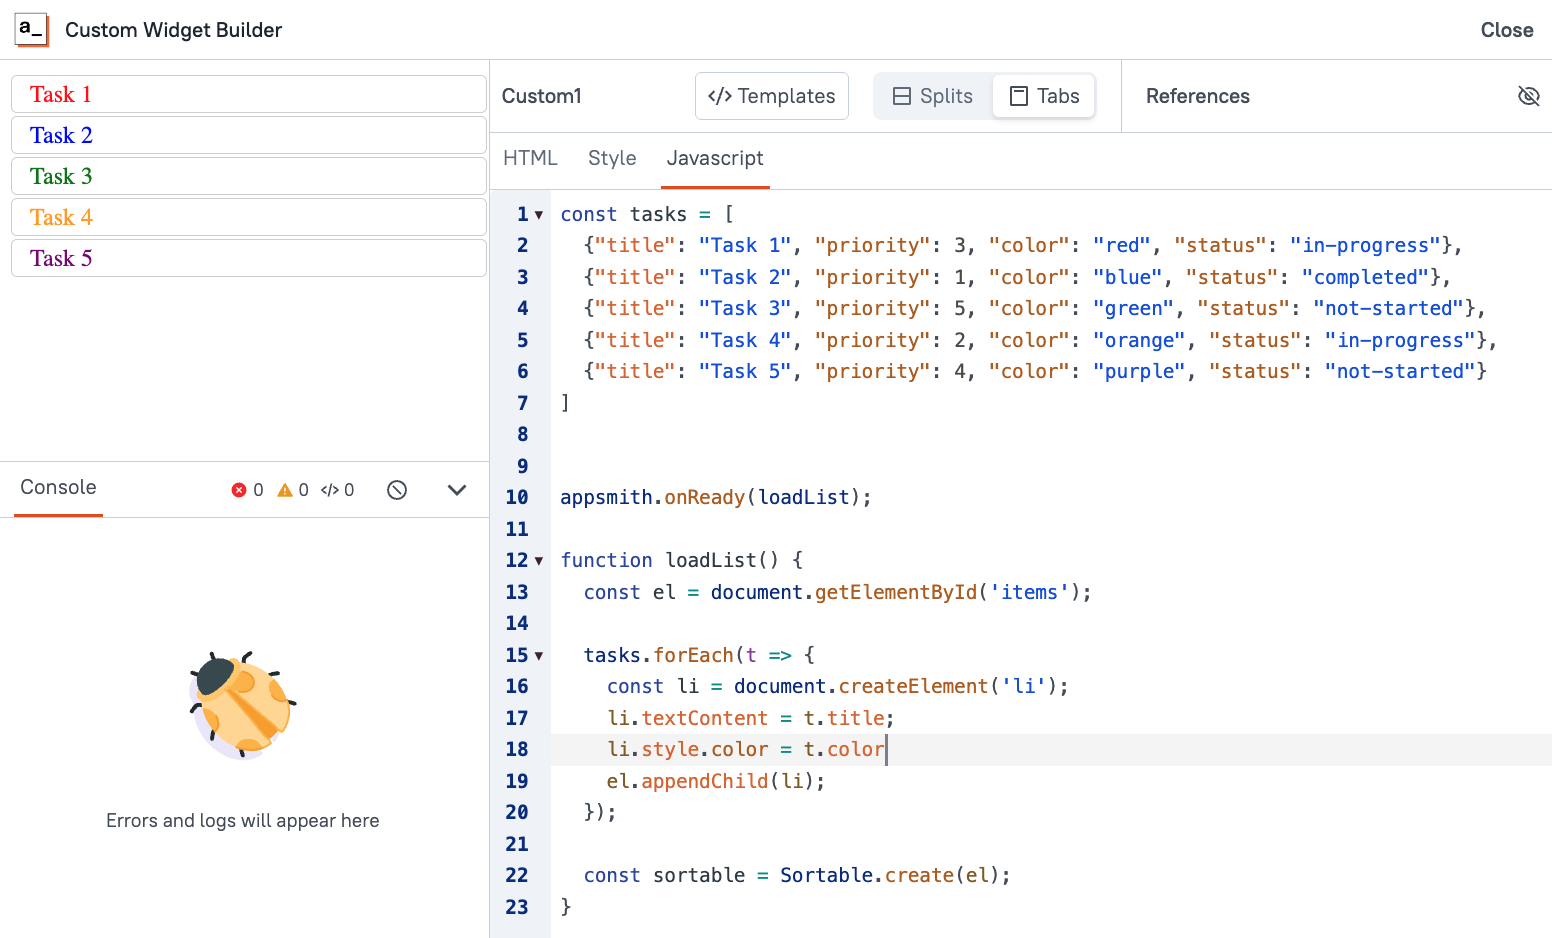
Ok, now that the list is being generated from data, we can change out that data and see the list update.
Inserting Data from the Model
This time we'll use data from the randomuser.me API so we can see it update with different data every time the API is ran.
Add a new GET API and name it getUsers.
Then set the URL to:
https://randomuser.me/api?results=100&inc=name,email,picture,nat,phoneNext, select the Custom Widget, and go to the property pane. Set the Default Model to an object with a users property that references the getUsers data.
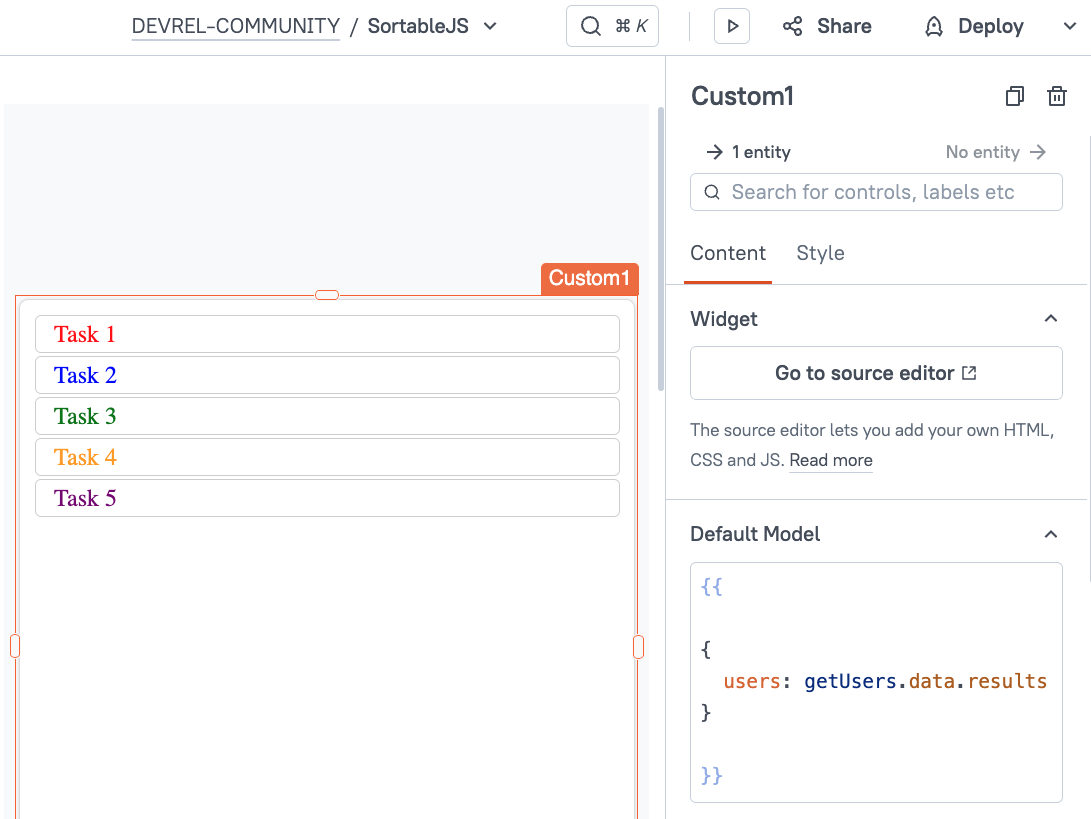
Now, go back to the Custom Widget's Edit source page. Update the loadList function to use data from the Appsmith model and adjust it for the property names in the mock user data.
appsmith.onReady(loadList);
function loadList() {
 const users = appsmith.model.users;
 const el = document.getElementById('items');
 users.forEach(t => {
   const li = document.createElement('li');
   const img = document.createElement('img');
   img.src = t.picture.medium;
   img.style.width = "50px";
   img.style.height = "50px";
   img.style.marginRight = "10px";
   li.appendChild(img);
   const text = document.createTextNode(t.name.first);
   li.appendChild(text);
   el.appendChild(li);
 });
 const sortable = Sortable.create(el);
}
The list is now using data from outside the custom widget! Let's see what happens when the data changes.
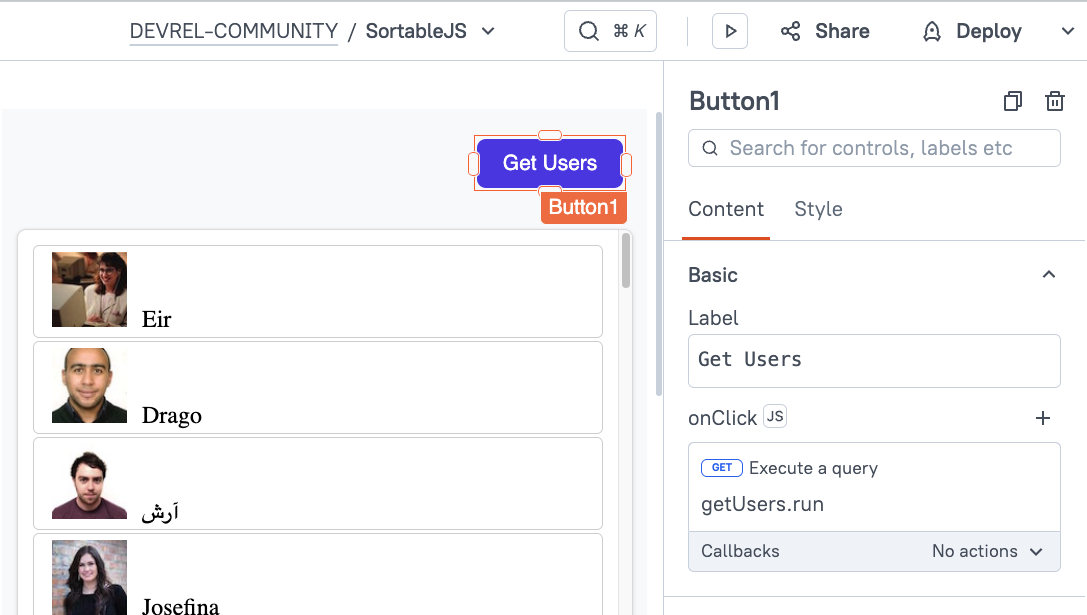
Add a button to the UI to re-run the getUsers query and watch the list for changes.
You'll notice that the getUsers query is running again and returning different data, but the list does not update!
Appsmith.onModelChange() Function
Head back to the Custom Widget editor and add an onModelChange() function that runs loadList, just like the appsmith.OnReady() function. As soon as you do this, you'll get the following error:
Uncaught TypeError: Cannot read properties of undefined (reading 'forEach')
What's going on here is that the onModelChange is firing before the getUsers API has returned any data, so there's nothing to loop over. To avoid this error, just check for data in the users array, and exit the loadList function if the array is empty.
if(!users){return}This will avoid the Cannot read properties of undefined error, but you'll notice the list still does not update when the data changes! That's because it's already loaded with the data from when it was initialized, and we're just adding new elements to that list. This can be fixed by emptying the list before looping over the data.
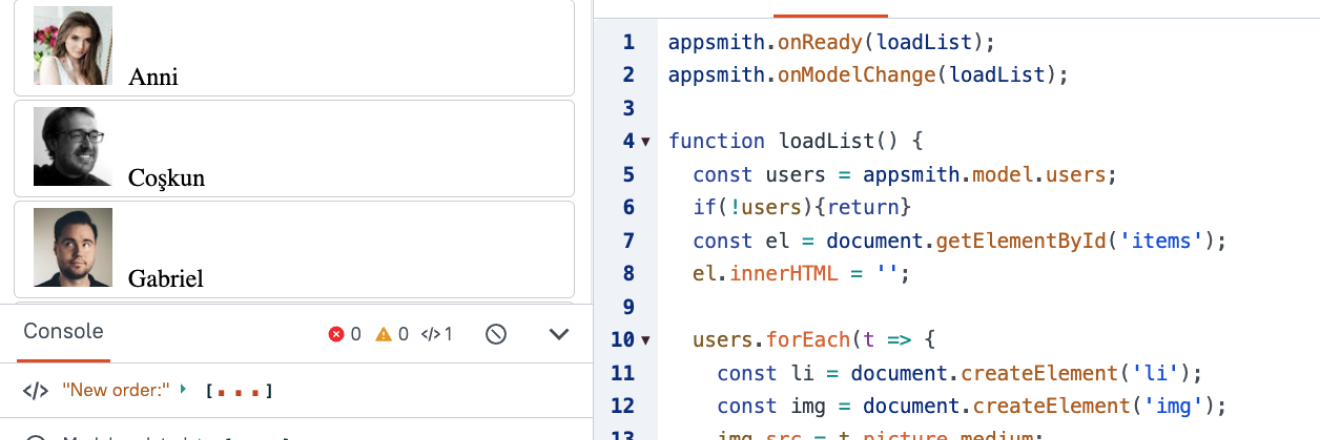
Putting it all together:
appsmith.onReady(loadList);

appsmith.onModelChange(loadList);

function loadList() {
 const users = appsmith.model.users;
    if(!users){return}
 const el = document.getElementById('items');
 el.innerHTML = '';
 users.forEach(t => {
   const li = document.createElement('li');
   const img = document.createElement('img');
   img.src = t.picture.medium;
   img.style.width = "50px";
   img.style.height = "50px";
   img.style.marginRight = "10px";
   li.appendChild(img);
   const text = document.createTextNode(t.name.first);
   li.appendChild(text);
   el.appendChild(li);
 });
 const sortable = Sortable.create(el);
}
Now when the API runs, you should see the list update with the new data.
Saving the New List Positions
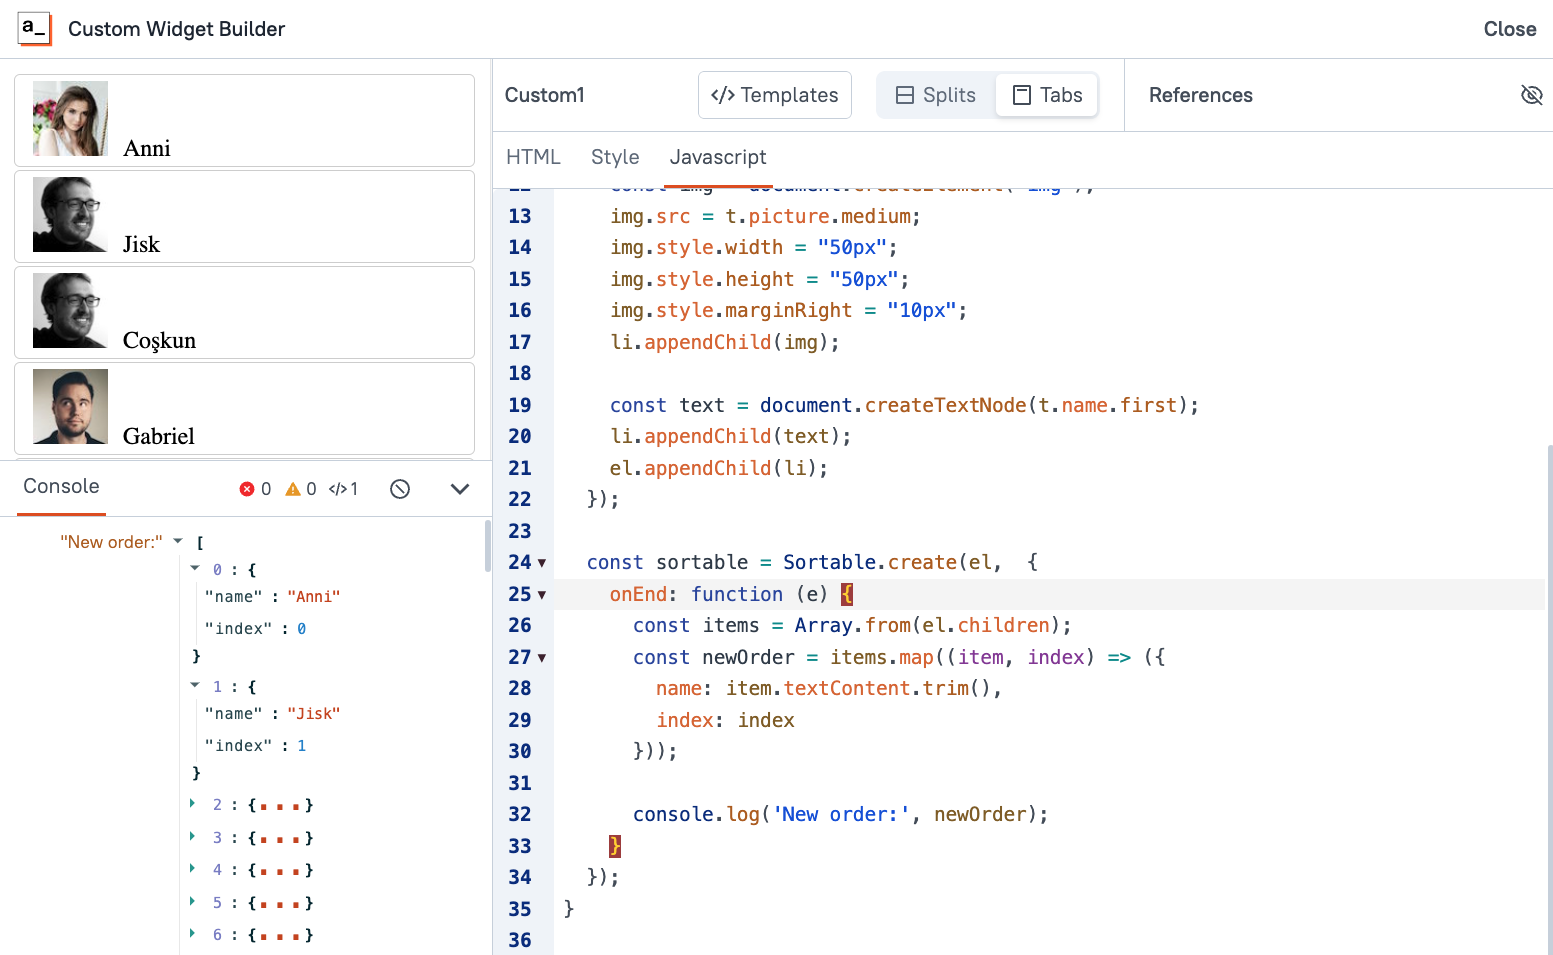
So far we've just been initializing Sortable using Sortable.create(el) with no other parameters. There's an optional config object though, with a bunch of different properties for enabling new features. One option is the onEnd function that will fire when the drag is complete. We can use this to log the new indexes by mapping over the list Items.
  const sortable = Sortable.create(el,  {
   onEnd: function (e) {
     const items = Array.from(el.children);
     const newOrder = items.map((item, index) => ({
       name: item.textContent.trim(),
       index: index
     }));
     console.log('New order:', newOrder);
   }
 });
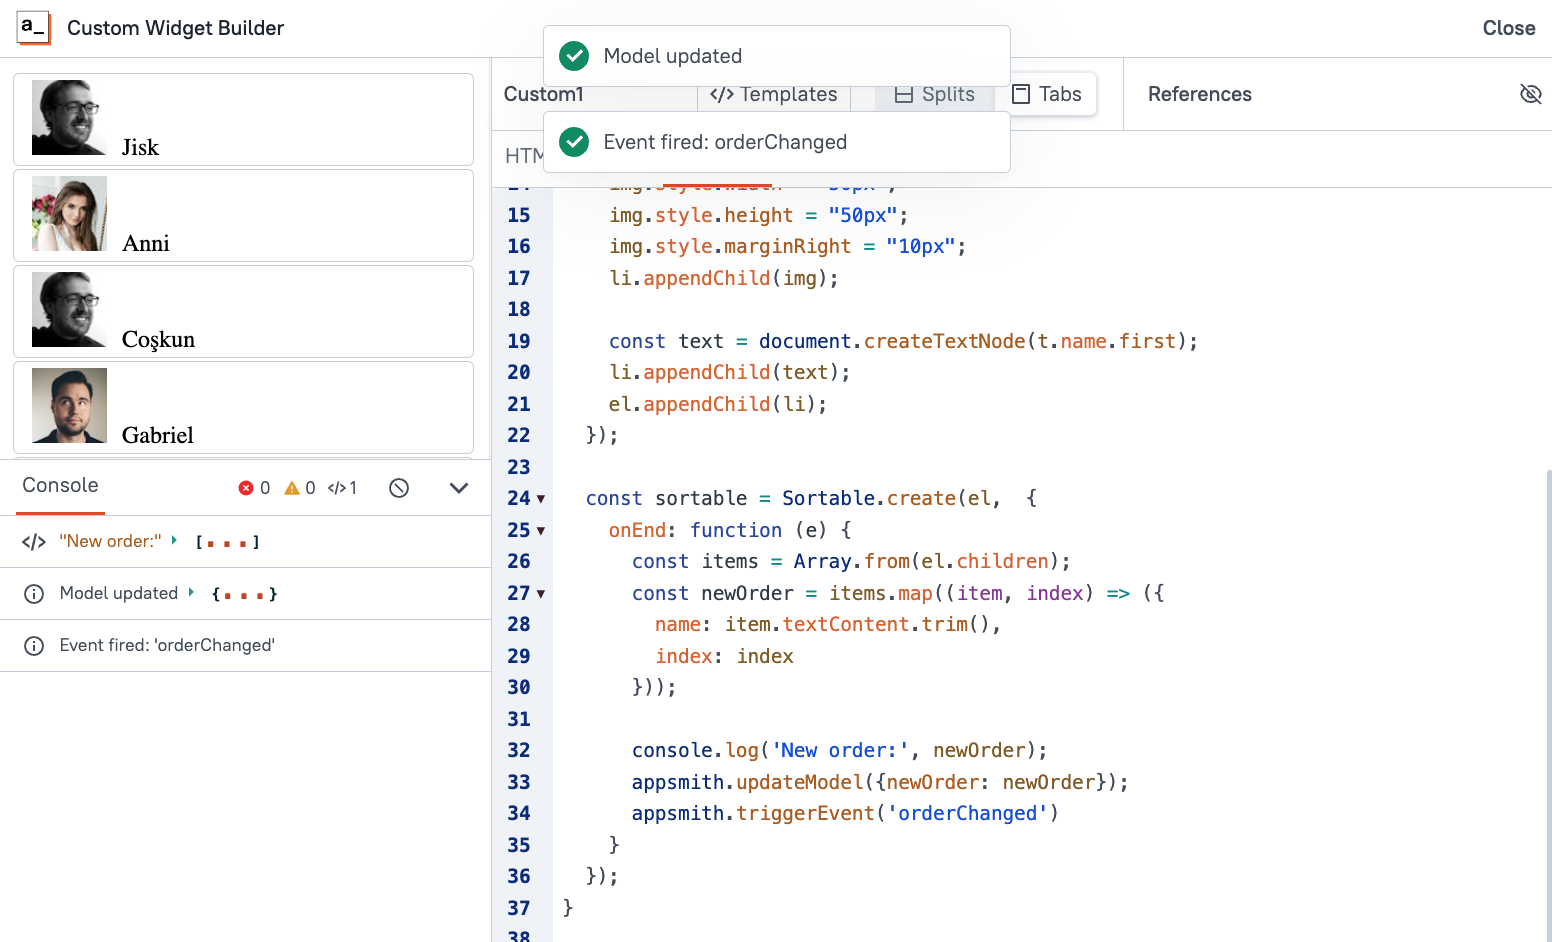
From here you can use the appsmith.triggerEvent() method to call an Appsmith event outside the custom widget. Instead of just console logging the newOrder, you can also save it to the Appsmith model, then fire an event outside the custom widget to use the new order data.
      console.log('New order:', newOrder);
      appsmith.updateModel({newOrder: newOrder});
      appsmith.triggerEvent('orderChanged')
Then go back to the main app editor, and find the Events section. First, delete the sample onResetClick event that is added to the custom widget by default. Then add a new event called orderChanged.
Set the new event's action to show an alert, and set the message to "List order updated!".
You should now have an event outside the custom widget that gets triggered when a row is dragged, and you can reference the Custom1.model.newOrder to get the new values.
Conclusion
Although Appsmith's native List and Table widget support most use cases, neither option provides a drag-to-reorder feature. But with a custom widget and the SortableJS library, you can easily build your own component and add features like reordering, swapping, cloning, and more. This guide has covered the basics to working with SortableJS in a custom widget. From here you can follow the SortableJS docs to add more advanced features.