Markdown is a common text format that uses special characters to add styling, like # Header to create an <h1> or **bold** to create bold text. It's commonly used in GitHub, Notion, and lots of other platforms.
Appsmith supports using markdown to populate the default value on the Rich Text Editor, but it doesn't actually let you write in markdown, because it's a Rich Text Editor. It just works for displaying markdown. So today, we're going to build a custom markdown editor widget, complete with syntax highlighting for code snippets and view modes for edit, preview, and side-by-side. We'll use Vue 3's composition API for the UI, along with MarkedJS and PrismJS for the markdown parsing and code highlighting.
Let's get started! 🤓
Custom Widget with Vue 3
In this guide, we'll be using Vue 3's Composition API to build the UI for the markdown editor. If you're not familiar with Vue or the Composition API, don't worry! I'm just starting to learn Vue myself. We'll figure it out together!
Start out by dragging in a new Custom Widget and click the Edit source button in the property pane.
First, let's get a basic markdown editor working with just a textarea for an input, and a div to preview the rendered markdown.
Clear out the JavaScript and Style tabs, then paste this in the HTML tab:
<div id="app">
    <div class="toolbar">
        <button>Full Editor</button>
        <button>Full Preview</button>
        <button>Split Screen</button>
        <button>Save</button>
    </div>
    <textarea v-model="markdown" @input="renderMarkdown"></textarea>
    <div class="preview-pane" v-html="compiledMarkdown"></div>
</div>
Here we have a toolbar div to switch view modes, and a button to save the markdown to the appsmith.model(), outside the custom widget where the rest of the app can read it.
The textarea will be watching a markdown variable in our script, and running the renderMarkdown() function when the user types. Then the preview-pane div will display the output of that function, the compiledMarkdown.
Next, paste this in the JavaScript tab:
import { marked } from 'https://cdn.jsdelivr.net/npm/marked@4.0.16/lib/marked.esm.js';
import { createApp, ref, watch } from 'https://cdn.jsdelivr.net/npm/vue@3.2.37/dist/vue.esm-browser.prod.js';

appsmith.onReady(()=>{
        createApp({
   setup() {
       const markdown = ref(appsmith.model.markdown);
       const compiledMarkdown = ref('');
       const renderMarkdown = () => {
           compiledMarkdown.value = marked(markdown.value, { breaks: true, gfm: true });
       };
       watch(markdown, renderMarkdown, { immediate: true });
       return {
           markdown,
           compiledMarkdown,
           renderMarkdown,
       };
   },
}).mount('#app');
    })
Here we're importing MarkedJS and Vue 3, then using Vue ref() to declare 3 variables:
markdown: the raw input from the textareacompiledMarkdown: the output from MarkedJS to show in preview pane, andrenderMarkdown(): the function to do the markdown parsing and update the compiled markdown. Then Vue watch() is used to update the UI immediately when those values change.
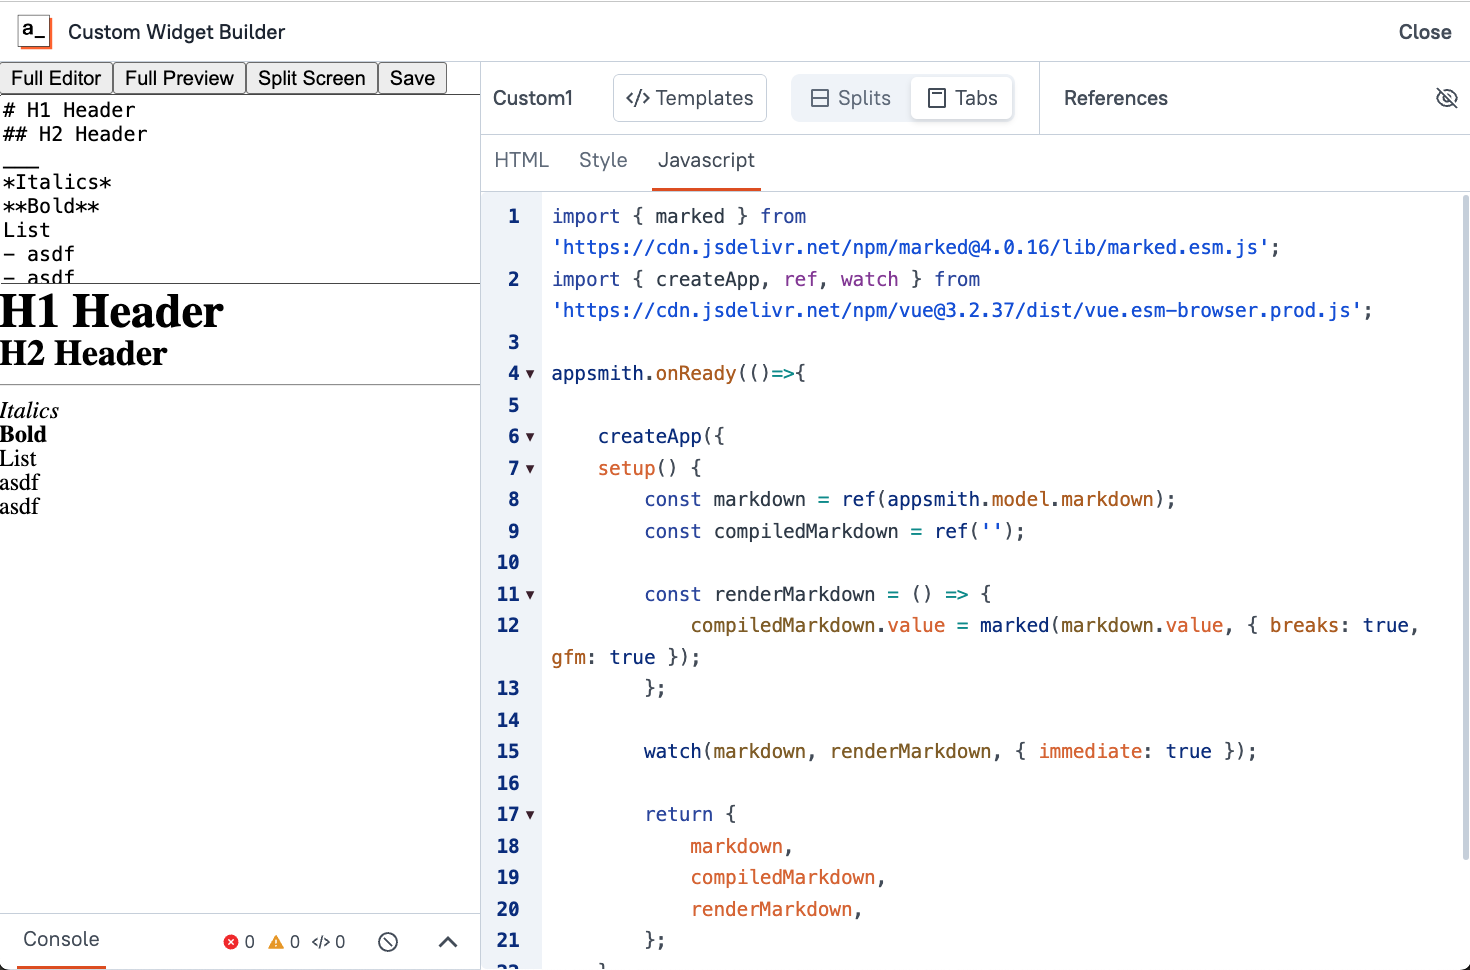
At this point you should have a somewhat functional markdown editor.
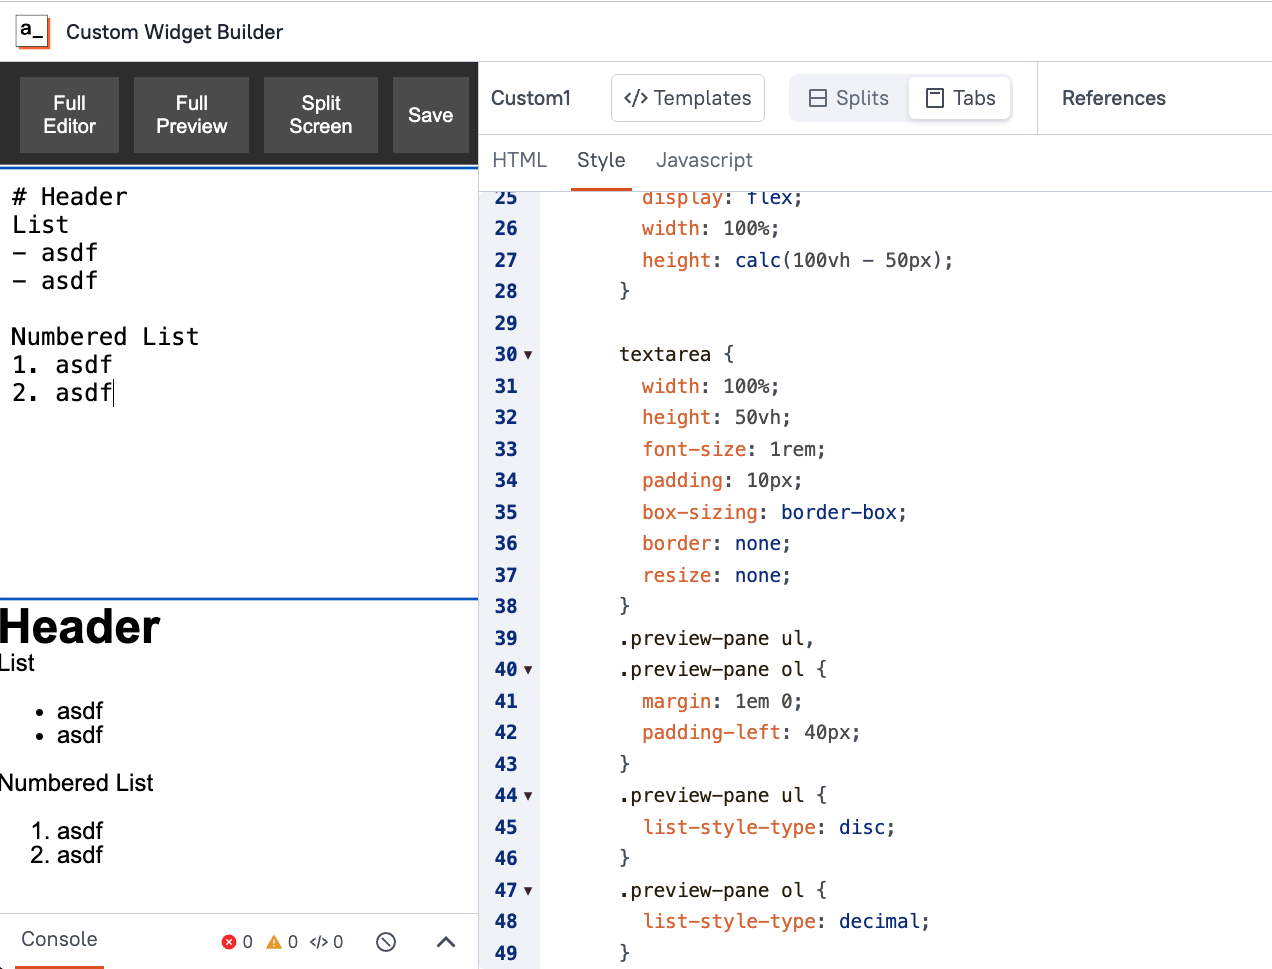
However, there are a few issues. Lists with bullet points are not working, the textarea input is too short, and there's no padding or margins on the text. All of this can magically be fixed with a little CSS.
Paste this in the Style tab:
            body {
                font-family: Arial, sans-serif;
                margin: 0;
                padding: 0;
            }
            *, *::before, *::after {
                box-sizing: border-box;
            }
            .toolbar {
                display: flex;
                justify-content: center;
                background-color: #333;
                color: white;
                padding: 10px;
            }
            .toolbar button {
                color: white;
                background: #555;
                border: none;
                padding: 10px;
                margin: 0 5px;
                cursor: pointer;
            }
            .editor-container {
                display: flex;
                width: 100%;
                height: calc(100vh - 50px);
            }
            textarea {
                width: 100%;
                height: 50vh;
                font-size: 1rem;
                padding: 10px;
                box-sizing: border-box;
                border: none;
                resize: none;
            }
            .preview-pane ul,
            .preview-pane ol {
                margin: 1em 0;
                padding-left: 40px;
            }
            .preview-pane ul {
                list-style-type: disc;
            }
            .preview-pane ol {
                list-style-type: decimal;
            }
Now it's starting to look half-way decent. I'll let you worry about the other half and try not to subject you to much more of my css.
Saving to Appsmith Model
Next, we need a function for the save button, to store the markdown to the Appsmith model. From there you can trigger an event outside the custom widget and run any query to save to your datasource of choice.
Update the JavaScript with:
import { marked } from 'https://cdn.jsdelivr.net/npm/marked@4.0.16/lib/marked.esm.js';
import { createApp, ref, watch } from 'https://cdn.jsdelivr.net/npm/vue@3.2.37/dist/vue.esm-browser.prod.js';

appsmith.onReady(()=>{
        createApp({
   setup() {
       const markdown = ref(appsmith.model.markdown);
       const compiledMarkdown = ref('');
       const renderMarkdown = () => {
           compiledMarkdown.value = marked(markdown.value, { breaks: true, gfm: true });

       };
       const saveMarkdown = () => {
           console.log('Markdown saved:', markdown.value);
           appsmith.updateModel({markdown: markdown.value})
       };
       watch(markdown, renderMarkdown, { immediate: true });
       return {
           markdown,
           compiledMarkdown,
           saveMarkdown,
           renderMarkdown,
       };
   },
}).mount('#app');
    })
Now clicking the Save button will store the current markdown value to the Appsmith model.
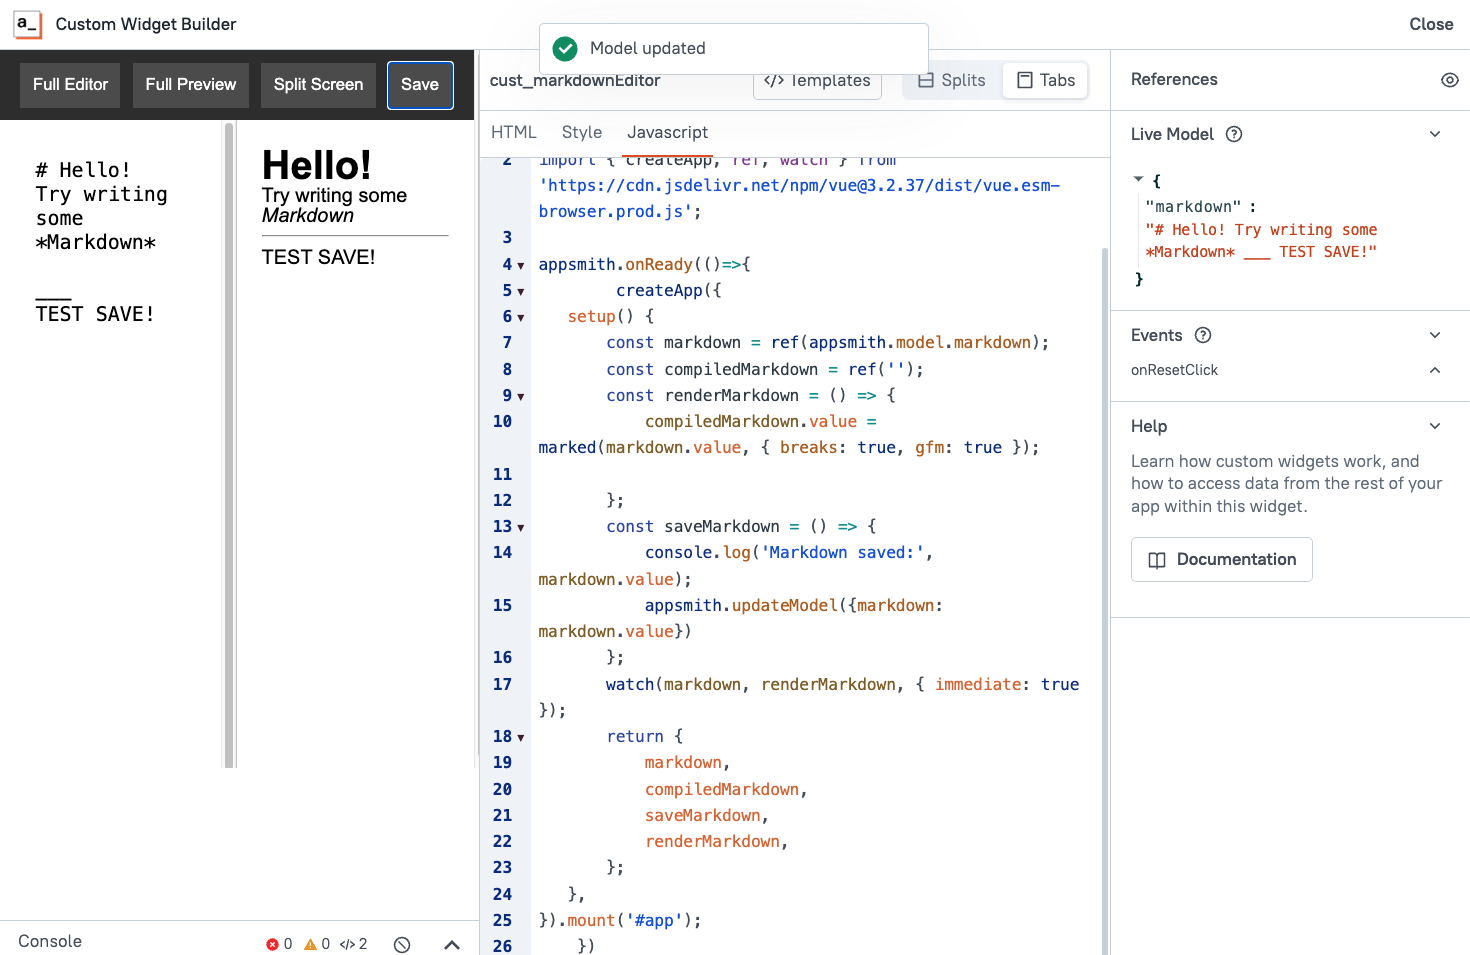
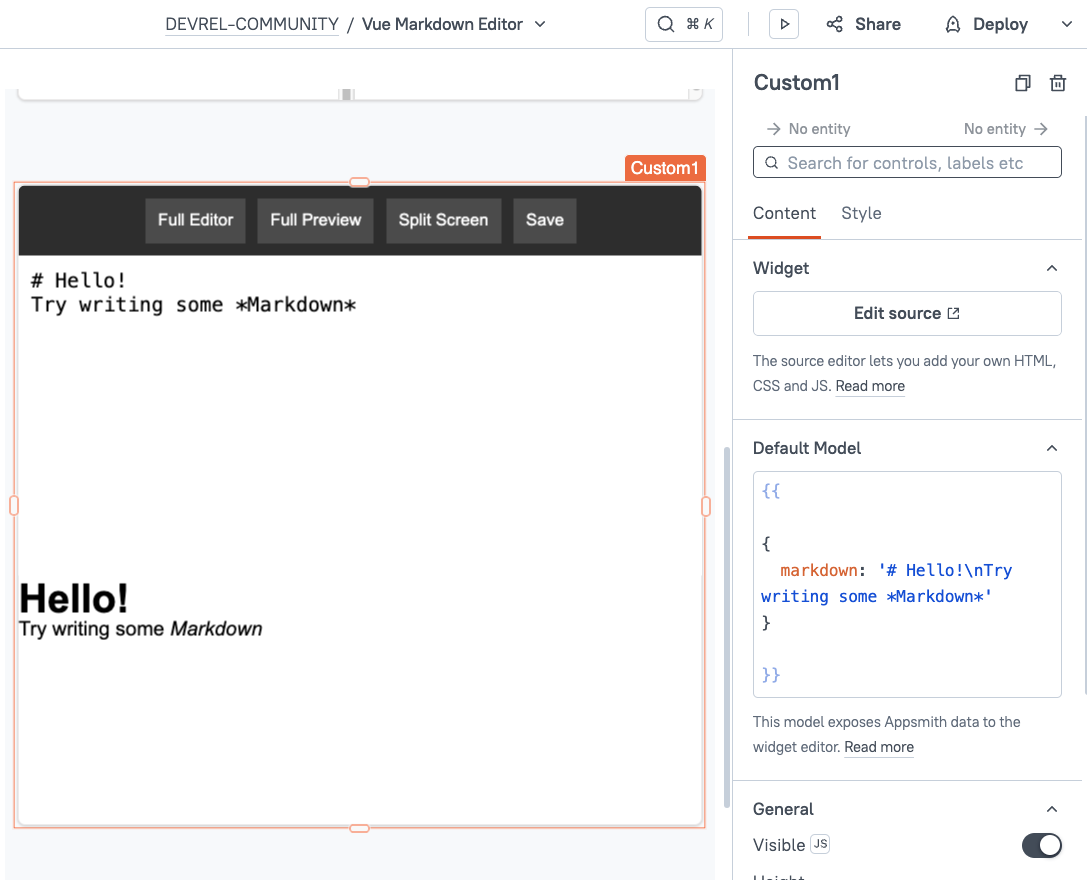
And we can send markdown into the custom widget to preload it with data. Just update the Default model in the widget's property pane.
{{
{
    markdown: '# Hello!\nTry writing some *Markdown*'
}
}}
View Modes
Now we'll add another variable and function to switch view modes.
Update the HTML with:
<script src="https://cdn.jsdelivr.net/npm/vue@3.2.37/dist/vue.global.prod.js"></script>
<script src="https://cdn.jsdelivr.net/npm/marked@4.0.16/lib/marked.esm.js" type="module"></script>
<div id="app">
    <div class="toolbar">
        <button @click="toggleView('editor')">Full Editor</button>
        <button @click="toggleView('preview')">Full Preview</button>
        <button @click="toggleView('split')">Split Screen</button>
        <button @click="saveMarkdown">Save</button>
    </div>
    <div class="editor-container" :class="viewMode">
        <div v-if="viewMode !== 'preview'" class="editor-pane">
            <textarea v-model="markdown" @input="renderMarkdown"></textarea>
        </div>
        <div v-if="viewMode !== 'editor'" class="preview-pane" v-html="compiledMarkdown"></div>
    </div>
</div>
Here we've added a toggleView function to each editor mode button that passes in a parameter for the view type. Then, the editor container has been updated to use the v-if directive to show and hide the editor and/or preview pane based on the mode.
Next, paste this in the JavaScript tab to add the toggleView function and update the exports.
import { marked } from 'https://cdn.jsdelivr.net/npm/marked@4.0.16/lib/marked.esm.js';
import { createApp, ref, watch } from 'https://cdn.jsdelivr.net/npm/vue@3.2.37/dist/vue.esm-browser.prod.js';

appsmith.onReady(()=>{

createApp({
   setup() {
       const markdown = ref('');
       const compiledMarkdown = ref('');
       const viewMode = ref('split');
       const renderMarkdown = () => {
           compiledMarkdown.value = marked(markdown.value, { breaks: true, gfm: true });
       };
       const toggleView = (mode) => {
           viewMode.value = mode;
       };
       const saveMarkdown = () => {
           console.log('Markdown saved:', markdown.value);
           appsmith.updateModel({markdown:markdown.value})
       };
       watch(markdown, renderMarkdown, { immediate: true });
       return {
           markdown,
           compiledMarkdown,
           viewMode,
           toggleView,
           saveMarkdown,
           renderMarkdown,
       };
   },
}).mount('#app');

})
This adds the viewMode ref variable and the toggleView() function, and then adds them to the export list.
Test it out, and you should now be able to toggle between modes.
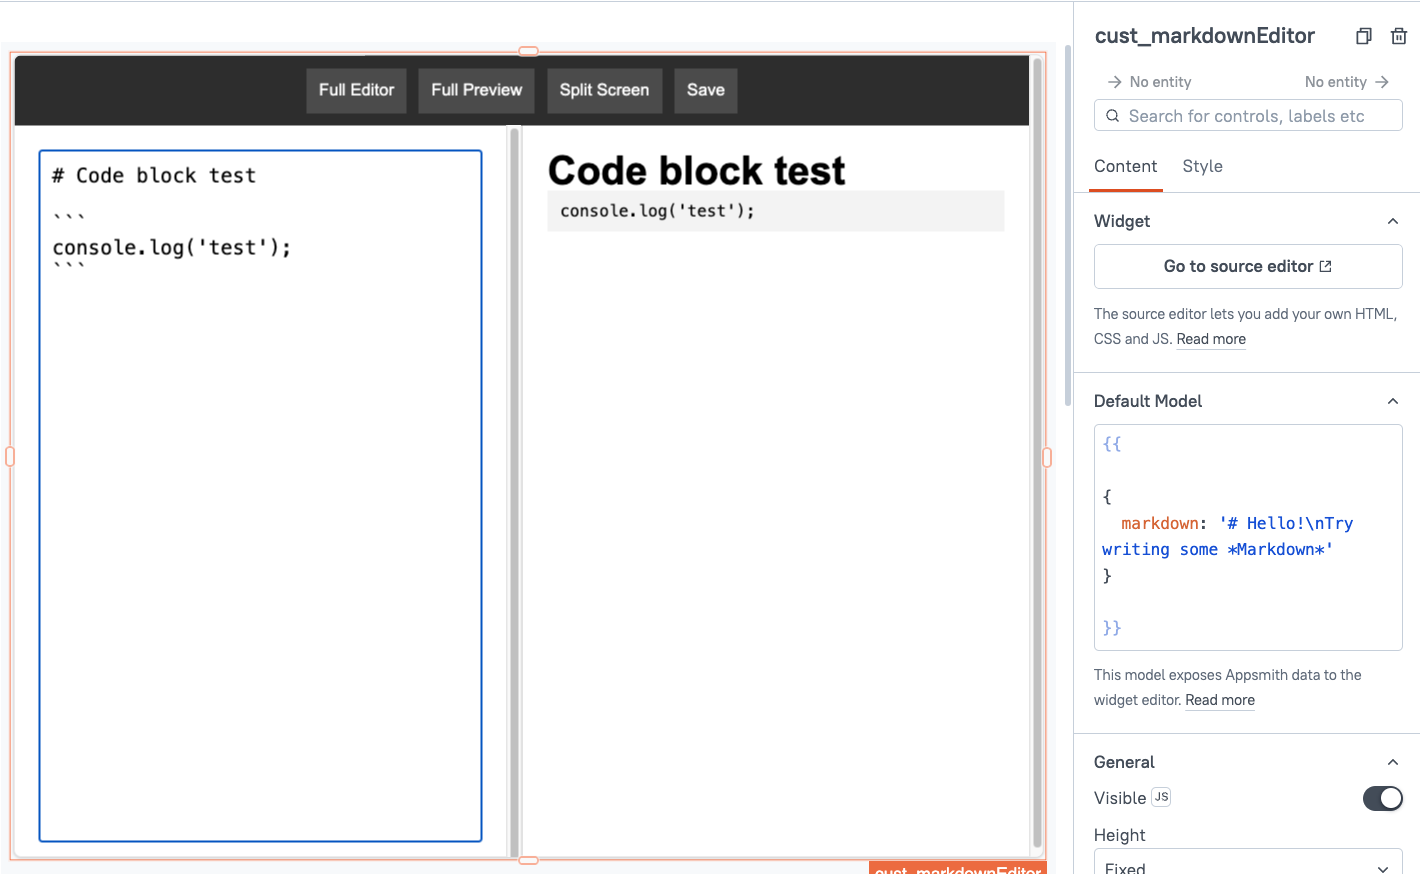
Even the code block is working and showing a monospace font with a shaded background. But one thing is missing: syntax highlighting!
Adding Syntax Highlighting
Lastly, import the PrismJS library, and add a line to parse the doc at the end of the renderMarkdown function.
Add the Prism JS library and CSS to the top of the HTML file:
<script src="https://cdn.jsdelivr.net/npm/prismjs@1.29.0/prism.min.js"></script>
<link rel="stylesheet" href="https://cdn.jsdelivr.net/npm/prismjs@1.29.0/themes/prism.css">
Then update the JavaScript tab with:
import { marked } from 'https://cdn.jsdelivr.net/npm/marked@4.0.16/lib/marked.esm.js';
import { createApp, ref, watch } from 'https://cdn.jsdelivr.net/npm/vue@3.2.37/dist/vue.esm-browser.prod.js';

appsmith.onReady(()=>{

	createApp({
    setup() {
        const markdown = ref(appsmith.model.markdown);
        const compiledMarkdown = ref('');
        const viewMode = ref('split');

        const renderMarkdown = () => {
            compiledMarkdown.value = marked(markdown.value, { breaks: true, gfm: true });
            Prism.highlightAll();
        };

        const toggleView = (mode) => {
            viewMode.value = mode;
        };

        const saveMarkdown = () => {
            console.log('Markdown saved:', markdown.value);
            appsmith.updateModel({markdown:markdown.value})
        };

        watch(markdown, renderMarkdown, { immediate: true });

        return {
            markdown,
            compiledMarkdown,
            viewMode,
            toggleView,
            saveMarkdown,
            renderMarkdown,
        };
    },
}).mount('#app');

})
Notice the Prism.highlightAll() at the end of the renderMarkdown function. This scans the whole document, auto-detects code blocks and the language, and then applies the correct syntax highlighting!
Conclusion
Building a markdown editor with code syntax highlighting sounds complicated, but it's actually fairly easily with a few JS libraries and an Appsmith custom widget. In just 20 lines of HTML and under 40 lines of JS, we have a functional markdown editor ready to save data to any API or database!
What's Next?
From here you can import other languages to add support for syntax highlighting on less popular languages, change themes, or add a PDF export feature! Got an idea for a use case? Drop a comment below!


