Issue
When using HTTPS with a custom CA certificate, users need to add this certificate in Appsmith as trusted by adding it to the ca-certs folder. If you don't have the certificate, then this article explains how you can export it from Chrome.
Typically, if the CA certificate is not added as trusted, the following error is returned in the server logs:
org.springframework.web.reactive.function.client.WebClientRequestException: PKIX path validation failed: java.security.cert.CertPathValidatorException: validity check failed
	at org.springframework.web.reactive.function.client.ExchangeFunctions$DefaultExchangeFunction.lambda$wrapException$9(ExchangeFunctions.java:136)
Resolution
You can export the SSL certificate for Appsmith using either a browser or the command line.
Method 1: Exporting via Browser
Follow these steps if you want to export the SSL certificate using your browser:
- To export the certificate, please follow the below steps:
- Navigate to https://www.appsmith.com/.
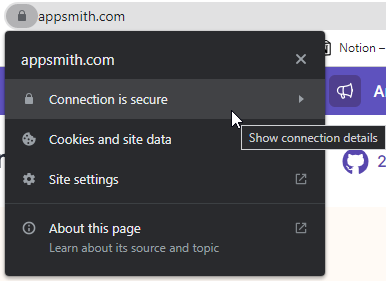
- Click on the lock symbol, then on Connection is secure.

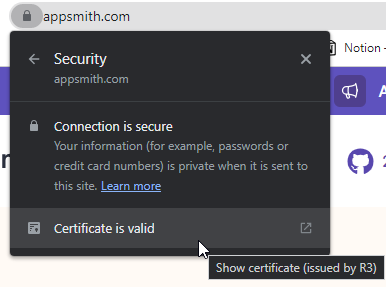
- Click on Certificate is valid.

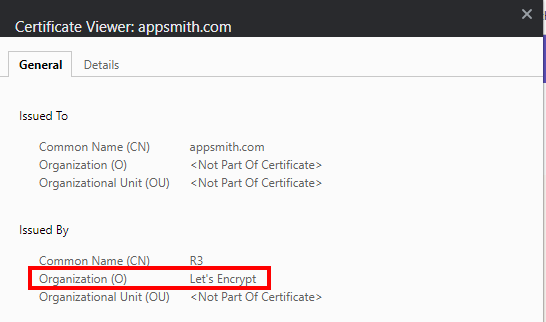
- You can see the type of certificate you are using in the General tab.

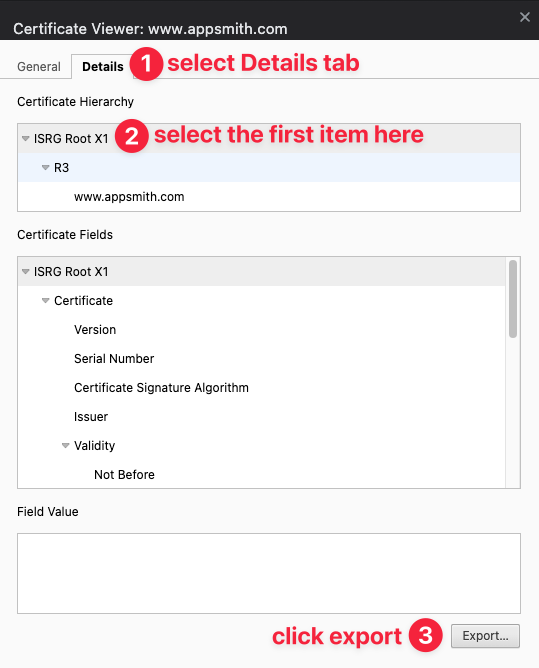
- In the Details tab, click the Export button to download the certificate.

- If the exported certificate does not have a
.crtextension, please rename it accordingly. - Save the exported certificate to the
ca-certsfolder by following this guide on installing custom CA root certificates.
Method 2: Exporting via Command Line
Follow these steps if you want to export the SSL certificate using the command line:
-
Run the OpenSSL command to export the certificate in PEM format:
openssl s_client -showcerts -connect <domain.com>:443 </dev/null 2>/dev/null | openssl x509 -outform PEM > ca_cert.crt -
Verify the exported certificate with:
curl --cacert <cert_path> https://domain/Replace
<cert_path>with the path toca_cert.pem -
Copy the certificate to the
/appsmith-stacks/ca-certs/folder:cp ca_cert.crt /appsmith-stacks/ca-certs/ -
Restart the Appsmith container to apply the changes:
docker restart <appsmith-container-name>Once the container is restarted, ensure the new certificate is installed correctly by checking the SSL configuration or testing the connection for any issues.