
How to Migrate Data From Sheets to Postgresql
Goal
At the end of this tutorial, you will be equipped with the necessary knowledge to build data migration applications using Appsmith.
Prerequisites
A source sheet in Google Sheets.
A destination database that can accept connections.
Overview
Is your team migrating data, for example, from a legacy system to a new database or application? Or are you looking for a way to enter content from a content sheet into a production database? What if I told you that you can build migration services in a matter of minutes using Appsmith?
In this tutorial, I will show you how easy it is to achieve this to demonstrate why appsmith customers reduce migration times by 62% and save 4 developer-days per migration.
Create a Google Sheets Datasource
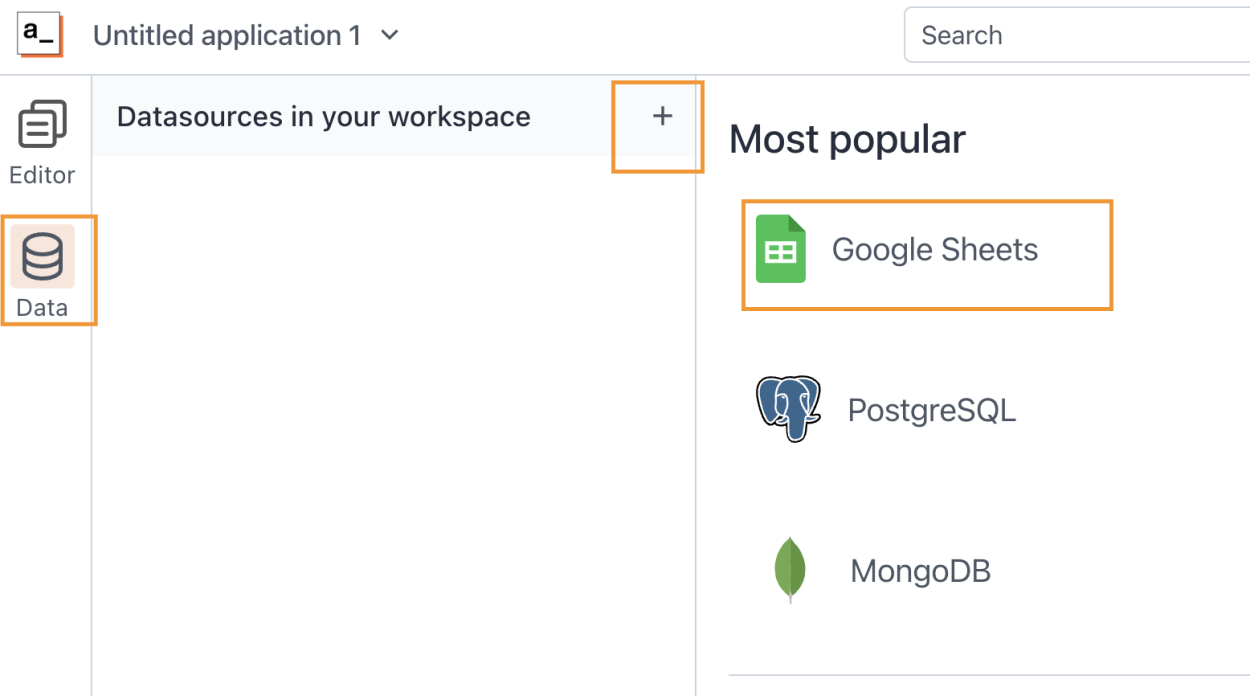
Appsmith makes it extremely easy to connect to your existing data. To connect to your data from your Google Sheets, go to the Appsmith and create a new app (or use an existing app), then go to the Data section in the left menu, then create a new Datasource and select Google Sheets.
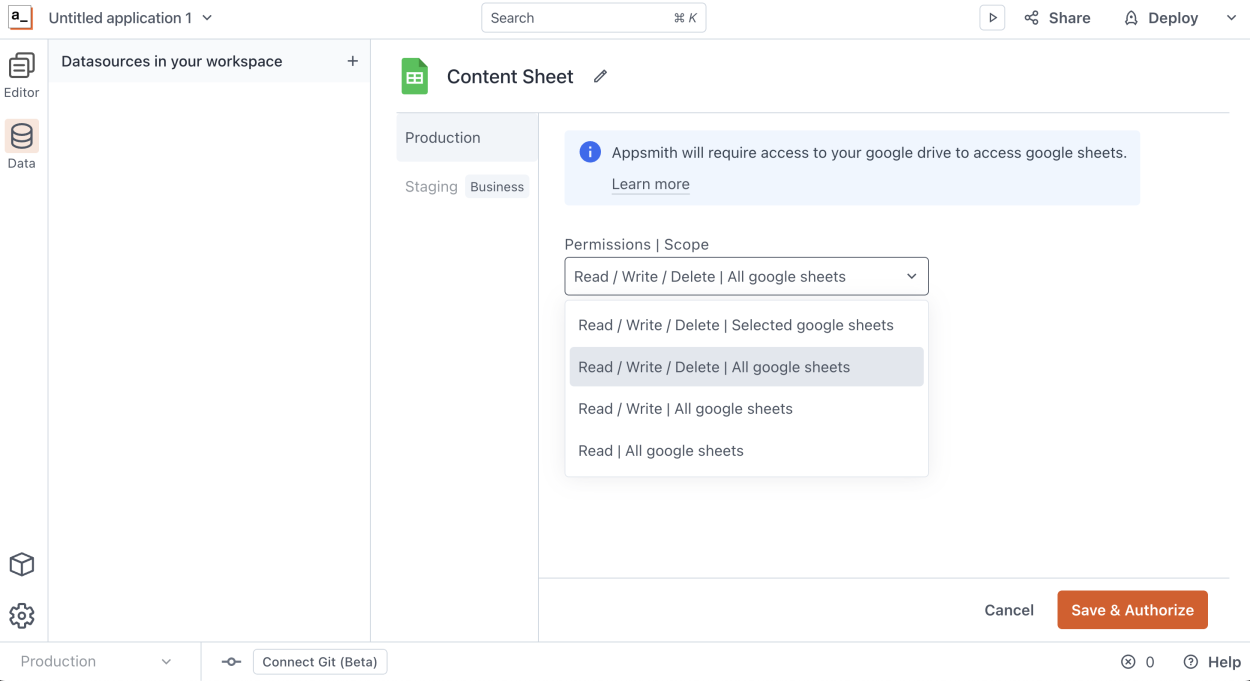
Then select how you want Appsmith to access your Google Sheets content, granular to the given sheets all or your content, then after your selection, click on Save & Authorize, and authenticate with your Google Account
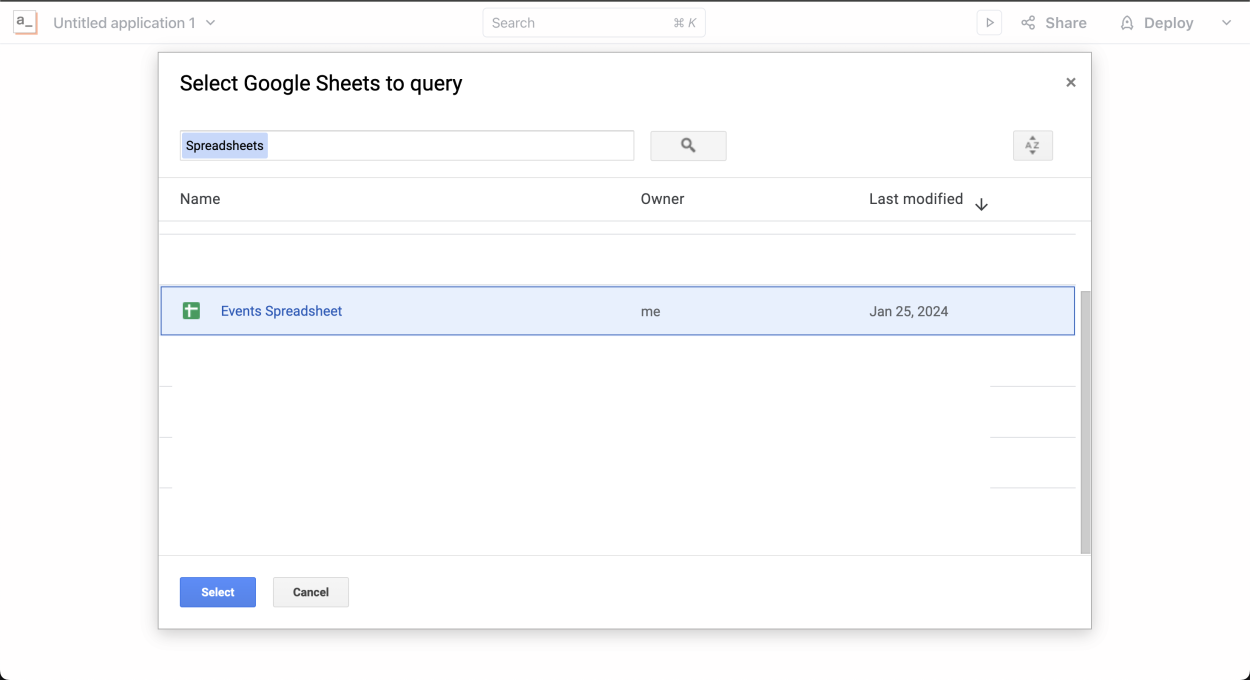
After authenticating, you will be prompted with your Google Sheets to select the one you want to import, choose the one you want, and click "Select". In my case, I want to import a list of Events I will be migrating to a PostgreSQL Database.
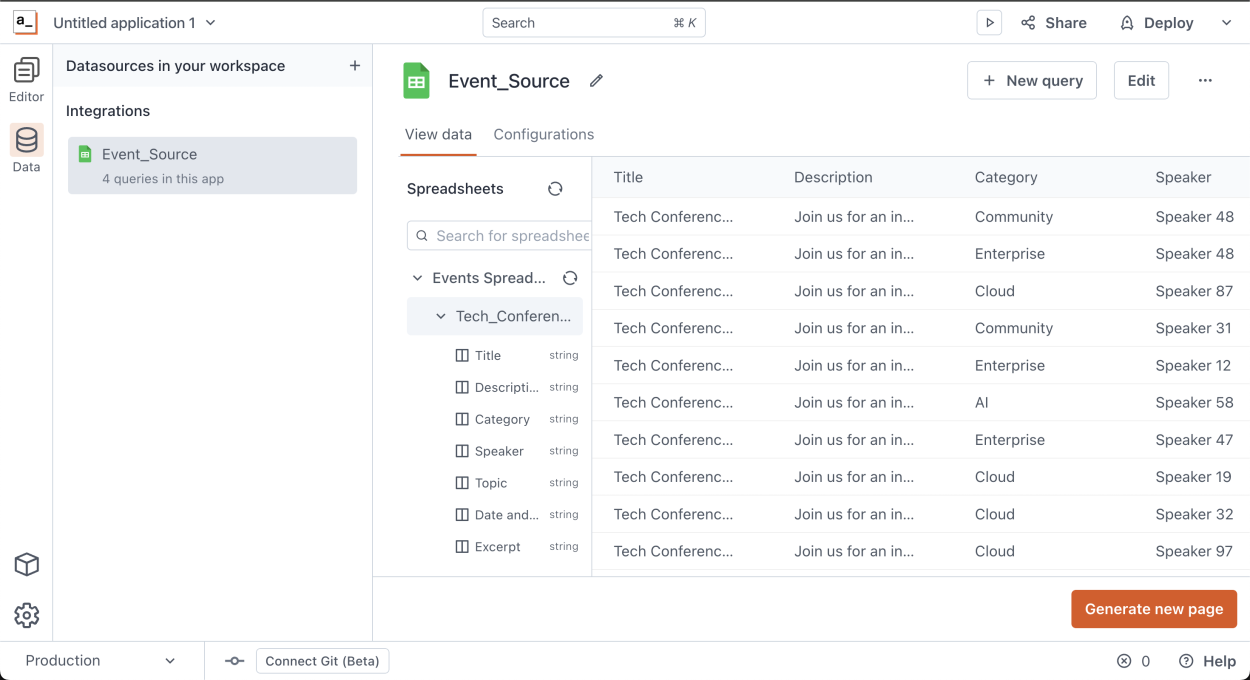
After you select it, you will be able to see your newly created Datasource and sneak a peek at the content in it; now, we can write queries against this data source.
Now, let's connect our PostgreSQL data source, which will be the destination of the data.
Create a PostgreSQL Datasource
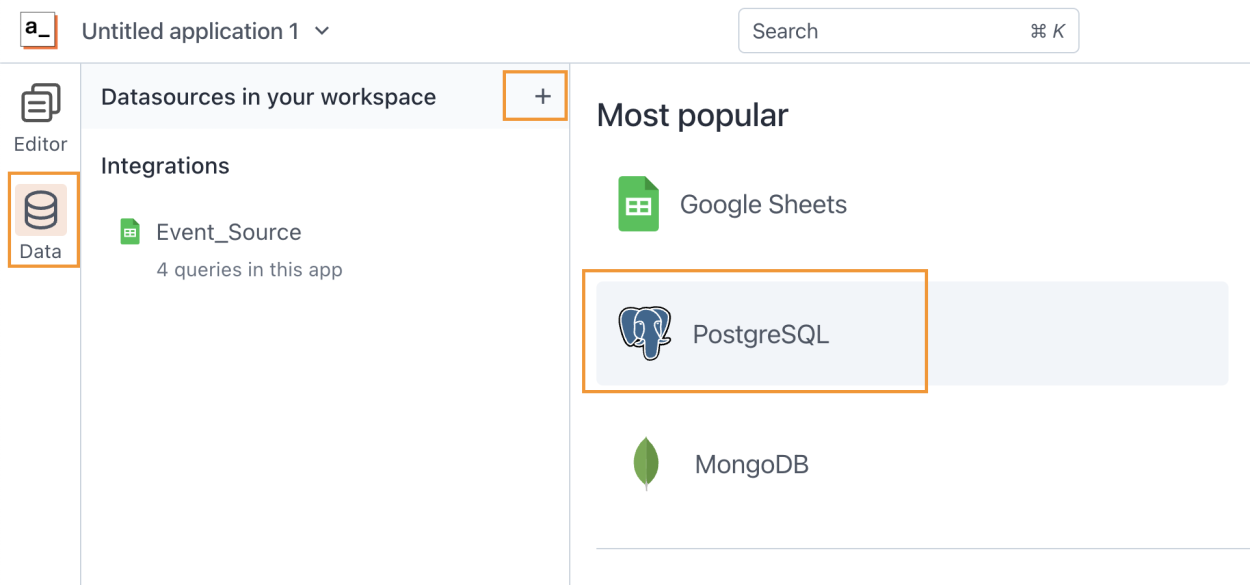
Now, let's add the PostgreSQL Database. Go to the Data section in the left menu, then create a new Datasource and select PostgreSQL.
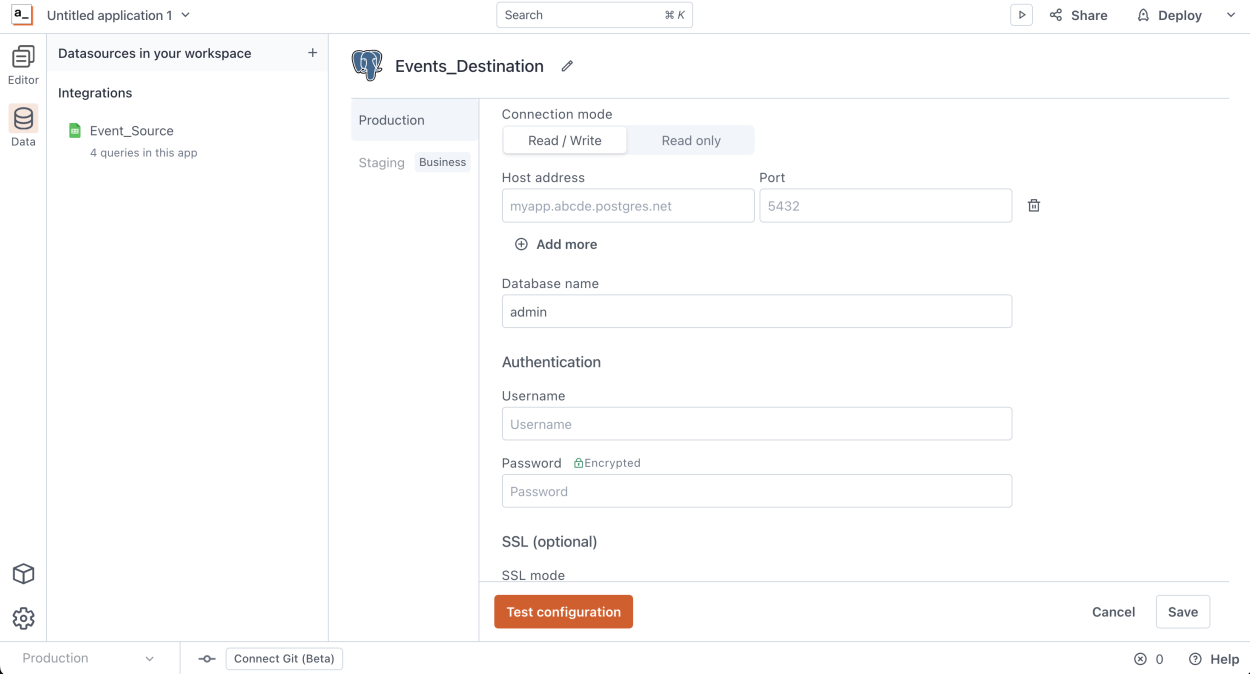
Enter your database credentials and click Save. You can also test that the connection works by clicking "Test Connection" before saving.
Once you save, you will see the Datasource and sneak a peek at the data on that Database.
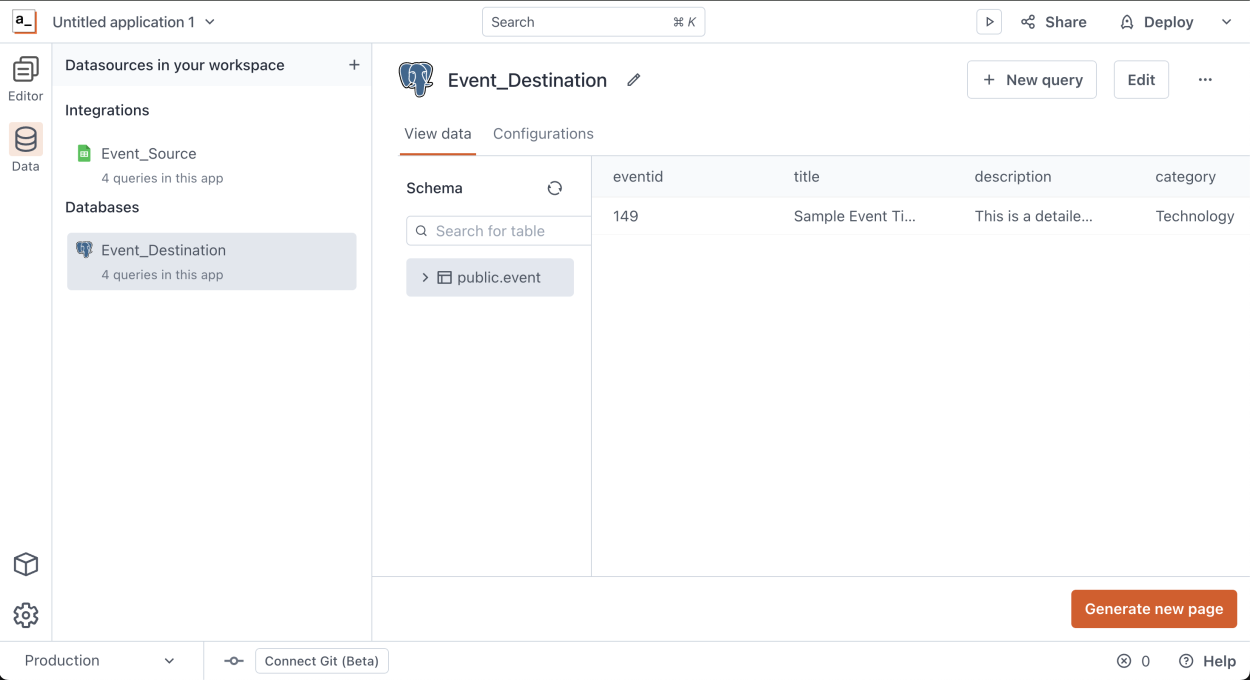
We can see that in the PostgreSQL Database, we have 1 event; this is where we will write the migration logic to move all events from sheets to PostgreSQL.
Now to prepare for the migration script, let's add a new Query for this data source to insert a new Event in the database; this is the Query we will call when writing the migration logic using the following statement:
INSERT INTO public."event" ("title", "description", "category", "speaker", "topic", "datetimeutc", "excerpt")
VALUES ({{this.params.title}}, {{this.params.description}}, {{this.params.category}}, {{this.params.speaker}}, {{this.params.topic}}, {{this.params.datetimeutc}}, {{this.params.excerpt}})
In this case, this Insert query basically uses
this.paramsvalues to insert the Event in the database which means we'll pass parameters to this query to make it dynamic, name itInsert_Event.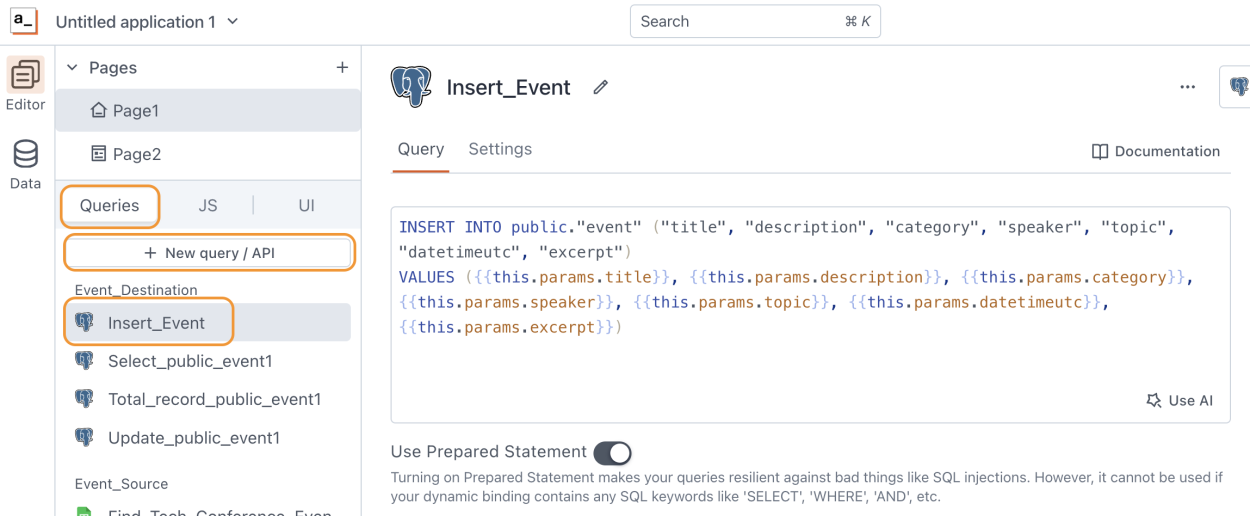
Displaying both Datasouces in the UI
Now, let's build a page where we can see both datasources, then we will write a custom action that will migrate the data. Go to the Editor section on the left menu and add a new Table widget to the canvas.

Then click on the "Connect Data" button to show the sheet's data in this table, and on the right menu, select the Sheets data source.
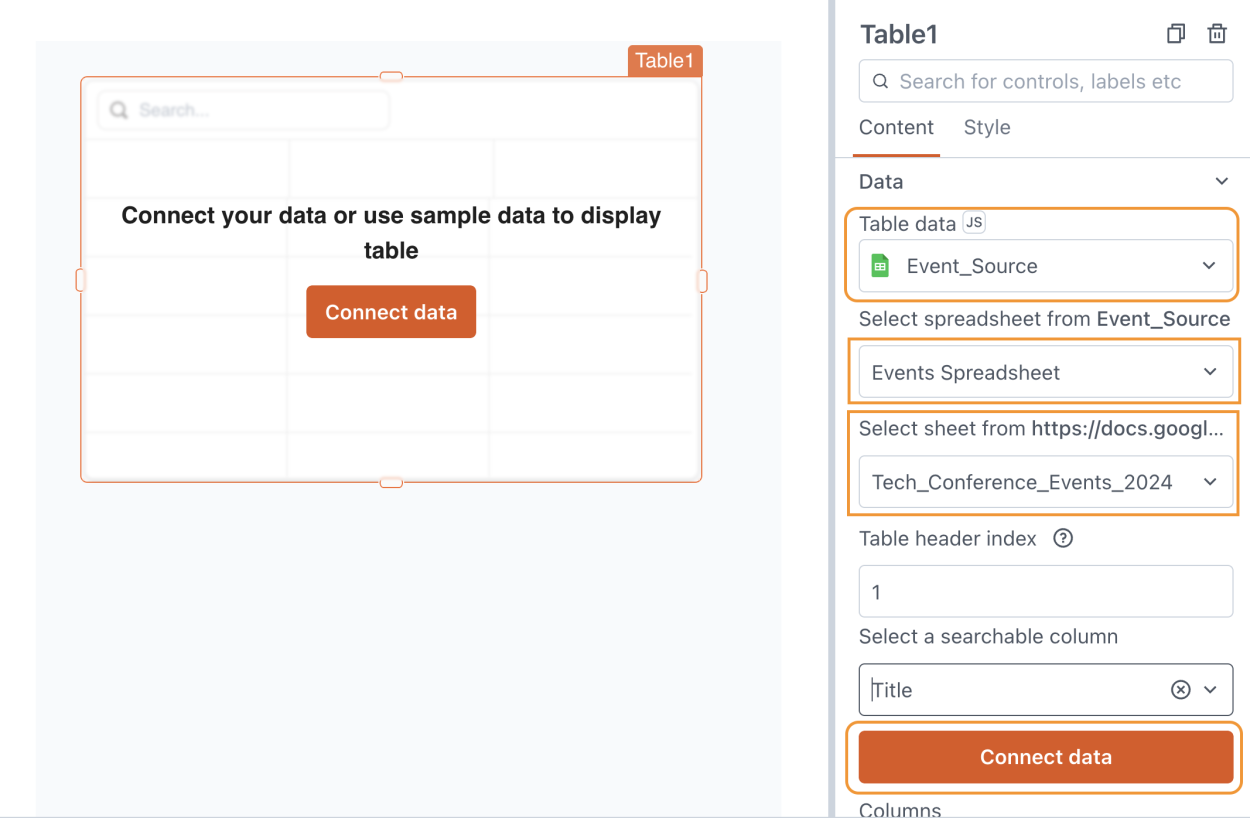
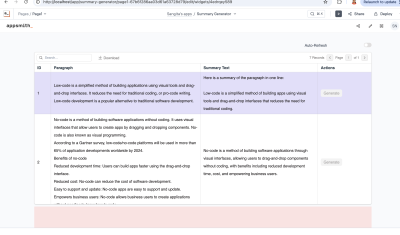
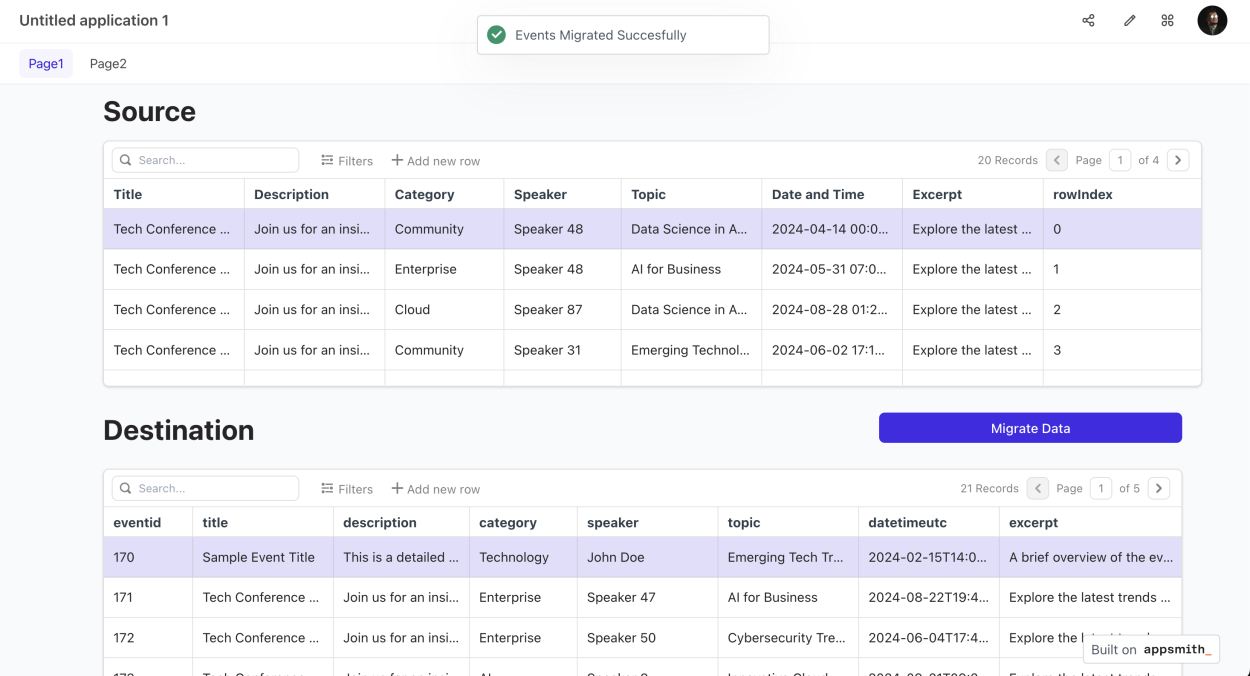
Then click on "Connect Data" and this will save the table binding. Now drag and drop a second Table and do the same with the PostgreSQL database. As a result, you will have a page showing both data, the Source sheet and the destination PostgreSQL like this:
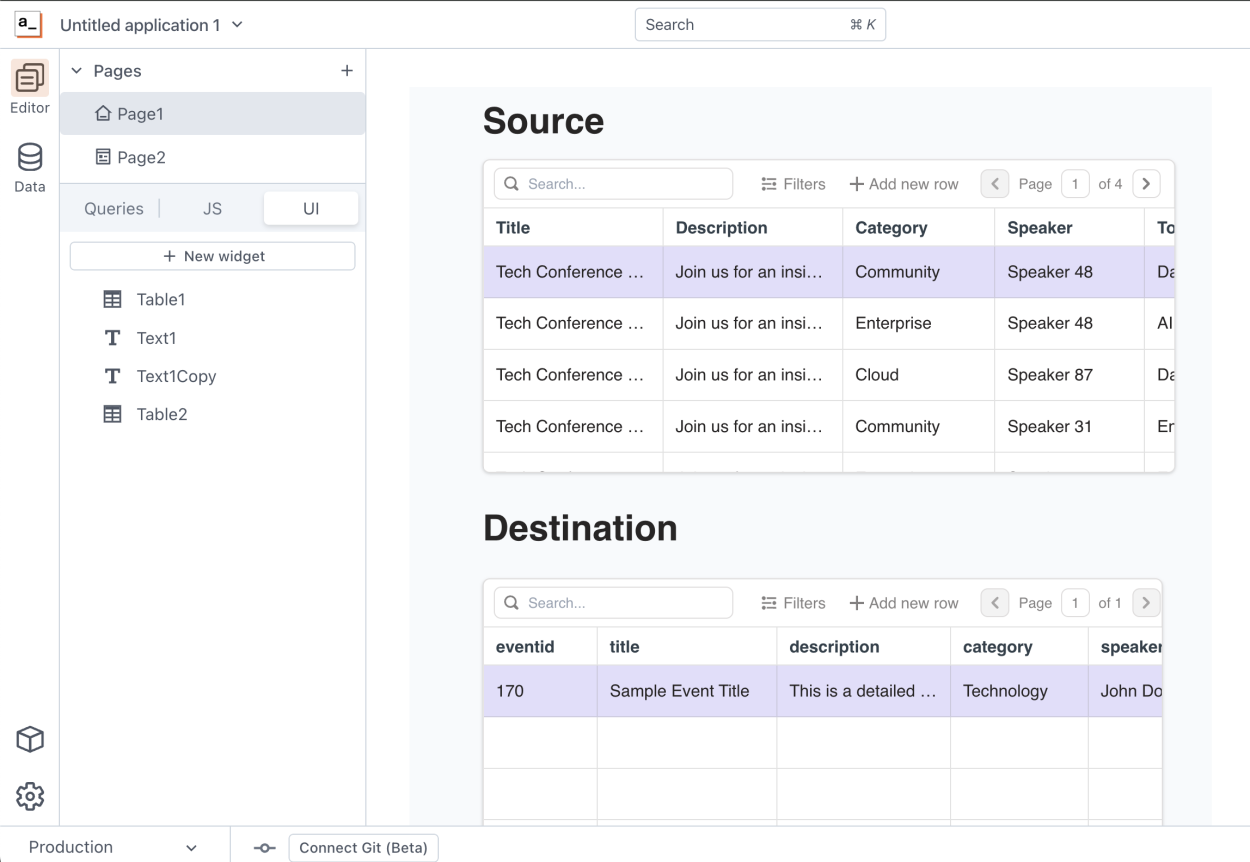
As you can see, we have 20 events in the sheet and just 1 in the destination database. Now, let's write Javascript logic to migrate the data over.
Write the Migration Logic
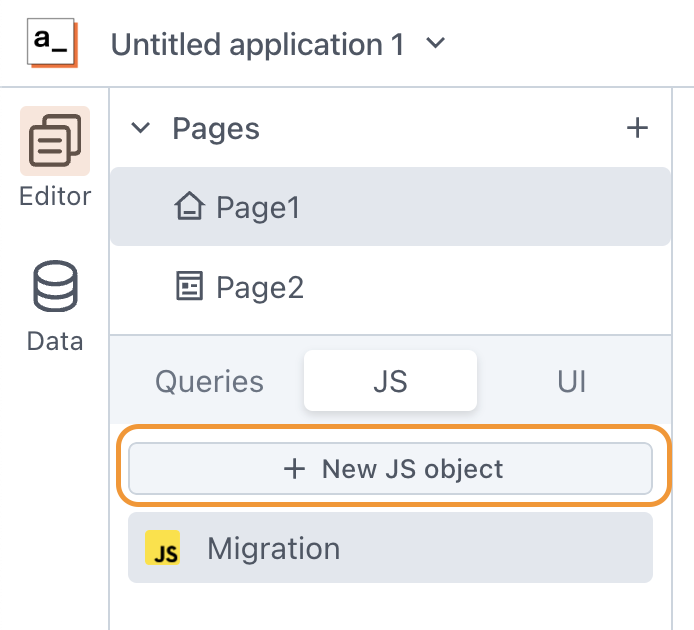
Now let's add a new Javascript object by going to the JS tab in the Editor, and add a new JS Object and giving it the name you want, mine will be called "Migration"
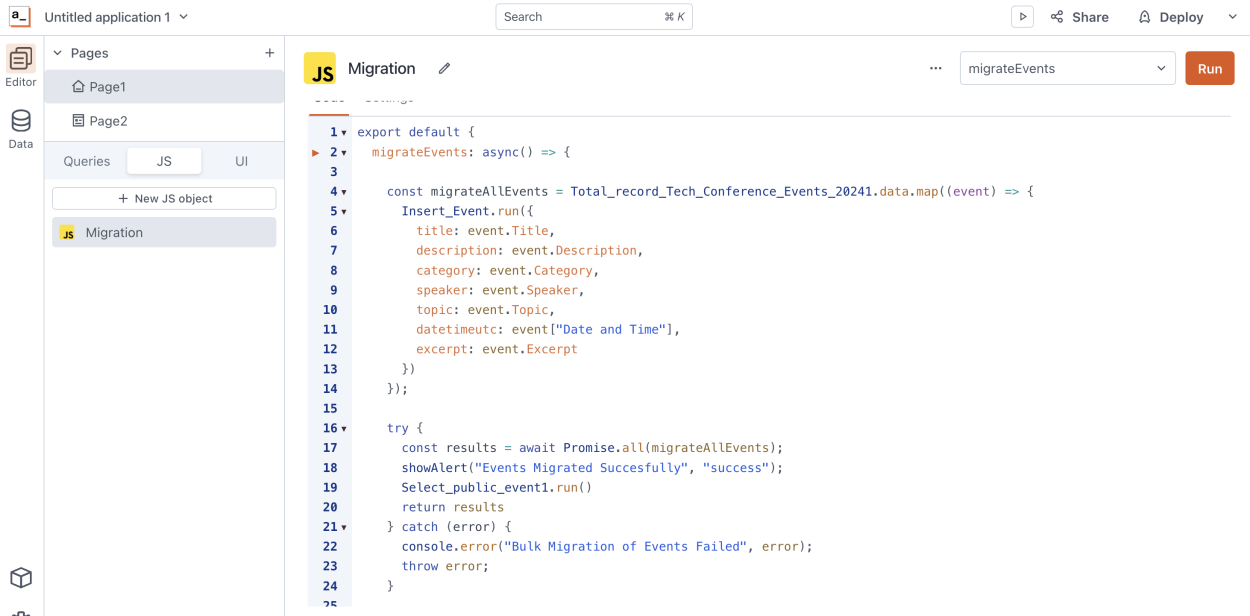
In that file, add the following piece of code:
export default {
	migrateEvents: async() => {

		const migrateAllEvents = Total_record_Tech_Conference_Events_20241.data.map((event) => {
      Insert_Event.run({
				title: event.Title,
				description: event.Description,
				category: event.Category,
				speaker: event.Speaker,
				topic: event.Topic,
				datetimeutc: event["Date and Time"],
				excerpt: event.Excerpt
			})
    });

		try {
      const results = await Promise.all(migrateAllEvents);
      showAlert("Events Migrated Succesfully", "success");
			Select_public_event1.run()
			return results
    } catch (error) {
      console.error("Bulk Migration of Events Failed", error);
      throw error;
    }

	}
}
It should look like this:
What is going on in this piece of code?
Basically we are defining an async function called
migrateEventsand in this function, we will go over each event in the seets using amapfunction:Total_record_Tech_Conference_Events_20241.data.mapinside that
mapfunction, we will call theInsert_Eventquery that we defined in step 2, and we will pass the parameters that Query expects using each event in the.mapfunction.Insert_Event.run({ title: event.Title, description: event.Description, category: event.Category, speaker: event.Speaker, topic: event.Topic, datetimeutc: event["Date and Time"], excerpt: event.Excerpt })As you can see, we are passing the parameters using the event object, which contains the event data on each pass of the
mapfunction, inserting that event in the PostgreSQL database.In this function, you can do any data manipulation, custom logic, or modification as you desire. In my case, I'm passing the data as it comes from the sheet, but if you need to edit it this is where you would do it.
Now, let's add a UI button that triggers this functionality:

And bind the Click event to the JS function we just wrote:

And that's it; now we can deploy this app and click the button, which will migrate the data and display a confirmation toast:
Conclusion
As you can see, integrating datasources, building custom data pipelines and migrations are really simple tasks to develop using Appsmith, and this is just an example, but you can use any Appsmith datasource as a source and any data source as a destination (APIs, GraphQL, Oracle, MsSQL, MySQL, MongoDB, etc) really the possibilities are endless.