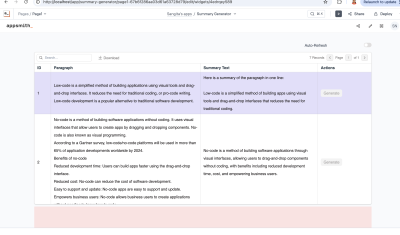
AI Assistants bring massive productivity boosts to most business processes. But to get the full benefit of an LLM, it needs access to your data. When working with teams across different departments with different levels of access, this can become a security and privacy risk if data is retrieved from a document that the user shouldn’t have access to. For cases like this, it’s better to have a per-user (or department, team) document store.
In this guide, we'll cover how you can build an AI Assistant with retrieval augmented generation that stores documents separately for each user, allowing you to leverage AI safely and securely. Each team member will have their own assistant with a separate file store, ensuring no sensitive data is exposed to the wrong user.
This guide will cover:
- Generating an API key in Pinecone, and saving it as an Appsmith Datasource
- Creating and Listing Assistants through the API
- Chatting with the Assistant
- Uploading files from Appsmith to the Assistant
- Async JavaScript to manage logic on page load
Let's get to it!
Watch the video tutorial here
Setting up the Datasource
Start out by signing up for a free Pinecone account and walk through the onboarding flow. On step 3, choose I'm using the Pinecone Assistant.
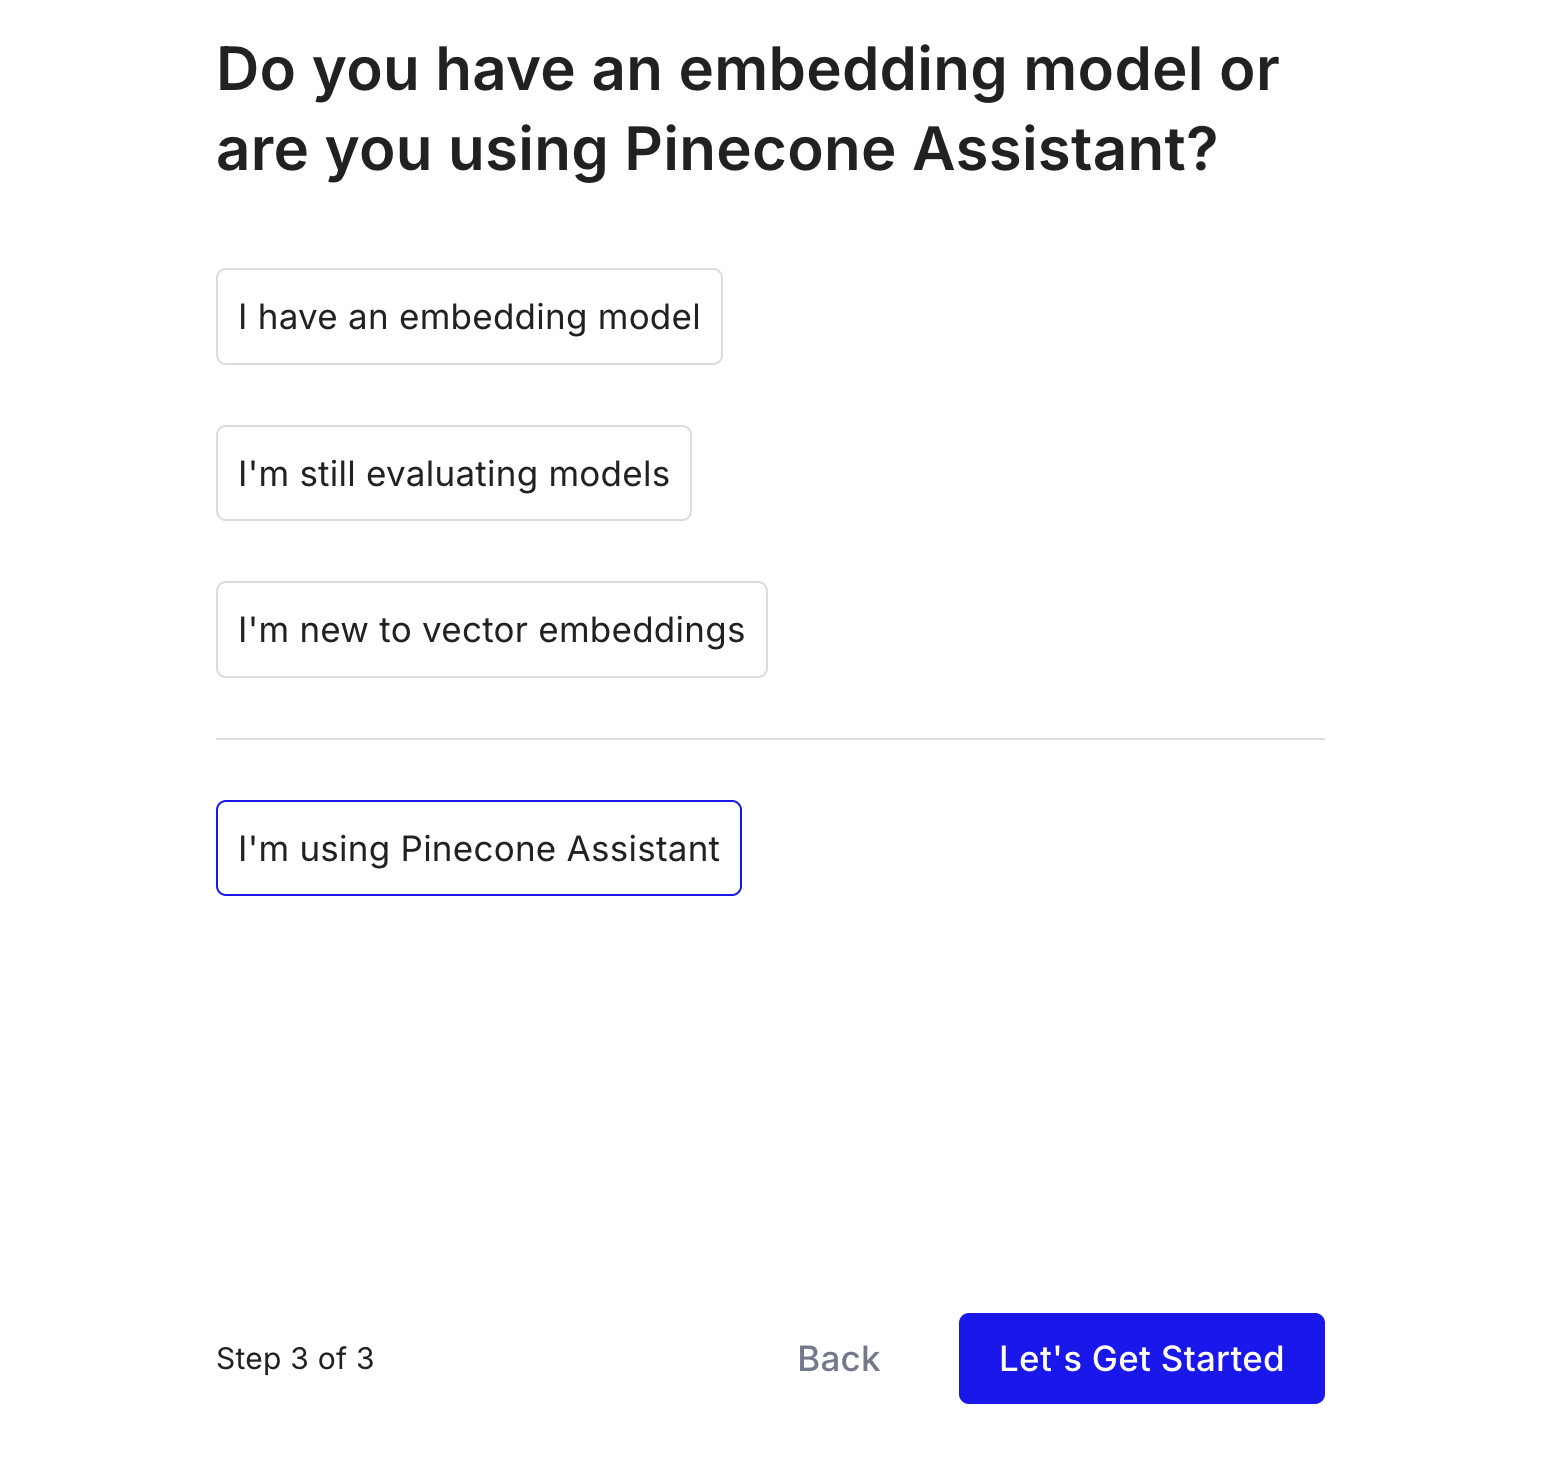
This will create your first project, and generate an API key on the next screen. Be sure to copy the key somewhere safe because you'll only be able to access it this one time in Pinecone. But you can always generate a new key later if needed. Keep this page open, and then open Appsmith in a new tab.
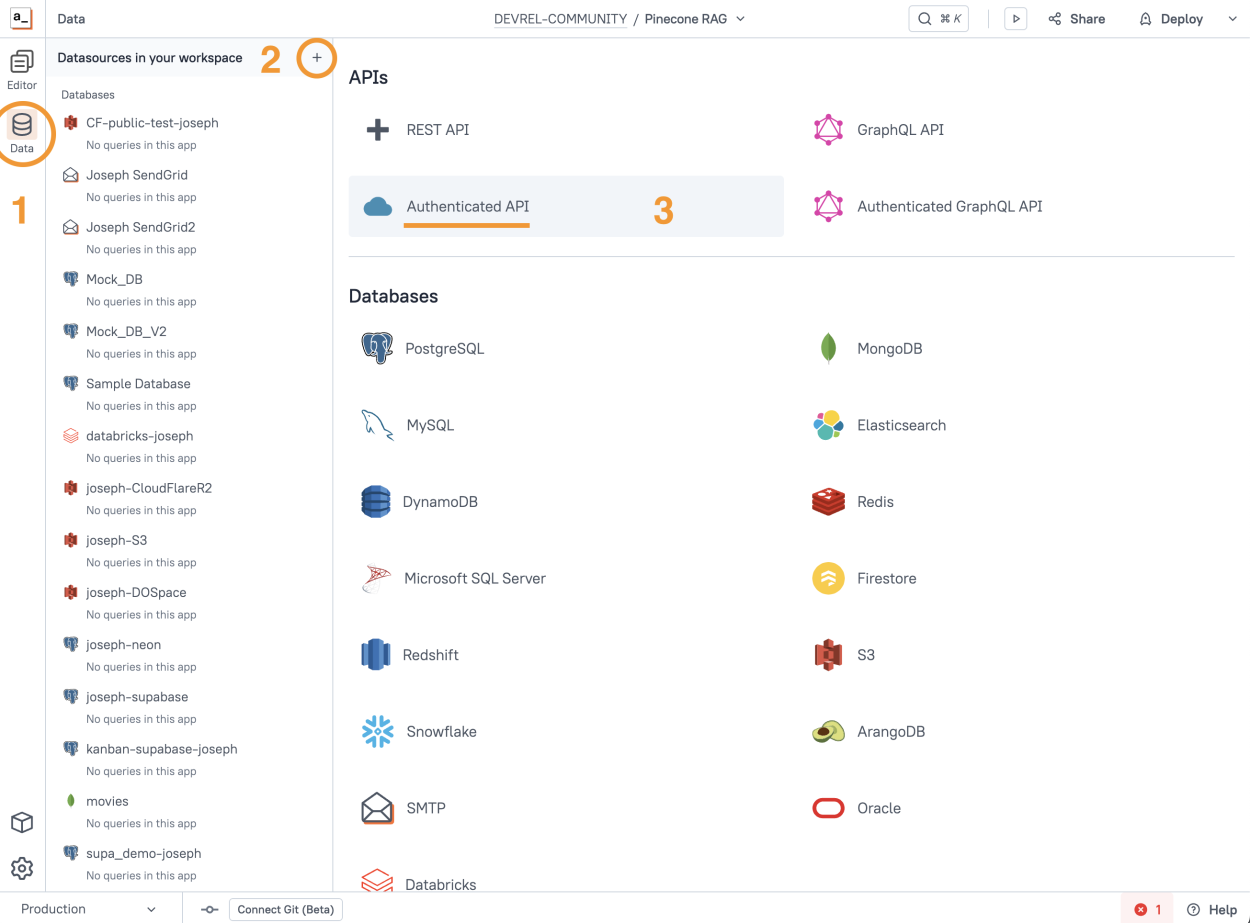
In the Appsmith editor, click Data on the left sidebar, then + to add a new Datasource, and select Authenticated API.
Configure the new Datasource as follows:
| Name | Pinecone |
|---|---|
| URL | https://api.pinecone.io |
| Authentication Type | API Key |
| Key | Api-Key |
| Value | YOUR_PINECONE_API_KEY |
Click Save to finish setting up the Datasource. Your API key is now securely stored on your self-hosted Appsmith server (or our free cloud), and will not be exposed to the end-users. You also won't be able to view it again in Appsmith, and we're going to need it again later! So make sure you have it saved somewhere safe.
Creating an Assistant
Next, add a new API under the Pinecone datasource and configure it as follows:
| Name | createAssistant |
|---|---|
| Method | POST |
| URL | /assistant/assistants |
| Body Type | JSON |
| Body |
|
Click Run, and you should see a response showing that the assistant was created. You can also view the new assistant in your Pinecone dashboard now.
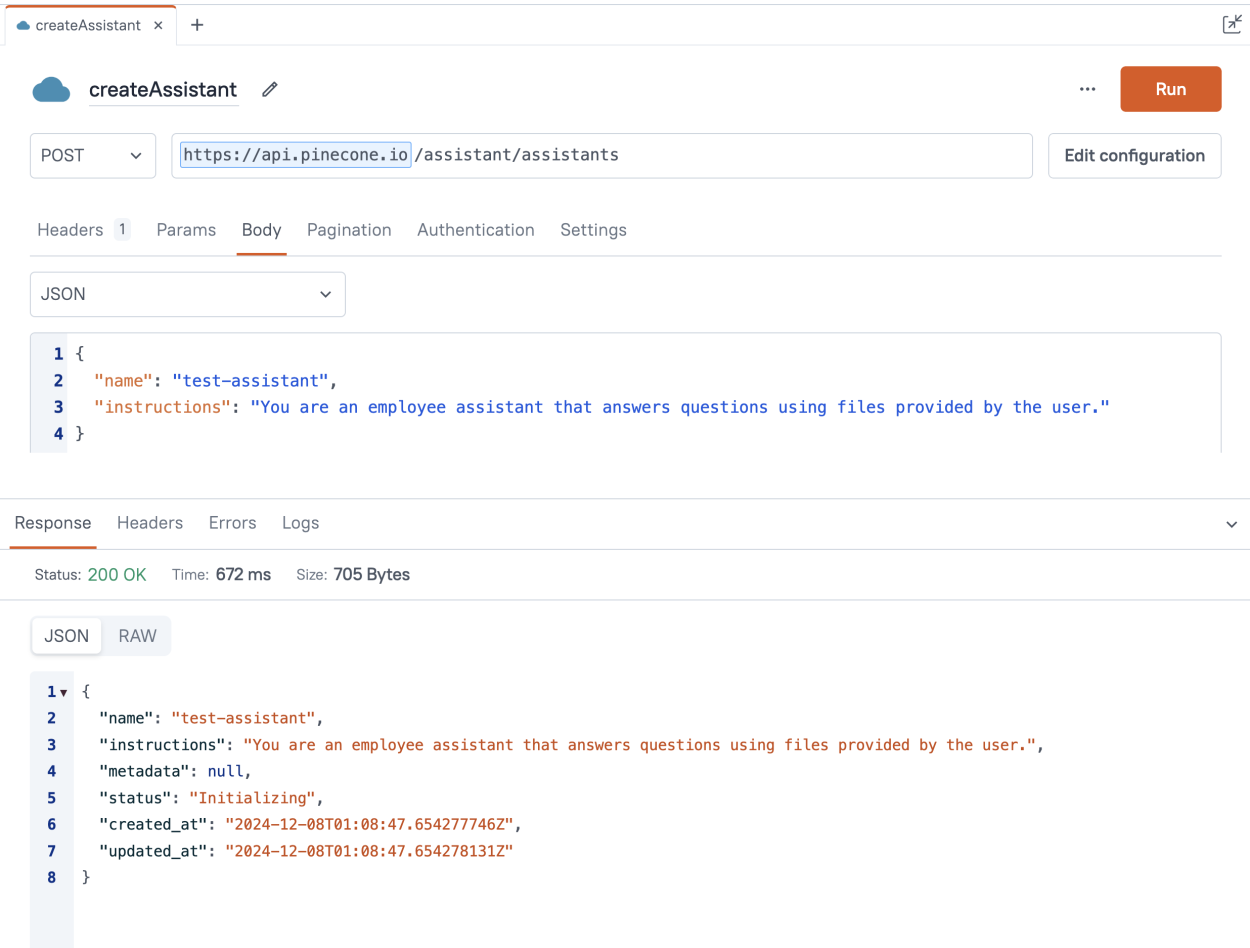
Now try clicking Run again. Notice a different response this time? The API will fail to run a second time because there's already an assistant created with this name.
In this guide we'll be creating one assistant for every user, so we need a way to check if an assistant already exists for a given user. We could just try the createAssistant API and let it fail, but a better approach is to use the endpoint for listing assistants.
Listing Assistants
Create a new API under the Pinecone Datasource to list assistants, and configure it as follows:
| Name | listAssistants |
|---|---|
| Method | GET |
| Url | /assistant/assistants |
Run the API and you should get back a list of the assistants in the project associated with your API key. We'll use this list in a few sections to add some logic using JavaScript to check for an existing assistant and create it if it doesn't already exist. But first, let's finish setting up the APIs for uploading files and chatting with the assistant.
Uploading Files
Next, we'll add a new API and configure it for adding files to the assistant. The endpoints for creating and listing assistants use the same domain, but once the Assistant is created, the API endpoints are a little different to actually interact with it. In my case, the new URL is https://prod-1-data.ke.pinecone.io, but yours may be different depending on your region. Double check the URL for your assistant by viewing the API docs.
Once you have the correct URL, set up another Authenticated REST API Datasource following the same setup as before. The API key will be the same, but the base URL for the endpoint will be different.
| Datasource Name | Pinecone Assistant |
|---|---|
| URL | https://prod-1-data.ke.pinecone.io |
| Auth Type | API Key |
| Key | APi-Key |
| Value | YOUR_API_KEY |
Next, go to the UI tab and drag in a FilePicker widget. Then set the Data type to Binary.

Refresh the page to make sure the FilePicker is in Binary mode, then click it and upload a PDF document. This just loads it into the FilePicker widget so that it's available to reference in the API.
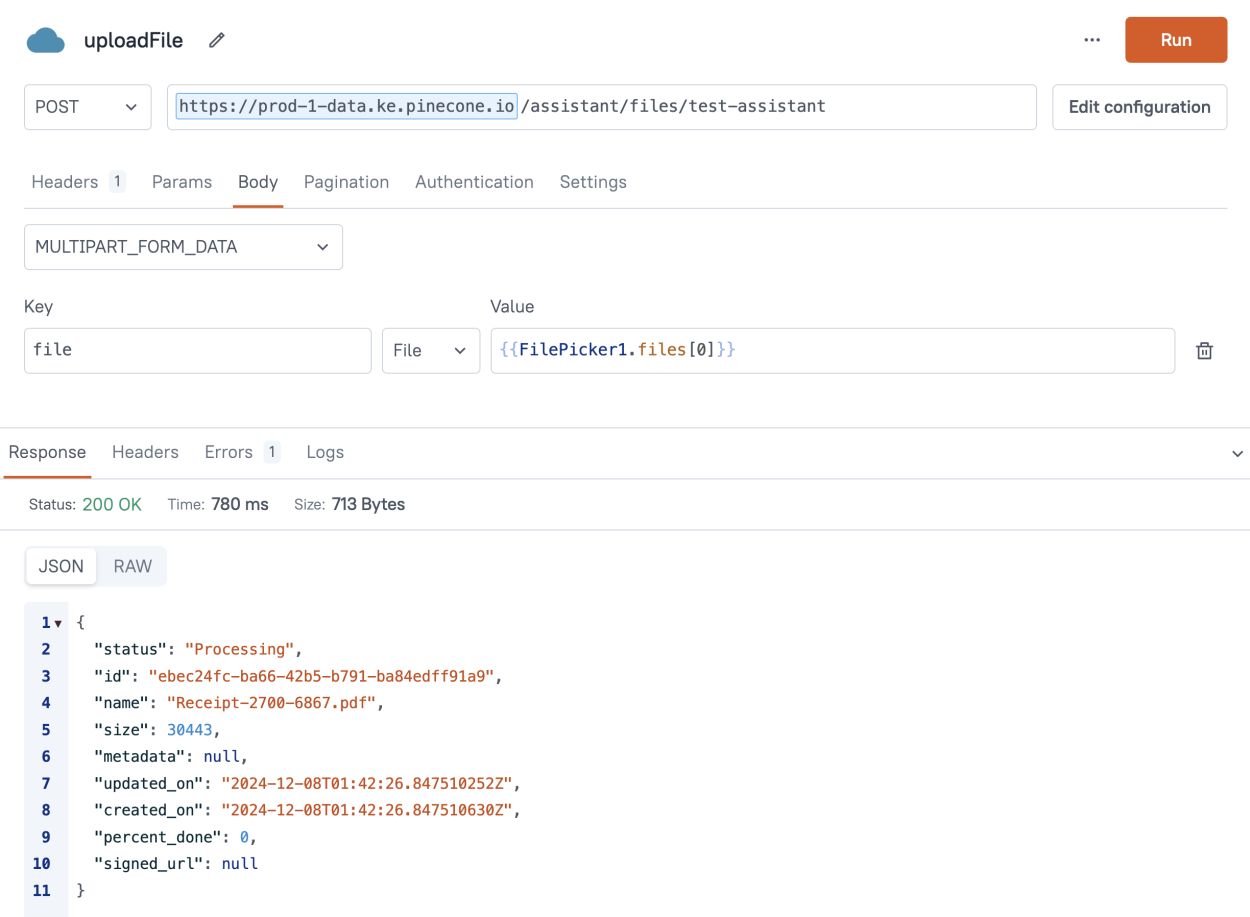
Now add a new API under the new Pinecone-Assistant Datasource, and configure it as follows:
| Name | uploadFile |
|---|---|
| Method | POST |
| URL | /assistant/files/test-assistant |
| Body Type | MULTIPART_FORM_DATA |
| Body (Key, Type, Value) | file, File, {{FilePicker1.files[0]}} |
Click Run, and the file will be uploaded to the assistant. You should see a message showing that the file is processing. It may take a minute or two before the assistant is ready to begin answering questions about the file.
Chatting with the Assistant
Ok, now that the file is uploaded, we're ready to start chatting with the assistant. Add one last API under the Pinecone-Assistant Datasource, and set it up as follows:
| Name | SendMessage |
|---|---|
| Method | POST |
| Url | /assistant/chat/test-assistant |
| Body Type | JSON |
| Body |
|
Click Run, and you should get back a response from the assistant with a description of the uploaded PDF. We now have all the necessary APIs to create separate assistants for each user, and let them upload files and chat with the assistant.
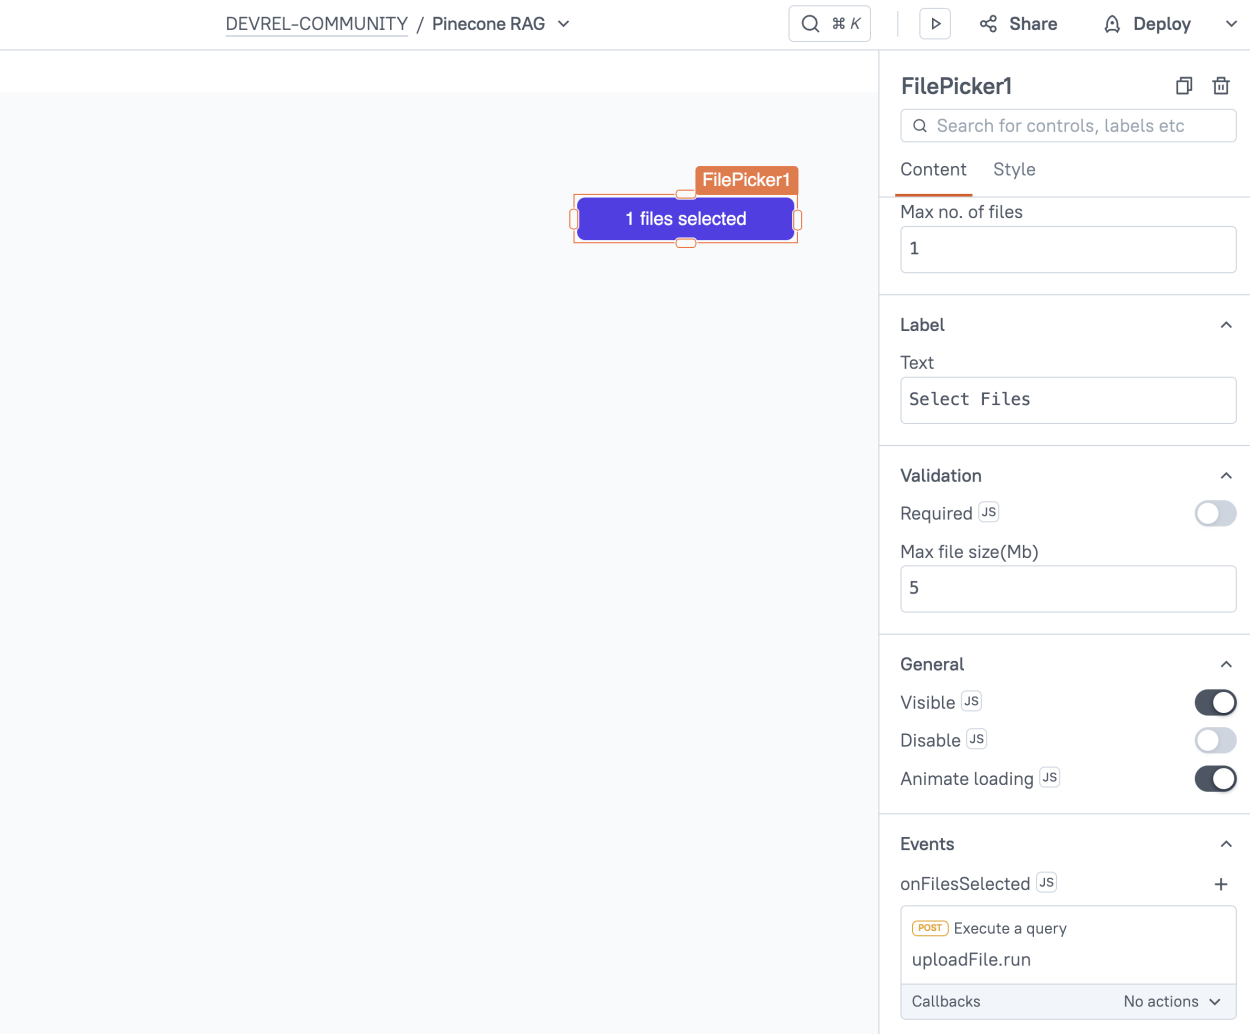
The end user won't be able to run the API from the editor though, so we need a way to trigger the file upload. Go back to the UI and select the FilePicker widget. Then set the onFileSelected event to trigger the uploadFile API.
Per-User Assistants
Now to make this multi-user. In this example, I'll be using each user's email address to name the assistant, so there's one assistant per user. But you could easily set this up as one assistant per team, department, or for the whole company.
The assistant names won't allow @ or periods from the email address, so we'll use RegEx to replace them with hyphens. Update the createAssistant, uploadFile, and sendMessage APIs to insert the user's email as follows:
{{appsmith.user.email.replace(/\W/g,'-')}Be sure to replace the test-assistant text with this binding, in the createAssistant body, and in the URL for both the uploadFile and sendMessage APIs.
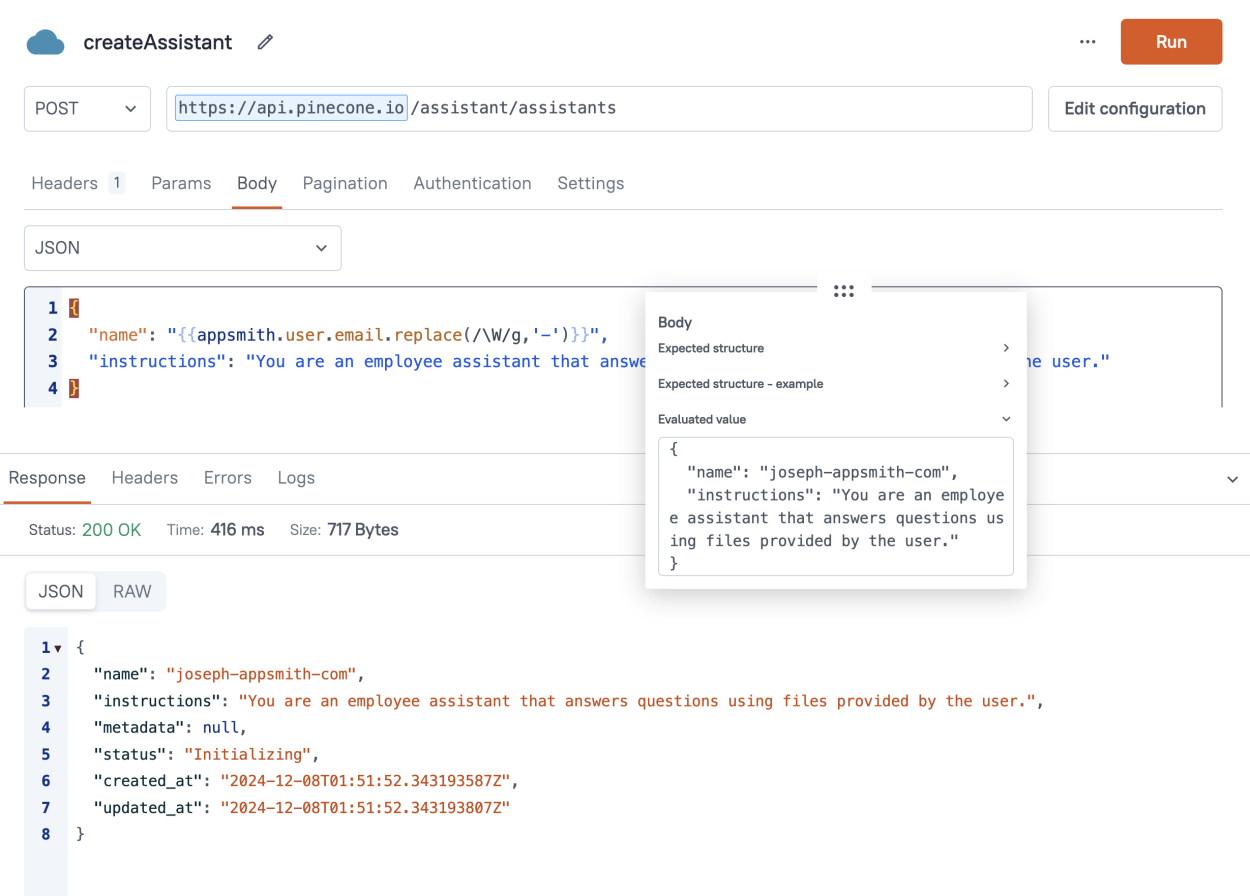
Now the createAssistant API will create a different assistant for each user, the first time the API is ran. However, it will still fail if we run it again. Time to add that JavaScript logic.
Page-load Logic
Now click the JS tab to add a new JSObject and paste in the following code:
export default {

	async onOpen () {

		const assistantList = await	listAssistants.run();
		const assistantCreated = assistantList.assistants.find(a => a.name===appsmith.user.email.replace(/\W/g,'-'));
		console.log(assistantCreated ? 'Assistant found for user.': 'Not found. Creating new assistant.');

		if(!assistantCreated){
			await createAssistant.run()
		}
	}

}
Then click the Settings tab for JSObject and set this onOpen function to run on page load.
Now when a user logs in, the function will check to see if they already have an assistant matching their email, and if not, it will create one.
Setting up the UI
Lastly, we'll add a UI to chat with the assistant. Drag in a text widget to display the response, an input widget for the prompt, and a button to send the message.
Text Widget
Set to fixed height, and then drag to make the widget taller. You may also want to change it to small text and turn off bold. Then set the text binding to display the response from the sendMessage API. Then set the binding to {{sendMessage.data.message.content}} to display the response from the assistant.
Input Widget
Set to Multi-Line and turn off auto-height. Then change the label to "Prompt".
Button Widget
Set the onClick to run the sendMessage API.

Time to test it out! Click Deploy, then try uploading a file and asking a question. Remember it may take a minute or two for the file to process after upload.
Conclusion
Retrieval Augmented Generation adds context to your assistant, allowing it to answer questions using your company's data. This can be extremely useful, but also poses security and privacy risks. By creating a separate assistant for each employee using Pinecone's Assistant API, you can safely leverage AI in your internal tools without exposing data to the wrong user. This same approach can be used to create assistants at the department or company level, providing a flexible and secure method of building smart AI chat bots with knowledge of your company and customers.


