Appsmith Workflows are now LIVE in public beta! Today we'll be taking a look at the new code-based workflow engine, and setting up a webhook trigger from Stripe to send customers to HubSpot. If this is your first time seeing Appsmith workflows, you may want to check out this video first for a full feature overview, since this guide will only be covering the webhook trigger .
This guide will cover:
- Creating and deploying your first workflow
- Triggering a workflow from a webhook
- Creating a webhook in Stripe
- Adding Customers to HubSpot from a workflow
Let's get to work! 🧑🏽💻
Note: Workflows are available on our Business and Enterprise editions. You can try workflows today by signing up for a free trial of the business edition, or by using the free sandbox hosted at https://workflows.app.appsmith.com/.
Intro to Workflows
We've taken a code-based approach to building workflows in Appsmith, providing a developer friendly environment that's more efficient and easier to maintain and navigate than visual or node-based workflows. The editor is similar to the JSObject editor in Appsmith, with the ability to connect to any API or database.

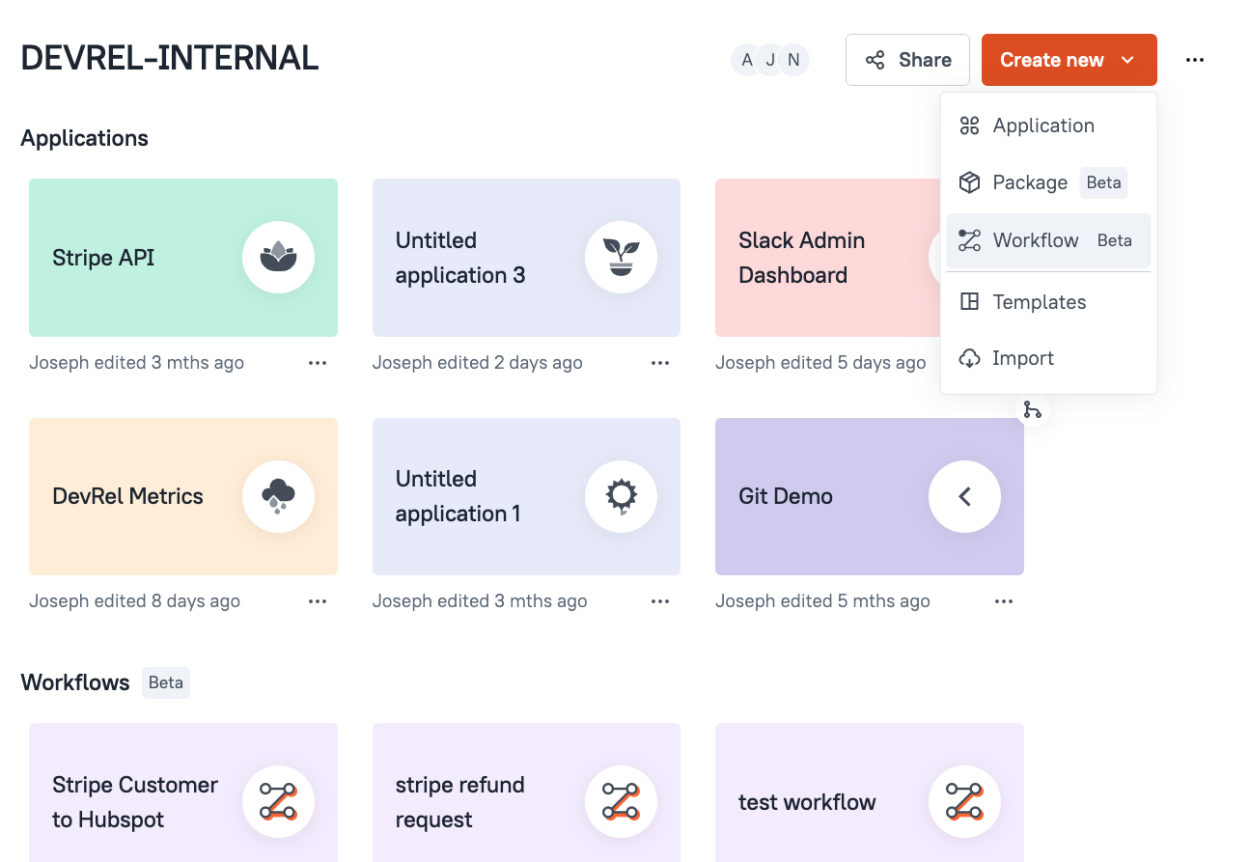
You can create a new workflow from the Apps Homepage. Workflows are a new type of object at the Workspace level, next to your other apps.
Creating a Workflow
Start out by creating a new workflow and name it Stripe Customer to HubSpot. Then paste this in the Main.js file and click Run.
export default {

	async executeWorkflow(data) {
		console.log(data)
		// write custom logic here
		return true;
	}

}
You should see an input appear to pass in some test data. Enter some dummy data so you can see it in the logs when the workflow runs.
{
	"test": 123
}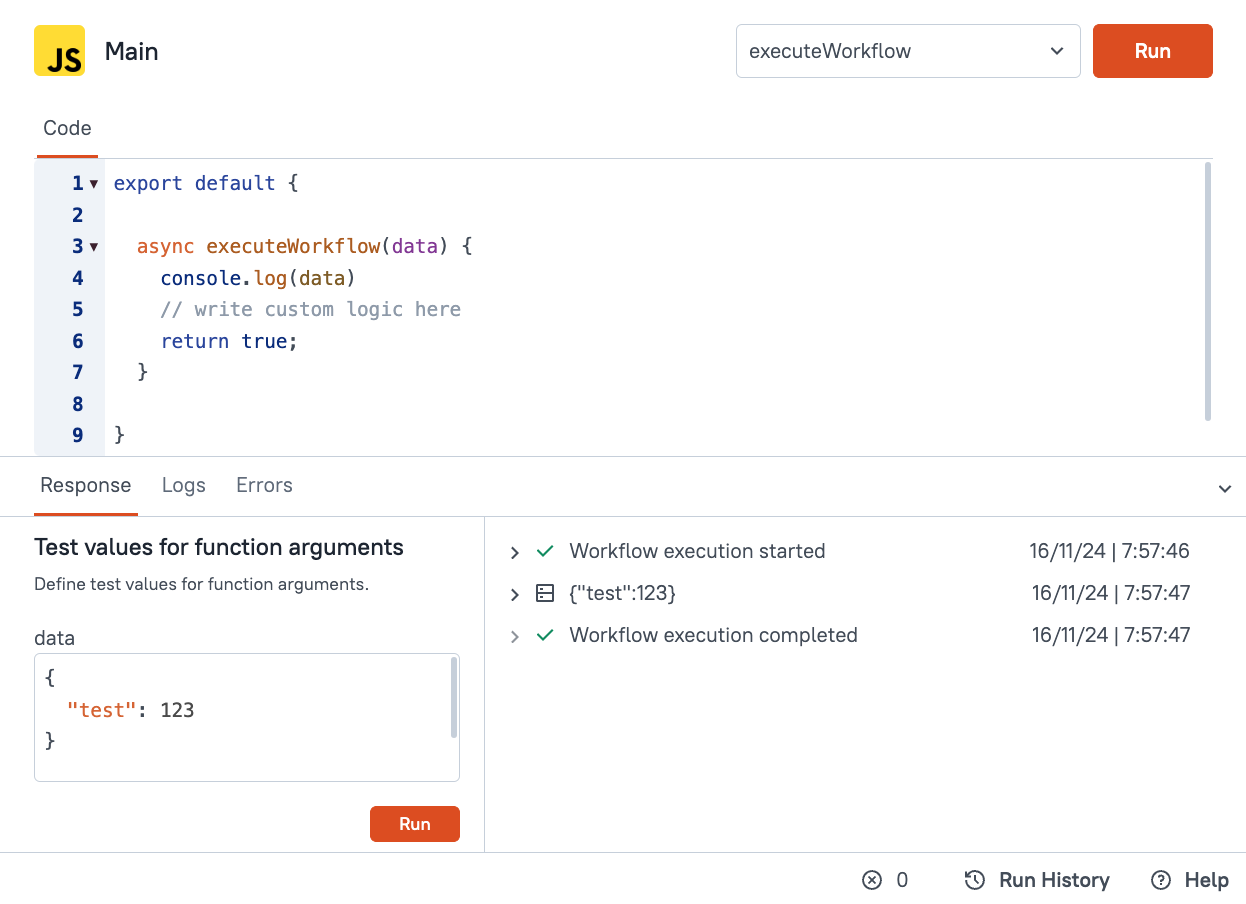
Note the Run History entry showing the console.log() of the data that was passed in.
Triggering Workflows
Next, we'll trigger the workflow from an external service and pass in some real data. But first, we have to deploy the workflow. Click Deploy so that the workflow can be triggered outside of the editor.
Next, click the Settings gear on the left sidebar, select Triggers, and enable the Webhook trigger for this workflow. This will present you with a new webhook endpoint which includes an API key. Copy the value to use in the next step, and leave this window open while setting up the webhook in Stripe.
Creating a Webhook in Stripe
Now head over to your Stripe Dashboard and ensure you're in Test mode. Go to the Developers section, then the Event destinations tab, and click + Add endpoint. Configure the new endpoint as follows:
| Endpoint url | Url from Appsmith (enter the URL only, not the cUrl request) |
|---|---|
| Listen to | events on your account (default) |
| Select events to listen to | Customers > customer.created |
Click Add endpoint to save the settings. Stripe should now be sending new customers to the Appsmith webhook.
Testing the Webhook
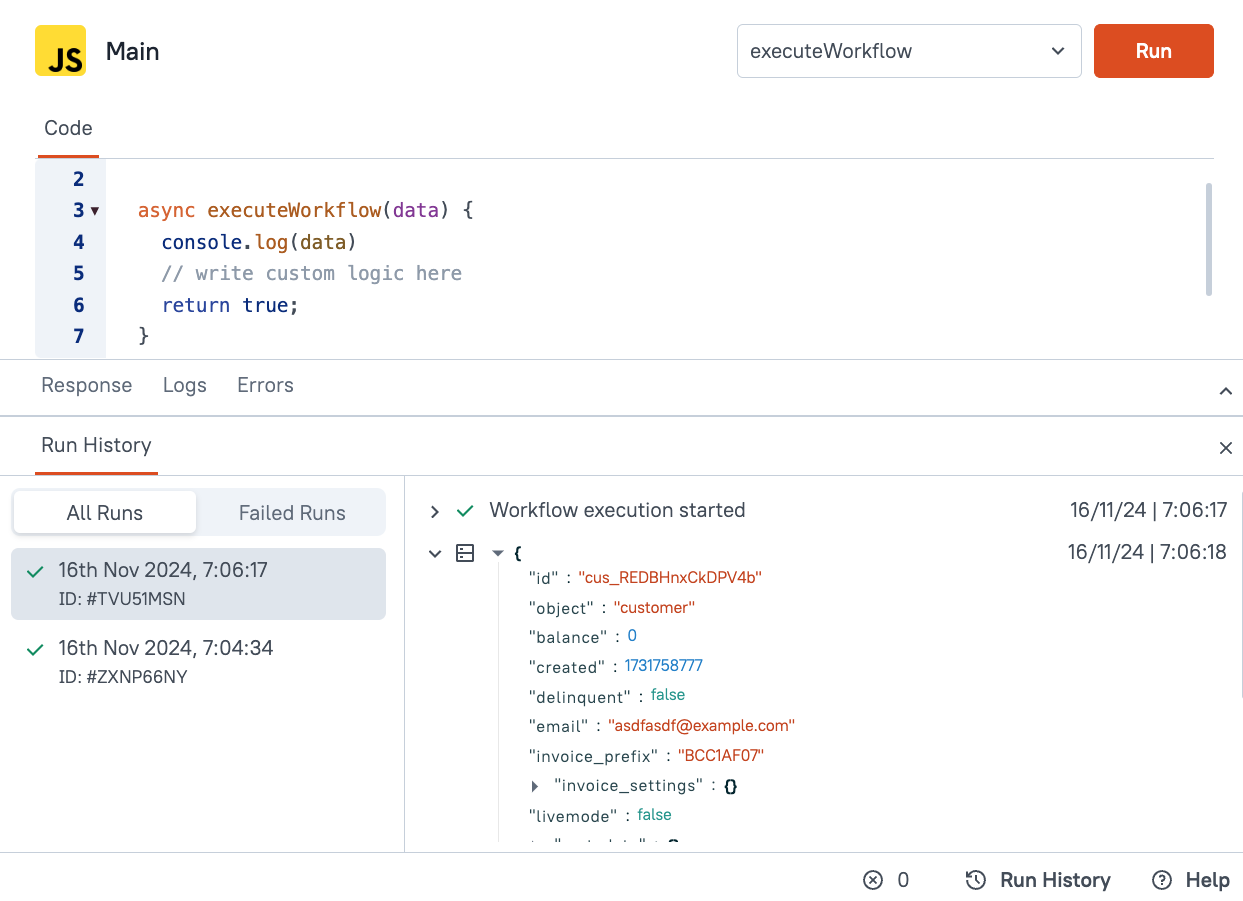
Create a new customer in Stripe (again, make sure you're in Test mode), and then check the Run History for the workflow in Appsmith. You should see the customer object in the console.log().
Ok, we have a workflow deployed, and webhook subscription set up to receive data from Stripe. Now to connect with HubSpot.
Creating a Customer in HubSpot
First, open up the Private Apps section in HubSpot, and click create a private app. Give the new app a name, then go to the Scope tab. Enter 'contacts' in the search, and then enable the crm.objects.contacts.read and crm.objects.contacts.write scopes, at a minimum. You may also want to enable the sensitive data, and read/write schemas, depending on your use case.
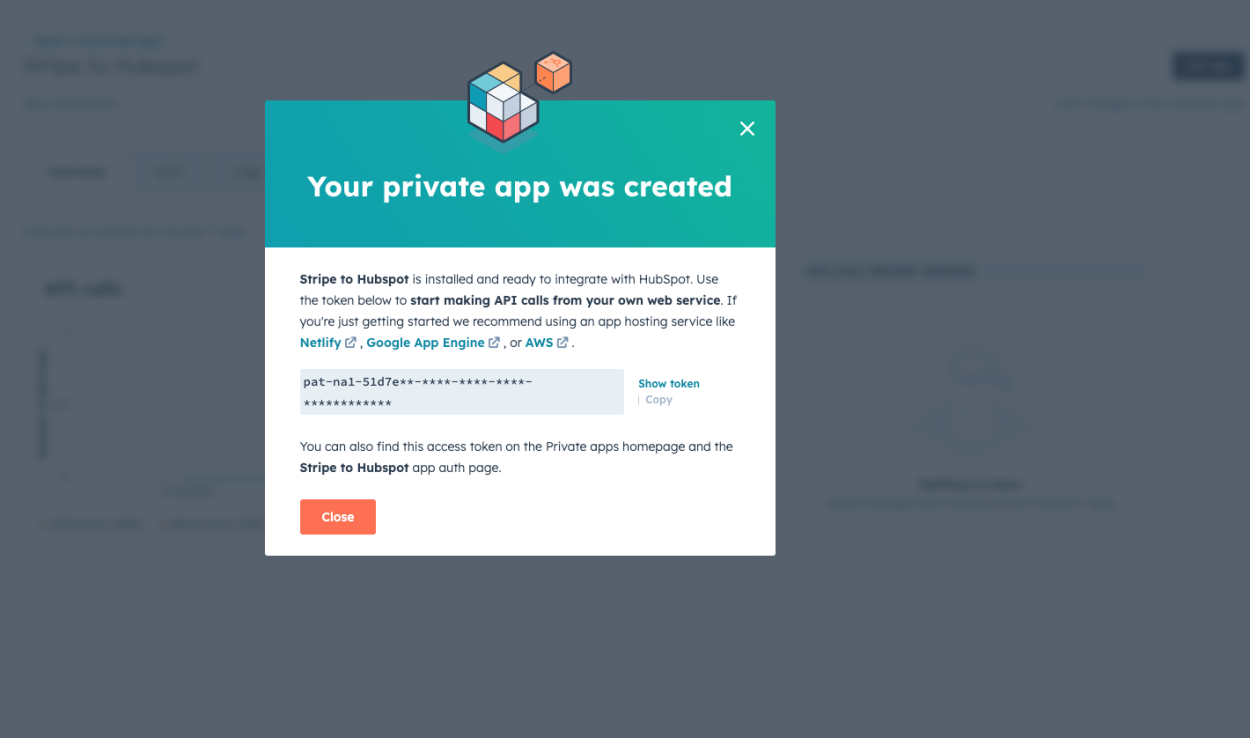
Click Update to save the scopes, then click Create app, and then click continue creating to confirm. You should be presented with a new personal access token. Copy the value, and then head back over to Appsmith.
Creating a HubSpot Datasource
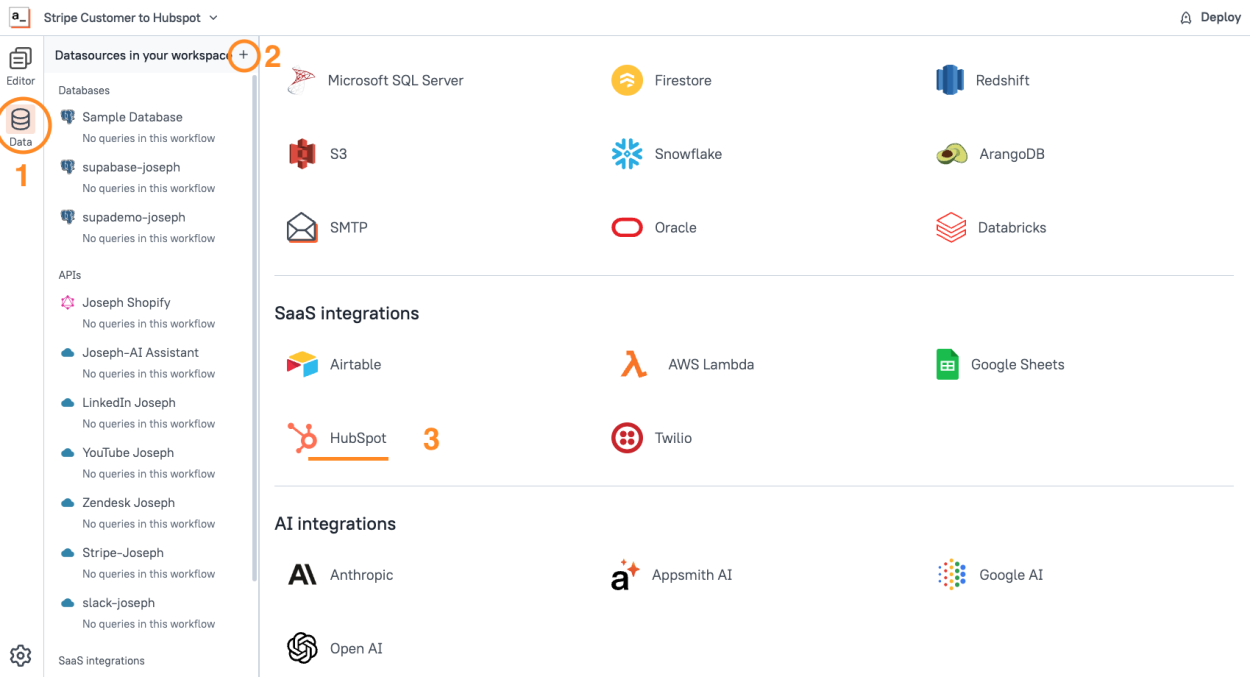
Click the Data icon on the left sidebar, then click + to add a new Datasource and select HubSpot.
Set the Authentication type to Bearer token and paste in the token from HubSpot. Name the Datasource and then click Save.
Creating a Contact in HubSpot
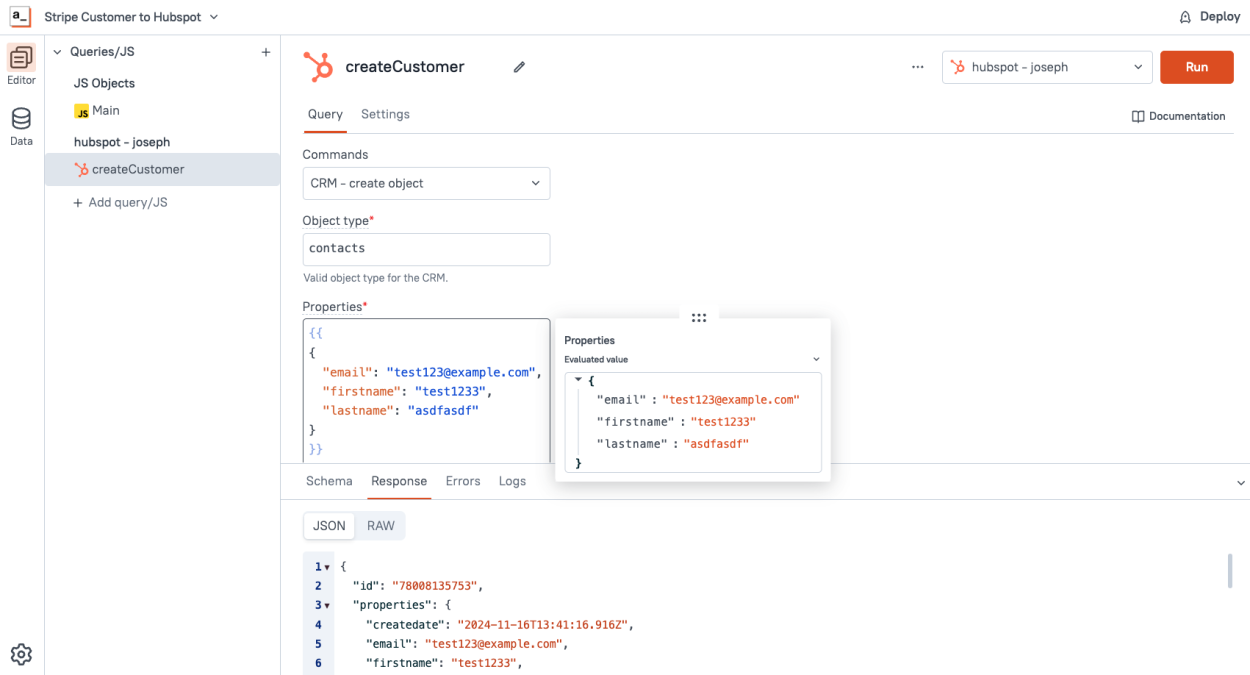
Now head back to the Editor and add a new query under the HubSpot Datasource. Configure the query as follows:
| Name | createContact |
|---|---|
| Commands | CRM - create object |
| Object type | contacts |
| Properties |
|
Click Run, and you should see a 200 response showing that the new contact was created.
Ok, we have all the individual pieces working, now to link everything up.
Putting it all together
Click the Run History and take a closer look at the Customer object from Stripe. The incoming webhook data contains an event object, with another property called data, which contains the actual Customer object. So the customer's info is at data.data.object.
Update the Main.js file to set this value to a variable, and then pass it to the createContact query for HubSpot.
export default {

	async executeWorkflow(data) {
		const stripeCustomer = data?.data?.object
		console.log(stripeCustomer)
		await createContact.run({...stripeCustomer})
		return true;
	}

}
Then update the createContact query Properties to use the parameters being passed in.
{{
{
  "email": this.params.email,
  "firstname": this.params.name?.split(' ')[0],
  "lastname": this.params.name?.split(' ')[1]
}
}}Note: in the data coming from Stripe, the name field contains both the first and last name. So in the HubSpot query, we can use the split method in JavaScript to get the first and last name. Optional chaining is used to avoid editor errors when no param is present.
Click Deploy once more on the workflow to save the new changes to the live version. Then create a new customer in Stripe. You should see a matching contact in HubSpot, created almost instantly!
Conclusion
As you can see, you can easily connect data from any Appsmith datasource, transform the data, and sync it between multiple systems with just a few lines of code! Appsmith's code-base approach to workflows make it easier to edit and re-use sections of your code, in a familiar and developer friendly environment, without navigating a spider-web of visual nodes.
What's Next?
From here you could add error checking, conditional logic, test for duplicate customers, or integrate with any of Appsmith's other datasources. Got an idea or new use case for Appsmith workflows? Drop a comment below, or share your own tutorial with the Appsmith community! Thanks, and happy App-smithing!
