

Appsmith ships with over 45 pre-built UI components, or Widgets, that can be used to quickly build a UI for just about any kind of internal tool you can imagine. But occasionally, there are a few use cases not covered by one of our widgets. Or are there? 🤔
Enter the Iframe widget: the escape-hatch that takes you from low-code to full-code, where you can code anything you want, then send data back and forth between Appsmith and the Iframe.
There are tons of use cases where an Iframe widget could be used to create a new, custom widget, given the right iframe code. But before we get to building those crazy iframe experiments, let's take a closer look at the widget properties and behavior.
This post will cover
- When to use the Iframe
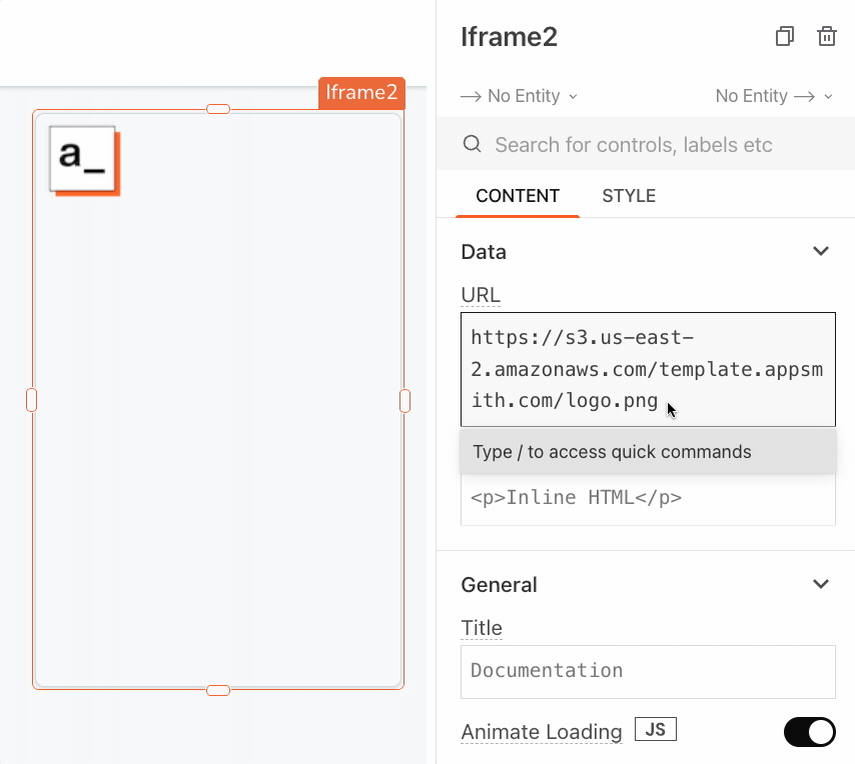
URLvsscrDocproperty - Various ways of providing HTML to the
scrDocproperty - Two-way communication between the iframe content and the parent app (Appsmith)
- Printing Iframe contents
- Generating HTML from raw data
Iframe: srcDoc vs URL Property
Iframe content can be loaded via an external URL, or by providing HTML directly in the srcDoc property. Each method has its own advantages, and limitations. Only one of these two options will be used in most use cases, but it's worth noting that you can actually use both at once. The URL will act as a default, or fallback value, if the srcDoc property is blank.
Iframe srcDoc Property
This is just an iframe element that uses the srcDoc to render its contents, instead of retrieving the HTML from a URL. As such, the srcDoc Iframes inherit the parent frame's (Appsmith's) Content-Security Policy.
On app.appsmith.com (our free cloud-hosted), we have a CSP set to allow loading scripts from only a set specific list of domains, like Intercom, Segment, Google, etc. This means that when you use the SrcDoc property, most scripts will fail to load on Appsmith cloud even though the same code would work on a self-hosted edition, or if loaded using the Iframe URL property.
NOTE: To see the current list of domains allowed by Appsmith's CSP, run the following command in the terminal:curl -sSI https://app.appsmith.com | grep Content-Sec
OUPUT:
Content-Security-Policy: default-src 'self'; script-src 'self' 'unsafe-inline' 'unsafe-eval' *; worker-src 'self' blob:; connect-src * 'self' blob: raw.githubusercontent.com *.intercom.io wss://*.intercom.io *.algolianet.com *.algolia.net api.segment.io *.sentry.io *.hotjar.com maps.googleapis.com fonts.googleapis.com www.gstatic.com fonts.gstatic.com; img-src * data: blob:; media-src * data: blob:; style-src 'self' 'unsafe-inline' fonts.googleapis.com cdnjs.cloudflare.com; font-src 'self' fonts.gstatic.com js.intercomcdn.com cdn.jsdelivr.net; frame-ancestors *; frame-src * data: blob:
Changing the srcDoc Input
It's also worth noting that ANY change to the value in the srcDoc field will cause the entire iframe document to reload, and any user inputs will be lost. So you can use a JS Object or the Appsmith store to provide the srcDoc, but once it's loaded, it's better to post messages back and forth to the iframe instead of updating the store or running the function again. More on 2-way iframe communication in the next section.
Iframe URL Property
When providing a URL, Appsmith loads the content and CSP from the external server at that URL. This iframe is of a different domain, and has its own CSP, so scripts are not blocked by the parent window (Appsmith).
Hosting the iframe code externally also enables use cases like custom React components or other scenarios where the site requires a server. Services like Vercel, Netlify, etc., can easily be used to host your iframe code externally, providing more options and flexibility.
Supplying HTML to the srcDoc Property
This is where things start to get interesting. The HTML that is provided to the srcDoc property can come from any combination of sources:
- hard-coded HTML typed directly into the srcDoc field
- a template literal that merges in HTML tags with values from Input widgets
- a function that returns dynamically generated HTML
- a FilePicker loaded with an HTML file from the user's local machine
- another iframe element?!
- a concatenation of any combo of the above
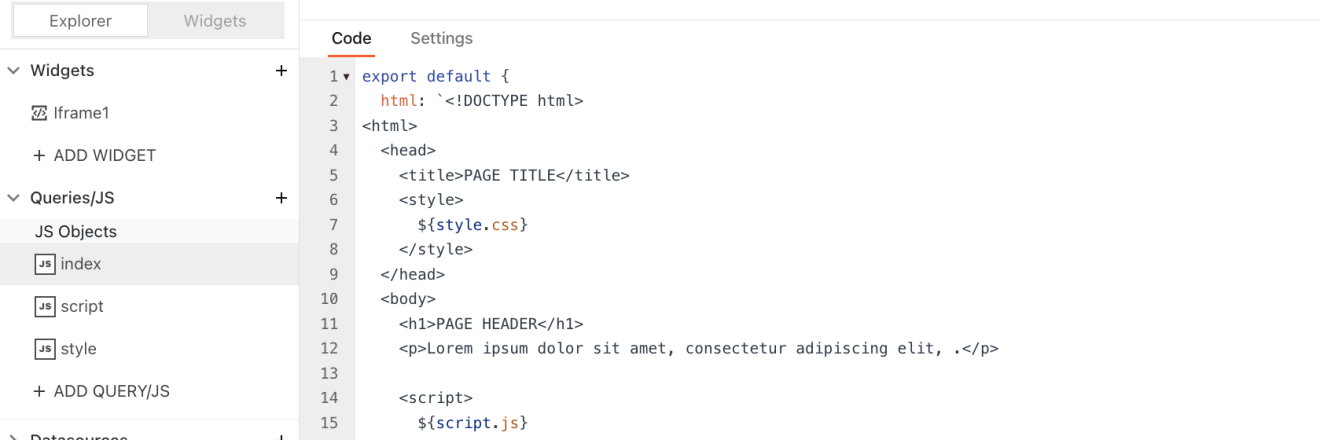
You can even use multiple JS Objects to break up the HTML, CSS, and JS, like a traditional website. Then assemble the files inside the index.html JS Object before sending it to the srcDoc property.
Two-Way Communication with Iframes
Getting data out of the iframe
Whether you use the URL or srcDoc property, chances are you're going to want to get data out of the iframe and into Appsmith at some point. This can be done by posting a message to the parent window (Appsmith), then accessing the message via Iframe1.message. For instance, the following snippet will add a textArea to capture user input, and a SAVE button that posts the textArea's value back to Appsmith.
  <textarea id="myTextarea" rows="5" cols="40"></textarea>
  <button onclick="saveTextAreaValue()">SAVE</button>

  <script>
    function saveTextAreaValue() {
      var textareaValue = document.getElementById('myTextarea').value;
      window.parent.postMessage(textareaValue, '*');
    }
</script>- More on the window.postMessage() method
The Iframe widget also has an onMessageReceived event that can be used to trigger Appsmith actions that react to the message. For instance, you could save the message to the Appsmith store, or run an API or database query to save the value to an external datasource.
Pro Tip: wrap the message in an object, then stringify it before posting. This way you can send multiple values with different property names, and ensure that valid JSON is always sent, even when the user input is blank.
window.parent.postMessage( JSON.stringify( {message:textareaValue, otherProperty:data} ), '*');
Sending Data into an Iframe
When using the srcDoc property, data can be merged into the HTML dynamically, passing in query responses or values from other widgets. This this case, hard-coded HTML is entered, with {{handlebars}} used to insert Table1.selectedRow bindings inline.
<div class="contact-card">
  <img src="{{Table1.selectedRow.image}}" alt="User Avatar">
  <h2>{{Table1.selectedRow.Name}}</h2>
  <p>Email: {{Table1.selectedRow.email}}</p>
  <p>Phone: {{Table1.selectedRow.phone}}</p>
</div>
With this approach, the srcDoc data changes every time a new table row is selected, and the iframe will reload the entire page. This may be ok for some use cases, but other times you might want to pass in data without resetting the whole page. In this case, it's better to update the data by posting a message to the iframe, then handling the message inside the iframe code.
Here's an example of an iframe snippet that will listen for window messages, then display the message in a log table.
<head>
  <title>Message Log</title>
  <style>
    table {
      border-collapse: collapse;
      width: 100%;
    }

    th, td {
      border: 1px solid #ddd;
      padding: 8px;
      text-align: left;
    }

    th {
      background-color: #f2f2f2;
    }
  </style>
</head>
<body>
  <table id="logTable">
    <thead>
      <tr>
        <th>Message</th>
      </tr>
    </thead>
    <tbody></tbody>
  </table>

  <script>
    window.addEventListener('message', function(event) {
      var message = event.data;

      var logTable = document.getElementById('logTable');
      var tbody = logTable.getElementsByTagName('tbody')[0];

      var newRow = document.createElement('tr');
      var newCell = document.createElement('td');
      var messageText = document.createTextNode(message);
      newCell.appendChild(messageText);
      newRow.appendChild(newCell);

      tbody.appendChild(newRow);
    });
  </script>
</body>
Using this approach, data can be posted to the window without reloading the entire page.
Printing Iframe Contents
So you've crafted an awesome iframe widget, and now you want to print it. Easy, just add a button that opens the browser's print dialog! This can also be used to 'print' to PDF, and download the file locally.
<button id="printBtn"onClick="window.print()">Print / Save PDF</button>
This works great, but now the print button shows up on the printed version.
No problem. Just sprinkle in some CSS!
< div > <button id="printBtn"onClick="window.print()"> Print / Save PDF < /button></div > <style>
button {
  padding : 8 px;
  margin : 20 px 0
}
@media print {
  button {
    display : none;
  }
}
Another option is to generate the PDF using jsPDF, html2pdf, or other JS libraries, to generate the PDF outside the iframe, in an Appsmith JS Object. This can be done by accessing the Iframe1.srcDoc property and passing the HTML to a JS function that generates the PDF. Stay tuned for a future guide on PDF generation with external libraries!
Generating HTML from raw data
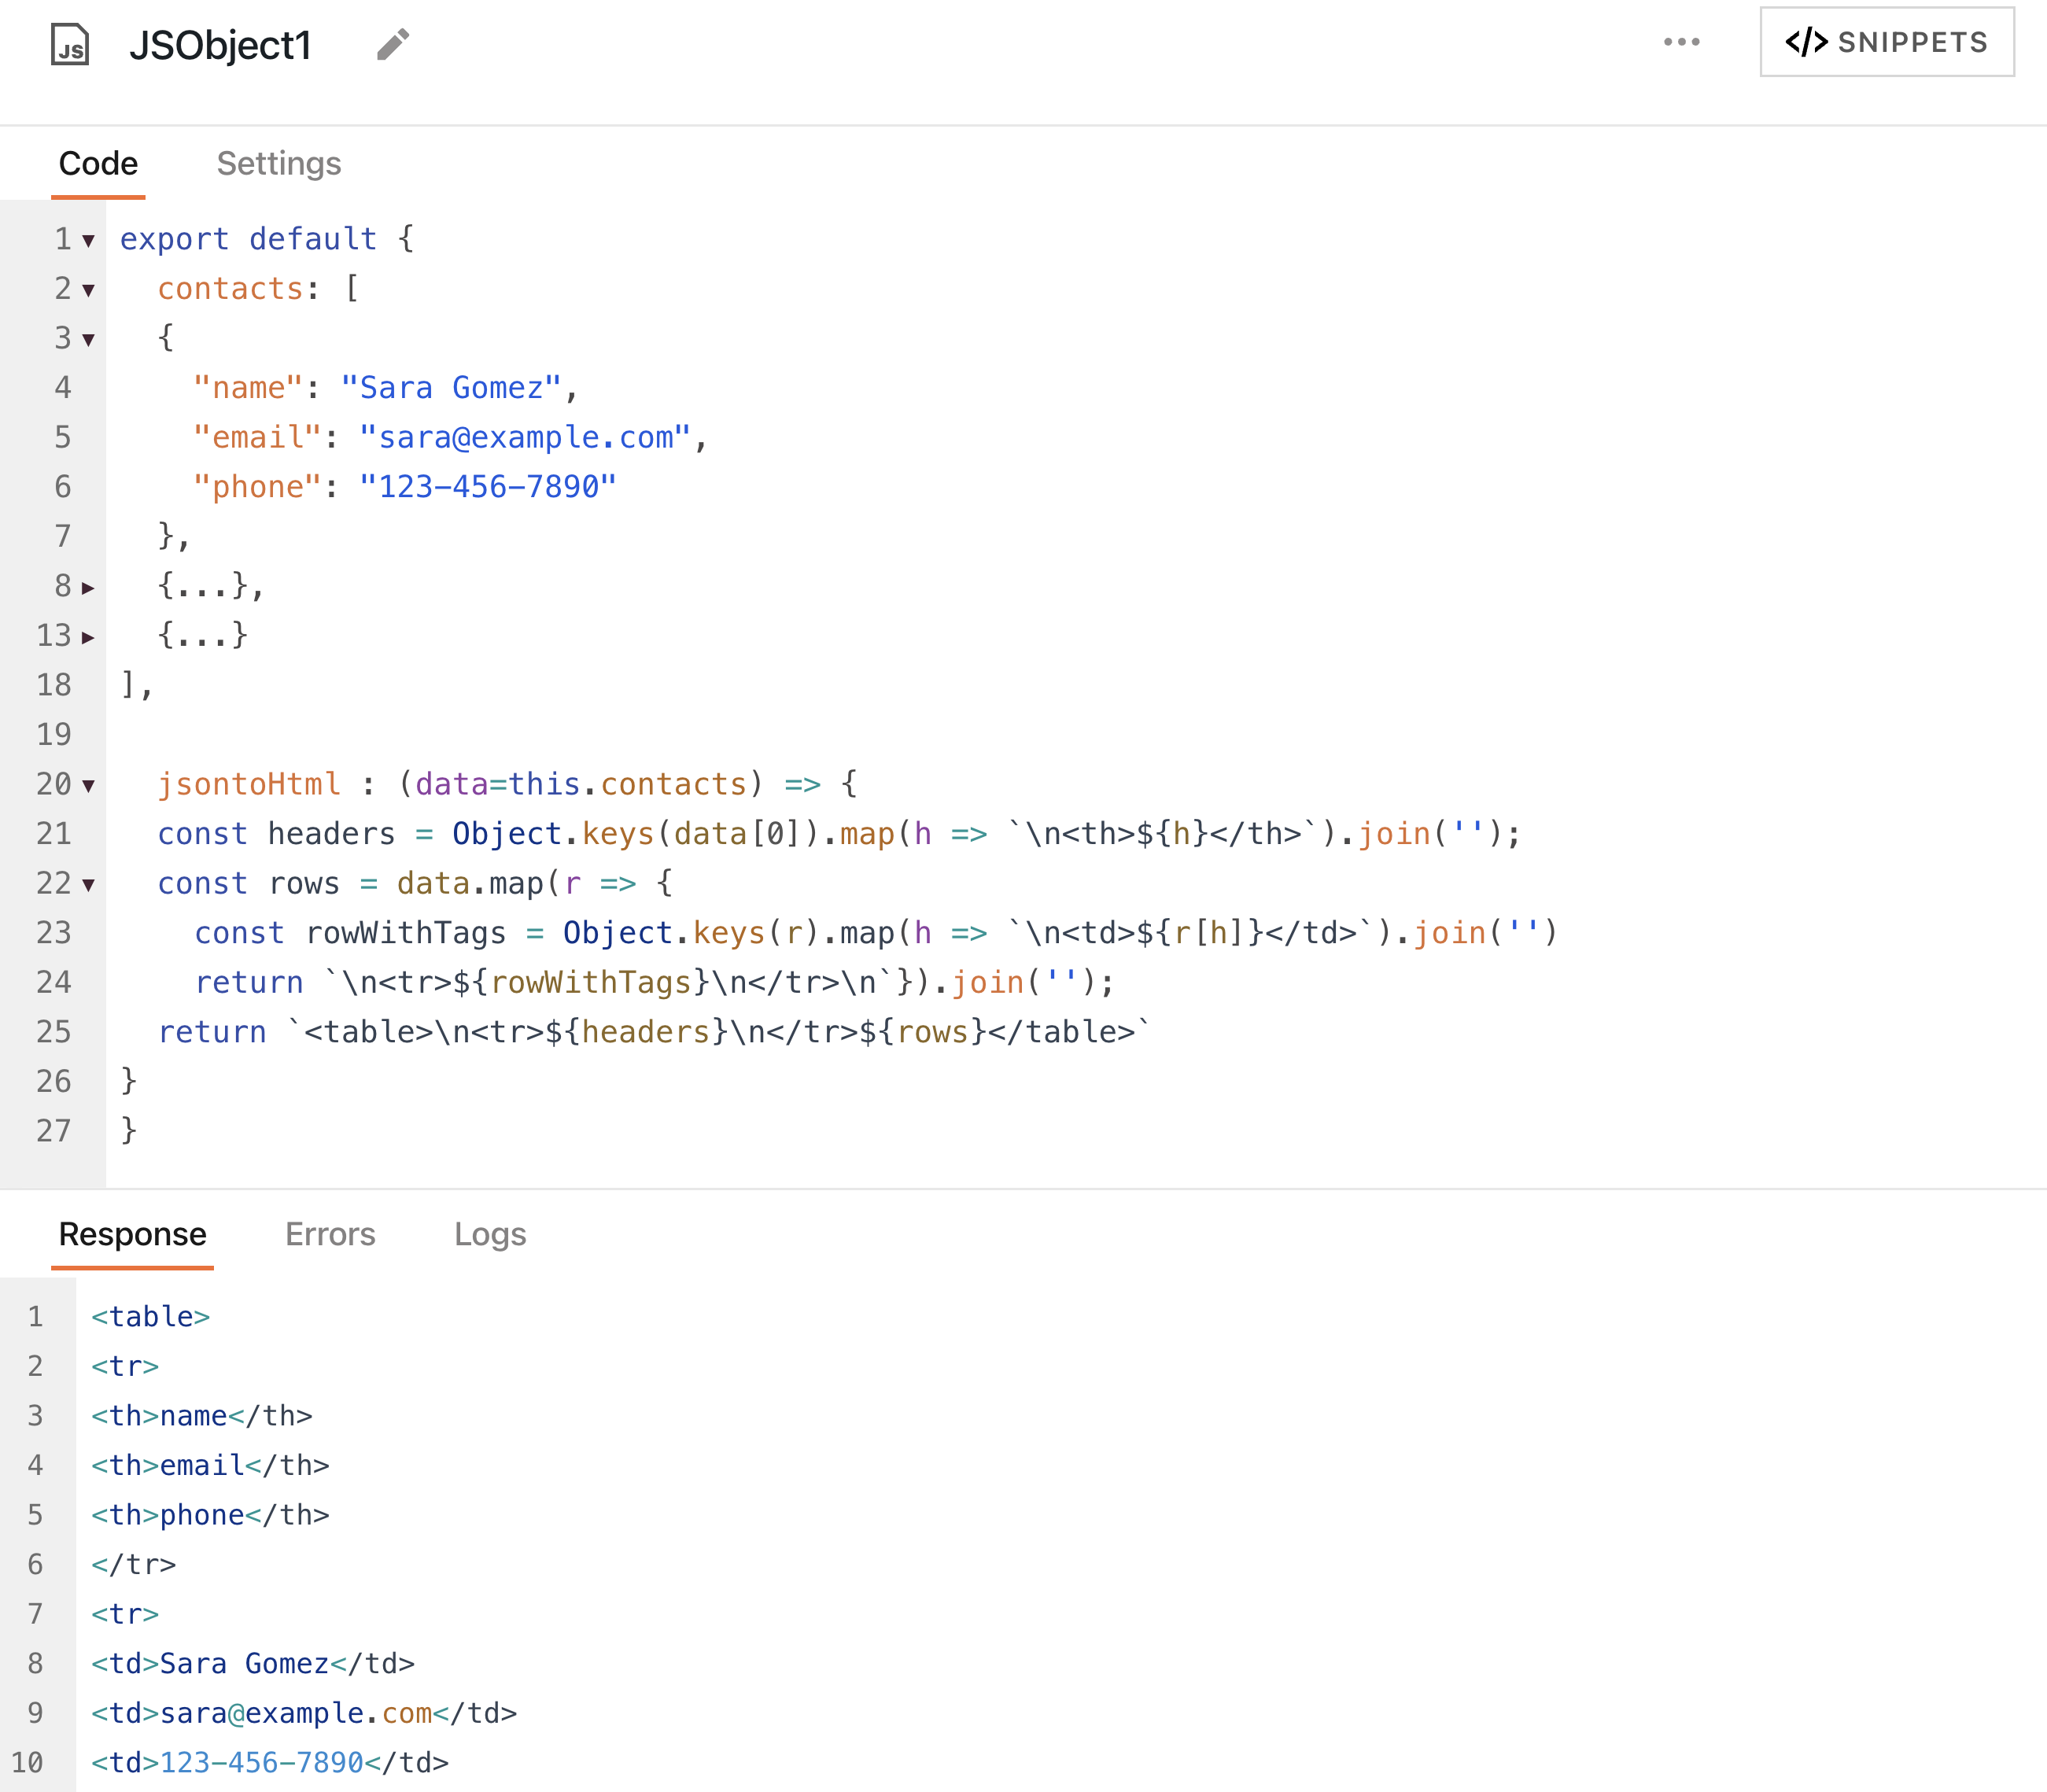
Say you have an array of contact data:
[
  {
    "name": "Sara Gomez",
    "email": "sara@example.com",
    "phone": "123-456-7890"
  },
  {
    "name": "Ahmed Khan",
    "email": "ahmed@example.com",
    "phone": "987-654-3210"
  },
  {
    "name": "Luisa Kim",
    "email": "luisa@example.com",
    "phone": "555-123-4567"
  }
]
...and you want to convert it into an HTML table, with all the values wrapped in <table>, <th>, <tr>, and <td> tags.
For the header row, you can use Object.keys() to get the headers from the first row of data. Then map over that and generate the HTML using template literals. Then map over the data, again using a template literal to wrap each value in <td> tags.
	jsontoHtml : (data=this.contacts) => {
  		const headers = Object.keys(data[0]).map(h => `\n<th>${h}</th>`).join('');
 		const rows = data.map(r => {
    		const rowWithTags = Object.keys(r).map(h => `\n<td>${r[h]}</td>`).join('');
    		return `\n<tr>${rowWithTags}\n</tr>\n`
			}).join('');
  		return `<table>\n<tr>${headers}\n</tr>${rows}</table>`
		}
Conclusion
That's the end of this article, but it's just the beginning when it comes to possibilities with the iframe widget! The techniques outlined in this post should give you a solid basis to understand the various approaches to developing iframe widgets in Appsmith. So now, the question is, what will you do with this new-found power?
I'd love to hear your ideas, see examples of what you've built, or answer any questions from the community on custom iframe widgets. Feel free to reach out on Discord!