Transitioning From Airplane.dev to Appsmith Using AWS Lambda
Goal
Migrate your existing Python scripts from Airplane.dev to Appsmith, using AWS Lambda for efficient execution.
Prerequisites
AWS Lambda
Appsmith Account
Familiarity with Python
Overview
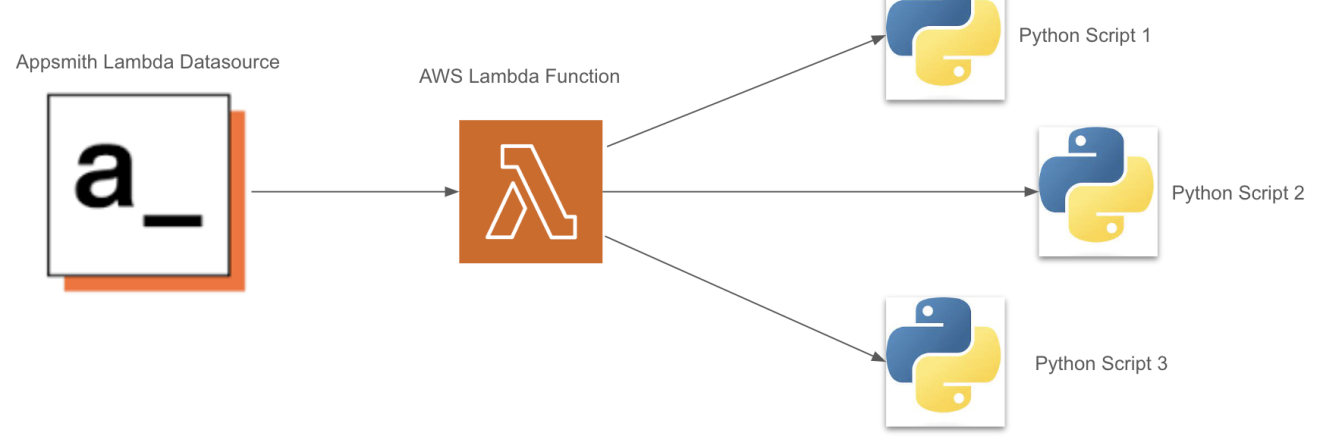
In this streamlined guide, we'll navigate the migration of your Python scripts from Airplane.dev to Appsmith, harnessing the efficiency of AWS Lambda. You'll learn to prepare your scripts, set up and configure an AWS Lambda function, and integrate this with an Appsmith application for a user-friendly interface. This tutorial promises a smooth transition, equipping your internal applications with enhanced performance and scalability, and is adaptable for various scripting languages including Python, TypeScript, and Node.js. Let's embark on this journey to optimize your scripting capabilities with a powerful, scalable solution.
Prepare Python Scripts
Gather all Python scripts intended for migration into a single folder and compress the folder into a zip file.
Set Up AWS Lambda Function

Create an AWS Lambda function and upload the zipped folder containing Python scripts as the source code for the Lambda function.
Write or modify the entry to the Lambda function ie the handler script, to accept a script name as an argument.
Use theoslibrary to check if the script file exists before executing the remaining steps of the code. Utilize thesubprocesslibrary to execute the correct script file dynamically using the Python command.import json import subprocess import os def check_script_file_exists(file_path): return os.path.exists(file_path) # Lambda entry point def lambda_handler(event, context): # Retrieve the request body from the event scriptName = event.get('script', 'updateUserAddress') if scriptName: pathname = f"PythonScripts/{scriptName}.py" doesScriptExist = check_script_file_exists(pathname) if not doesScriptExist: return { 'statusCode': 404, 'body': f"Script '{scriptName}.py' not found." } try: # Use subprocess to execute the specified script result = subprocess.run(["python3", pathname], capture_output=True, text=True) output = result.stdout except subprocess.CalledProcessError as e: return { 'statusCode': 500, 'body': f"Error running subprocess: {e}" } except Exception as e: return { 'statusCode': 500, 'body': f"Error executing script: {e}" } # Return the result return { 'statusCode': 200, 'body': output } else: return { 'statusCode': 400, 'body': 'Invalid script name' }Create an Appsmith App and configure AWS Lambda Datasource in it
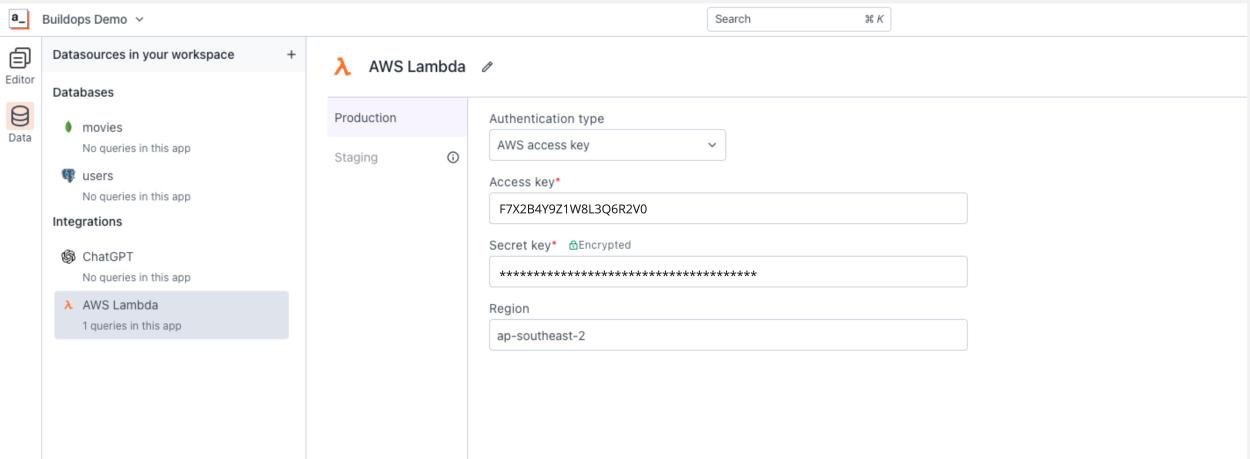
Develop an Appsmith App for your internal application. Under datasources, create and authorise the AWS Lambda datasource within the Appsmith App.
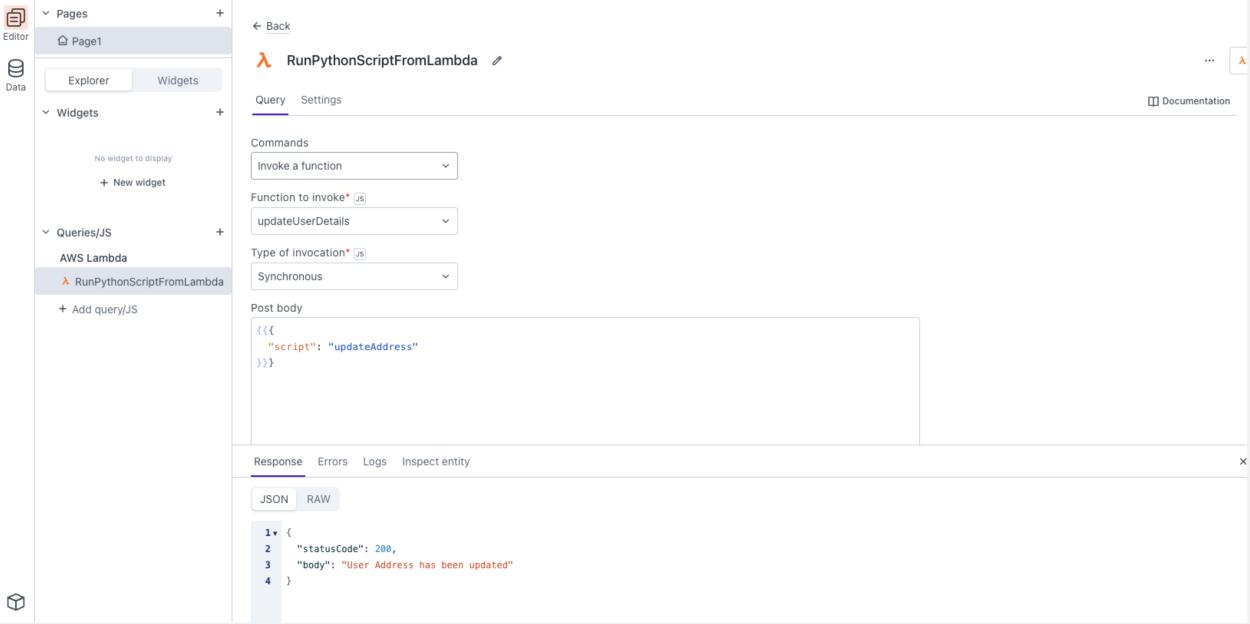
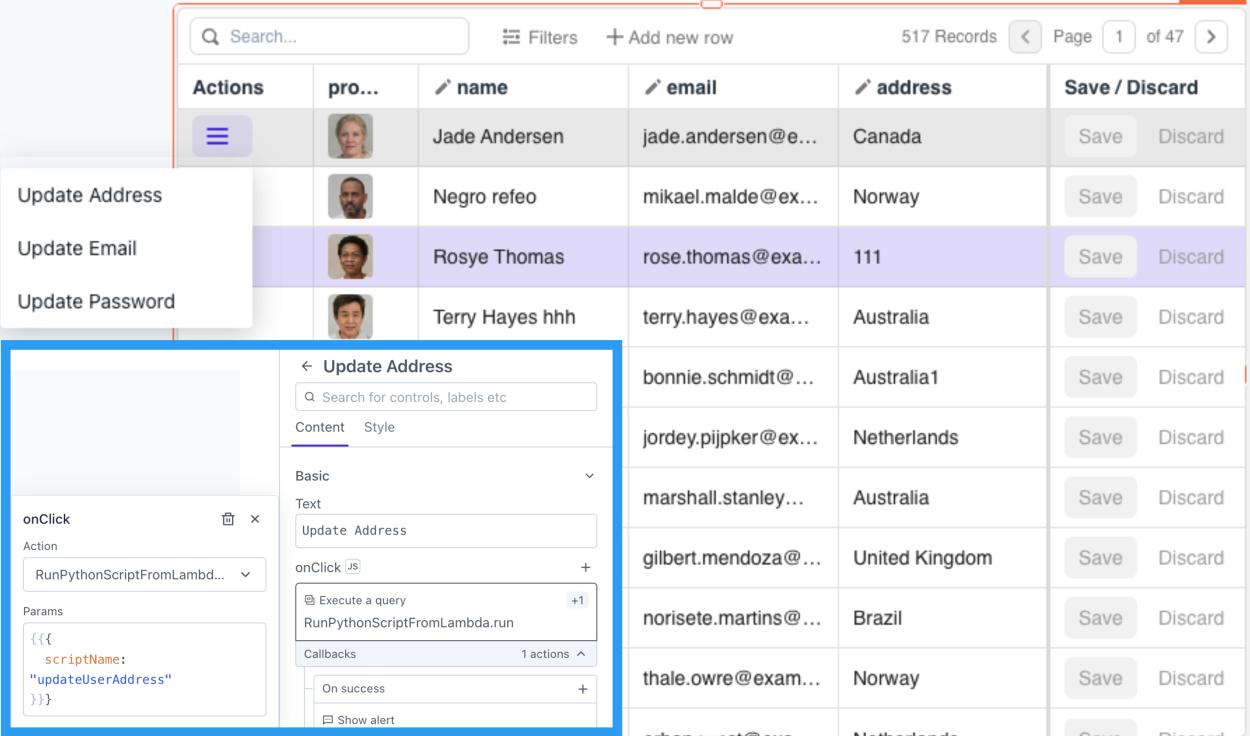
Set up a query in Appsmith on top of the above datasource to trigger the AWS Lambda function we created earlier. Pass the script name to be run as a parameter in the post body message to dynamically trigger the respective Python script.
Need more info? Check out our docs on connecting to AWS Lambda!
Build UI Components and Define Actions
Design a user-friendly UI in the Appsmith App with buttons and tables. Connect these buttons to the AWS Lambda query, created earlier, to run with a different script name needed for the action.
Conclusion
Congratulations on successfully completing the migration of your Python scripts from Airplane.dev to Appsmith, enhanced with the robust capabilities of AWS Lambda. You've not only ensured a smooth transition but also empowered your internal applications with a more efficient and scalable solution.
As you explore the possibilities with Appsmith and AWS Lambda, it's essential to note that this process is not limited to Python scripts alone. The same streamlined migration can be applied seamlessly to scripts written in TypeScript or Node.js, providing flexibility in your scripting choices. The dynamic execution and user-friendly interface of Appsmith coupled with the serverless power of AWS Lambda offer a versatile solution for your scripting needs.
Embrace the potential of Appsmith and AWS Lambda, and may your scripting endeavors be more agile and effective than ever before. Happy coding!
