

Appsmith has a built-in confirmation dialog that you can enable on any API or query. Simply turn on the 'Require confirmation before running' toggle in the Settings tab and it will present the user with an option to confirm or cancel before executing the action.
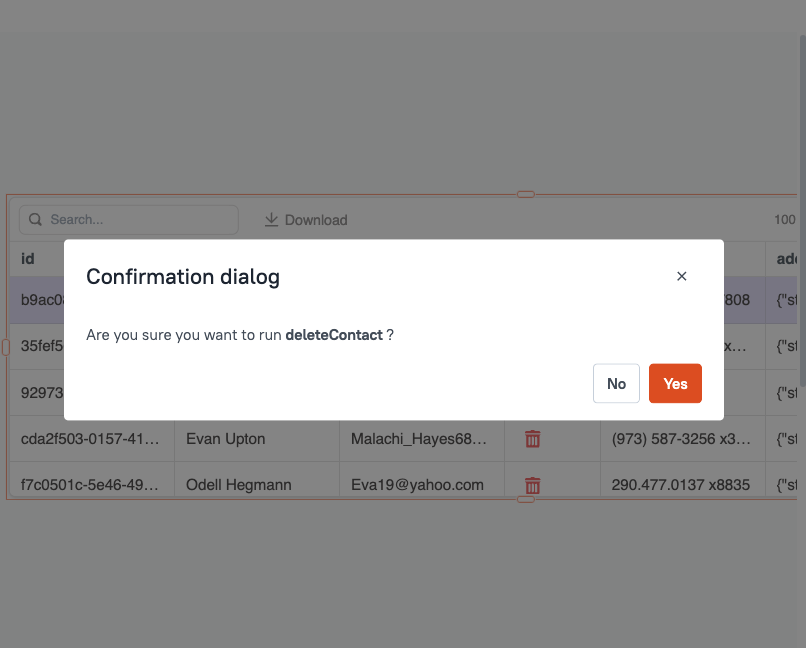
However, the message and button texts are not editable. Adding your own modal with a custom message is easy enough, but what if you have a bunch of actions on every page to configure? That's where a dynamic modal comes in.
Building a dynamic confirmation modal is a great way to improve the user experience of your app while also minimizing code and making it reusable. In this guide, I'll show you how to create a data-driven modal to confirm any API, query, or JSObject function, using a single modal. This will allow you to call a wrapper function and specify the action, along with a message, icon, color, etc.
Let's get started!
Data Driven Modal
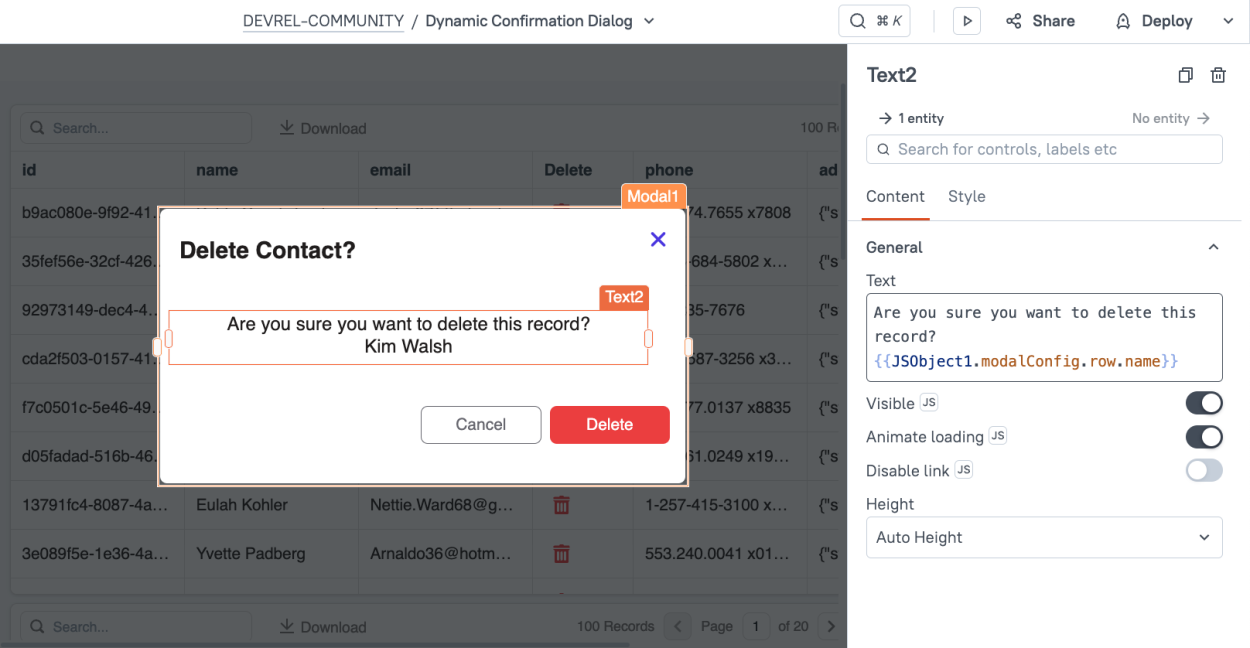
First, let's look at how to show a data-driven modal that displays details about a record being deleted from a table. This part is easy enough. Simply reference the table's triggeredRow object and bind to the name or any other details you want to show in the message.
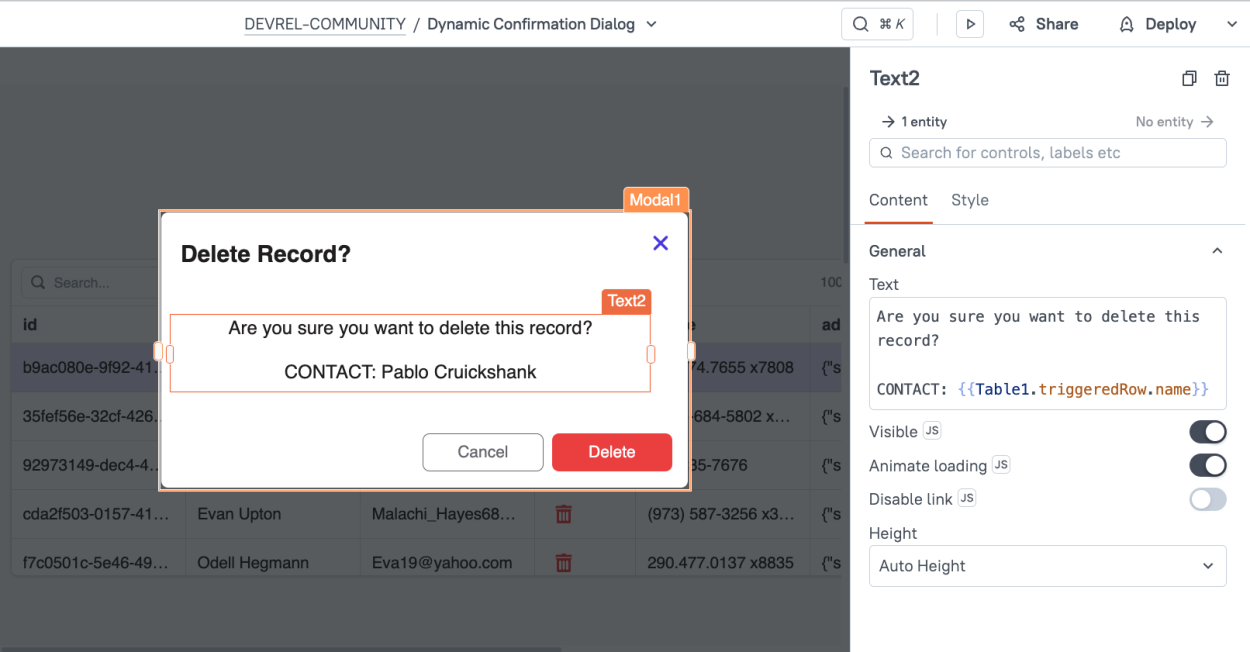
In this case, the message is dynamic, but the Delete button is hard coded to run the deleteContact query every time. In order to make the entire modal dynamic, including the action and button labels, we need a data-driven approach that covers all the variables involved.
Dynamic Function Call
The tricky part to making all of this dynamic is how to call a different function for each use case. Let's say you have a CRUD app with endpoints for companies, contacts, and users, and you want to use a single confirmation modal for the delete action in all 3 tables. We would need variables to define which API to run, what row is being affected, and what the message should be. These can all be stored in a single object, then passed to a wrapper function.
Start out by adding a new Modal to the canvas.
Then add a JSObject and replace the default code with:
export default {
modalConfig: {
action: '', //name of action to run
row: {}, //triggeredRow object
message: '' //message to user
},
//open modal with dynamic message
async modalAction(config){
this.modalConfig = config;
await showModal(Modal1.name)
},
// individual wrappers for each API or Query
// refreshes GET to update table widget after delete
async companyConfirmDel(){
await deleteCompany.run();
closeModal(Modal1.name);
await showAlert('company deleted','success');
getCompaines.run()
},
async contactConfirmDel(){
await deleteContact.run();
closeModal(Modal1.name);
await showAlert('contact deleted','success');
getContacts.run()
},
async userConfirmDel(){
await deleteUser.run();
closeModal(Modal1.name);
await showAlert('user deleted','success');
getUsers.run()
}
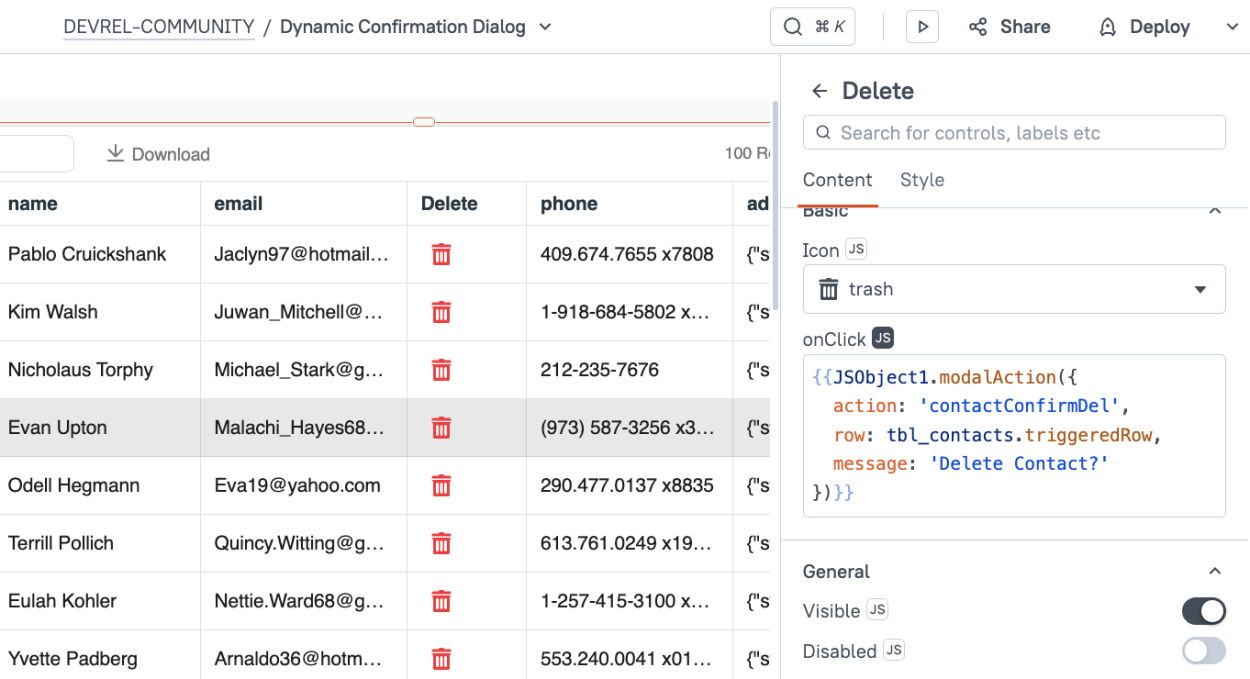
}Next, update the individual Delete buttons in the Table widgets to call this function and pass in parameters.
This can be done by opening the settings for the button column, and changing the onClick action to JS mode.
Then enter:
{{
JSObject1.modalAction({
    action: 'contactConfirmDel',
    row: tbl_contacts.triggeredRow,
    message: 'Delete Contact?'
})
}}
Now click the table's delete button and the modal should open.
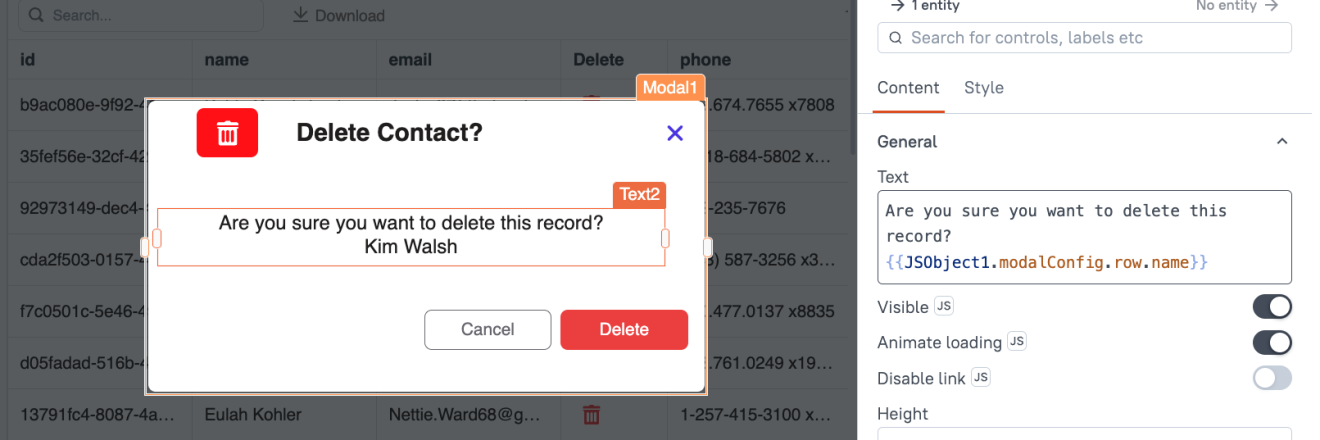
Update the text bindings in the modal to display the name from the row in the modalConfig.
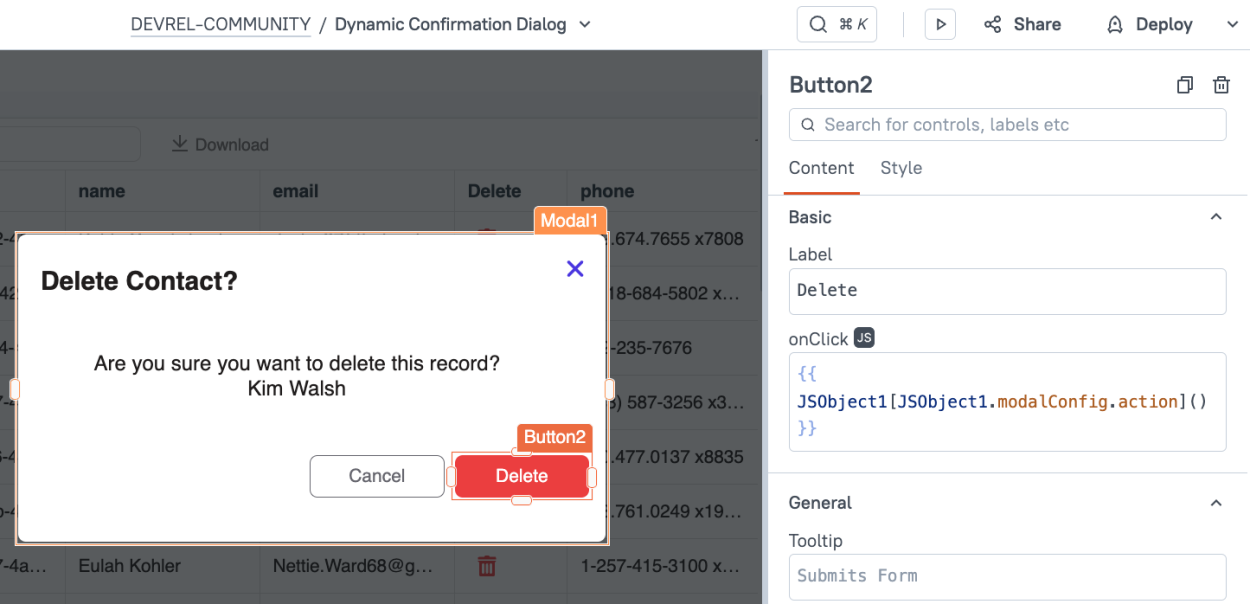
Then update the modal's delete button (not the table's) to dynamically call the function based on the name stored in the action property of the modalConfig.
This can be done by enabling JS mode for the onClick action, and using bracket notation:
 {{
 JSObject1[JSObject1.modalConfig.action]()
 }}
Now the Modal's Delete button should dynamically run a function based on the name in the action property of the modalConfig.
Clearing the modalConfig
Lastly, we should clear the modalConfig when the modal is closed, just to make sure it's always displaying the new value every time the modal opens.
Set the modal's onClose action to JS mode and enter:
{{
JSObject1.modalConfig = {}
}}
Adding an Icon and Color
Now that the basics are working, you can add some styling by passing in an icon and color to go with the dialog.
Update the onClick of the table's delete button to:
{{
JSObject1.modalAction({
action: 'contactConfirmDel',
row: tbl_contacts.triggeredRow,
message: 'Delete Contact?',
icon: 'trash',
color: 'red'
})
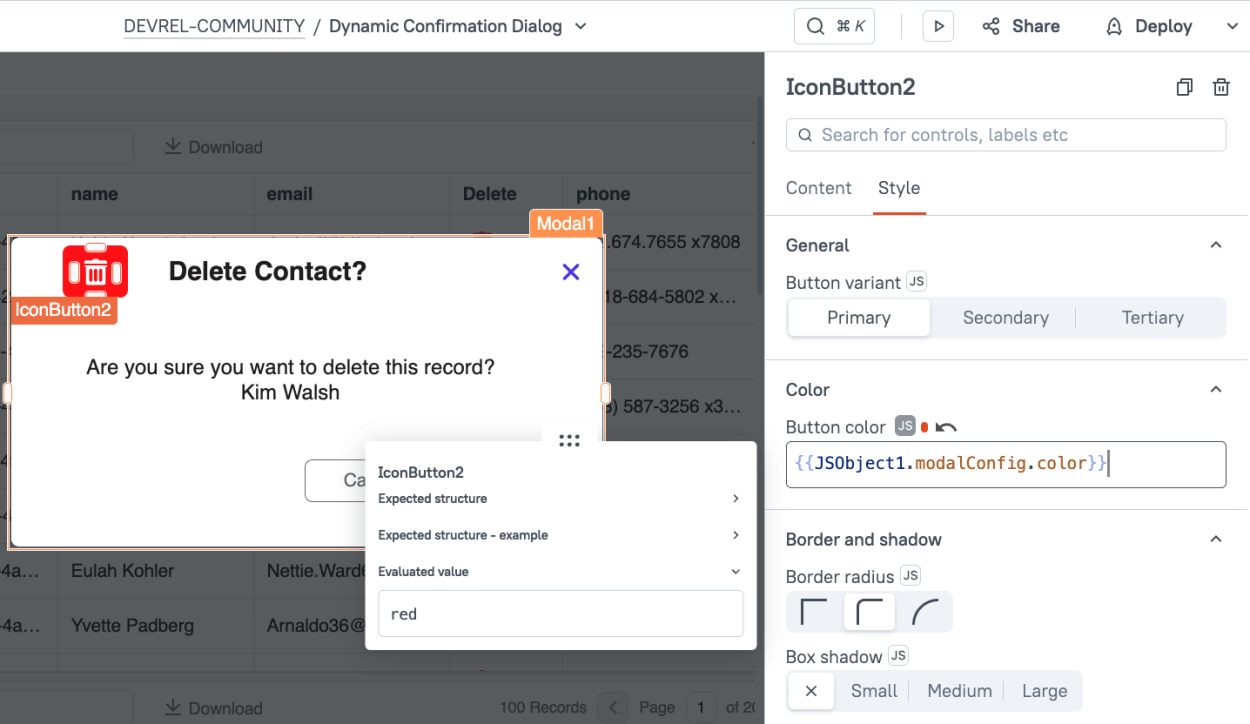
}}Then add an icon button to the modal and change the color and icon to JS mode to reference the modalConfig.
Conclusion
Adding a dynamic confirmation modal can save you a lot of time compared to maintaining separate modals for each action. This approach makes it easy to use a single modal with a data-driven message and action. Adding new actions takes just a few lines of code, and no changes to the modal.