Open AI recently added support to their API for structured outputs, which allow you to define the response format using JSON Schema. Prior to this, the JSON response mode was able to reply with JSON, but there was no way to enforce a specific structure, define enum values, and specify required or optional fields. But with Structured Outputs, you can define every detail about the response, to ensure the data is ready to be passed on to your database or workflow.
In this guide, I'll be using OpenAI's Structured Outputs to analyze customer reviews for a hotel chain. The reviews only contain the rating (1-5), and the review text. The Structured Output feature will be used to add new datapoints for sentiment (positive, neutral, negative), offensiveContent (true/false), and tags (cleanliness, service, staff, etc).
This guide will cover:
- Creating an OpenAI API key and saving it to an Appsmith datasource
- Using the Chat /completions API
- Building a UI to select and send reviews to the assistant
- Defining a JSON Schema for the response
Let's get started!
(Check out the video tutorial here)
Setting up the Datasource
Start out by going to the OpenAI Dashboard and selecting API Keys on the left sidebar, then click + create new secret key.
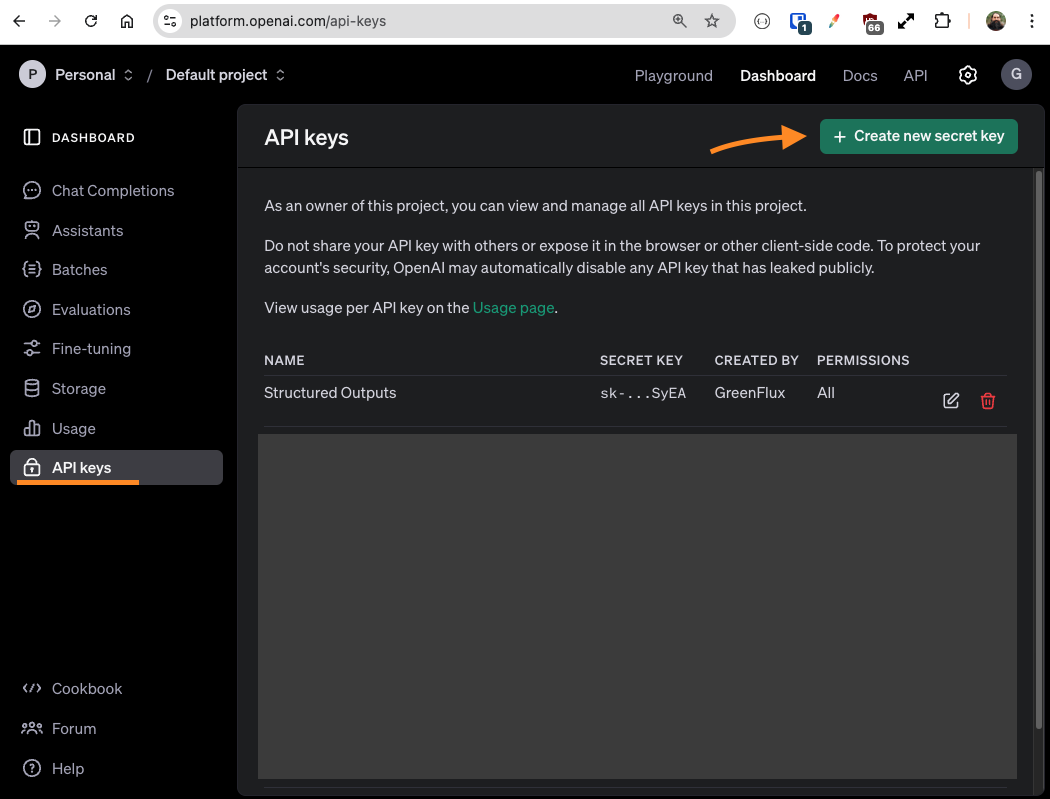
Copy the key, and leave this page open while setting up the Datasource in Appsmith.
Next, open the Appsmith editor and click the Data icon on the left sidebar, then + to add a new Datasource and select Authenticated API.
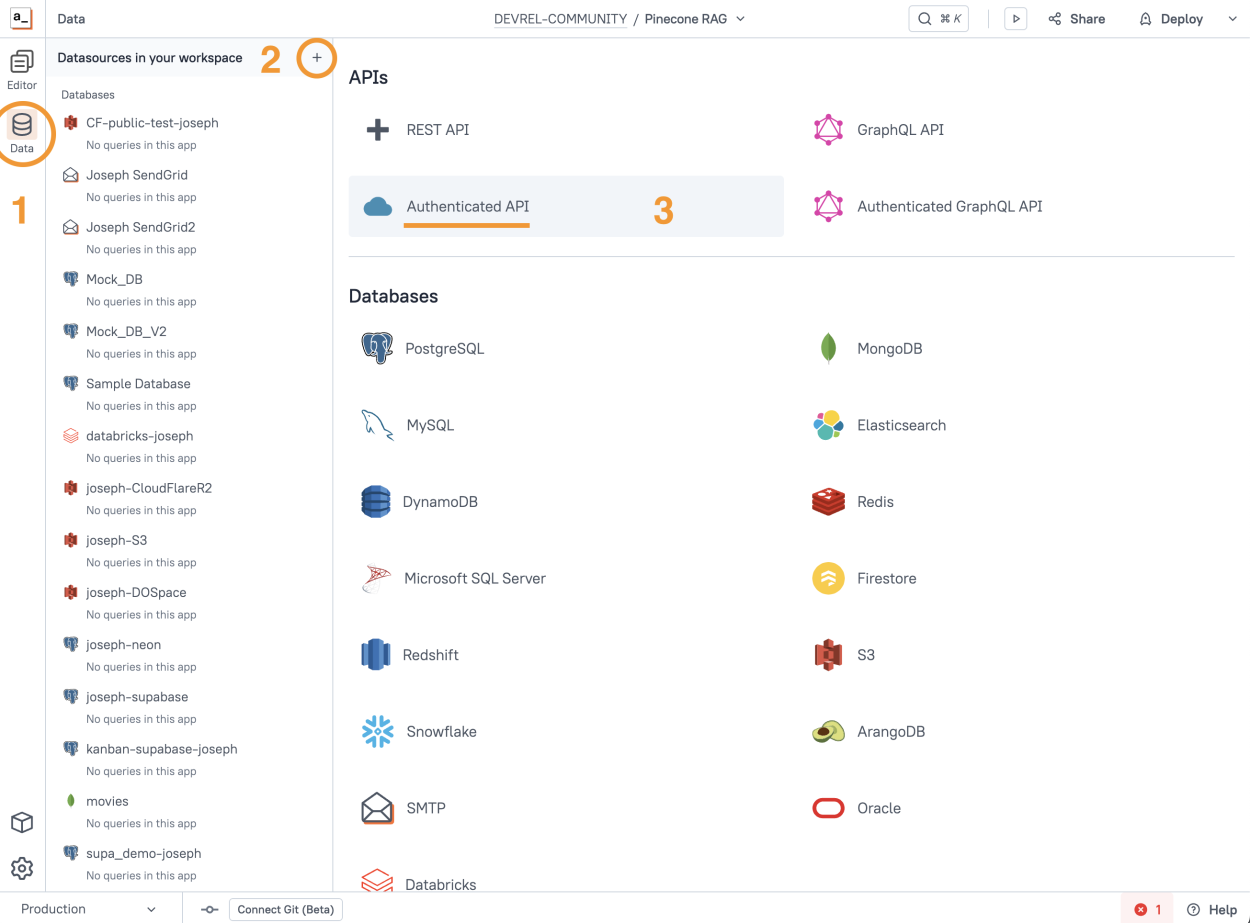
Configure the new Datasource as follows:
| Name | OpenAI |
|---|---|
| URL | https://api.openai.com |
| Authentication Type | Bearer Token |
| Bearer Token | YOUR_SECRET_KEY |
Click Save to finish setting up the Datasource. Your API key is now securely stored on your self-hosted Appsmith server (or our free cloud), and it will never be sent to end-users.
Using the Chat /completions API
Next we'll set up the API for chat completions. Structured Outputs also work with OpenAI Assistants, but since we're only extracting data, the completions endpoint will work fine.
Click the Query tab and add a new API under the OpenAI datasource, and configure it as follows:
| Name | sendMessage |
|---|---|
| Method | POST |
| Url | /v1/chat/completions |
| Body Type | JSON |
| Body |
|
Click Run, and you should get back a response with a choices array, containing the message from the assistant.
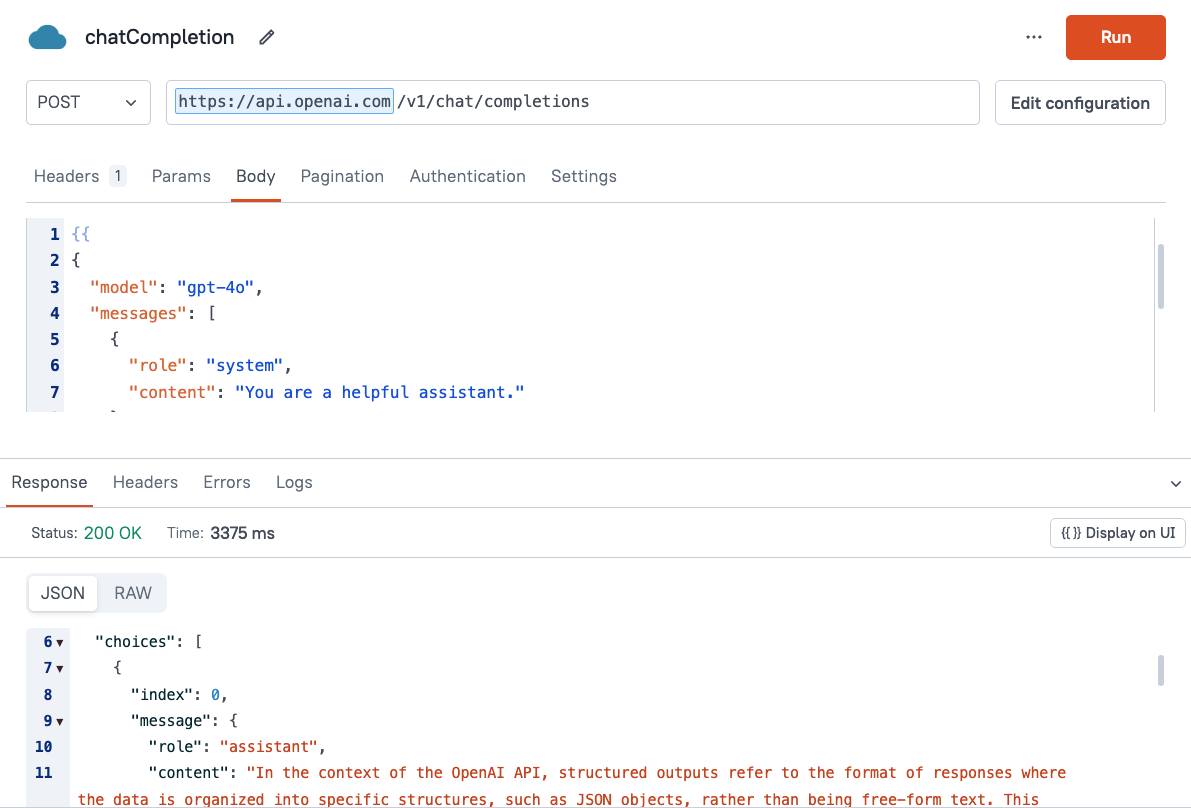
Mock Data
Next we'll add some mock review data to send to the assistant. I'm using mock data to limit the number of datasources and keep this example simple. But these could easily be reviews from TrustPilot's API, HubSpot, or any other SaaS or database.
Click the JS tab and add a new JSObject. Name it MockData, then paste in the following:
export default {

	reviews: [
  {
    rating: 4.8,
    userName: "AliceW",
    timestamp: "2024-12-09T10:00:00Z",
    reviewText: "Comfortable bed, friendly staff, and an excellent breakfast spread."
  },
  {
    rating: 4.5,
    userName: "TravelPro23",
    timestamp: "2024-12-08T14:23:15Z",
    reviewText: "Clean rooms, quick service, and a great view from the balcony."
  },
  {
    rating: 3.0,
    userName: "AprilShaw55",
    timestamp: "2024-12-07T09:45:32Z",
    reviewText: "Overall okay. Nothing special, but not bad either."
  },
  {
    rating: 1.5,
    userName: "walter72",
    timestamp: "2024-12-06T16:10:00Z",
    reviewText: "Rundown rooms, inattentive staff, and poor Wi-Fi connectivity. This place is @#$@#$%$!"
  },
  {
    rating: 2.0,
    userName: "jamie_99",
    timestamp: "2024-12-05T20:00:25Z",
    reviewText: "Noisy hallways, slow check-in process, and subpar cleanliness."
  }
]
}
Building the UI
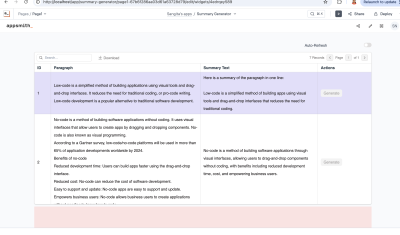
Next, click the UI tab and drag in a table widget. Set the data to JS mode, and then enter {{MockData.reviews}}.
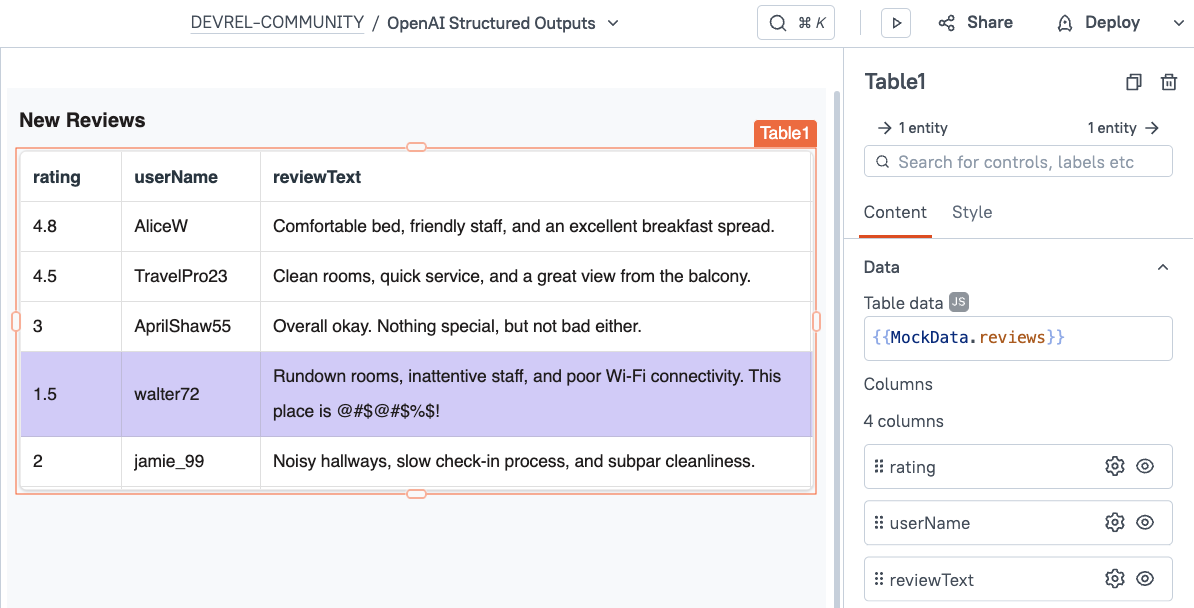
Then set the table's onRowSelected trigger to call the sendMessage API.
Next, drag in a text widget to display the assistant's response. Set the text binding to:
{{JSON.stringify(JSON.parse(sendMessage.data.choices[0].message.content), undefined, 2)}}Note: The OpenAI API returns the JSON as a minified JSON string, so there are no line returns to help with readability. Using JSON.parse() converts the string into real JSON, then JSON.stringify(json, undefined, 2) turns it back into a string with 2 spaces of indention.
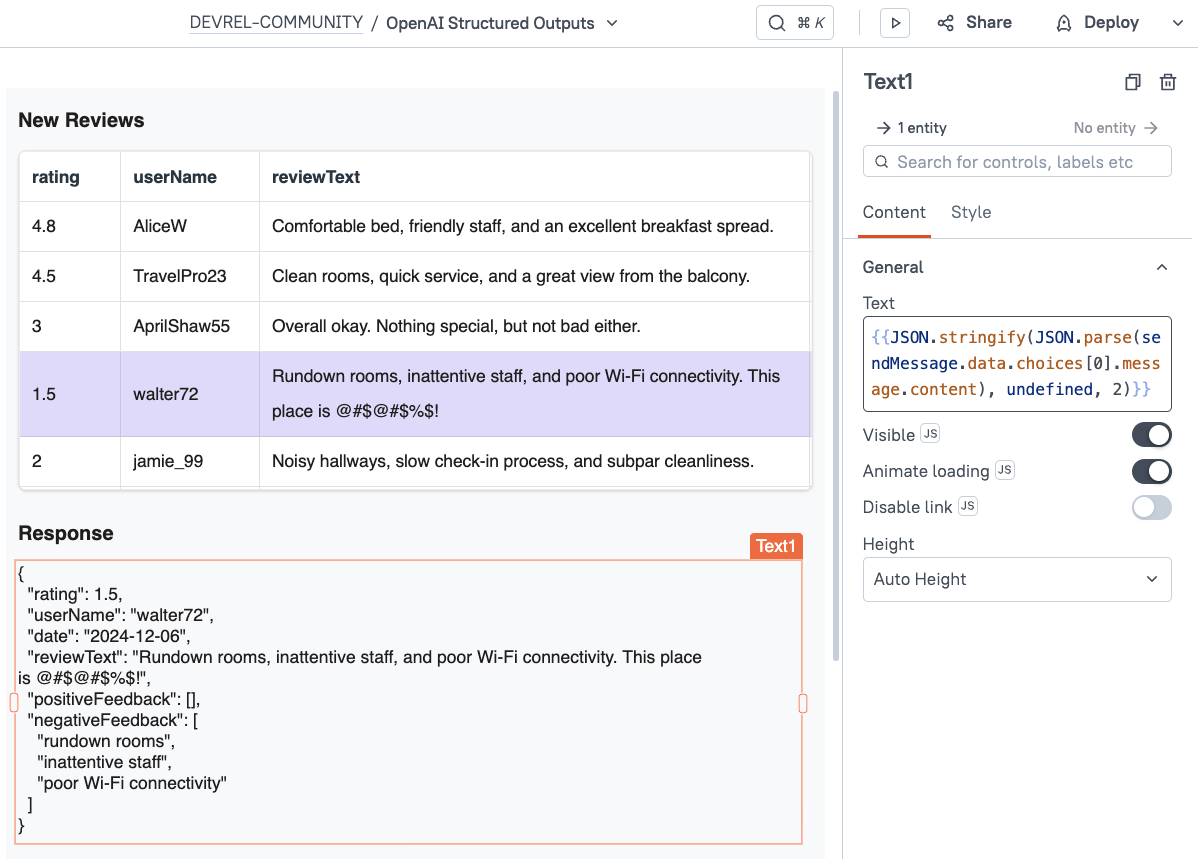
Lastly, go back to the Query tab and update the sendMessage API body to use data from the selected review:
{{
{
  "model": "gpt-4o-2024-08-06",
  "messages": [
    {
      "role": "system",
      "content": "You extract structured data from online reviews."
    },
    {
      "role": "user",
      "content": JSON.stringify(Table1.selectedRow)
    }
  ]
}
}}
Now head back to the UI and select a new table row. You should see the assistant respond with data extracted from the selected review. However, we haven't actually defined the output data structure that we want. This response is just the LLM's assumption of data points to extract.
Defining a JSON Schema for the response
To ensure the assistant responds with the exact datapoint we want to extract, we must provide a JSON schema with the prompt that defines the exact fields and allowed values. This JSON is fairly long and nested, so to keep things more readable we'll store this in a separate JSObject.
Add a new JSObject and name in JsonSchema, then paste in the following:
export default {
	"data": {
		"name": "test",
		"schema": {
			"type": "object",
			"additionalProperties": false,
			"properties": {
				"userName": {
					"type": "string"
				},
				"rating": {
					"type": "number"
				},
				"timestamp": {
					"type": "string"
				},
				"reviewText": {
					"type": "string"
				},
				"sentiment": {
					"type": "string",
					"enum": ["positive", "neutral", "negative"]
				},
				"tags": {
					"type": "array",
					"additionalProperties": false,
					"items": {
						"type": "string",
						"additionalProperties": false
					}
				},
				"offensiveContent": {
					"type": "boolean"
				}
			},
			"required": [
				"userName",
				"rating",
				"timestamp",
				"reviewText",
				"sentiment",
				"tags",
				"offensiveContent"
			]
		},
		"strict": true
	}

}
This schema tells the assistant to add fields for sentiment, tags, and offensiveContent, so that it can only respond with this exact data structure.
Now, update the sendMessage API body to use this schema:
{{
{
	"model": "gpt-4o-2024-08-06",
	"messages": [
		{
			"role": "system",
			"content": "You extract structured data from online reviews."
		},
		{
			"role": "user",
			"content": JSON.stringify(Table1.selectedRow)
		}
	],
	"response_format": {
		"type": "json_schema",
		"json_schema": JsonSchema.data
	}
}
}}
Return to the UI and select a new row. You should now get back a response with the exact fields specified in the JSON schema.
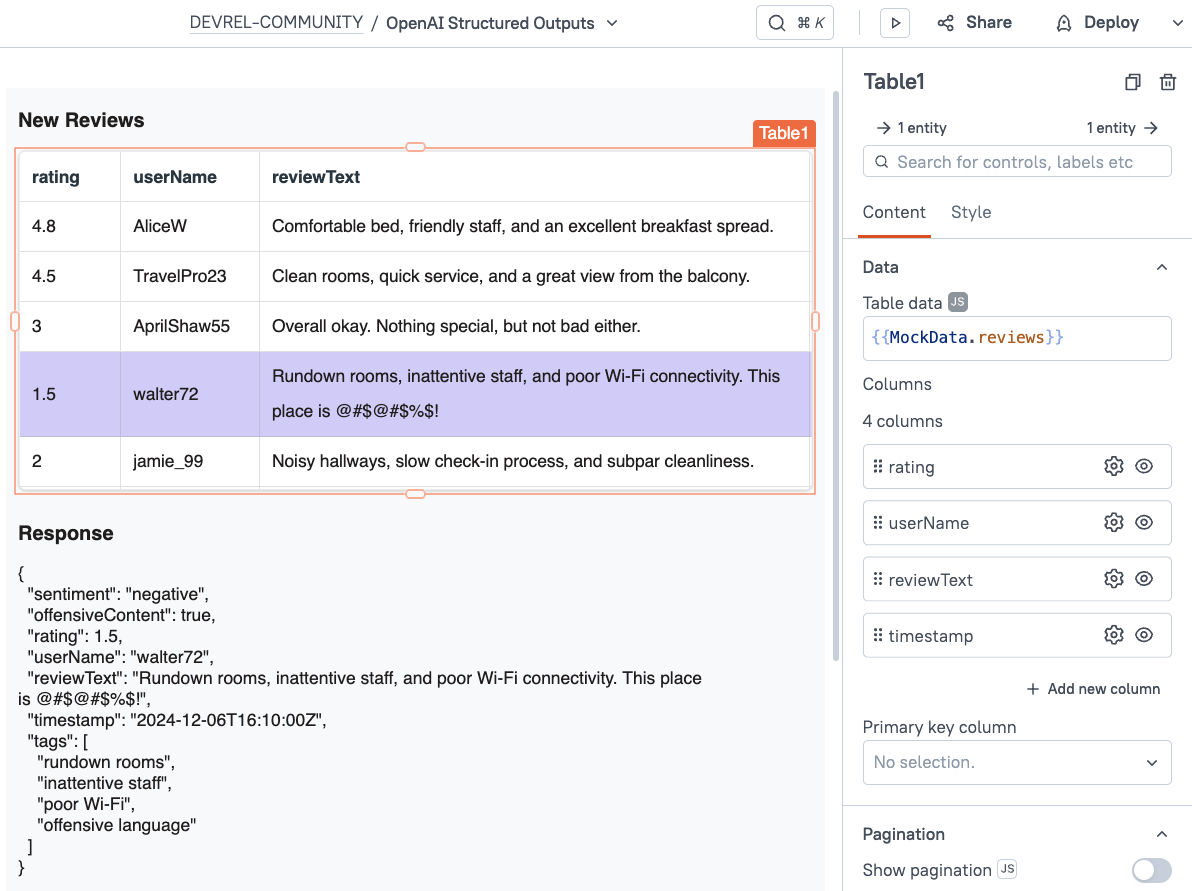
The response is now using a structured output that will ensure compatibility with other datasources and workflows. Using this approach, you can define JSON schemas that match your needs, and avoid data transformation and validation before the data can be processed by other systems involved in your use case.
Conclusion
Structured Outputs enable developers to take action on LLM response data without needing to pre-process the response first. By defining the exact output structure ahead of time, the response will always be in the correct format and within the expected range of values to match with your other applications and services.
