Local Llms: Connecting Appsmith to Llama3 On an M1 Macbook
Goal
- Run Llama3 locally and connect from a local Appsmith server on MacOS
- Create an AI powered chat app without sending traffic out of the local network
You can follow along on your local machine with an Appsmith Docker container, or use a cloud hosted instance and install Ollama on the same server. In either case, the AI generation will work without data leaving the local network!
Prerequisites
A Self-hosted Appsmith instance (on your local machine, or cloud hosted)
Access to install Ollama on the same server
Overview
When it comes to integrating with AI in Appsmith, you have a lot of options! We have native integrations for OpenAI, Anthropic, and Gemini, as well as Appsmith AI, which leverages all three, depending on the task. Then there's the regular REST API connector for integrating with other AI services like HuggingFace, Cohere, etc.
These are great options for most cases, but they all require sending your data off to a 3rd party and storing data on their server. Many organizations are unable to use these AI services because of privacy regulations and company policy. In cases like this, the best solution is to host the LLM on the same network as the Appsmith server, enabling you to leverage AI without the data leaving your own network.
In this guide, you'll learn how to run Ollama and the Llama3.2 model locally, and connect from a local Appsmith server. No high end GPU or special hardware is required. I'll be using my M1 Macbook, which is able to run Llama3.2 easily and respond quickly.
Let's get started! 🤖
Appsmith Server
For this guide, I'll be hosting Appsmith on my Mac using Docker. However, the same approach should work to connect to Ollama running on a Windows or Linux server.
Regardless of your OS, and server location (local or cloud), connecting from Appsmith to Ollama on the same machine is a similar process.
Note: This won't work with Appsmith's free cloud. You'll need your own server, where you can install Ollama on the same machine. See the Appsmith docs for details on self-hosting.
Llama vs Ollama
Before we get into installing, let's get this Llama-terminology sorted out.
Llama is an LLM model developed by Meta for natural language understanding and generation. It's a series of models with different versions, just like ChatGPT3, 4, o1, etc. In this guide, we'll be using the Llama3.2 model, which is a 2GB download, and contains 3 Billion parameters!
Ollama is a tool that allows users to run and manage Llama-based AI models locally on their devices. It has installers for Mac, Windows and Linux, and handles downloading and running different models.
Install Ollama and Download Llama3.2
- Download the Ollama installer, unzip it, and move the Ollama.app file to the Applications folder
- Open Ollama and complete the installer by granting drive access
- Copy the terminal command shown in the installer and run it in the terminal
The Llama3.2 model will start downloading. Once it's finished, Ollama will run the model automatically and start a chat right in the terminal!
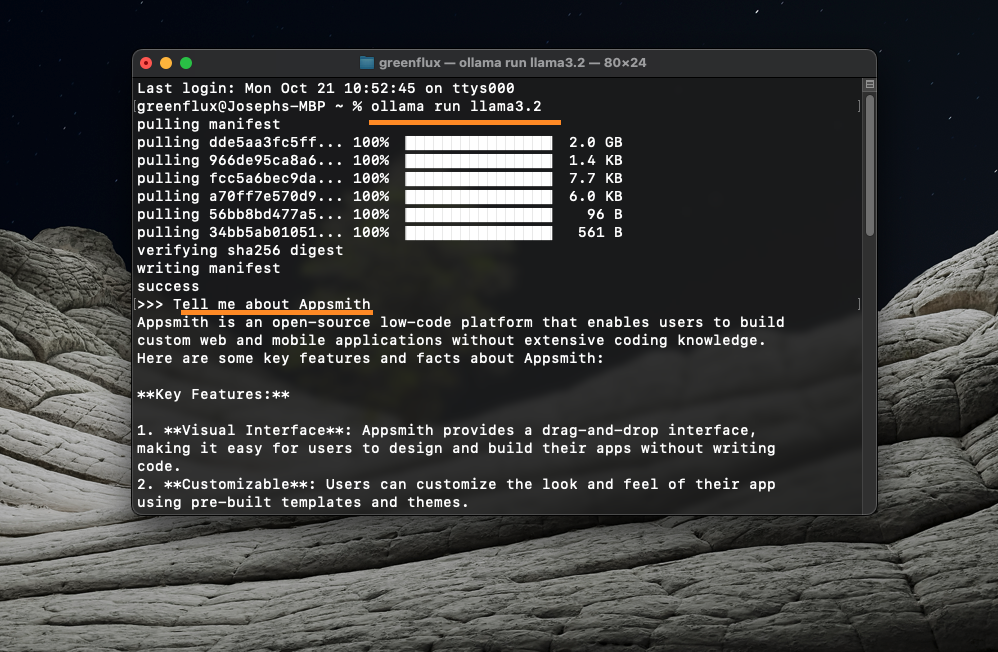
You can also check that the server is running by going to:
http://localhost:11434/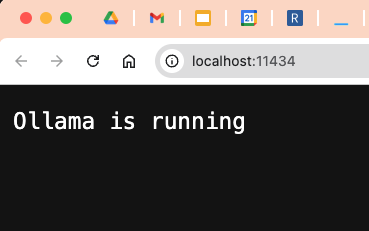
Appsmith API
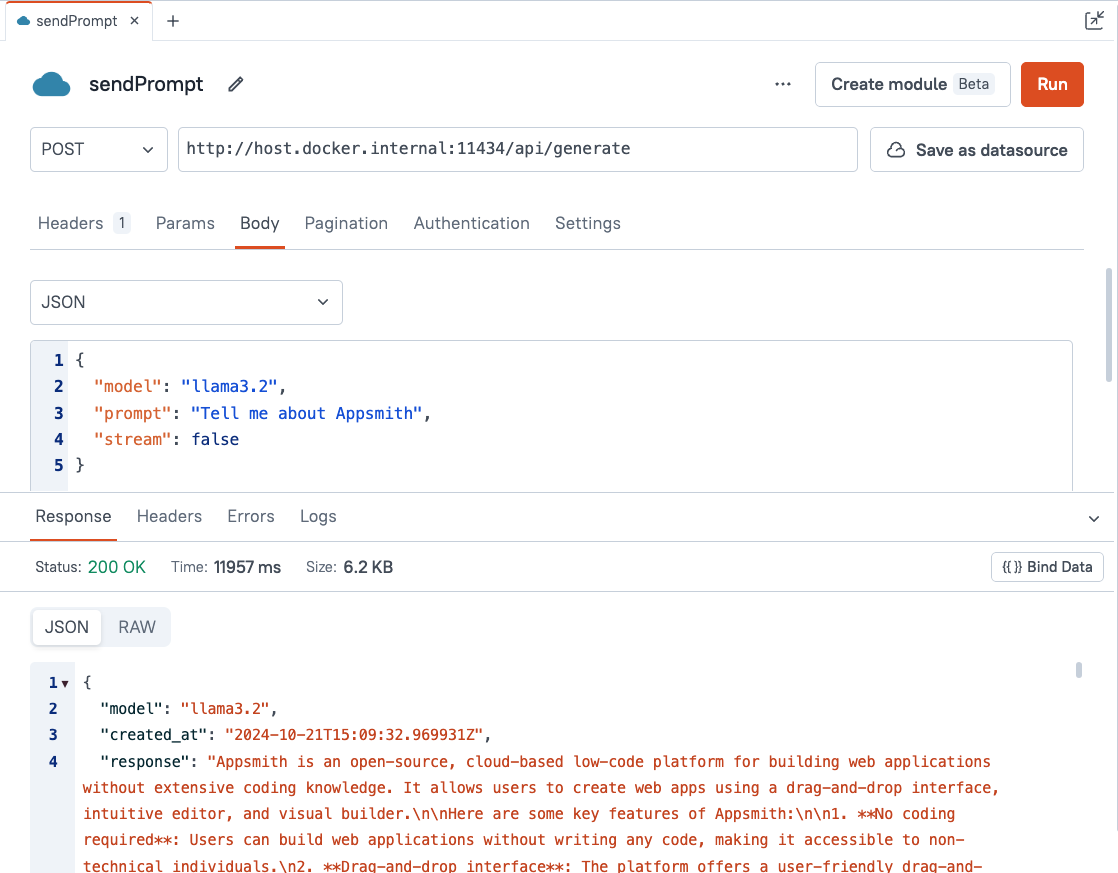
Next, open a new Appsmith app and go to the Query tab. Add a new API, with the following configuration:
Name sendPrompt Method POST URL http://host.docker.internal:11434/api/generate Body type JSON Body { "model": "llama3.2", "prompt": "Tell me about Appsmith", "stream": false } Timeout (Settings Tab) 60,000 (one minute) Notes:
- To connect outside of the Docker container to other local resources, use
host.docker.internal, instead oflocalhost. - The
streaming=falseparameter tells the server to wait until the model is done generating a response before replying, instead of sending multiple partial responses.
Run the API, and you should get back a response from the model.
- To connect outside of the Docker container to other local resources, use
Adding a Chat UI
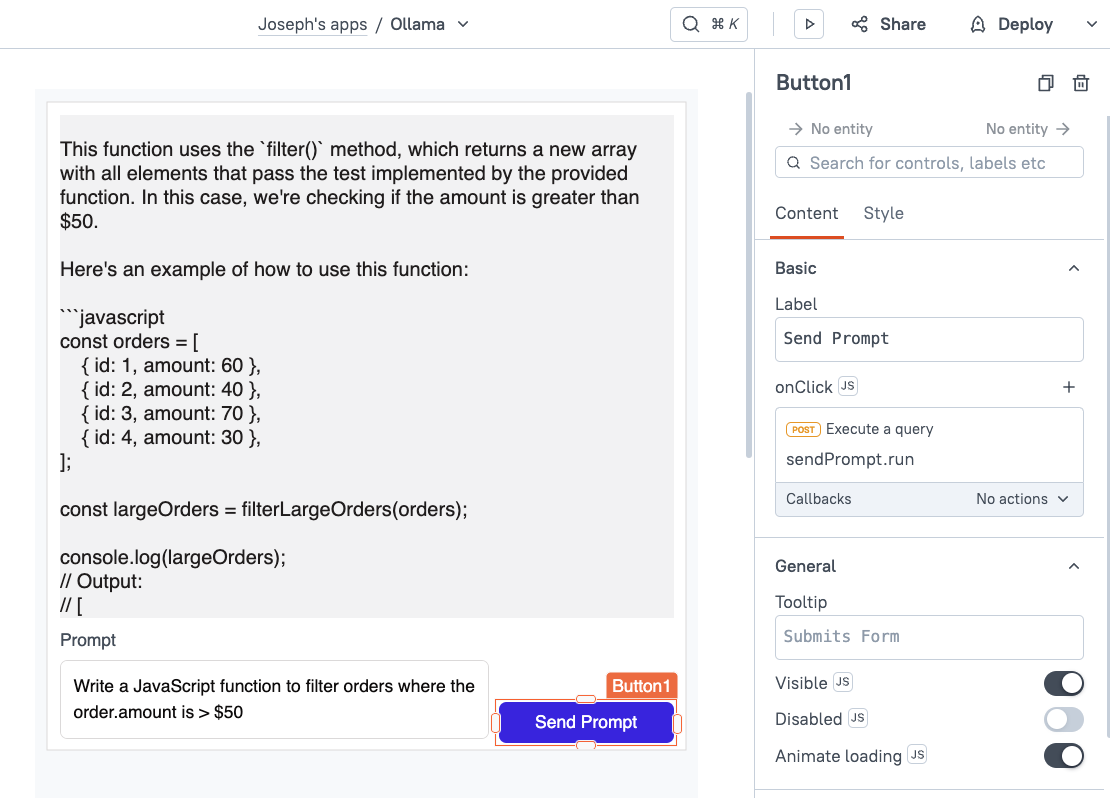
Now we'll add an interface to chat with the model. Drag in an input widget, button, and a text widget, and lay them out like a chat app with the input at the bottom. It helps if you set the input to multi-line, and the text for displaying the reply to fixed height.
Set the text widget to display the response from the model using:
{{sendPrompt.data.response}}Then set the button's onClick event to trigger the sendPrompt API.
Lastly, go back to the API, and replace the hard coded message with the value from the input.
{{
{
 "model": "llama3.2",
 "prompt": Input1.text,
 "stream": false
}
}}
Time to test it out!
Head back to the UI tab and enter a prompt then click the send button.
Conclusion
That's it! In only a few minutes, you can be up and running with a local LLM connected to Appsmith. From here you can build internal tools with any of our database or API integrations, and add AI text generation, summaries, classification, and other assistive features.
What's Next?
For a more ChatGPT-like interface, check out this AI Chat Bot template!


Joseph, Thanks for Sharing this Tutorial