
Openai Assistant API Starter Template
Goal
Build a starter template for connecting to the OpenAI Assistant API. You can either follow along and build your own app, or copy the finished app from here.
Or you can skip the tutorial, and copy the finished app to start using it with your AI Assistant now.
Open AI Assistant API Starter Template
Prerequisites
A paid subscription plan for OpenAI (Personal or Business)
An Appsmith account (free)
Overview
OpenAI's Assistant API allows developers to integrate ChatGPT-like features into any application or website. In this tutorial, you'll learn how to build an app connected to your own custom AI Assistant. Then you can build on top of this template to create any kind of app where you want to let the end-user interact with the AI.
NOTE: Appsmith also has an OpenAI integration under Datasources, which supports Chat, Embeddings, and Vision. These are easier to enable and build with than using the API directly. However, the Assistant is only available through the API.
Create an Assistant
Start out by creating a new Assistant from your OpenAI dashboard. Give it a name and enter your instructions, then upload any files you would like the assistant to reference. You can also open the new assistant and test out the responses using the Playground mode.
Note the Assistant ID under the Name field (
asst_xxxx). You'll need to copy this in a few steps.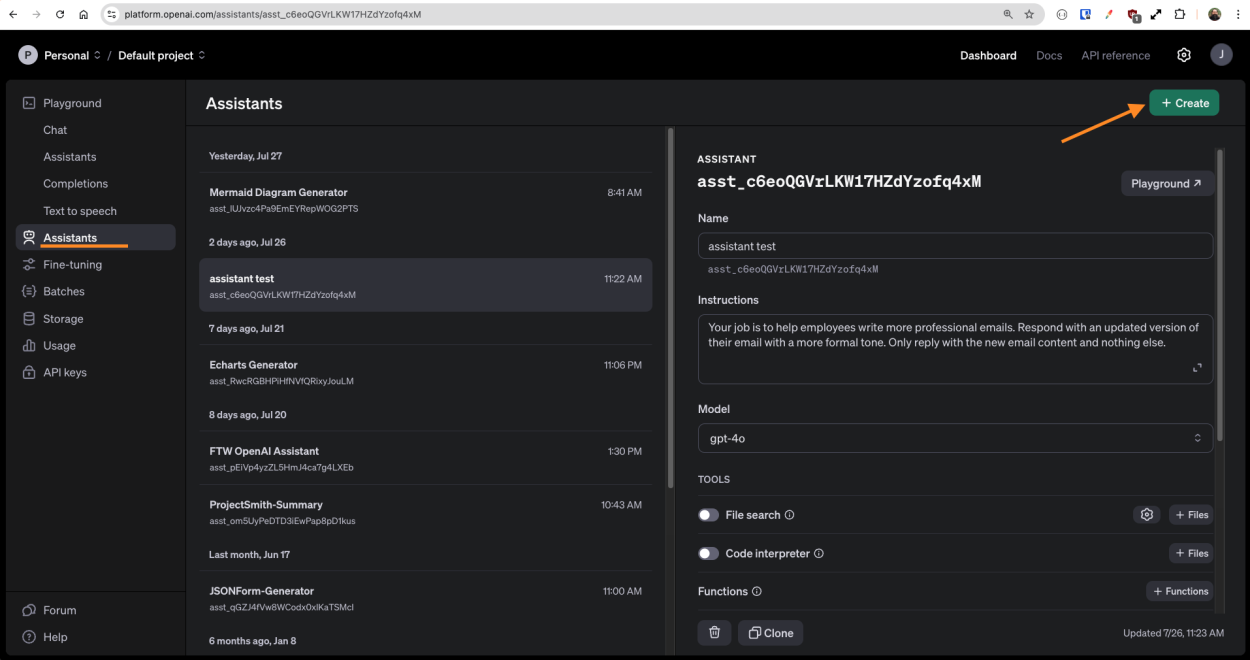
For this example, the assistant is being used to help employees write more professional sounding emails. You can use whatever Instructions you want for your assistant.
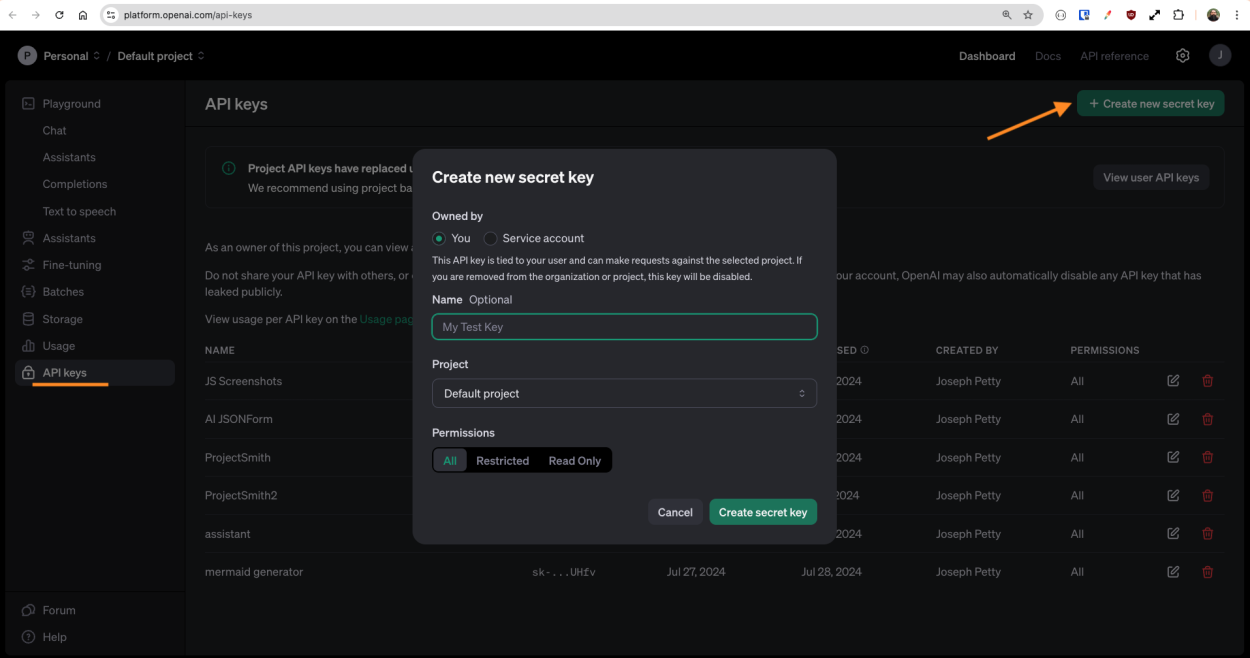
Create an API Key
Next, go to the API Keys section and create a new key. Give it a name, and then click create secret key. Copy the key and and save it somewhere safe, or leave this page open so you can copy it a few steps later. You won't be able to access it again once you close the window.
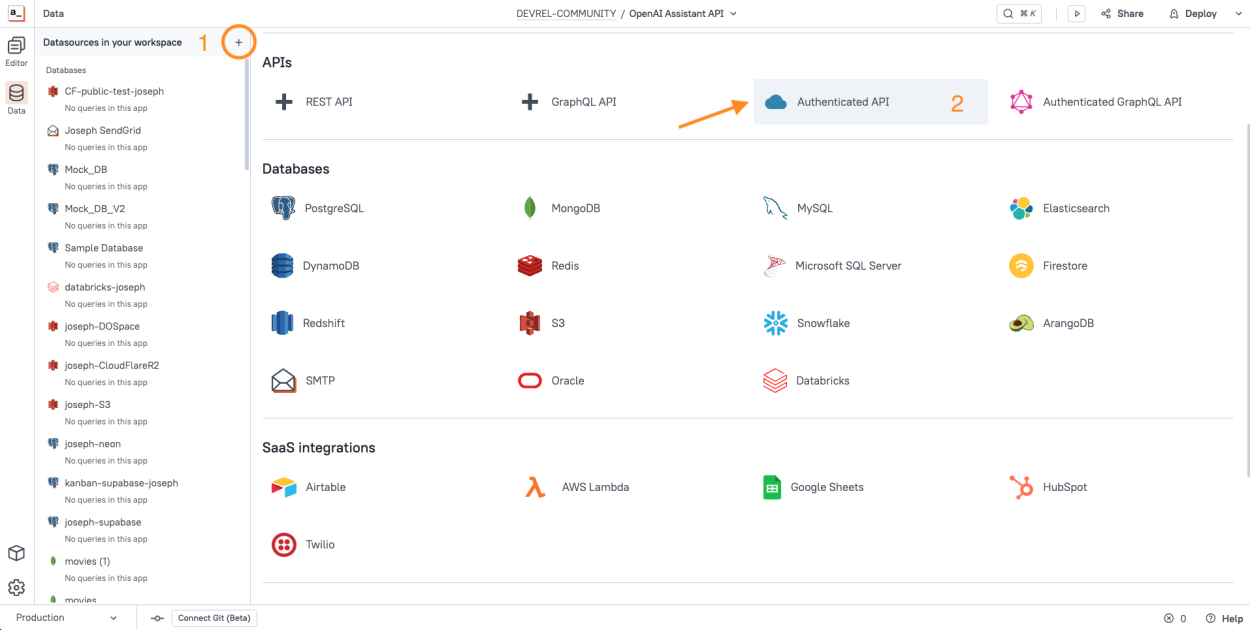
Create OpenAI Datasource in Appsmith
Next, open a new Appsmith app, or an existing app if you want to add AI to something you've already built. Click the Datasources icon on the left sidebar, and add a new Authenticated API Datasource.
For the URL, enter:
https://api.openai.comNext, add the following Header:
OpenAI-Beta: assistants=v2Then scroll down to the Authentication section and enter the following settings:
- Authentication type:
API key - Key:
Authorization - Value:
YOUR_API_KEY - Add to:
Header - Header prefix:
Bearer
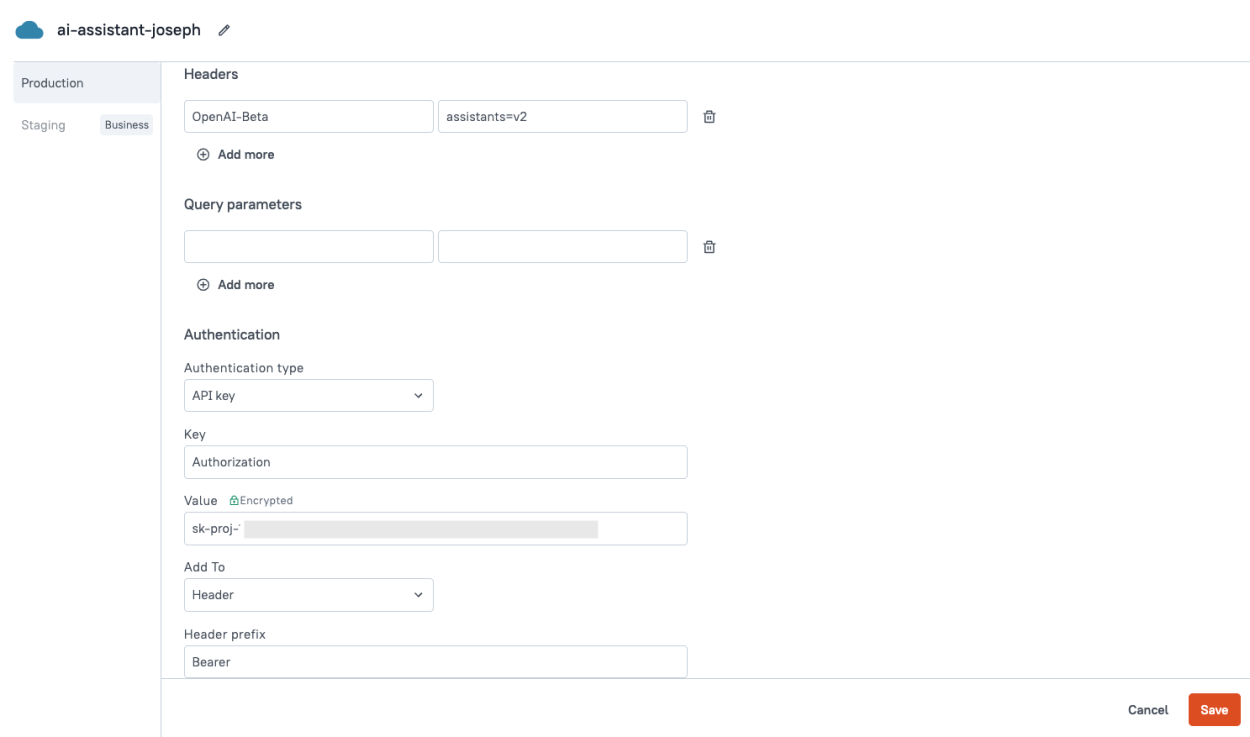
Note the green lock icon on the Value field. This securely encrypts the API on the Appsmith server, instead of storing it in the app itself.
Click Save to finish creating the datasource.
- Authentication type:
Creating a Thread
In order to build a chat-style experience in your app, there are 4 different APIs involved. The first step is to create a thread, which will return an ID. The thread is empty at first, but the ID is needed to add messages, run the thread, and get the assistant's reply message in the following steps.
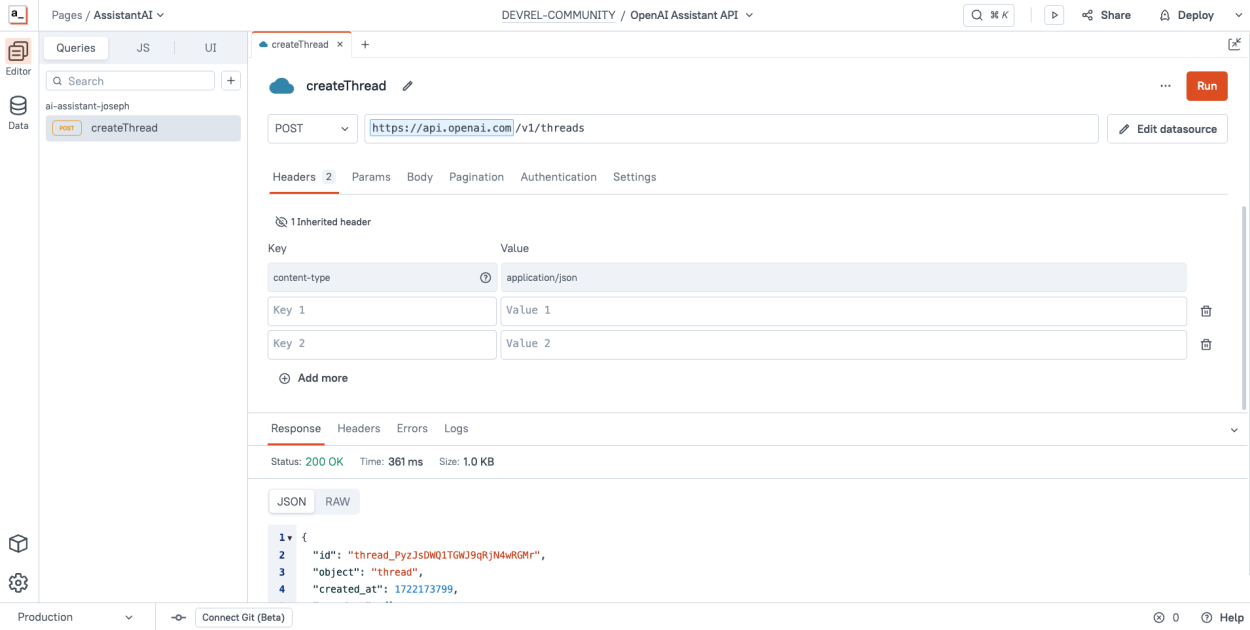
If you're still viewing the new Datasource, click the + New API button in the top right to add the first API. You can also use
cmd-shift-+(mac) orctrl-shift-+(windows) to add a new API, then select the datasource.Name the API
createThread, and append the URL with:/v1/threadsChange the method to POST, and then click RUN. You should get back a 200 response and an object containing an ID for the thread.
Note the blue bar across the URL. This indicates that the API has been created under an Authenticated API Datasource, allowing it to inherit headers and authentication settings securely, without storing them in your app.
Go to the Settings tab for the API and set it to run on page load. This will ensure a thread ID is always available to use in the next step.
Adding a Message and Running the Thread
Next, add a new API under the same datasource, name it
addMessage, and change the method to POST.Set the URL to:
/v1/threads/{{createThread.data.id}}/messagesThis will reference the ID returned by the createThread API, and add a message to that thread.
Go to the Body section, and set the type to JSON, then enter:
{
    "role": "user",
    "content": "Help me write an email to boss to ask for time off"
}
Click RUN, and you should get back a 200 response and an object with a message ID.
This only adds the message to the thread, but it doesn't trigger the AI to analyze it or reply.
Next, add another API, change the name to
runThread, and set the method to POST.For the URL, enter:
/v1/threads/{{createThread.data.id}}/runsSet the Body to JSON and enter:
{
    "assistant_id": "YOUR_ASSISTANT_ID"
}
Click RUN and you should get back a 200 response and an object with a run ID.
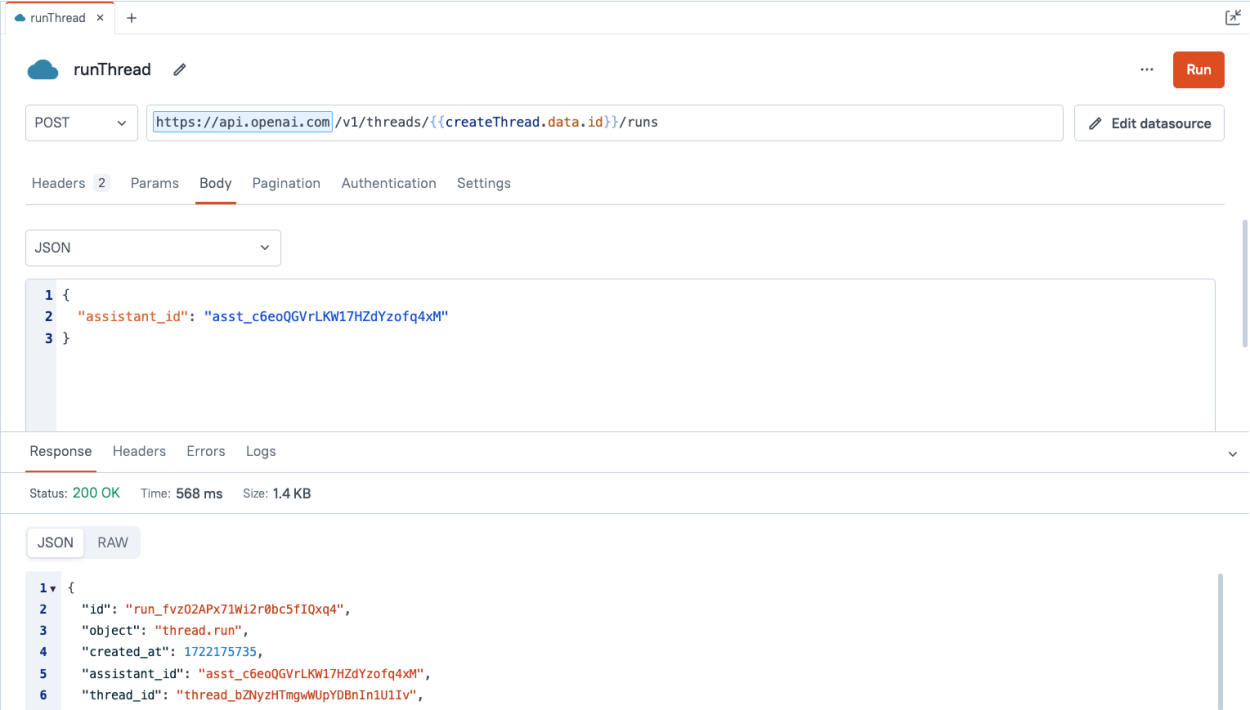
Now the AI will begin processing your message and adding a reply. The createRun does not respond with the reply though, because it takes time to generate. You have to make a separate GET request to check the results.
Reading the Assistants Reply Message
The last step is to read back the messages on the thread to see the reply from the assistant. Add one last API, name it listMessages and leave the method set to GET this time.
For the URL, enter:
/v1/threads/{{createThread.data.id}}/messagesClick RUN and you should get back a 200 response with an object containing a
dataarray.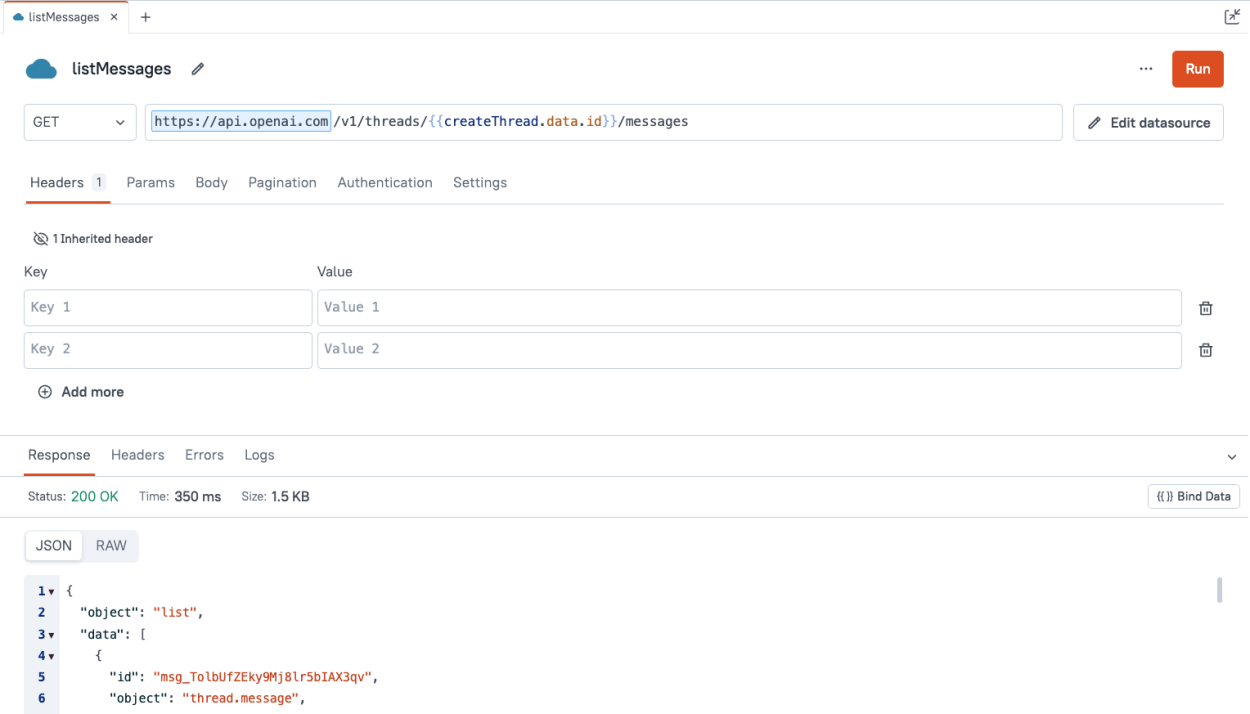
The response data is fairly nested, so the actual AI's reply is a bit hard to see at first. It can be found in the content array, inside the data array, at
listMessages.data.data[0].content[0].text.value.Adding the UI
Now that all the APIs are connected, head over to the UI tab and add an Input widget for entering the prompt. Next, drag in a Text widget for displaying the response.
In the widget properties pane for the text widget, set the Text to:
{{listMessages.data.data[0].content[0].text.value}}Now the Text widget should display the most recent message. If you run the listMessages API too soon, you may still see your message as the last one on the thread. Just wait a few more seconds and run it again.
Note: This binding will throw an
undefinederror when the listMessages API has not run yet. To avoid the error, you can use a ternary operator to check for a response first, and use a fallback value of an empty string, by entering:{{listMessages.data.data[0] ? listMessages.data.data[0].content[0].text.value : ''}}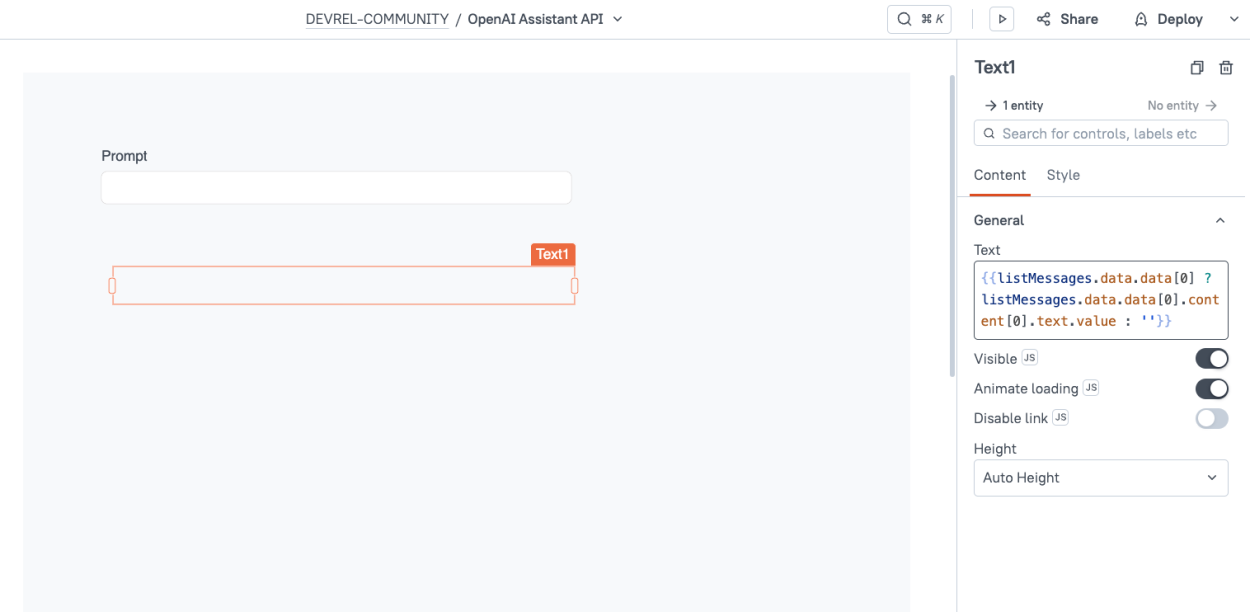
Now, head back to the
addMessageAPI, and update the body to reference the input widget.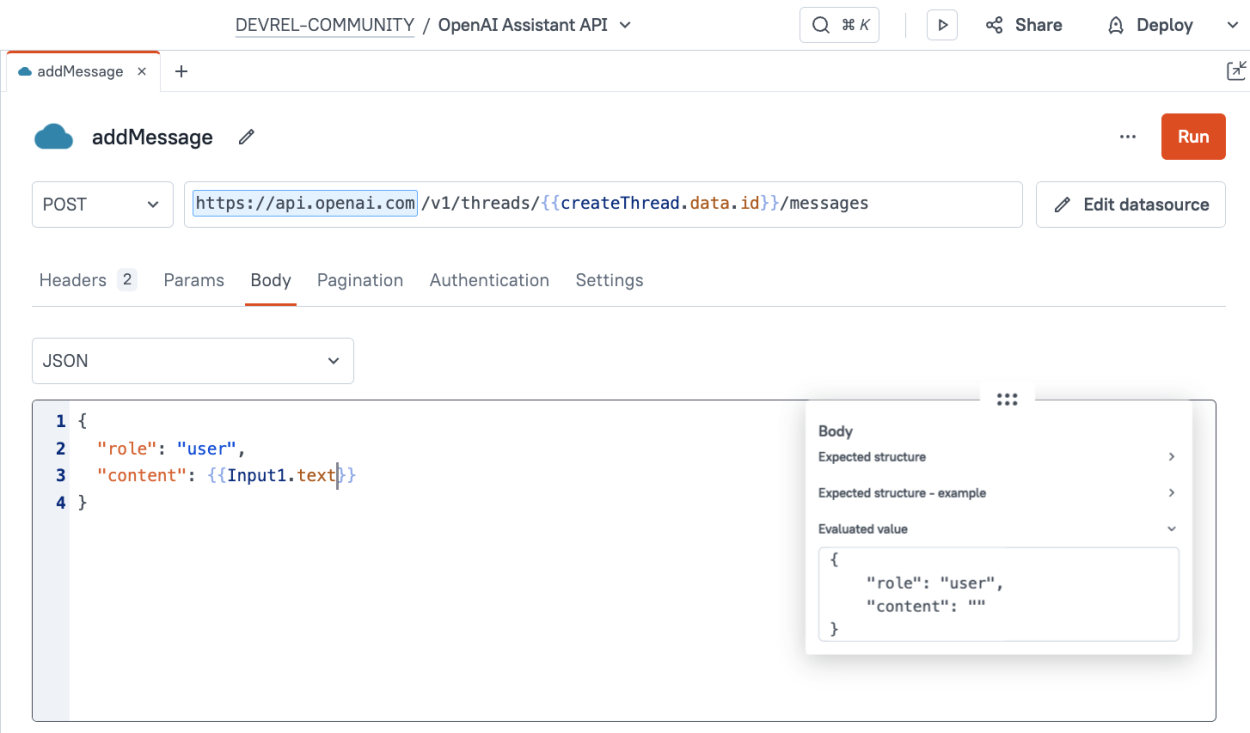
Next, drag in a Button widget and set the label to Add Message. Then go to the onClick setting and select the
addMessageAPI. Then set the success callback torunThread, so that every button click will immediately run the thread after adding a message.
Lastly, drag in one more Button widget and change the label to Check Response. Then set the onClick to run the
listMessagesAPI.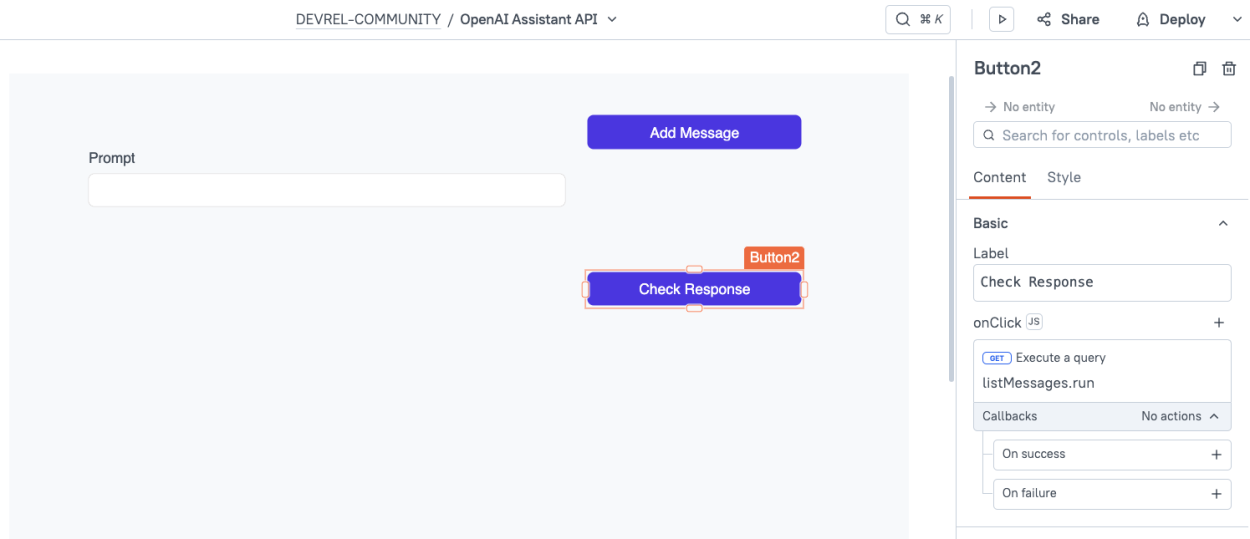
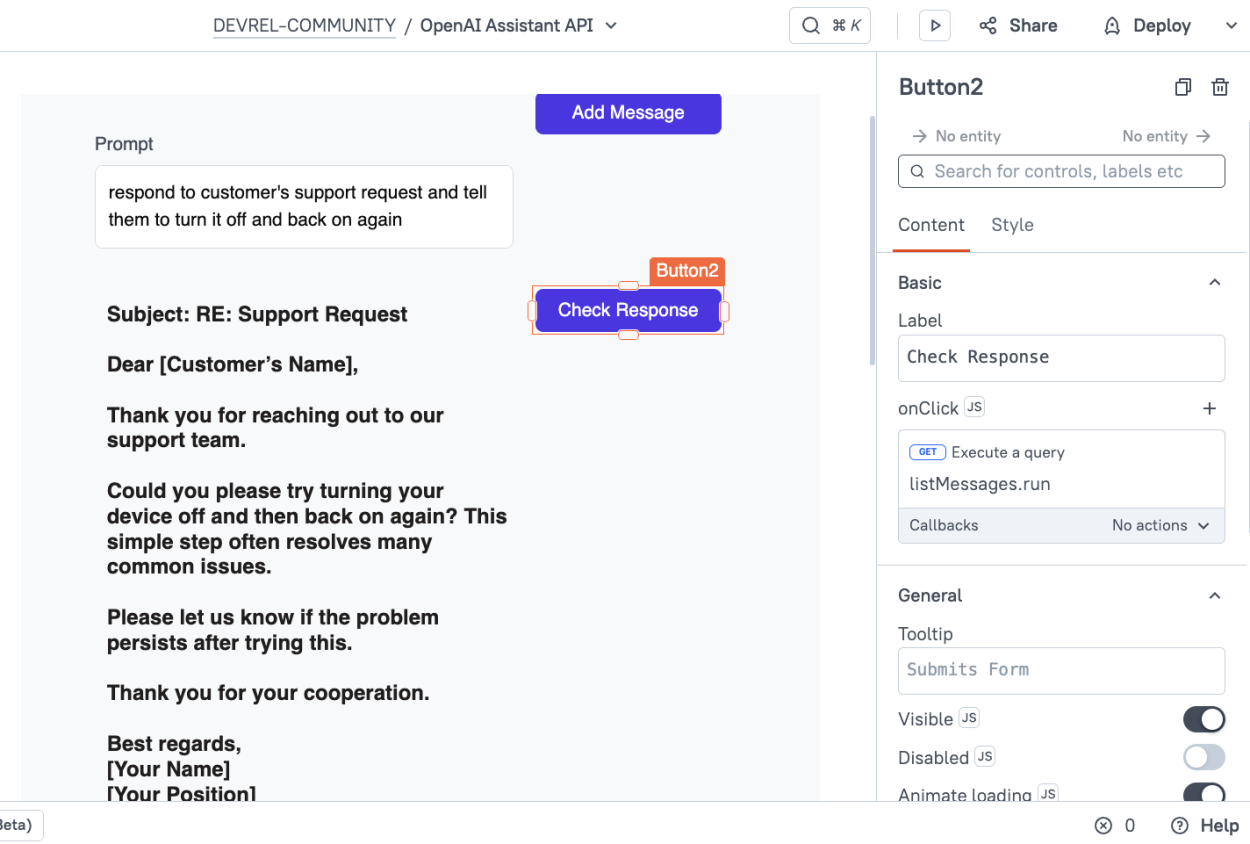
Deploy and Test
Time to test it out! Click Deploy, then enter a prompt and click Add Message. Click Check Response immediately after, and you'll probably still see your message as the last one on the thread. Give it a few more seconds, then click Check Response again, and you should see the AI Assistant's reply.
Conclusion
That's it! You now have a working starter template to add an AI Assistant to any app you want to build. From here, you can integrate with any of our 35+ databases and SaaS connectors, or any REST or GraphQL API, and build a custom, AI powered app for any use case!