Appsmith is an extremely powerful and flexible tool, with the ability to connect to virtually any datasource and build any kind of interface for your internal tooling. And like many things in programming, there's always more than one way to accomplish a task. Even something as simple as sending an email attachment can be done several different ways, and it helps to be familiar with all of them before choosing the right solution for your use case.
Today we'll explore various techniques for sending emails and adding attachment files, including a few tips on generating PDF and text files, and how to integrate with SMTP or a mail service like Twilio SendGrid.
This guide will cover:
- Sending a basic email over SMTP
- Attaching a file from the user's device using a FilePicker widget
- Attaching images from the camera widget
- Sending email with the Twilio SendGrid API
- Dynamic text file generation and attachment
- Dynamic PDF generation and attachment
Let's get started!
Sending a basic email over SMTP
First we'll set up an SMTP datasource and send a basic text email. I'll be using Twilio SendGrid for this example, but you can use any SMTP server.
Start out by clicking the Data icon on the left sidebar, click the plus to add a new datasource, and select SMTP.
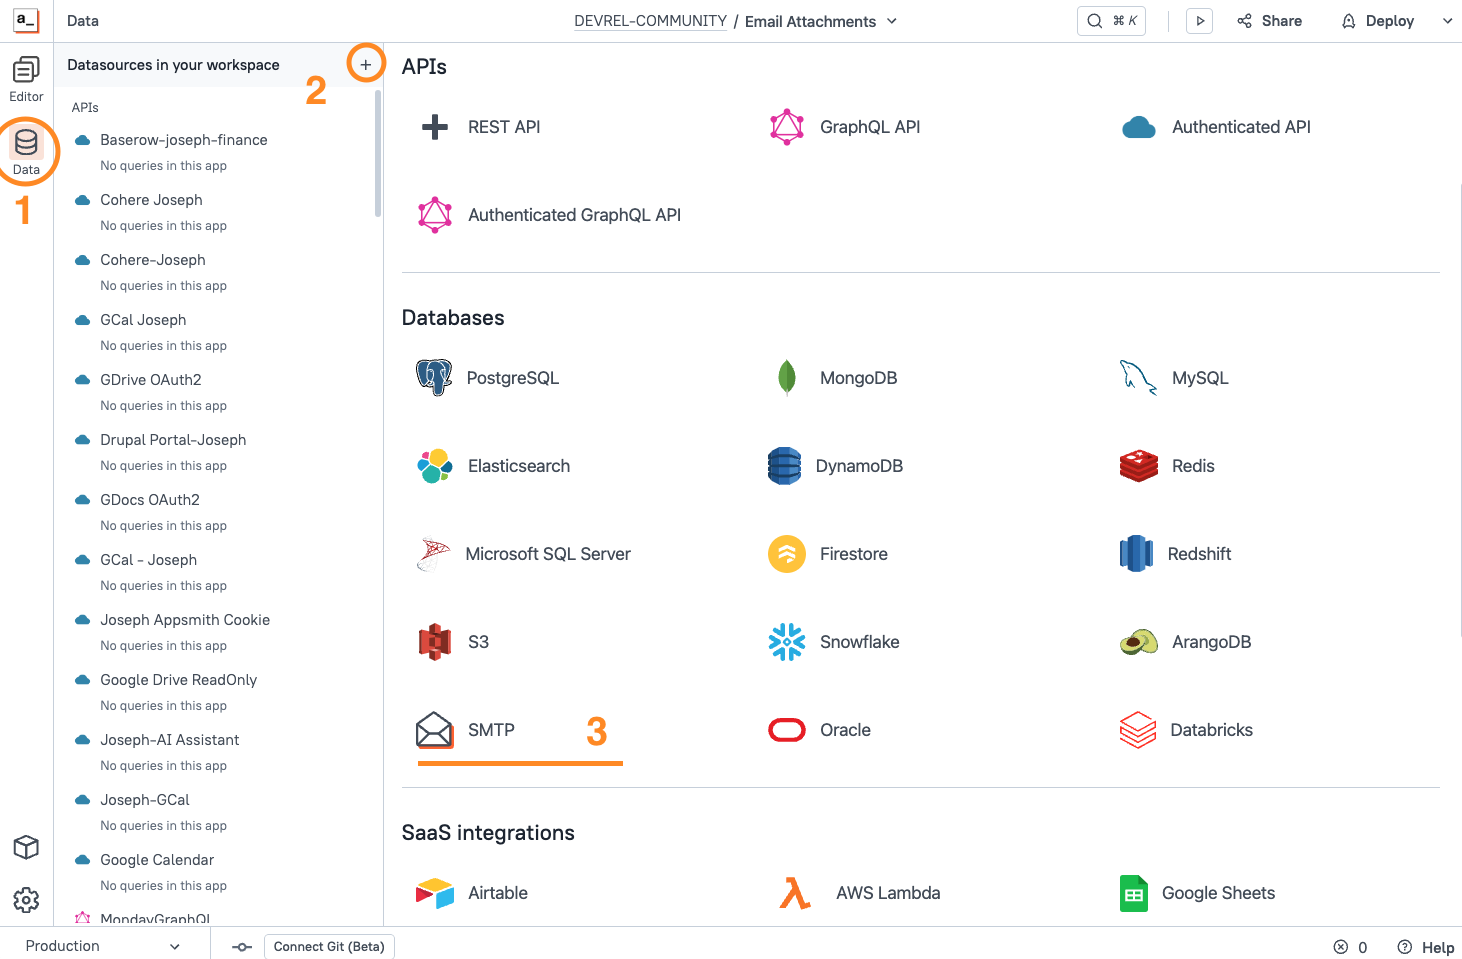
Then configure the new datasource as follows:
| Host Address | Your server IP |
|---|---|
| Port | See your SMTP server settings (usually 587 or 465) |
| User Name | apikey (the word 'apikey', not your actual key) |
| Password | YOUR_API_KEY |
Then save the datasource to begin using it.
Adding a Send Email Query
Next, click the New Query button and add a Send Email query under the new datasource.
Fill in the query settings to send a test email to yourself, then test it out.

Note: If using Twilio, you must first very ownership of the sender address before using it.
Attaching a file from the user's device using a FilePicker widget
Next we'll email a file that's uploaded from the user's device. Start out by adding a FilePicker widget to the canvas. Then upload an image or document to attach. Make sure to use a small file (less than 5Mb) just to avoid any issues with attachment limits with your mail provider.
Once the file is uploaded to the FilePicker widget, update the SendEmail query to add the attachment.
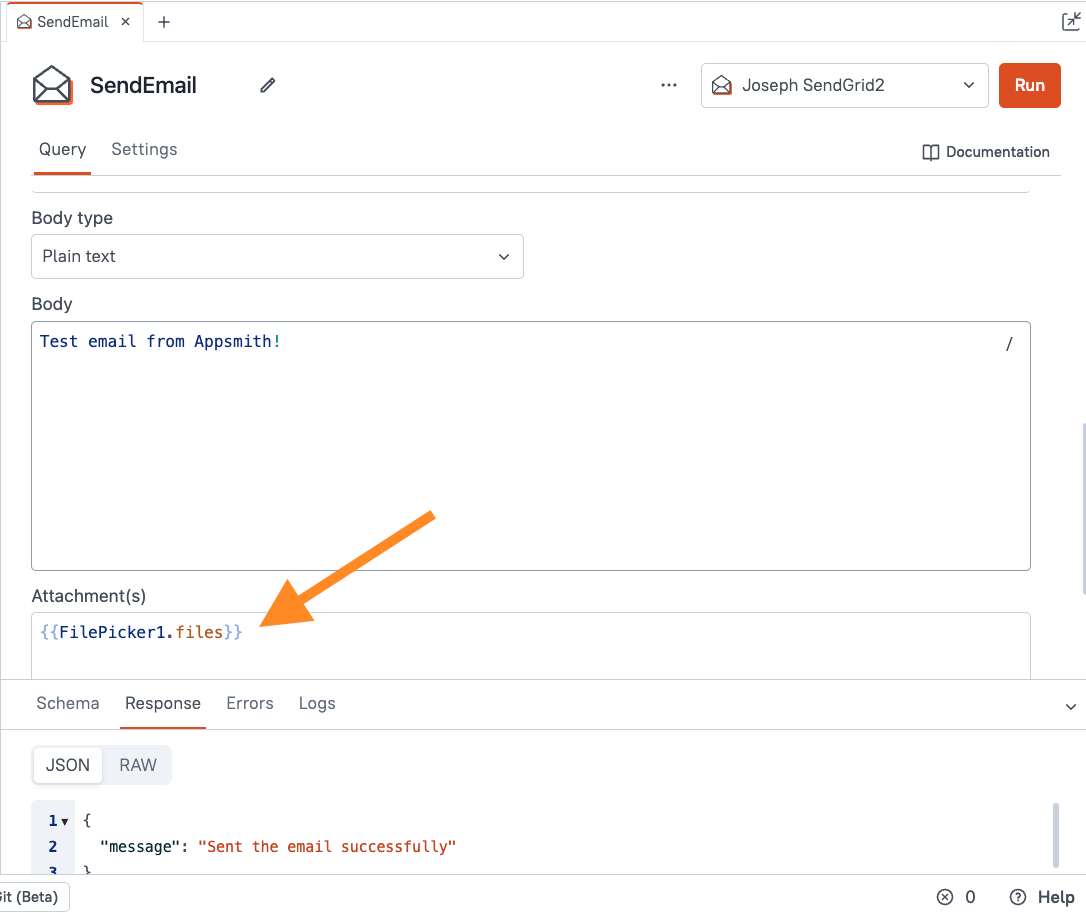
Test it out, and you should see the file attached in the email.
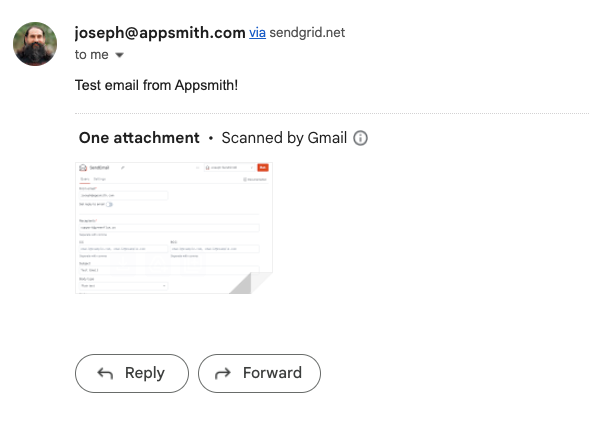
You can add as many files as you want to the attachment field, as long as it's within the size limits for your SMTP server. Just increase the Max number of files setting in the FilePicker widget. The {{FilePicker1.files}} binding will add all files as individual attachments.
Attaching images from the camera widget
Now let's try adding a file from the camera widget. Drag in a new camera widget and take a picture to load it with an image.
Next, update the SendEmail query to insert the image data from the Camera Widget. In this case, we only have the raw data itself, and not a full file, with a name, file type, etc. But the Camera Widget provides several formats to accommodate different APIs, databases, and S3 buckets. You can access the data from the camera widget as base64, binary, or blob.
Instead of accessing FilePicker1.files, which is an array of file objects, you have to construct an individual file and wrap it in an array to create the same format. The new email attachment field should looks something like this:
{{
[
  {
    "data": Camera1.imageDataURL,
    "type": "image/webp",
    "dataFormat": "Base64",
    "name": "captured_image.webp"
  }
]
}}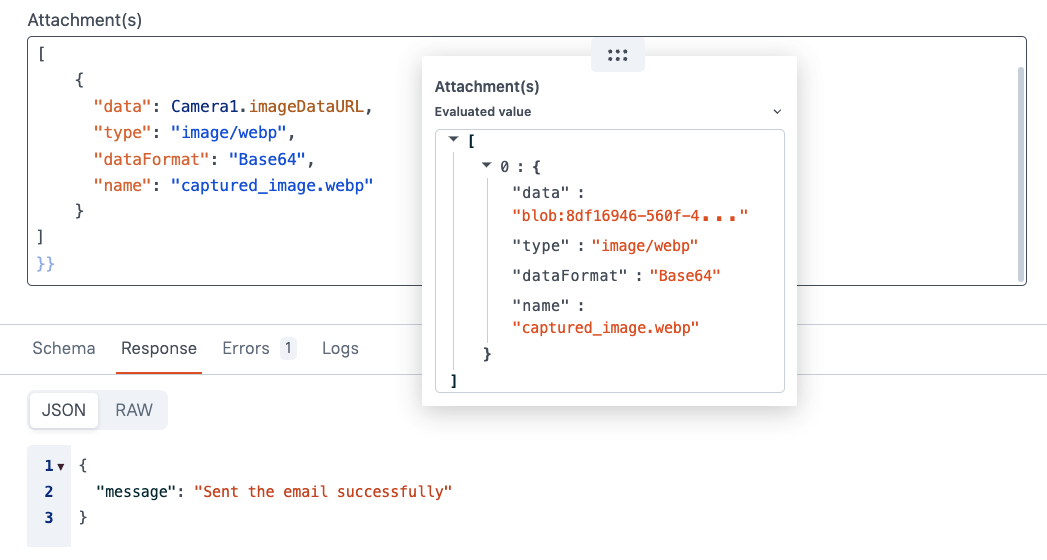
Now test it out, and you should be able to send an attachment from the camera widget.
Note: for more info on Base64 and binary files, check out this post:
Do Base64 Strings Always End in an Equal Sign? - Working with Blobs, Binary and Base64
Sending email with the Twilio SendGrid API
Now let's try sending a few emails using the SendGrid API. Start out by creating an API key from the SendGrid dashboard.
Give the key a name, and add the Mail Send scope (or choose full access). Then leave this page open, or copy the key somewhere safe to use in the next step.
Next, click the Data icon and add a new Authenticated API Datasource.
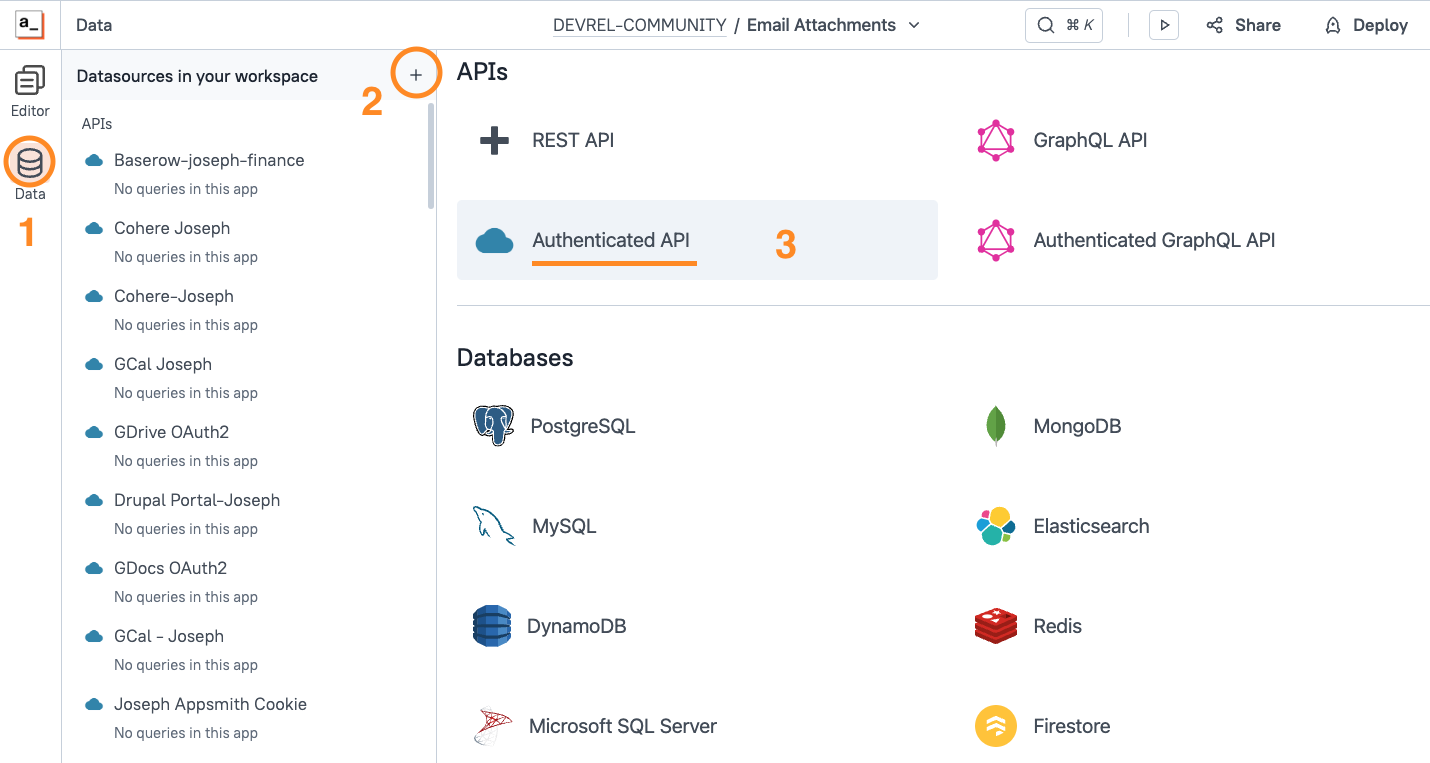
Configure the Datasource as follows:
| Name | SendGrid API |
|---|---|
| URL | https://api.sendgrid.com/ |
| Authentication type | Bearer Token |
| Bearer token | YOUR_API_KEY |
Save the datasource to begin using it. The API key is now securely encrypted on the Appsmith server, instead of in the app definition.
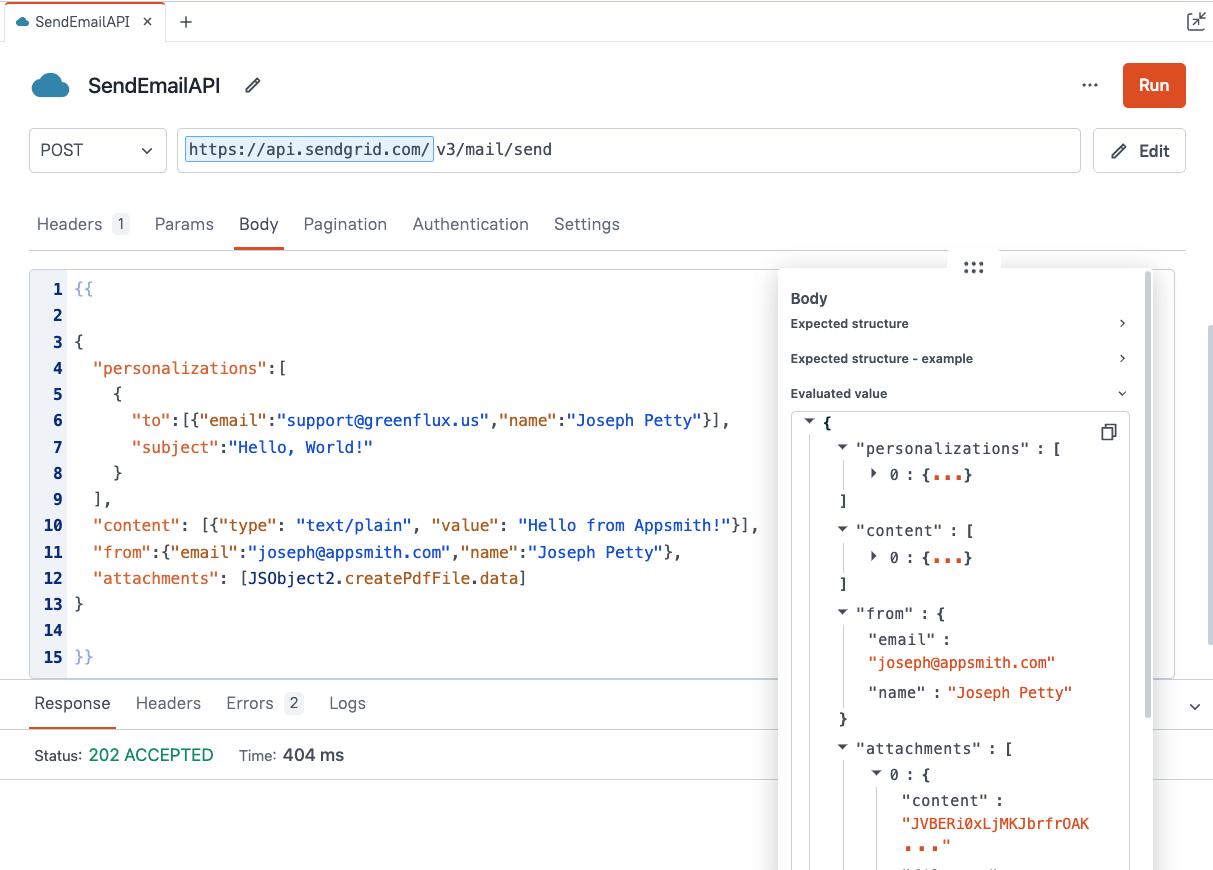
Add a new API under the SendGrid API Datasource, and configure it as follows:
| Name | SendEmail API |
|---|---|
| Method | POST |
| URL | v3/mail/send |
| Body type | JSON |
| Body |
|
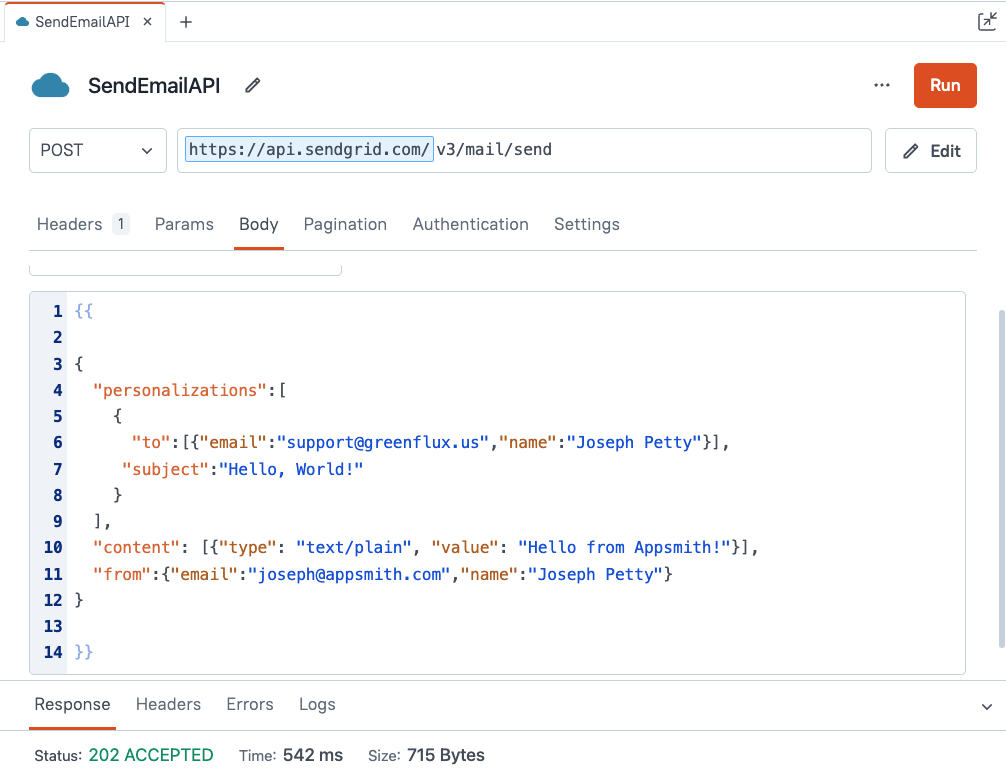
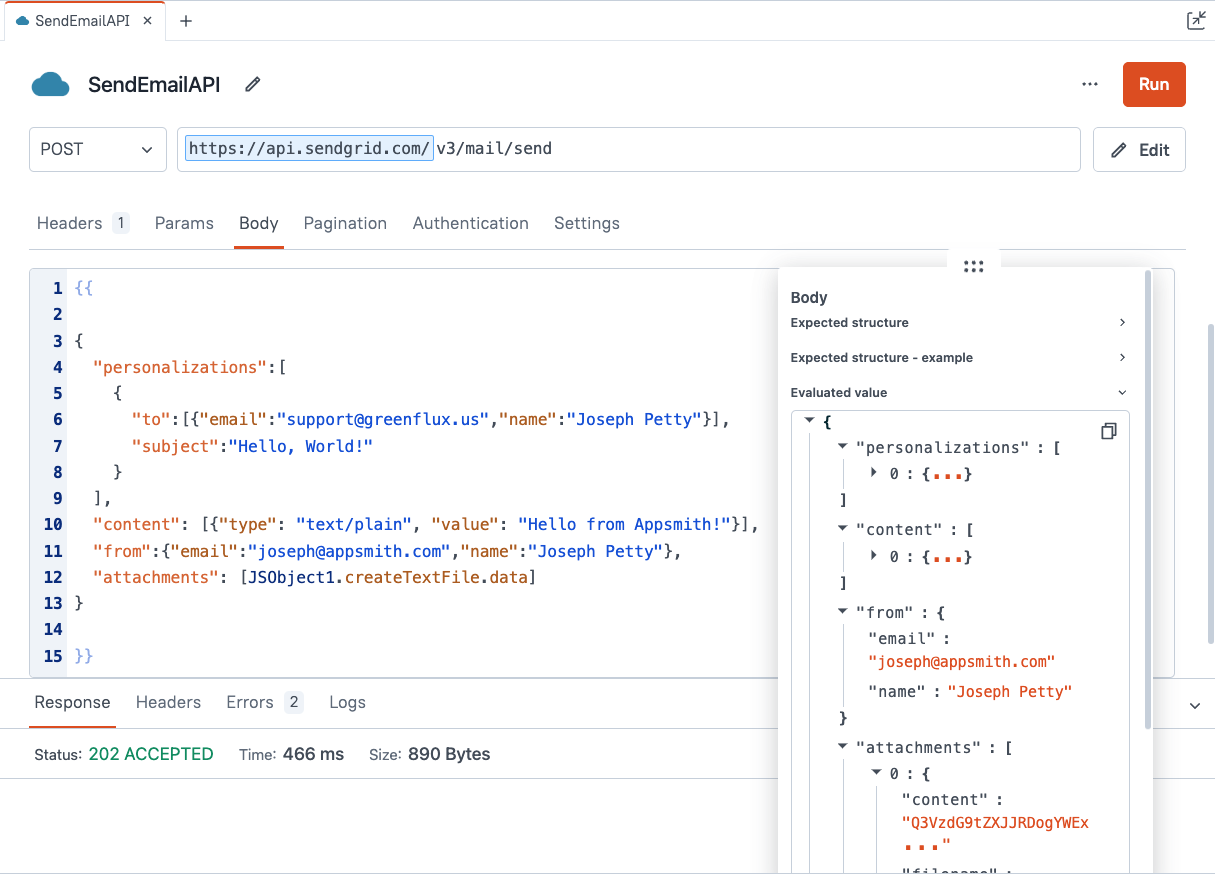
Click Run and you should get a 202 ACCEPTED response. If you get a 400 error, make sure your API key has the right scope. And if you get a 202 response but no email, make sure your sender email is verified in SendGrid.
Dynamic text file generation and attachment
Ok, this is where things get fun! Next we're going to generate a text file from an API response, and then attach it to an email. For this example, I'll be using Mockoon's API Playground to get a single customer record, then save it as a text document.
First, add a new REST API. This time, no datasource is needed because there's no API key to save. So make sure to add a new blank REST API that is not under the SendGrid (or any other) datasource.
| Name | GetCustomer |
|---|---|
| Method | POST |
| URL | https://playground.mockoon.com/customers?limit=1 |
Click Run and the API should return a single customer record.
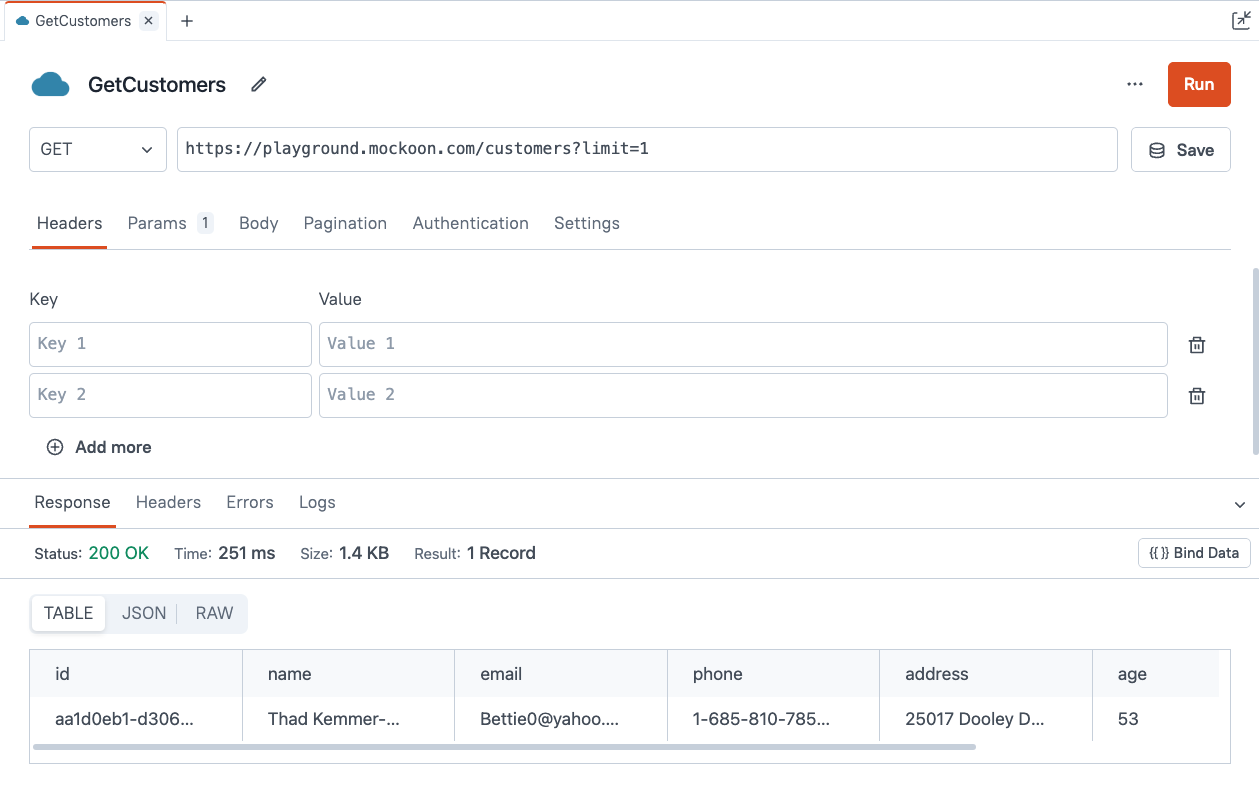
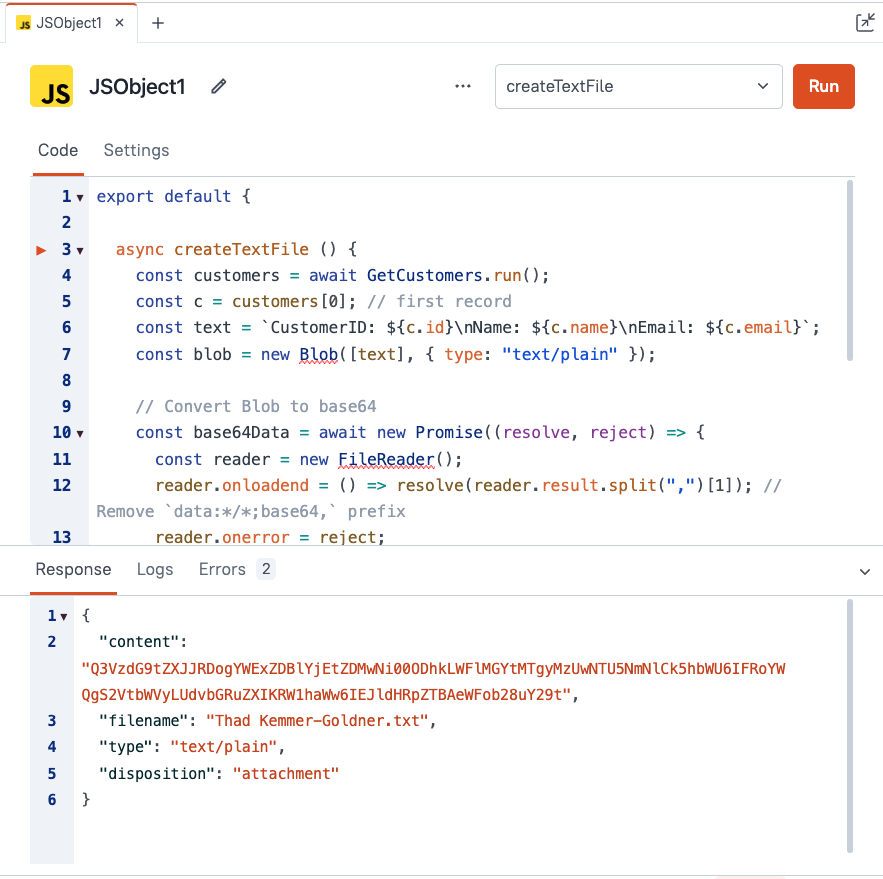
Next, add a new JSObject, and paste in the following code:
 export default {

	async createTextFile () {
		const customers = await GetCustomers.run();
		const c = customers[0]; // first record
		const text = `CustomerID: ${c.id}\nName: ${c.name}\nEmail: ${c.email}`;
		const blob = new Blob([text], { type: "text/plain" });

		// Convert Blob to base64
		const base64Data = await new Promise((resolve, reject) => {
			const reader = new FileReader();
			reader.onloadend = () => resolve(reader.result.split(",")[1]); // Remove `data:*/*;base64,` prefix
			reader.onerror = reject;
			reader.readAsDataURL(blob);
		});

		return {
			content: base64Data,
			filename: `${c.name}.txt`,
			type: "text/plain",
			disposition: "attachment"
		};
	}

}
This returns a file object with a dynamic name and contents, based on the GetCustomers API response.
Next, update the SendEmail API body to include the text file in the attachments array.
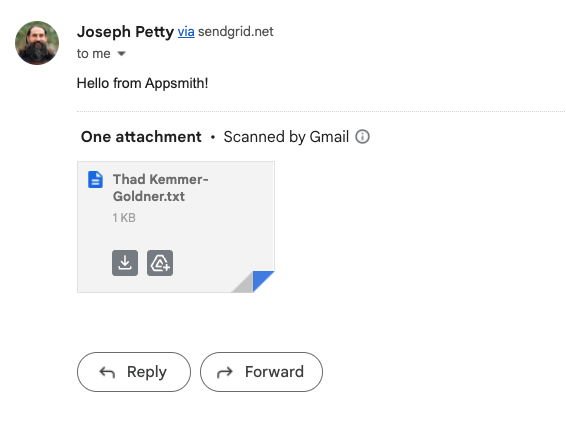
Now test it out! You should get an email with the text file attached.
Dynamic PDF generation and attachment
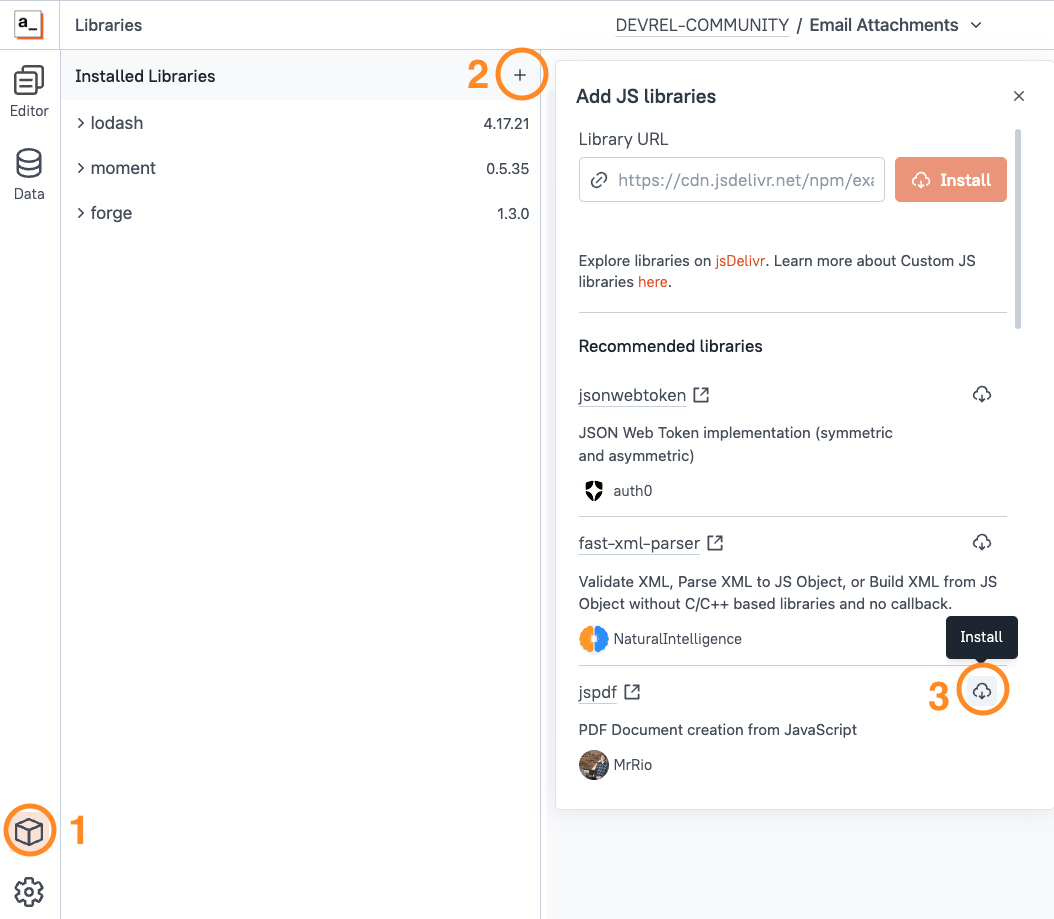
Lastly, we'll show a quick example of generating and attaching a PDF. Start out by clicking the Libraries (cube) icon on the left sidebar, and install the JSPDF library from the suggested libraries list.
Then add a new JSObject and paste in the following code:
export default {
	async createPdfFile() {
		const customers = await GetCustomers.run();
		const c = customers[0]; // first record
		const text = `CustomerID: ${c.id}\nName: ${c.name}\nEmail: ${c.email}`;

		// Initialize jsPDF
		const pdf = new jspdf.jsPDF();

		// Add text content to PDF
		pdf.text(text, 10, 10);

		// Generate PDF as base64 string
		const base64Data = pdf.output("datauristring").split(",")[1]; // Extract base64 part

		return {
			content: base64Data,
			filename: `${c.name}.pdf`,
			type: "application/pdf",
			disposition: "attachment"
		};
	}
}
Lastly, update the SendEmail API body to insert this file in the attachments array.
For more info on generating dynamic PDFs and inserting tables, check out this video.
Conclusion
As you can see, there are quite a few different ways of sending emails and attaching files in Appsmith. It helps to be familiar with each method before building your app, to ensure you chose the right approach for your use case. This guide has shown how to use SMTP and a REST API, to send email and attach various file types.
What's Next?
From here, you can build other dynamic file types, attach multiple files, or even try compressing multiples files and attaching a single zip file.
