

Intro
Let's say you're in support at a company that uses Zendesk, and your boss has a 'special project' for you 😑
- Boss: We need to start tracking all tickets that involve a return, exchange, refund, or anything else costing us extra.
- You: No problem. I'll have the team start tagging new tickets as the come in.
- Boss: Excellent! Also, I need a report showing how many tickets in each category for the last 90 days.
- You: But the old tickets don't have the tags yet. That's hundreds of tickets to update before we could generate a report!
- Boss:
-

If this sounds like you, then you're in luck!
In this guide, you will learn how to:
- Create an API Token in Zendesk
- Save the token to an Appsmith Datasource
- List and Update Tickets with the Zendesk API
- Classify text with Appsmith AI
- Loop over a dataset and run an API for each row
Creating a Zendesk API Token
Start out by going to the Admin Home page of your Zendesk instance. Then click Apps and Integrations on the left sidebar, and go to Zendesk API.
The url will be in the format:
https://{subdomain}.zendesk.com/admin/apps-integrations/apis/zendesk-api/settings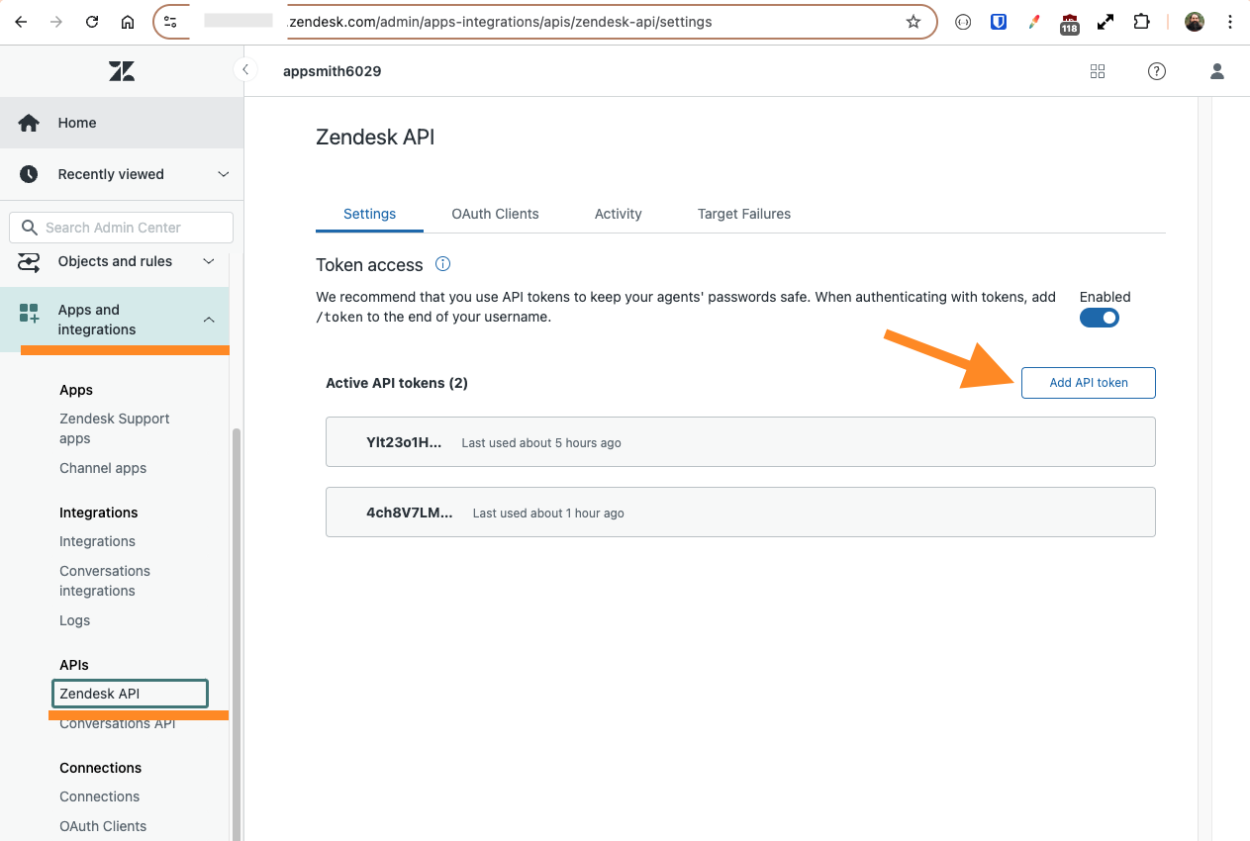
Click Add API Token, and give it a description. Then copy the token, and leave this page open while creating the Appsmith datasource in the next step.
Saving Token to Appsmith Datasource
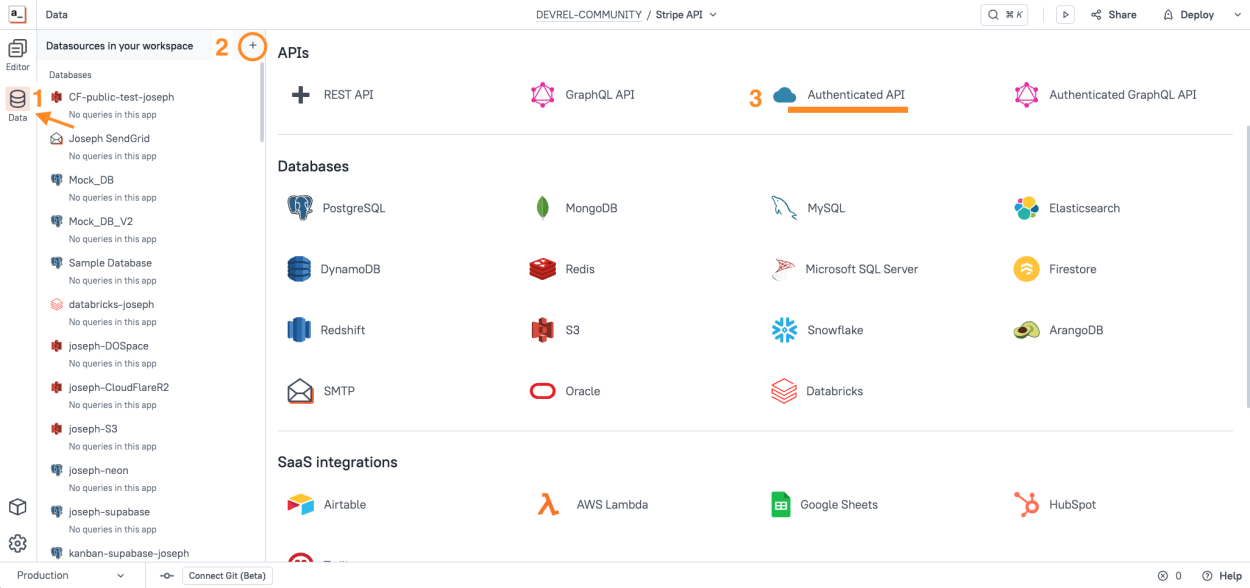
Open the app where you want to use the Zendesk API. Click the Data icon on the left sidebar and create a new Authenticated API Datasource.
Fill in the form as follows:
| Name | Give the Datasource a title. It helps to also add your name, when working with a team. |
|---|---|
| URL | https://{subdomain}.zendesk.com/ |
| Authentication Type | Basic |
| User name | {YOUR_EMAIL}/token |
| Password | {API_TOKEN} |
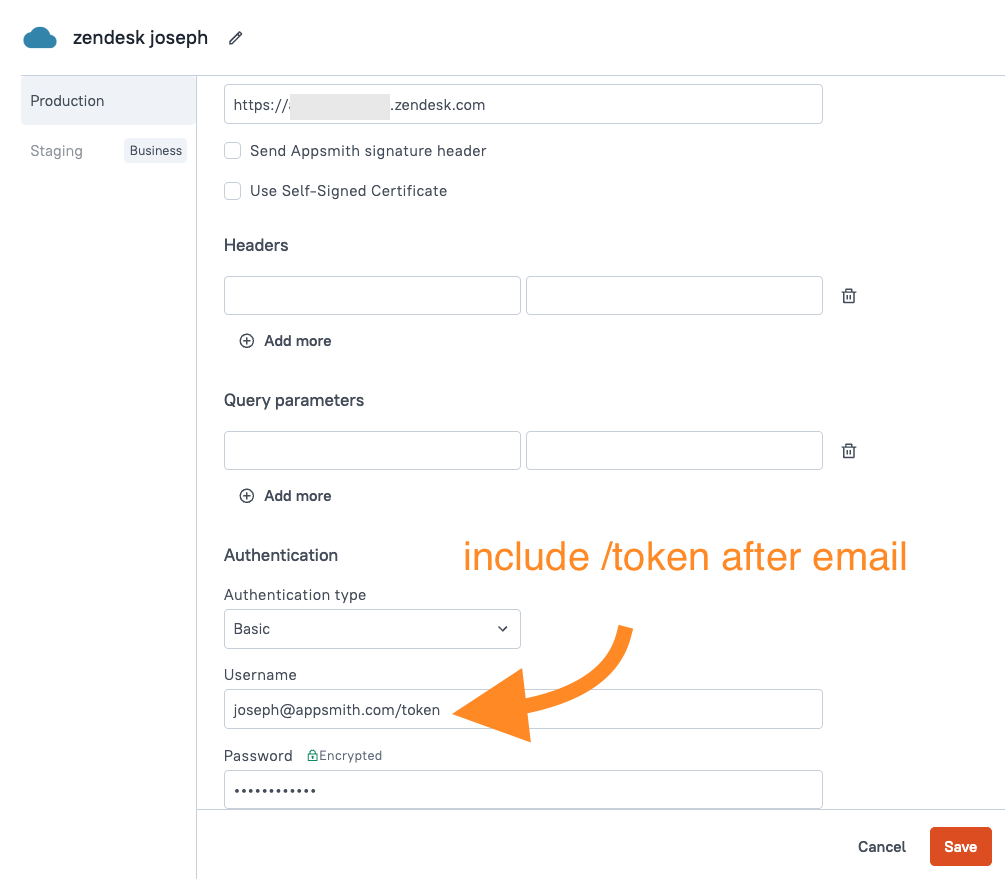
Notice the green lock icon on the Password field. This indicates the field is encrypted on your self-hosted Appsmith server, and will never be sent to client applications. More on security here.
Click SAVE. Your Datasource is now connected and ready to use.
Listing Tickets
Next, add a new API under the Zendesk Datasource. If you're still viewing the Datasource, you can use the + New API button in the top right to add an API to it. Or go to the Queries tab and click + to add a new API, then select the Stripe Datasource. You can also use cmd-shift-+ (mac) or ctrl-shift-+ (windows) to quickly add a new API.
You should see the URL prefilled with https://{subdomain}.zendesk.com with a blue bar around it, indicating that this API is part of a Datasource and will inherit the Authentication settings.
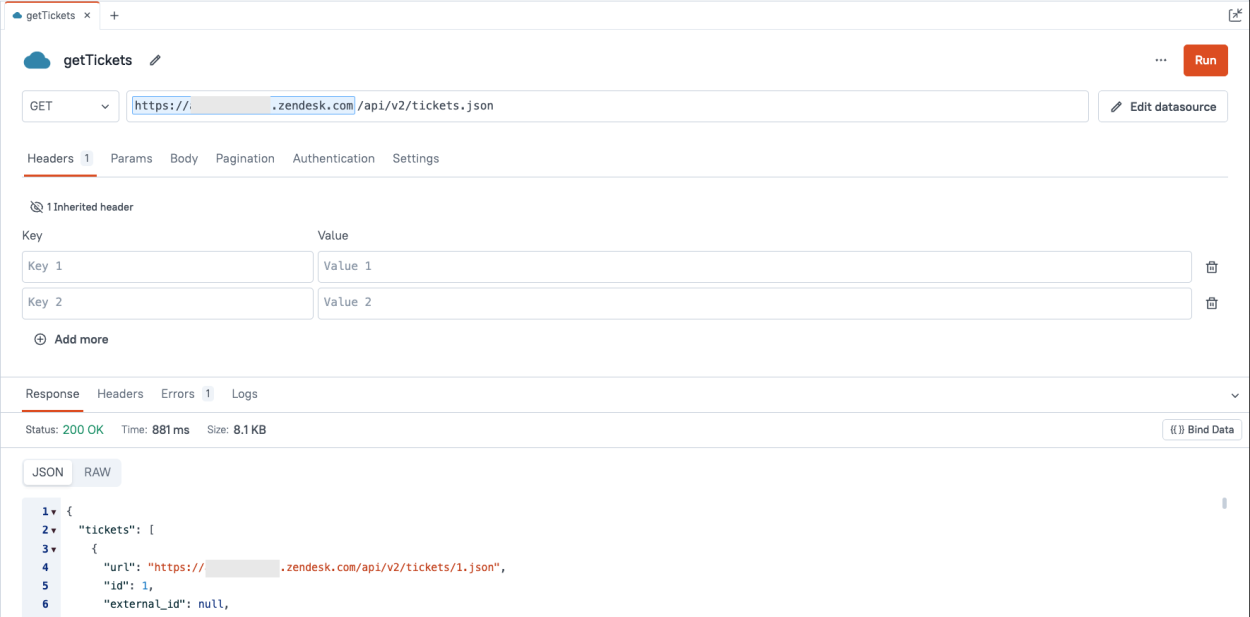
Configure the API as follows:
| Name | getTickets |
|---|---|
| Method | GET |
| URL | /api/v2/tickets.json |
Click RUN and you should get back a 200 response with a list of any Tickets that your account has access to.
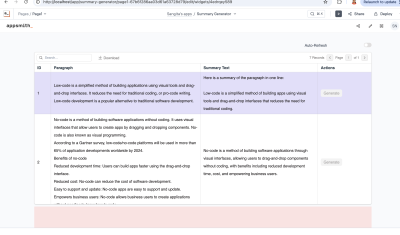
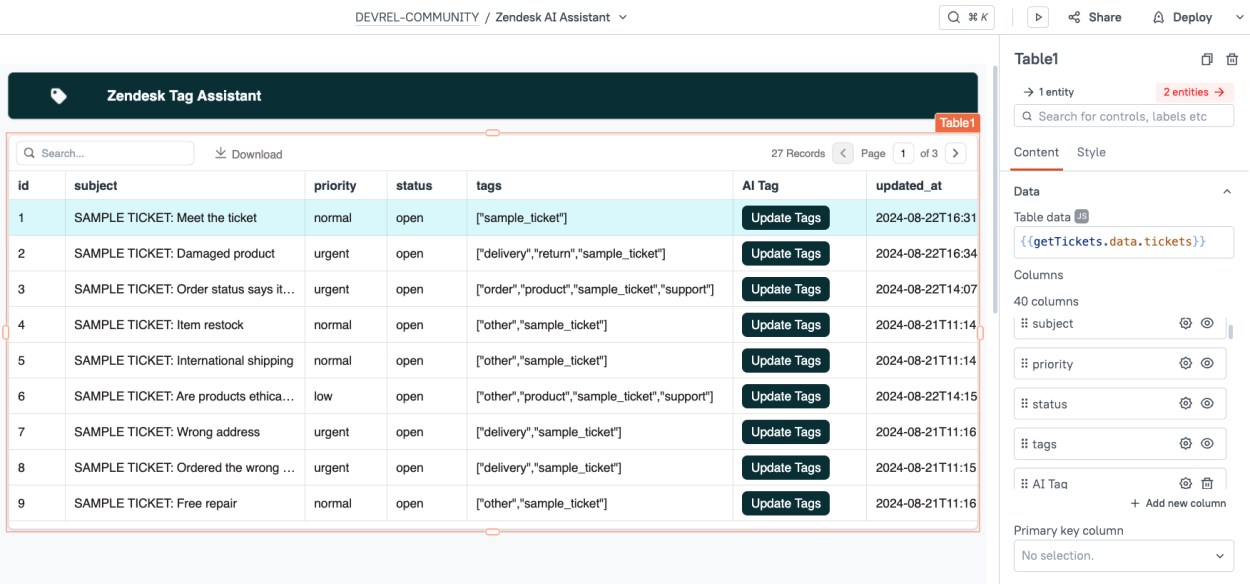
Next, go to the UI pane and drag in a Table widget. Then connect its Data property to getTickets.data.tickets.
Now, add a new column to the table widget named AI Tags, set the type to button with the label Update Tags. And finally, adjust the column order and visibility so you can see the Subject and the Tags field, and the new button.
Appsmith AI Text Classification
Now for the fun part: using Appsmith AI to classify text. Click the Data icon and add a new Datasource, then select Appsmith AI and name it Zendesk AI Tagger.
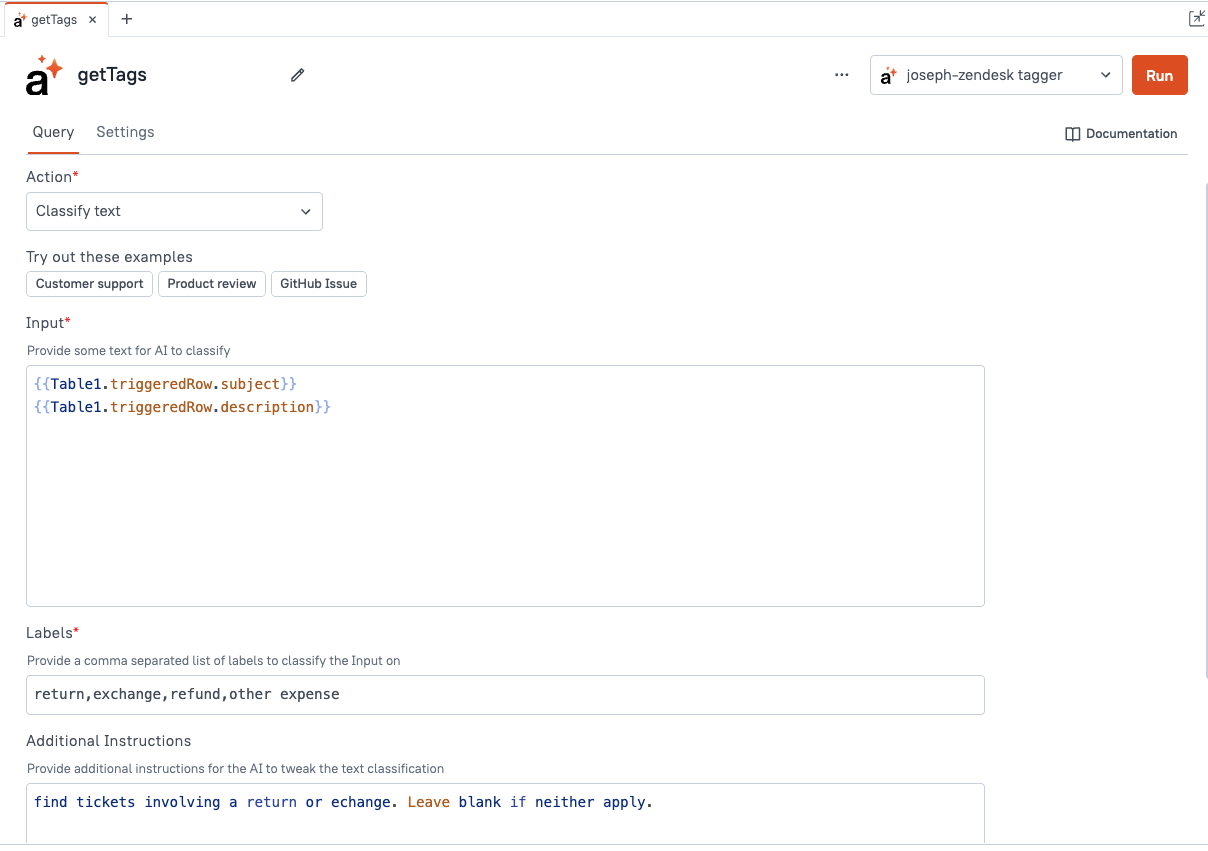
Then add a new API under the datasource, and configure it as follows:
| Name | getTags |
|---|---|
| Action | Classify text |
| Input | {{Table1.triggeredRow.subject}} {{Table1.triggeredRow.description}} |
| Labels | return,exchange,refund,other expense |
| Additional Instructions | find tickets involving a return or echange. Leave blank if neither apply. |
Lastly, head back to the table widget and set the Add Tags button to trigger this new API.
Clicking the button should now run Appsmith AI to classify the text of the ticket. Try it out from the table widget and then go back to view the API response. You should see an object with a response property containing an array of the labels that were selected by the AI.
{
 "response": [
   "exchange"
 ]
}
Updating a Ticket with AI Data
Now to save the AI's response.
Create a new API under the Zendesk Datasource and configure as follows:
| Name | updateTicketTags |
|---|---|
| URL | /api/v2/tickets/{{Table1.triggeredRow.id}} |
| Method | PUT |
| Body Type | JSON |
| Body |
|
This will update the ticket with the Labels provided by the AI, while leaving the existing Labels in place.
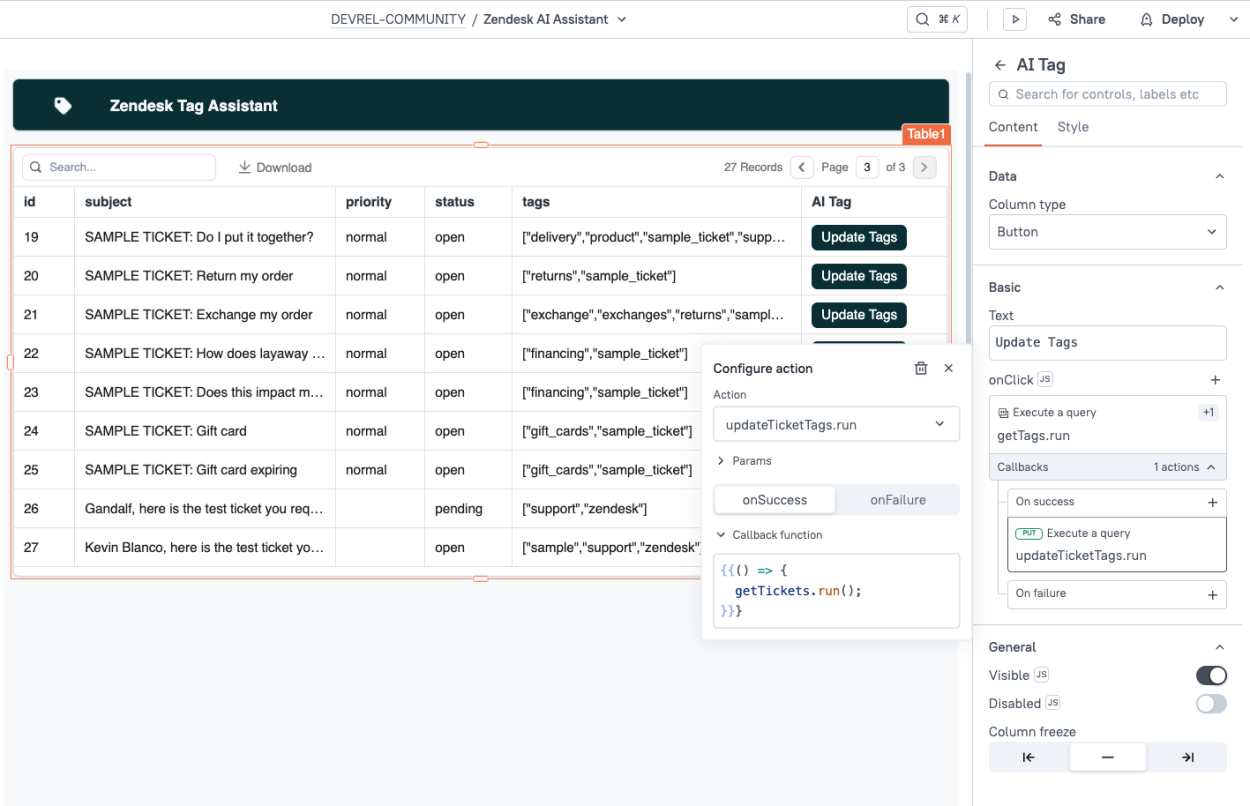
Next, go back to the button in the table widget, and set the callback of the getTags action to run updateTicketTags. And inside of that action, set its callback to getTickets. Now the Update Tags button will use Appsmith AI to get new tags, update that row with the tags, and then refresh the table.
Now test it out! You should be able to apply AI generated labels with just the click of a button now.
Ok, this takes the work out of reading a ticket and deciding on which labels to apply, but there's still a lot of buttons to click!
Running an API in a Loop
In this last section, we're going to use a slightly different version of the Appsmith AI API to getTags, and the updateTicketTags API in Zendesk. Instead of getting the ticket ID from the table widget's triggered row, we need to pass the ID as a parameter so it can be ran in a loop using JavaScript.
Make a copy of the getTags API, name it getTagsLoop and change the body to:
{{this.params.subject}}
{{this.params.description}}
Next, make a copy of the updateTicketTags API, name it updateTicketTagsLoop, and configure it as follows:
| URL | /api/v2/tickets/{{this.params.id}} |
|---|---|
| Body |
|
Now these two APIs can be used in a loop by passing parameters.
Instead of looping over the entire getTickets API response, this would be a good place to use the table widget's multi-row selection feature. Head back to the table widget and go to the Row Selection section of the properties to enable multi-row selection. Select a few rows while you're here so you can see the selected rows in the next step.
Next, add a new JSObject to loop over the table's selected rows.
export default {

    async updateSelectedTickets() {
        const selectedTickets = Table1.selectedRows;

        for (const t of selectedTickets) {
            await getTagsLoop.run({subject: t.subject, description: t.description});
            await updateTicketTagsLoop.run({id: t.id, tags: t.tags});
        }

        await getTickets.run();
    }

}
Lastly, add a new button above the table widget to run this function on the selected rows.

Time to DEPLOY! 🚀
You should now be able to bulk update ticket tags in Zendesk using Appsmith AI to classify ones that involve returns or exchanges.
Conclusion
Appsmith AI can easily be added to any Appsmith app to add features like text and image classification. This guide has shown how you can quickly connect to any API in Appsmith and begin adding generative AI to enhance your internal tools, and save your team countless hours of work.