

Introduction
Building your own custom AI chat bot is easier than you think! In this guide, I'll show you how to build you own self-hosted AI Chat app using Cohere.com, enabling use cases like:
- text classification on support tickets to extract issue details and customer sentiment
- summarizing email threads and drafting a response for human review/approval
- detecting fraudulent transactions based on previous account history
- AI support agent trained on your company policies and support docs
Why Self-Host?
AI can be a huge productivity boost for work, but there's a catch: To truly be useful, it needs access to your business data. And most enterprises can't send their sensitive data to 3rd party AI providers due to their own security policies, or industry regulations.
By hosting the LLM within your own company's network, you can securely train and deploy AI agents without sending sensitive customer data out of your company's virtual private cloud. And with Appsmith self-hosted in the same VPC, you can build AI powered business solutions securely, knowing the data never leaves your network.
This guide will cover:
- Creating a Chat model in Cohere
- Saving Cohere API key to an Appsmith Datasource
- Creating APIs to interact with the model
- Building a UI for the chat app
Cohere can be self-hosted on-premise or in your own VPC, just like Appsmith, making it a perfect addition to your internal tool stack. They also offer a cloud hosted version with a free plan, which I will be using for this guide. For instructions on hosting Cohere in your VPC, see their deployment options.
Cohere Chat API
Cohere's chat endpoint is surprisingly easy to use, especially when compared with OpenAI's Assistant API. With OpenAI you need 4 different APIs to create a thread, add a message to the thread, run the thread, then get the messages. But with Cohere's chat API, you only need to make a single API request and the response is returned directly.
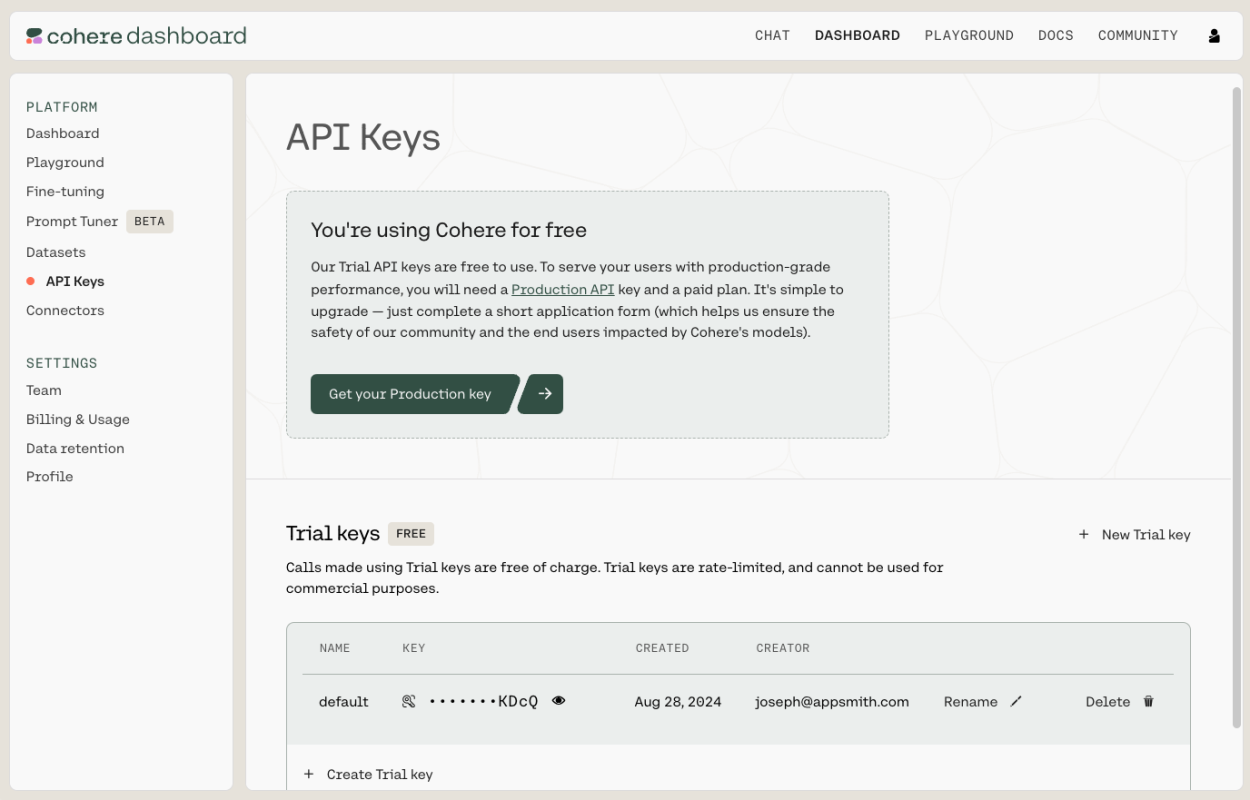
To get started, go to the Cohere Dashboard, and select API Keys from the left sidebar. Then copy your free trial key. This will be rate limited, but it should work fine for development.
Creating Appsmith Datasource
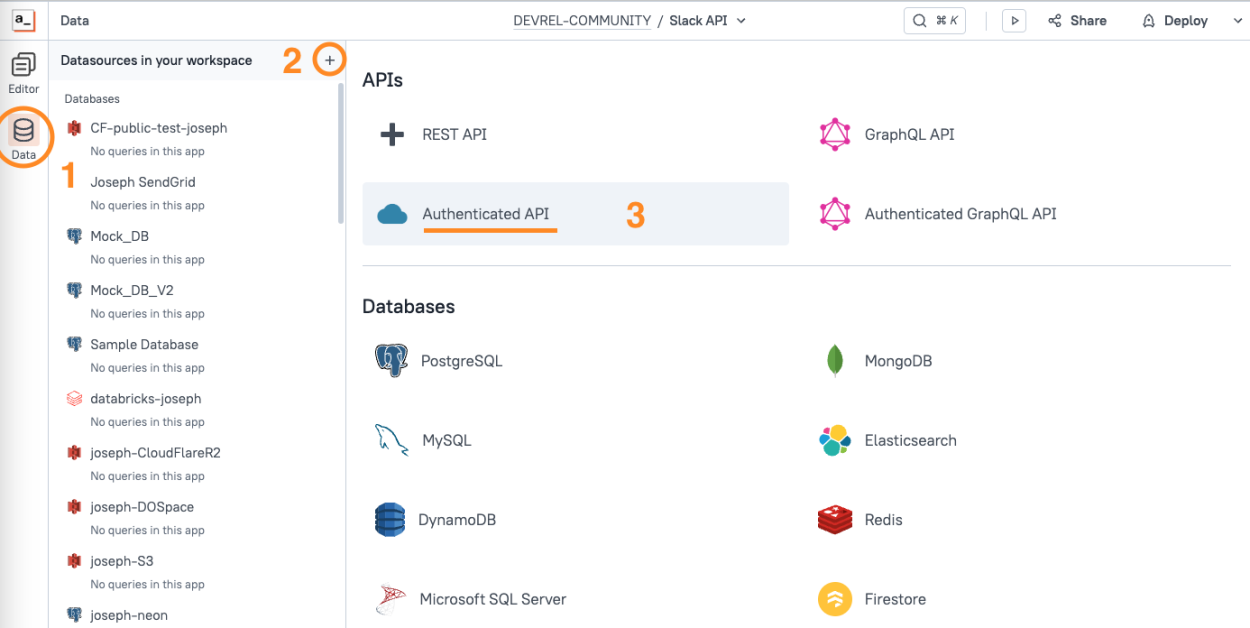
Then head over to Appsmith and open the app where you want to use the Cohere API. Click the Data icon on the left sidebar, then select the [+] to add a new Datasource and choose Authenticated API.
Configure the new Datasource as follows:
| Name | Name the datasource. If working with a team, it helps to include your own name. |
|---|---|
| URL | https://api.cohere.com/ |
| Header | content-type: application/json |
| Authentication Type | Bearer token |
| Bearer Token | token from Cohere |
Notice the green lock icon on the Bearer token field. This indicates the field is encrypted on your self-hosted Appsmith server, and will never be sent to client applications. More on security here.
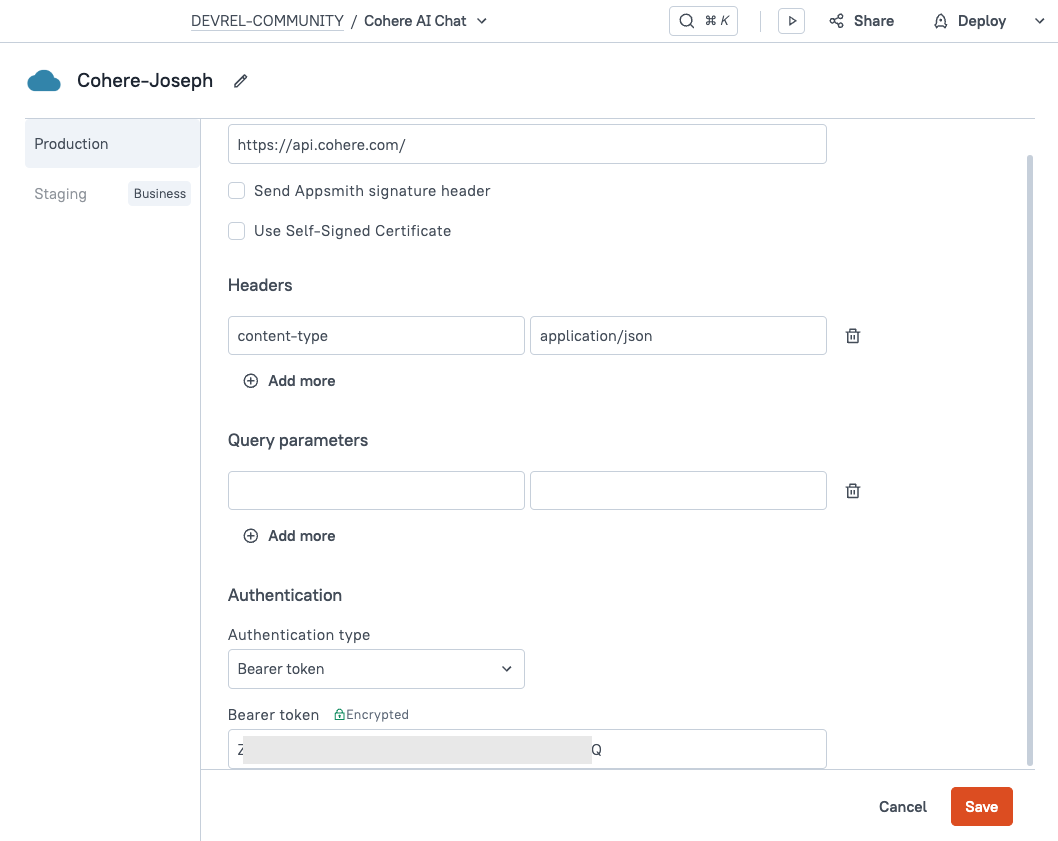
Click SAVE. Your Datasource is now connected and ready to use.
Starting a Chat
Chatting with the Cohere API is as simple as sending a single POST request. You can either supply a chat_history array to preload a chat with messages, or provide a conversation_id as a reference. To start a new conversation, just leave out the chat_history and supply your own conversation_id.
If you're still viewing the Datasource, you can use the + New API button in the top right to add an API to it. Or go to the Queries tab and click + to add a new API, then select the Cohere Datasource. You can also use cmd-shift-+ (mac) or ctrl-shift-+ (windows) to quickly add a new API.
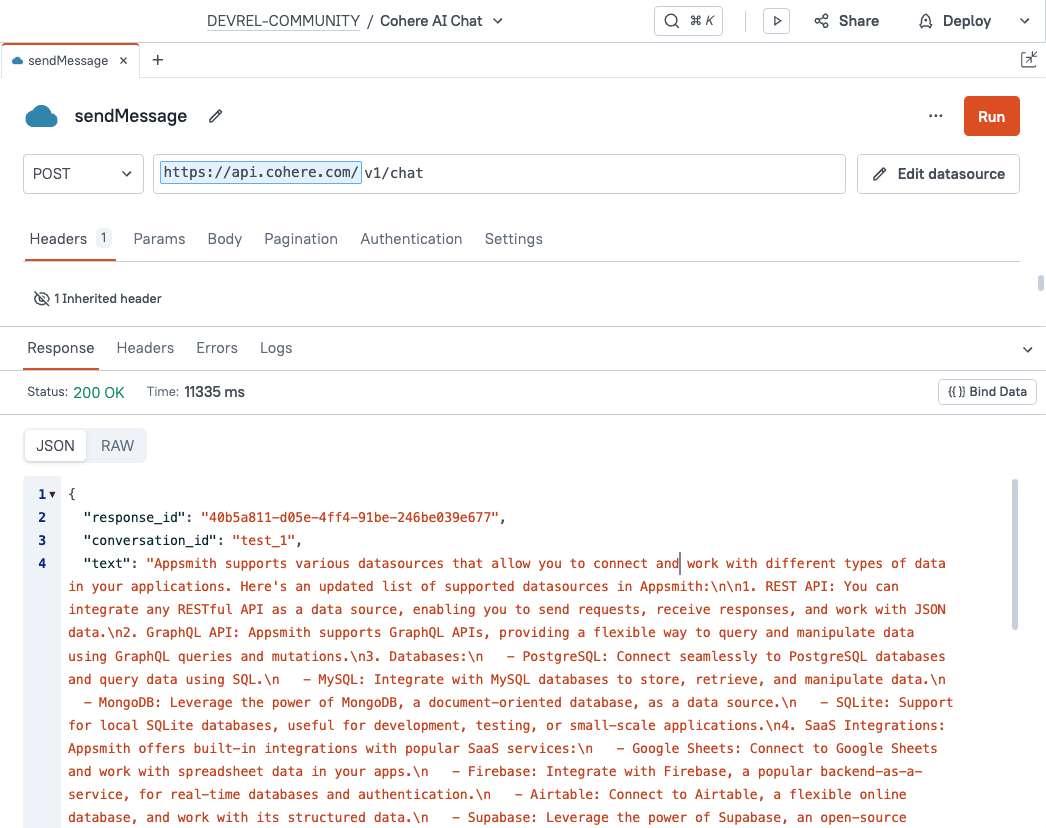
You should see the URL prefilled with https://api.cohere.com/ with a blue bar around it, indicating that this API is part of a Datasource and will inherit the Authentication settings.
Configure the API as follows:
| Name | sendMessage |
|---|---|
| URL | v1/chat |
| Method | POST |
| Body Type | JSON |
| Body |
|
Next, go to the Settings tab for this API and increase the timeout to 60,000 (60 seconds). Most responses won't take that long, but this will prevent any errors for queries that take longer than the default 10 seconds.
Click RUN and you should get back a 200 response with a message from the LLM.
You can also use the web-search connector to enable reading data from any public URL:
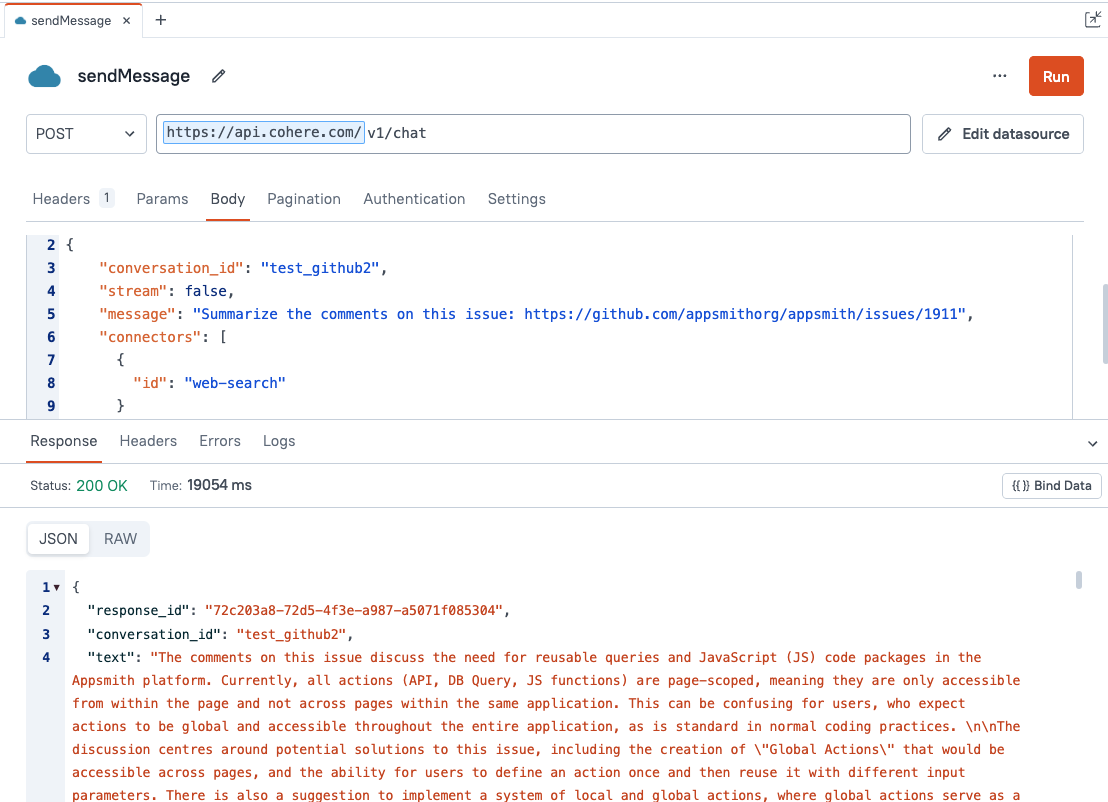
And you can add a specific URL to ground the responses to only search one site:
{
   "conversation_id": "grounded_test",
   "message": "What deployment options does Appsmith support?",
   "connectors": [
     {
       "id": "web-search",
       "site": "https://docs.appsmith.com/getting-started/setup"
     }
   ]
}
Ok, on to building the UI!
Building the Chat Interface
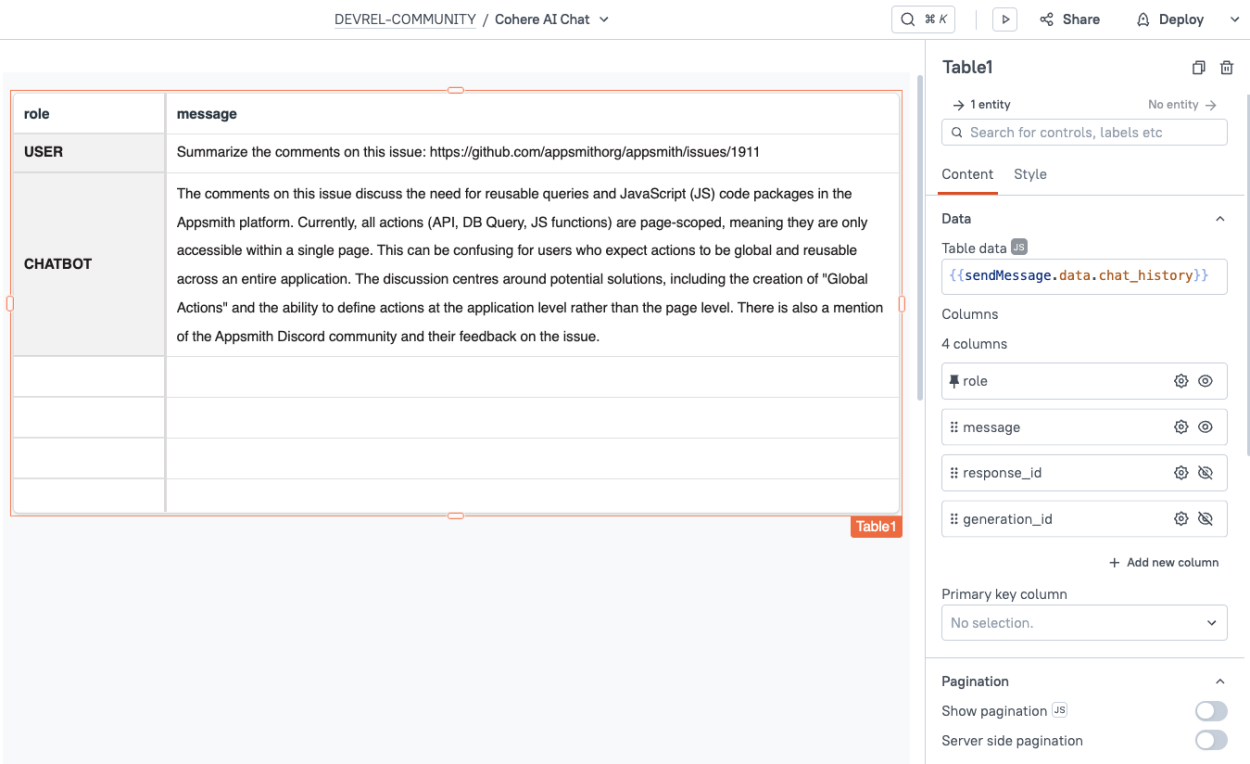
Start out by dragging in a Table Widget, and set the Data binding to {{sendMessage.data.chat_history}} . Then open the Settings (gear icon) for the message column and turn on Cell wrapping. Then back out to the main Table widget settings and disable the search, filter, show pagination and download options to hide the top toolbar of the table. Lastly enable server side pagination to make the table scrollable!
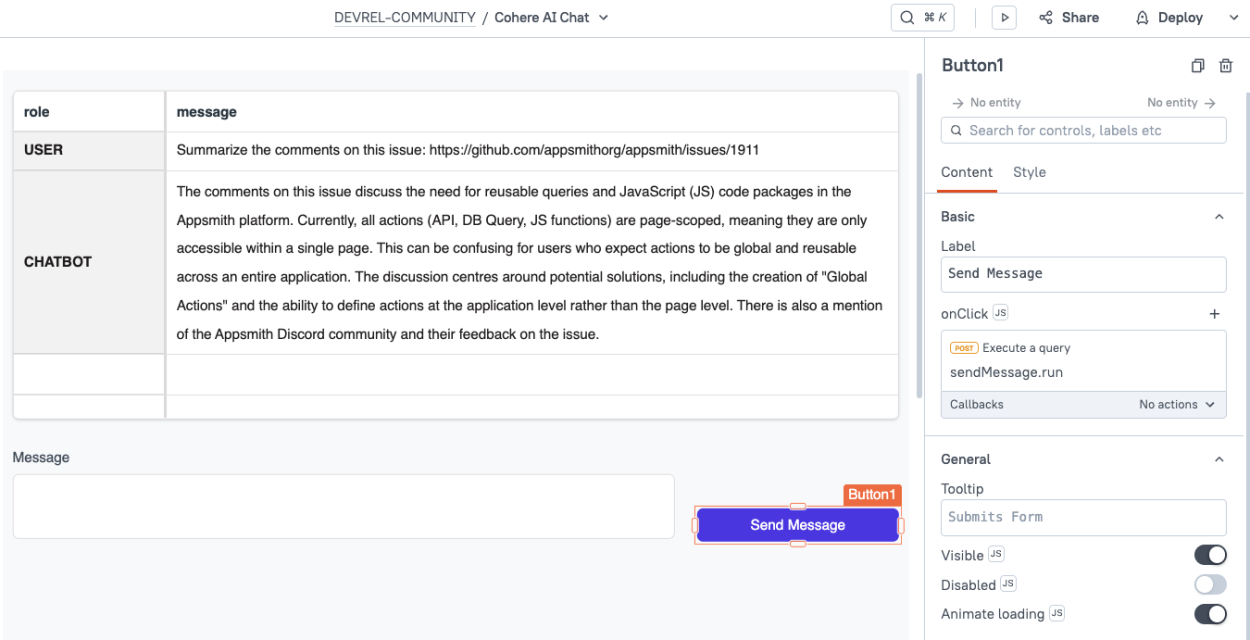
Then add an Input widget, and add a Button widget with the onClick action set to run the sendMessage API.
Lastly, go back to the Query pane and set the sendMessage API body to:
{{
{
   "message": Input1.text,
   "connectors": [
     {
       "id": "web-search"
     }
   ]
 }
}}
That's it! Time to DEPLOY! 🚀
Click Deploy and test it out. You should be able to chat with the AI now and start a new conversation every time the page is refreshed.
What's Next?
To retain the conversation history between sessions, be sure to give your first message a conversation_id, then include that ID in subsequent messages, instead of the chat_history array.
You can also add system messages and preambles to add more context to the user's message, and enable other tools and connectors for additional functionality.
Conclusion
Security and privacy minded enterprises can easily leverage LLMs in their internal tools by self-hosting Appsmith and Cohere in the same VPC. This combination allows organizations to benefit from AI without their sensitive customer data leaving their network.