


Connecting to the Jira API in Appsmith
Goal
This guide will show you how to enable the Jira API and create an API key, then use that key in Appsmith to access your Jira data using Basic Authentication. From there, you can use Appsmith to build a custom UI to manage data in Jira, and connect to other APIs and databases.
Prerequisites
A Jira account
https://www.atlassian.com/try/cloud/signupAn Appsmith account
https://app.appsmith.com/user/loginA New or Existing Appsmith App
to create the Jira Datasource in
Overview
Jira offers a variety of APIs and authentication methods. This tutorial will focus on the Jira REST API v3, using Basic authentication. Appsmith's Authenticated API Datasource feature will be used to securely store the credentials on your Appsmith server, instead of on the client side or in the app definition. By the end of this tutorial, you'll be able to create and edit data in your Jira account from Appsmith and build a custom UI on top of the data.
Enable the Jira API and Create an API Key
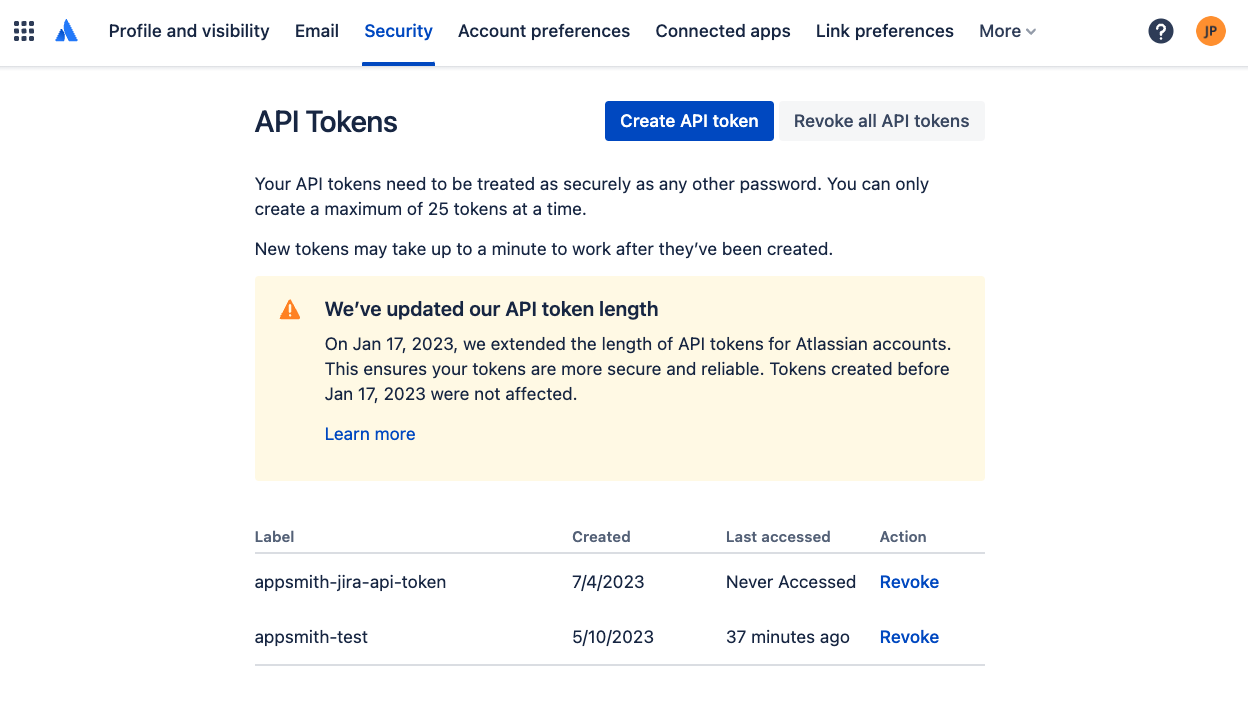
- Login to Jira and go to Account > Security > Manage API Tokens
- Click Create API Token and enter a name
- Copy the token (WARNING - you can only view this once!)
- Save it somewhere safe for the next step
Create a Basic Token with your email address
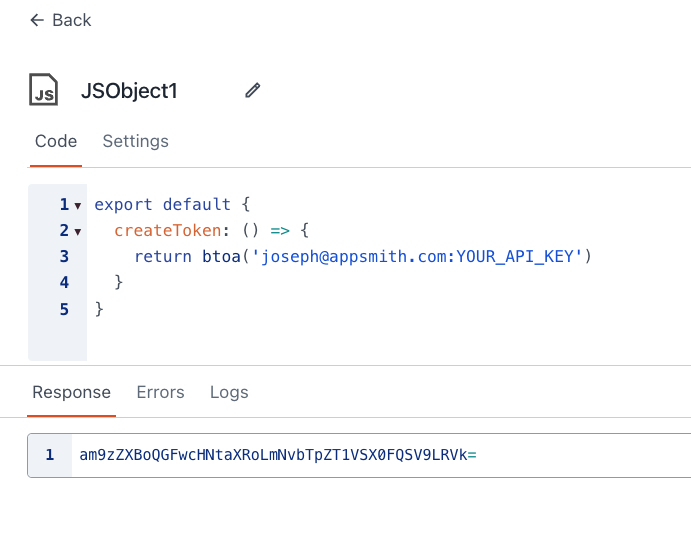
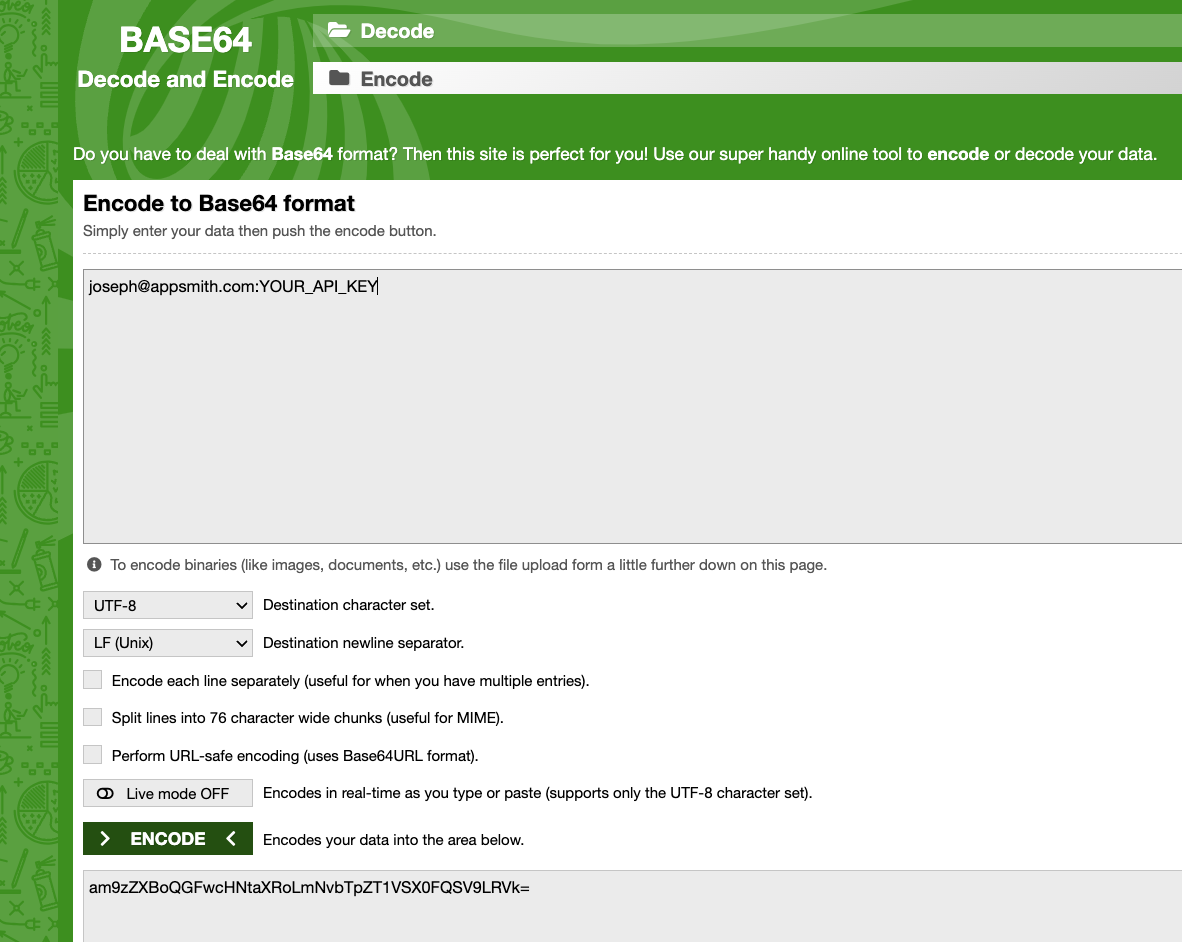
The Jira API uses an authentication header that consists of the user's
emailand theAPI Keyseparated by a:colon, and base64 encoded. This can be done in Appsmith or any JavaScript environment using the btoa() method. Or you can use an online tool like base64encode.org. Then this new base64 encoded value will be used in the Authorization header.Authorization: Basic
(email:API_KEY)<== Base64Encoded
Create a Datasource in Appsmith
Now that you have the Jira API enabled, an API Key created, and a Basic Token generated, you can use that to create an Authenticated API Datasource in Appsmith. This will save the token on the Appsmith server so that it is never exposed on the client side, even for other app editors and admins.
In a new or existing Appsmith app, click the (+) to add a new datasource and choose Authenticated API. Then fill out the form as follows:
Jira Authenticated API Datasource Configuration - Basic Auth Datasource Setting Value Notes Name Jira API-Joseph Helps to include name of API provider, and account owner Url https://appsmith-test.atlassian.net/rest/api/3/ replace with your subdomain Authentication Type API Key Authentication > Key Authorization This is the header key Authentication > Value **The base64 encoded email:API_KEY** Note the encrypted field 🔐 indicating it will be stored securely on the server Authentication > Add to Header Header prefix Basic Save the Datasource.
With an Authenticated API Datasource configured, you can now begin to add new APIs that will all have proper authentication added in by the Appsmith server, without exposing the credentials to the client-side, even for you as the admin.
NOTE: If you go to edit the datasource, the encrypted fields will be blank, and must be re-entered before saving the datasource again.
GET Projects from Jira
Next, add a GET API for the new Jira Datasource, and configure it for the /project/search endpoint.
Click the ADD API on the Jira Datasource page, or click the (+) to add a new API/Query, then select the new Jira Datasource. Note how the URL is prefilled, and locked to the value set in the datasource setup.
To make a GET request to the Projects endpoint, just add
project/searchto the URL and click RUN.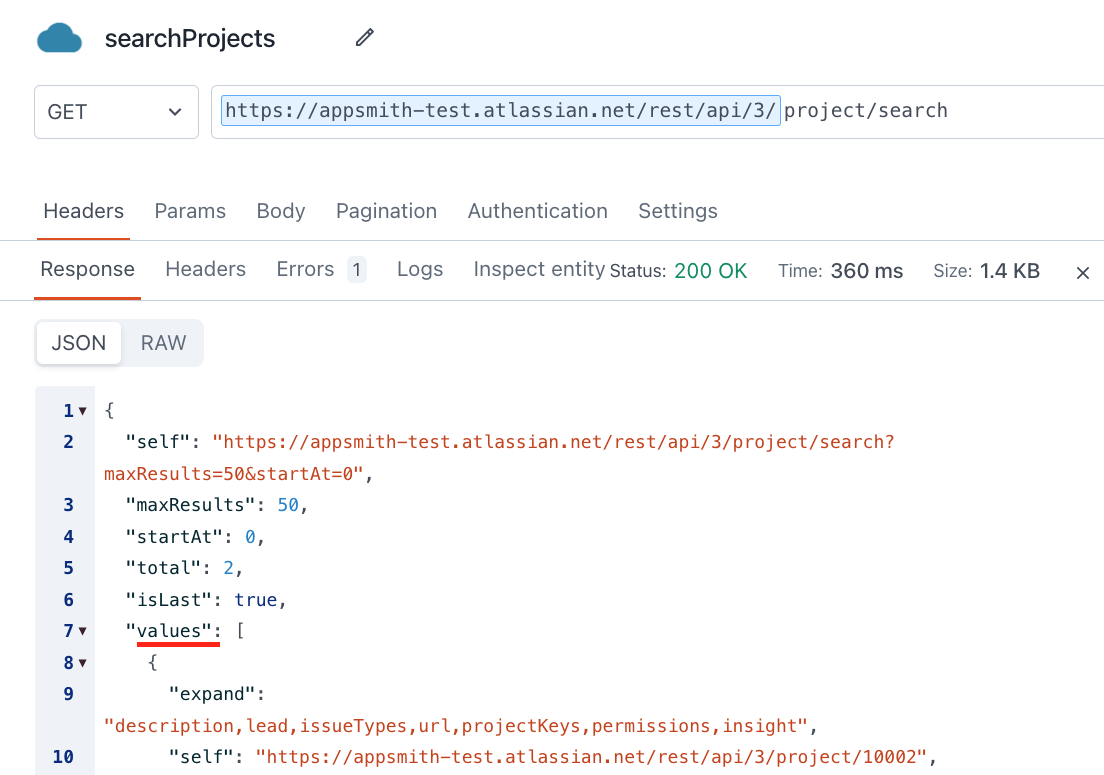
NOTE: The API response can be accessed at
searchProjects.data, but the actual records are nested, in thesearchProjects.data.valuesarray.Add a Table Widget for Projects
Next, add a new Table widget and click the JS option for the Table Data. Then update the data binding to
searchProjects.data.value.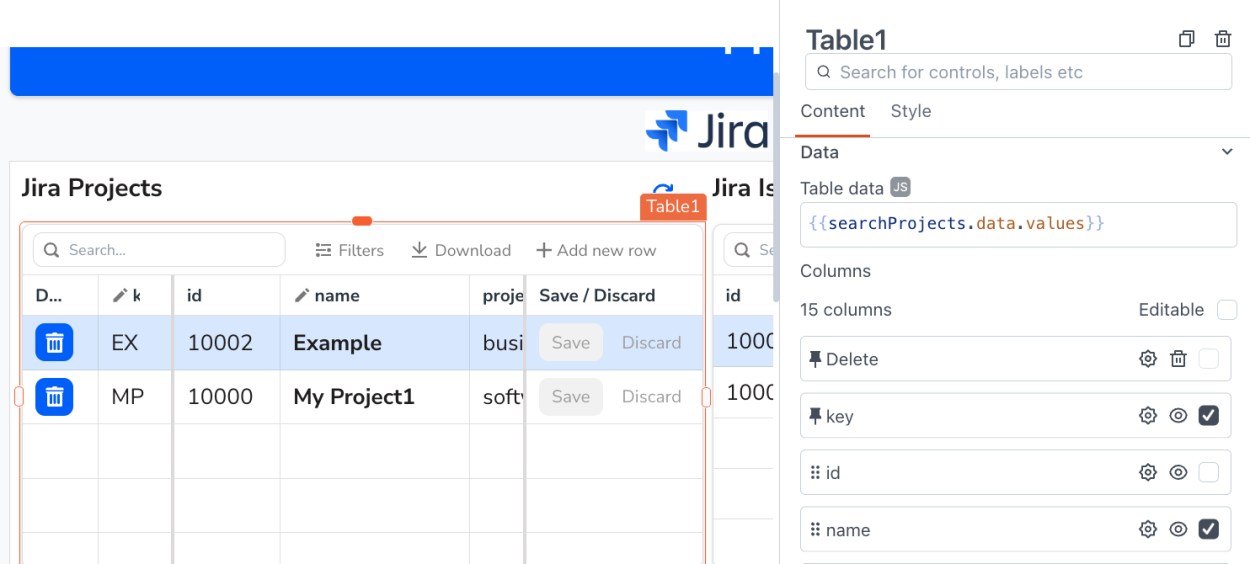
Add APIs for Other Methods and Endpoints
You can continue to add new APIs for other methods, like PATCH (update) or DELETE, or other endpoints, in Jira to manage Issues, Users, or other resources. Just use the Jira REST API docs to find the endpoint you want use, then create the new API under your Jira Datasource.
You can also use the Table widget for creating, editing, and deleting records in Jira! Check out this video for details on how to add, edit and delete rows using the Table widget.
Conclusion
Although Basic Authentication is generally viewed as less secure than OAuth2, the Authenticated API Datasource in Appsmith allows developers to securely store the credentials on the Appsmith server, and adds a new layer of security. This enables developers to integrate with APIs like Jira, and build secure apps with a custom UI and multiple permission levels, without exposing the API key.


![Thumbnail for the [FTW] Building a Calendar Widget Using Fullcalendar.js & the Google Calendar API 🗓️ video](/sites/default/files/styles/card_image/public/video_thumbnails/fSG_-tS0tUZYnK_KGq62_rsVZejErRRnMuhOL8HEl8k.jpg?itok=eqB2GYof)