

Slack API: Oauth2 Integration Tutorial
Goal
Create an Authenticated API Datasource for the Slack API using OAuth2
Prerequisites
A Slack Account, and a workspace to access with the API
An Appsmith Account
Overview
Slack offers several different methods for integrating it with other platforms. If you're just looking to send a message to a channel from your app, Slack webhooks provide a quick and easy solution with no authentication required. This is much easier to set up than the API, so give webhooks a try first if you only need to send a message to a certain channel.
For more complex operations like creating channels and adding users, you can create a 'bot token' or 'user-token' in Slack and use that to connect from Appsmith. This tutorial will cover using bot tokens, but the same approach works for user tokens, if you want the channel edits to come from your account instead of the bot.
This tutorial will cover:
- Creating a Slack App, adding scopes, and generating a token (user or bot)
- Saving the token as an Authenticated API Datasource in Appsmith
- Adding APIs to List Channels and add Users
Create a Slack App
Start out by going to your My Apps page in Slack, and click Create New App.
Enter the following settings:
- Choose From Scratch
- Name the App, and select a Workspace
- Click Create App
Adding Scopes
Now that the app is created, click OAuth & Permissions on the left sidebar and then scroll down to Scopes. Under the Bot Token Scopes section, click Add an OAuth Scope.
Add the following scopes:
- channels:join
- channels:read
- channels:manage
- channels:write.invites
Installing the Slack App To Your Workspace
Next, the app needs to be approved by a user by going through the OAuth consent screen. Scroll up to the OAuth Tokens section and click Install to WORKSPACE_NAME.
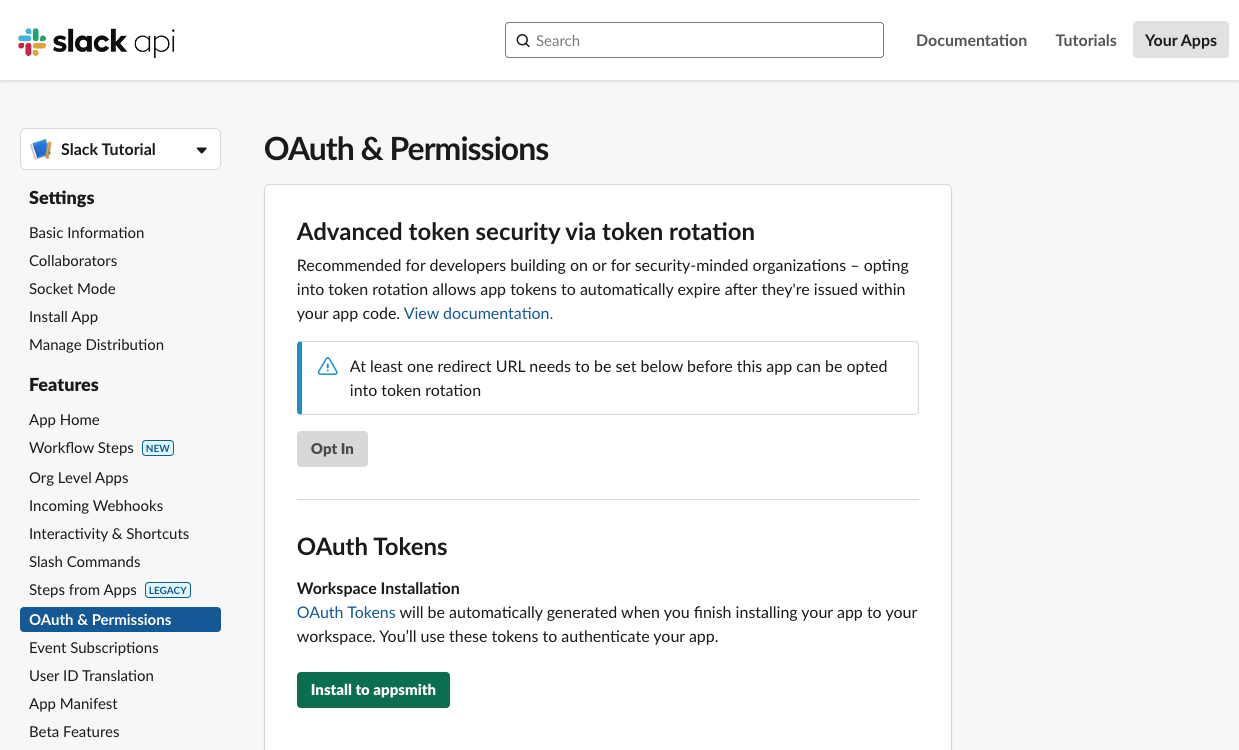
Next you should see the OAuth consent screen, listing your app name and the permissions being requested. Click Allow and then the token will be generated.
Lastly, go to Slack and invite the bot to the channel(s) you want to interact with. Open the channel's settings and go to the Integrations tab. Click Add App, then search for the app you created and add it to the channel. The bot should now be able to add other users to this channel.
Saving Token to Appsmith Datasource
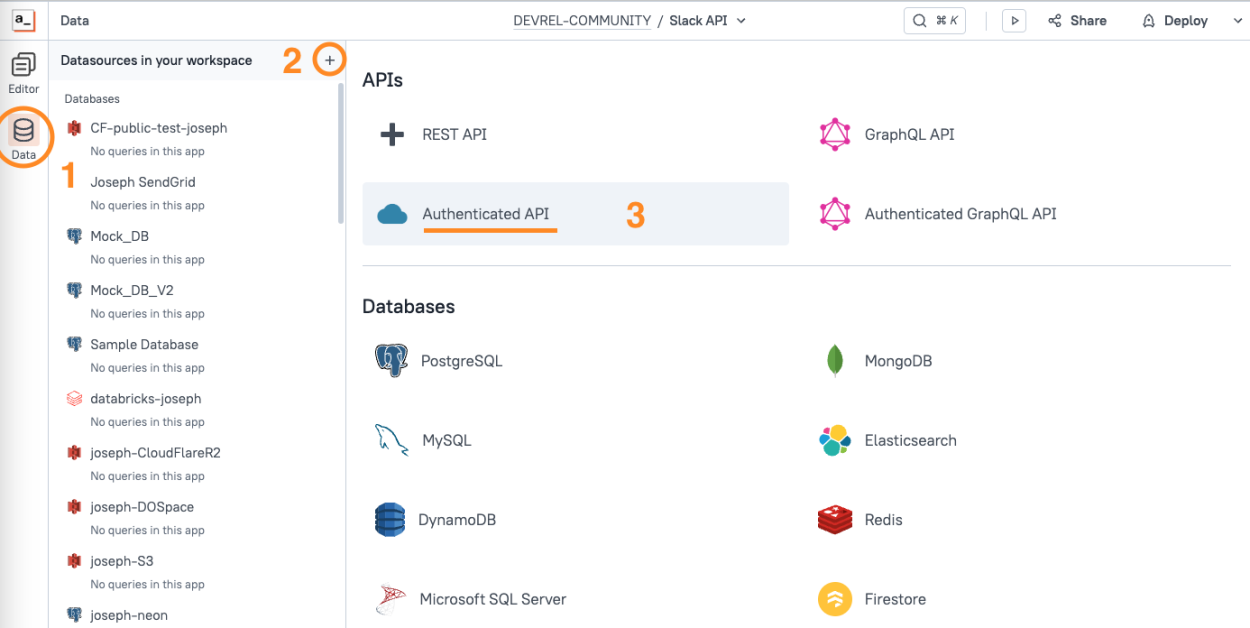
Open a new Appsmith app and click the Data icon on the left sidebar, then select the [+] to add a new Datasource and choose Authenticated API.
Configure the new Datasource as follows:
Name Name the datasource. If working with a team, it helps to include your own name. URL conversations.list Authentication Type Bearer token Bearer Token token from Slack Notice the green lock icon on the Bearer token field. This indicates the field is encrypted on your self-hosted Appsmith server, and will never be sent to client applications. More on security here.
Click SAVE. Your Datasource is now connected and ready to use.
Listing Channels
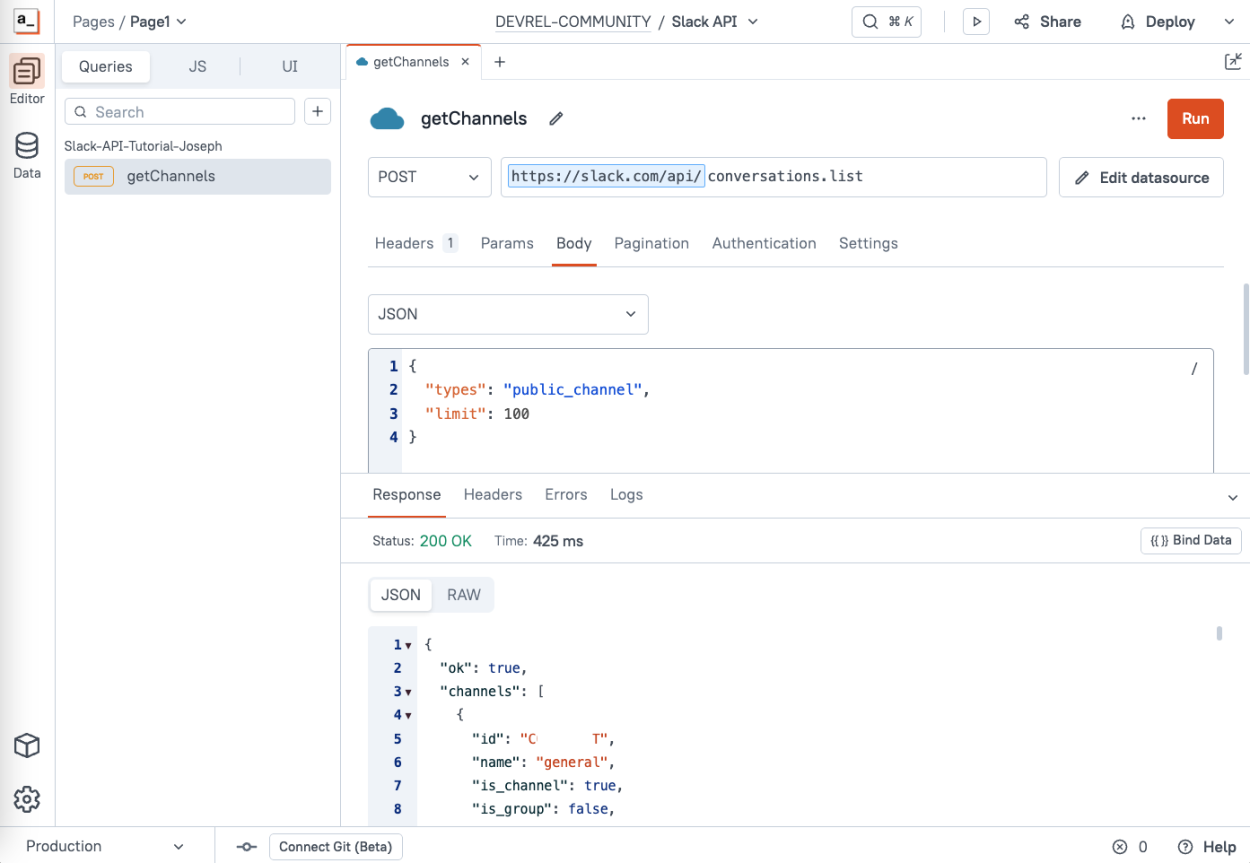
You can now begin adding APIs under the Slack Datasource. If you're still viewing the Datasource, you can use the + New API button in the top right to add an API to it. Or go to the Queries tab and click + to add a new API, then select the Slack Datasource. You can also use
cmd-shift-+(mac) orctrl-shift-+(windows) to quickly add a new API.You should see the URL prefilled with https://slack.com/api/ with a blue bar around it, indicating that this API is part of a Datasource and will inherit the Authentication settings.
Configure the API as follows:
Name getChannels URL conversations.list Method POST Body Type JSON Body { "types": "public_channel", "limit": 100 }Click Run and you should get back a list of the public Channels in your Workspace.
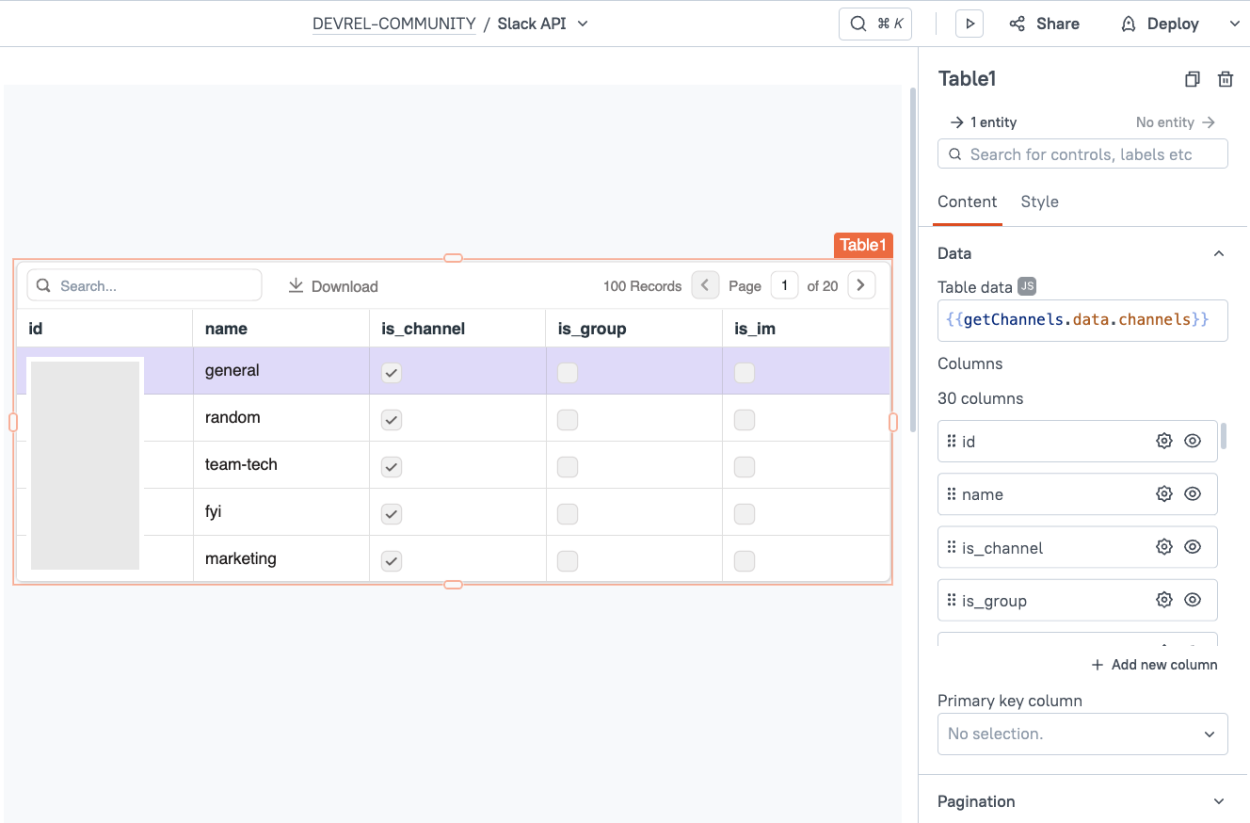
Next, click the UI tab and drag in a table widget. Select the getChannels API to display the response data.
Inviting Users to a Channel
Next, add an Input widget above the table and name it
inp_addUser. Set the label to Slack UserID.Then add a Button widget and set the text to Add User.
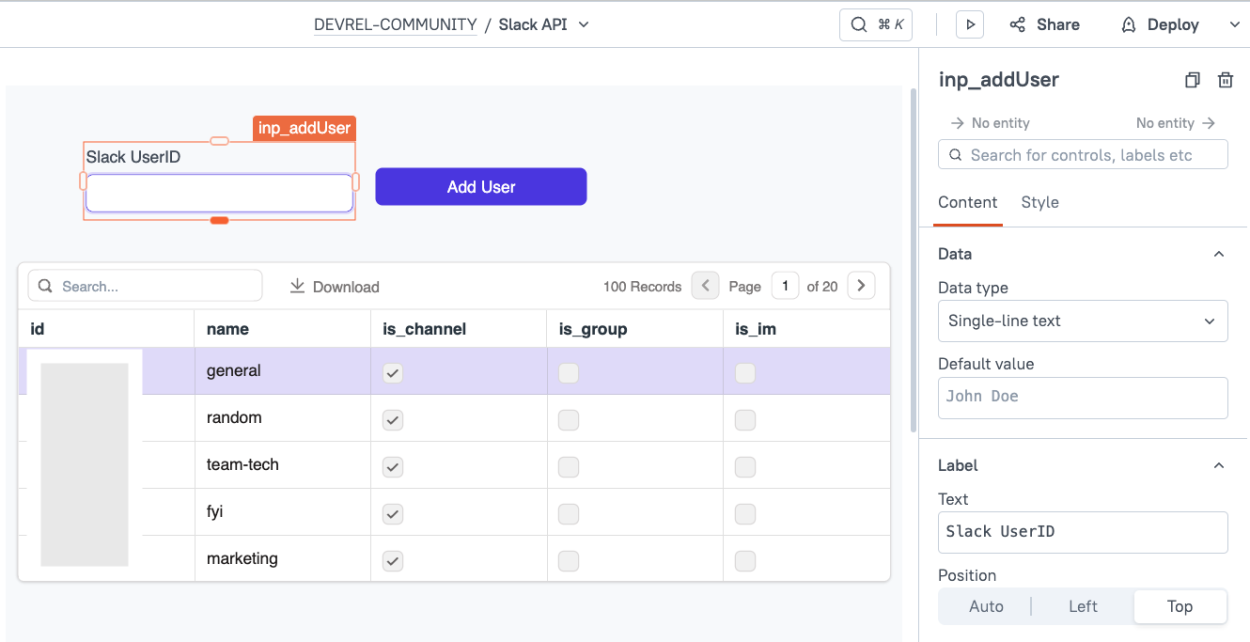
Adding the inviteUser API
Next, add a new API under the Slack Datasource, and name it
inviteUser.Configure the API as follows:
URL conversations.invite Method POST Body Type JSON Body {{ { "channel": Table1.selectedRow.id, "users": inp_addUser.text } }}
Lastly, update the Add User button's onClick event to run the inviteUser API.
The app should be ready to test out.
Go to Slack and copy a member ID from the [...] menu on another user's profile. Then paste that in the input and select a channel from the table that the user is not already in. Click Add User and they should now be added to the Slack Channel.
You can also add the users:read scope and add an API to list users to lookup their name. Be sure to reinstall the app in Slack after changing scopes.
Conclusion
Appsmith's Authenticated API Datasource makes it easy to integrate with the Slack API. The Datasource handles the refresh token for you, ensuring you always have a valid token ready to use, and keeps the token secure on your self-hosted Appsmith server instead of in the client application.


![Thumbnail for the [FTW] Building a Calendar Widget Using Fullcalendar.js & the Google Calendar API 🗓️ video](/sites/default/files/styles/card_image/public/video_thumbnails/fSG_-tS0tUZYnK_KGq62_rsVZejErRRnMuhOL8HEl8k.jpg?itok=eqB2GYof)