

Integrating with the Google Calendar API
Goal
Integrate Appsmith with the Google Calendar API to list and create events.
Prerequisites
An Appsmith Account
A Google Account
Overview
This tutorial will cover:
- Creating a Project and enabling the Google Calendar API
- Creating OAuth2 credentials
- Saving the credentials as an Authenticated API Datasource in Appsmith
- Listing and creating events from Appsmith
Create a Google Project and Enabling the Calendar API
Start out by going to your Google Cloud Console and creating a new project. Enter a name for the project, and click create.
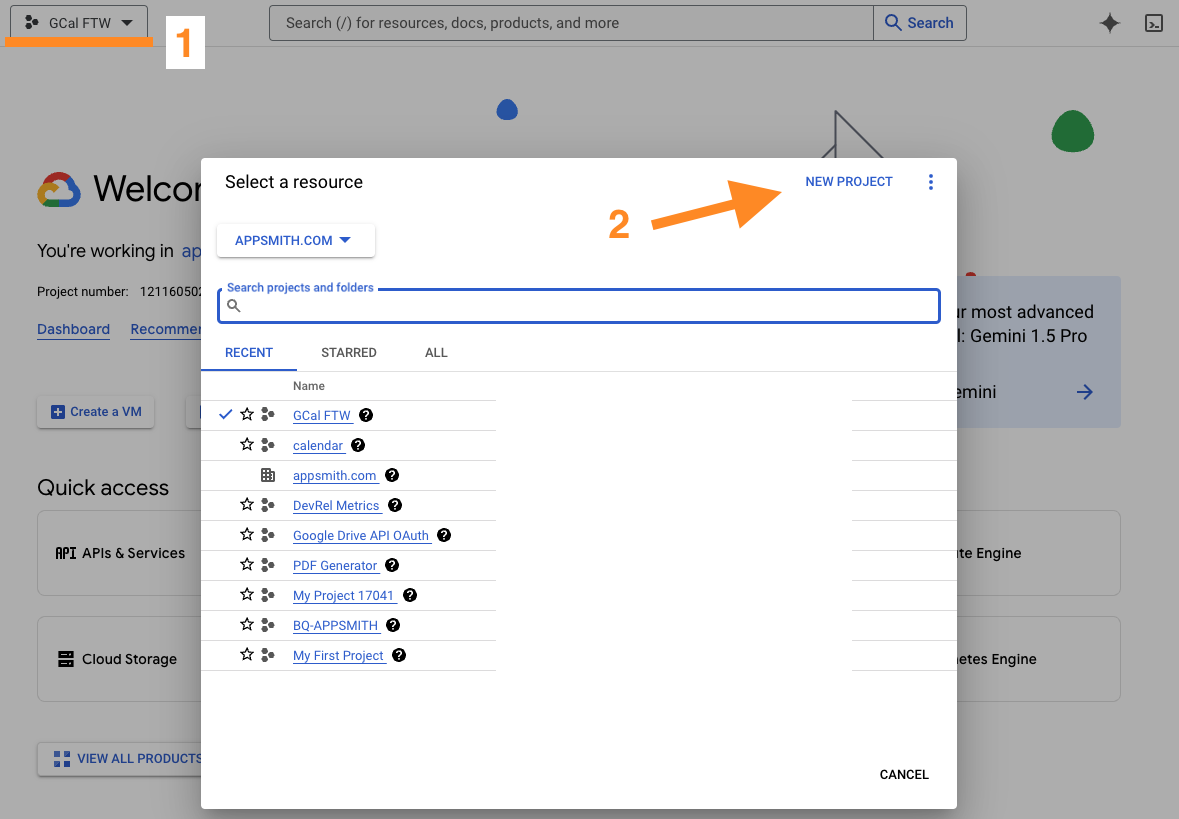
Note: It will take a few seconds for the project to be created, so after you click Create, you may see a different project still selected than the one you just created. Make sure you stop and select the new project before proceeding to the next step.
Once the project is created and selected,
- click the APIs & Services link, then on the next page + Enable APIs and Services.
- Search for "Calendar", select Google Calendar API,
- Click Enable
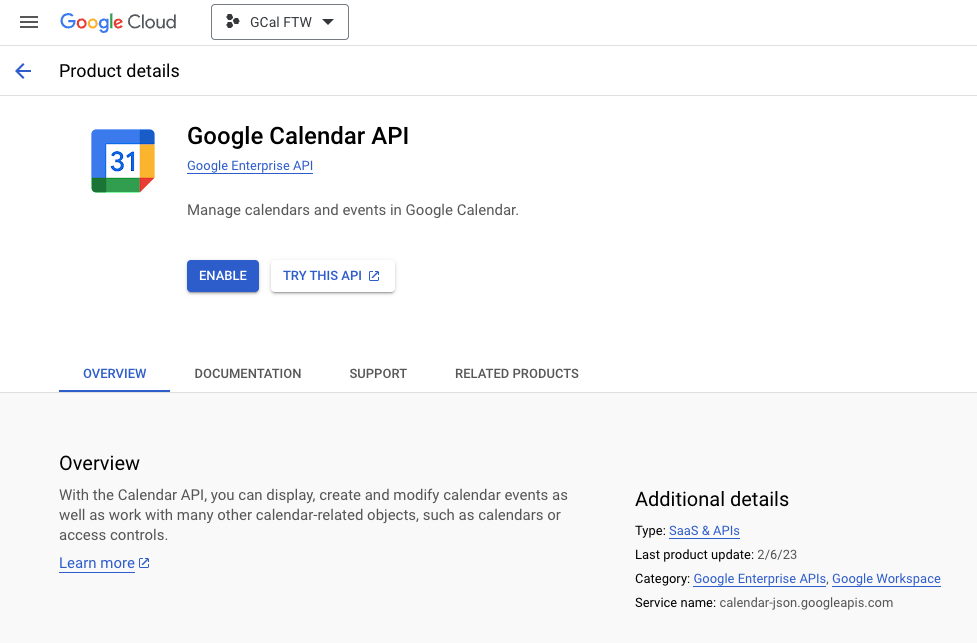
The Calendar API is now enabled for your project. However, this step does not actually create an API key or token. To use the API, you must first create a new set of credentials.
Create OAuth2 Credentials
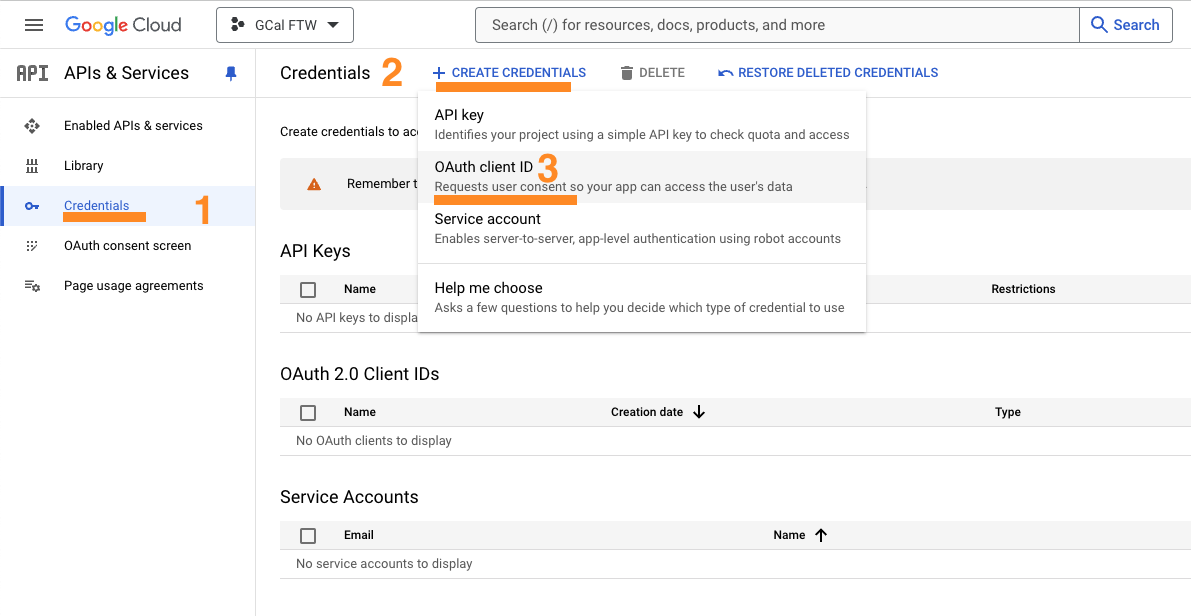
Next, Select Credentials from the left sidebar, then + Create Credentials, and select OAuth2 Client ID.
On the next screen, enter the following settings:
- Application Type :
Web Application - Name: enter a name for the credentials
- Authorized redirect URIs:
https://app.appsmith.com/api/v1/datasources/authorize - Click CREATE
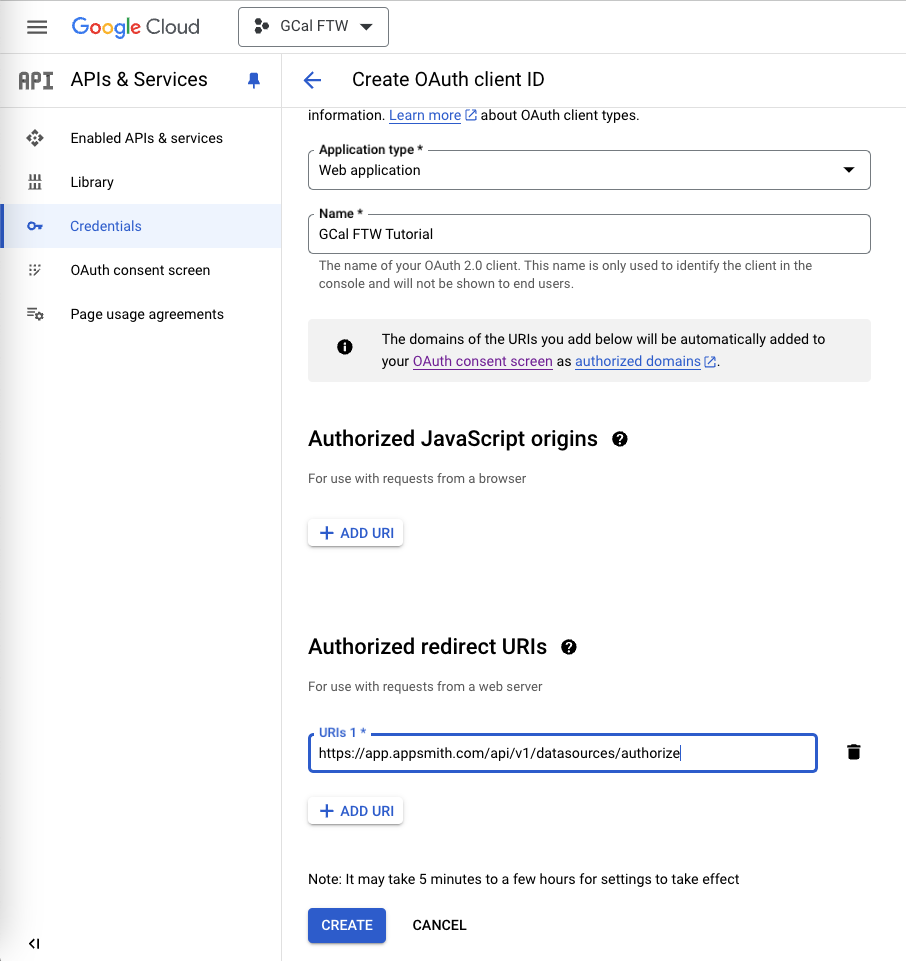
Leave the next screen open so you can copy the new Client ID and Secret.
- Application Type :
Save Credentials to Appsmith Datasource
Now, open the Appsmith app where you want to add the Google Calendar datasource. Click the Data icon on the left sidebar, and add a new Authenticated REST API.
Enter the following settings:
URL https://www.googleapis.com Authentication Type OAuth2 Grant Type Authorization Code Add Access Token To Request Header Header prefix Bearer Acces token URL https://oauth2.googleapis.com/token Client ID YOUR_CLIENT_ID Client secret YOUR_CLIENT_SECRET Scopes https://www.googleapis.com/auth/calendar.events Client Authentication Send client credentials in body Authorization URL https://accounts.google.com/o/oauth2/v2/auth Custom Authentication Parameter #1 access_type : offline Custom Authentication Parameter #2 prompt : consent Note the green lock icon on the Client Secret field. This indicates that the value will be securely encrypted on the Appsmith server, and never sent back to end-users in the application. Even you as the admin will not be able to view it again from Appsmith, but the secret can be copied again from the Google Console later.

Click Save & Authorize. You should be directed to select your Google account, then shown the consent screen.
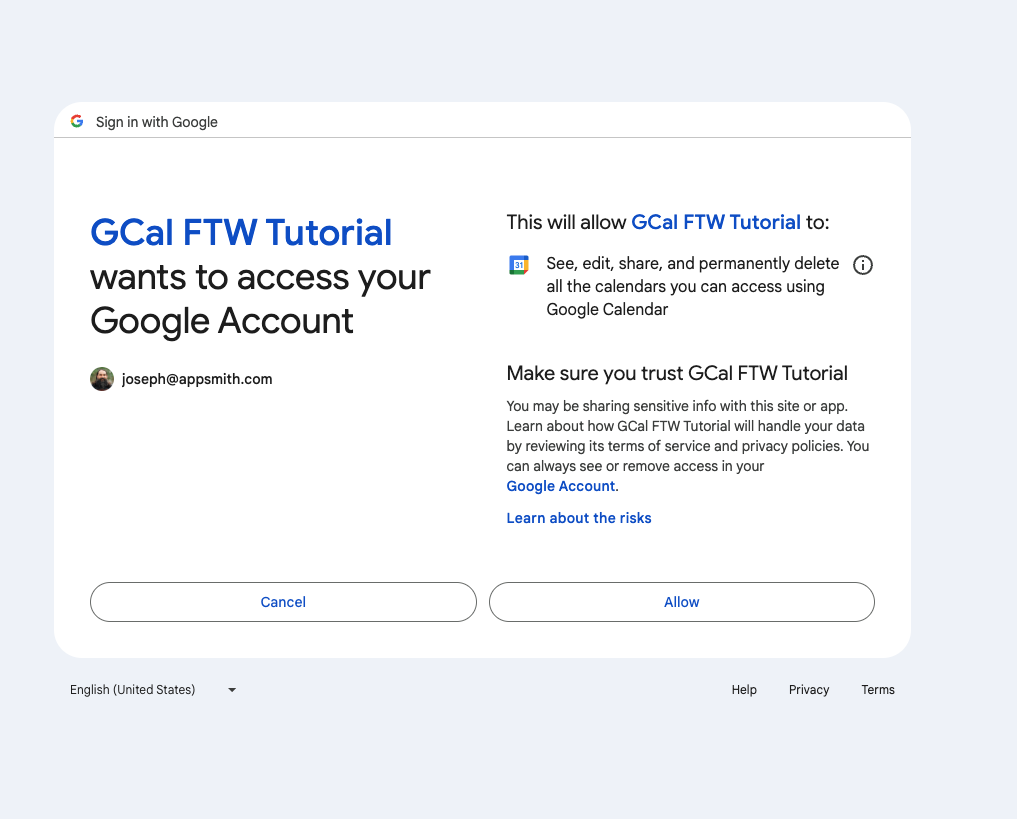
Click Allow, and you should be redirected back to Appsmith and see a toast message that the connection was successful.
Your datasource is now connected and ready to use.
Listing Events
Next, create a new API under the new Google Calendar datasource. If you're still viewing the datasource, you can use the + New API button in the top right. Or go to the Queries pane and click + , then select the datasource. You can also use
cmd-shift-+(mac) orctrl-shift-+(windows) to create a new API.Name the new API getEvents and set the endpoint to :
/calendar/v3/calendars/primary/eventsClick Run and you should get back a 200 response with events from your primary Google Calendar. The events are nested in the response, at
getEvents.data.items.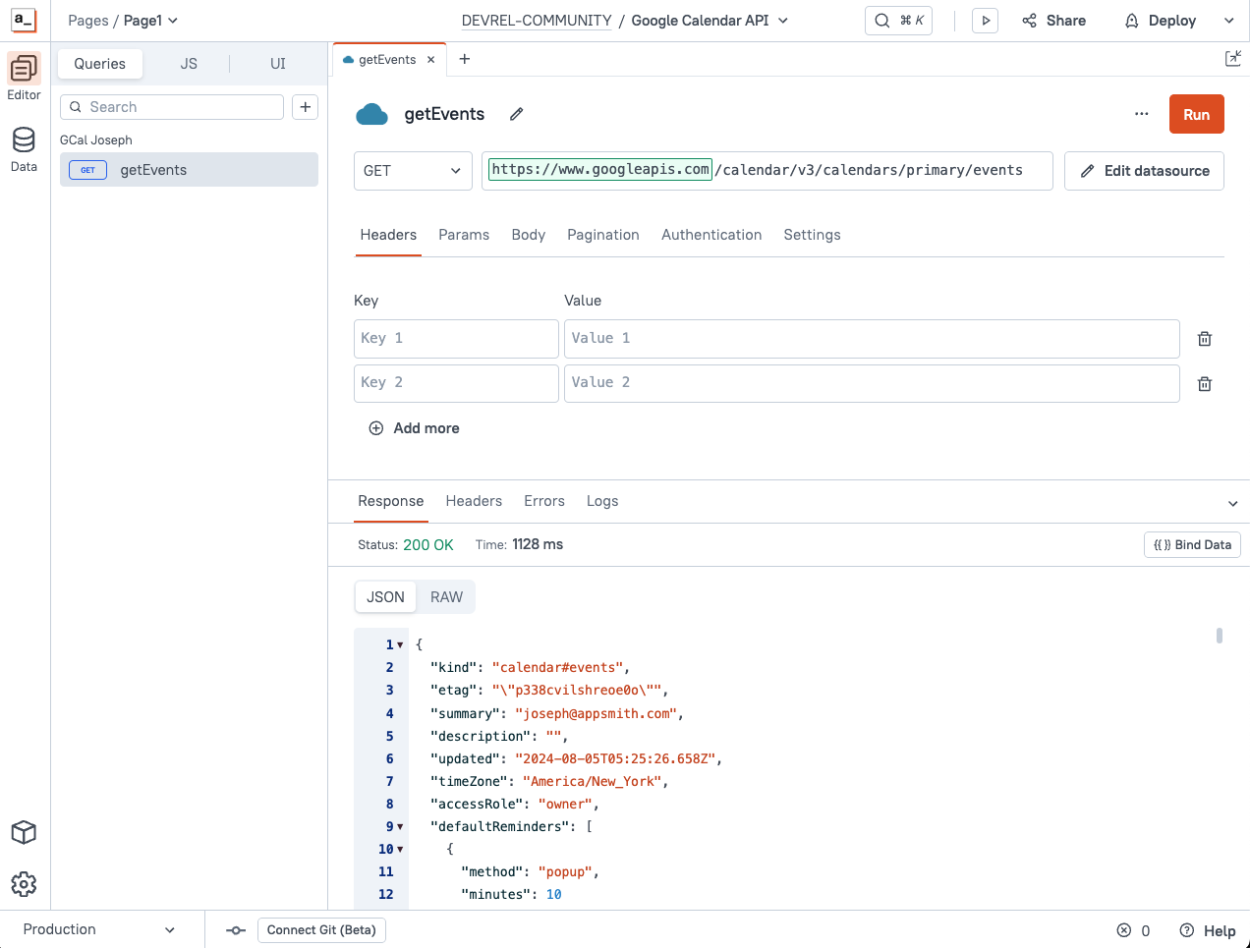
Switch over to the UI tab and drag in a List Widget. Then, in the List Widget properties under Data, set the Items to:
{{getEvents.data.items}}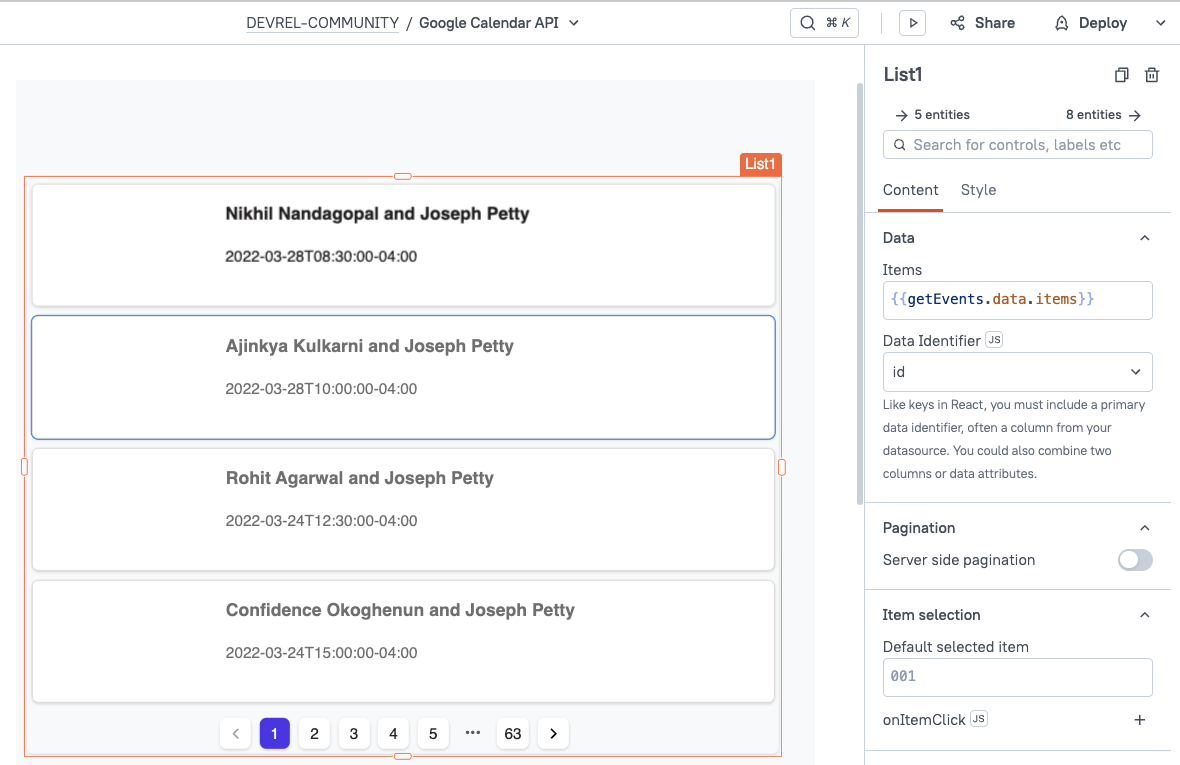
Then update the two text widgets on the first row of the list to display the
currentItem.summaryandcurrentItem.start.dateTime. You can delete the default Image widget that was included with the List.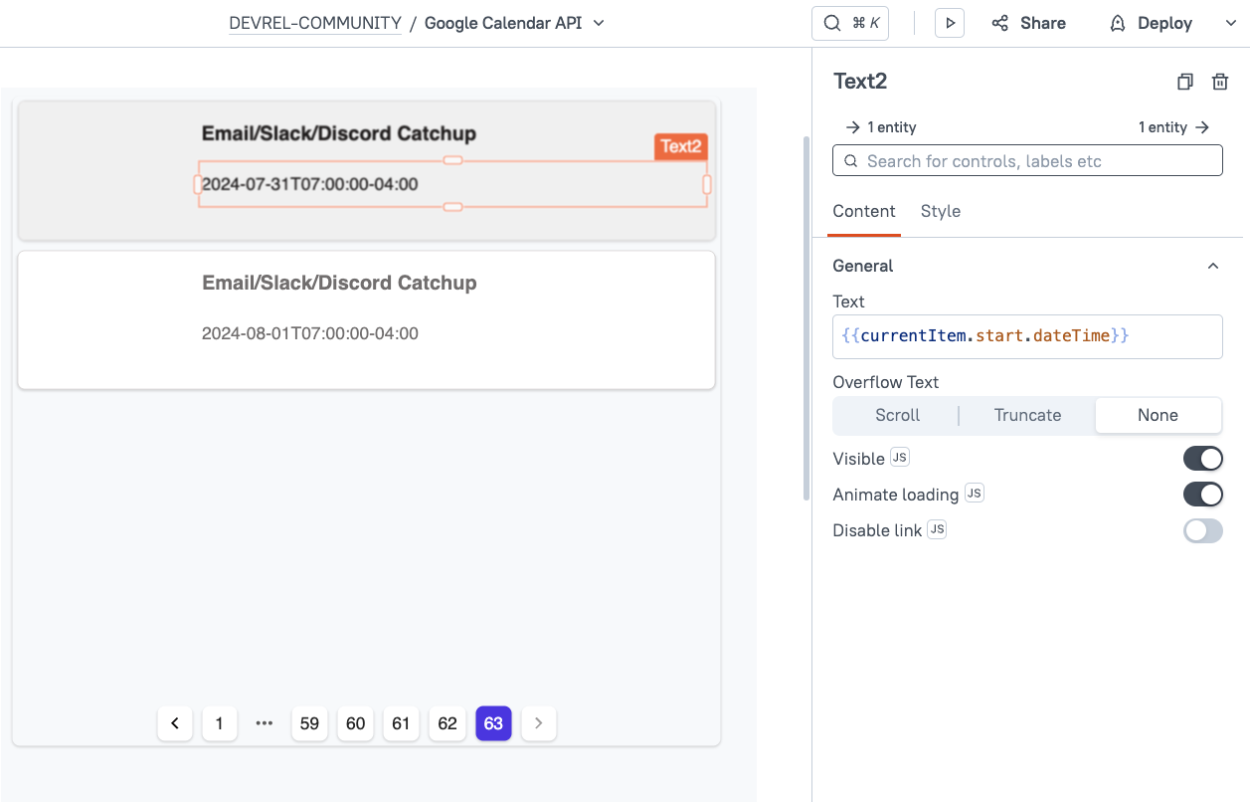
You should now see a list of events from your calendar, starting with the oldest event in your account.
Next, add a date filter by dragging in two DatePicker widgets, and name them
date_startanddate_end. In both widgets, set the onDateSelected Event to run the getEvents query.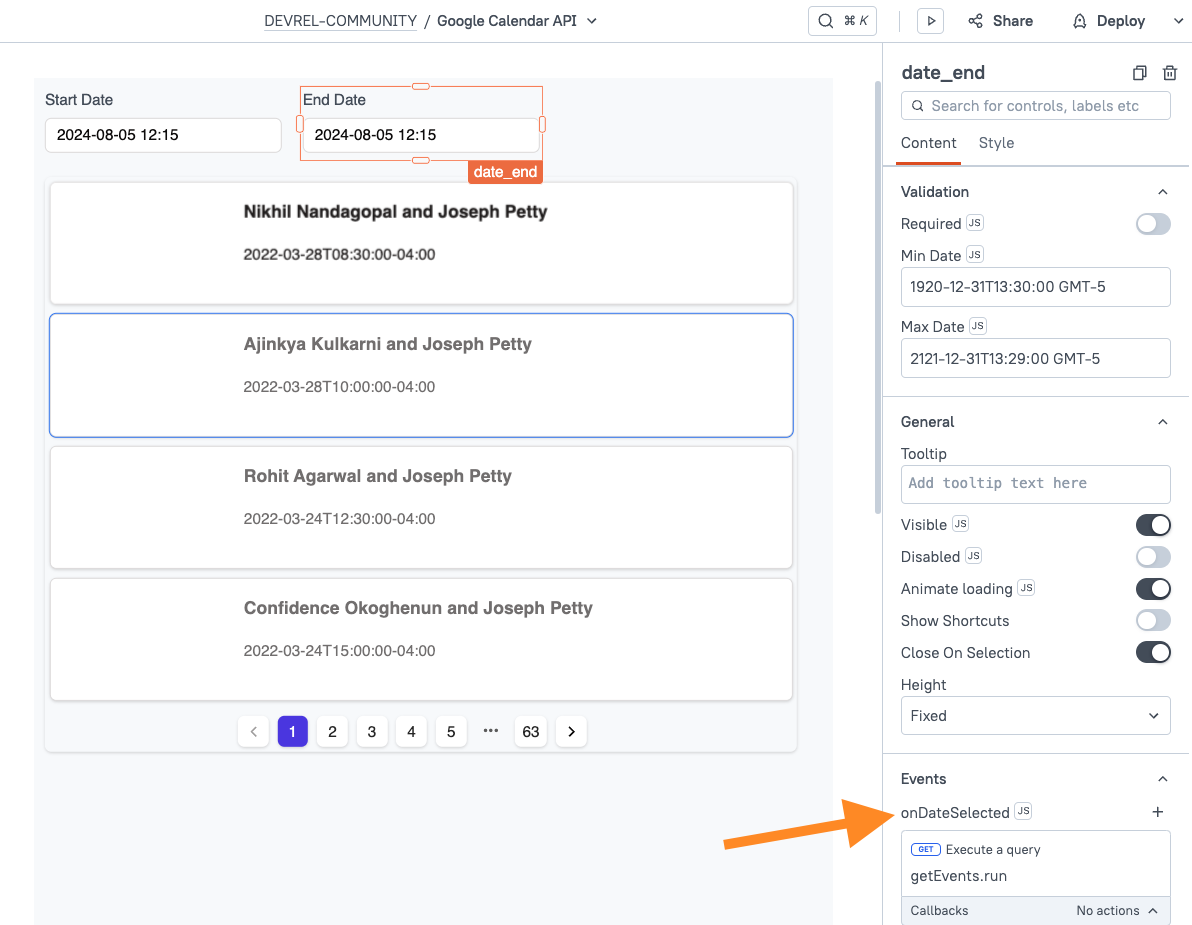
Now just update the getEvents URL and bind the selected dates to the query parameters. The Google Calendar API uses a
minTimeandmaxTimeparameter to filter events. So update the URL with:/calendar/v3/calendars/primary/events?timeMin={{date_start.selectedDate}}&timeMax={{date_end.selectedDate}}&&singleEvents=trueThe
singleEvents=truewill expand recurring events to show each instance as a new record.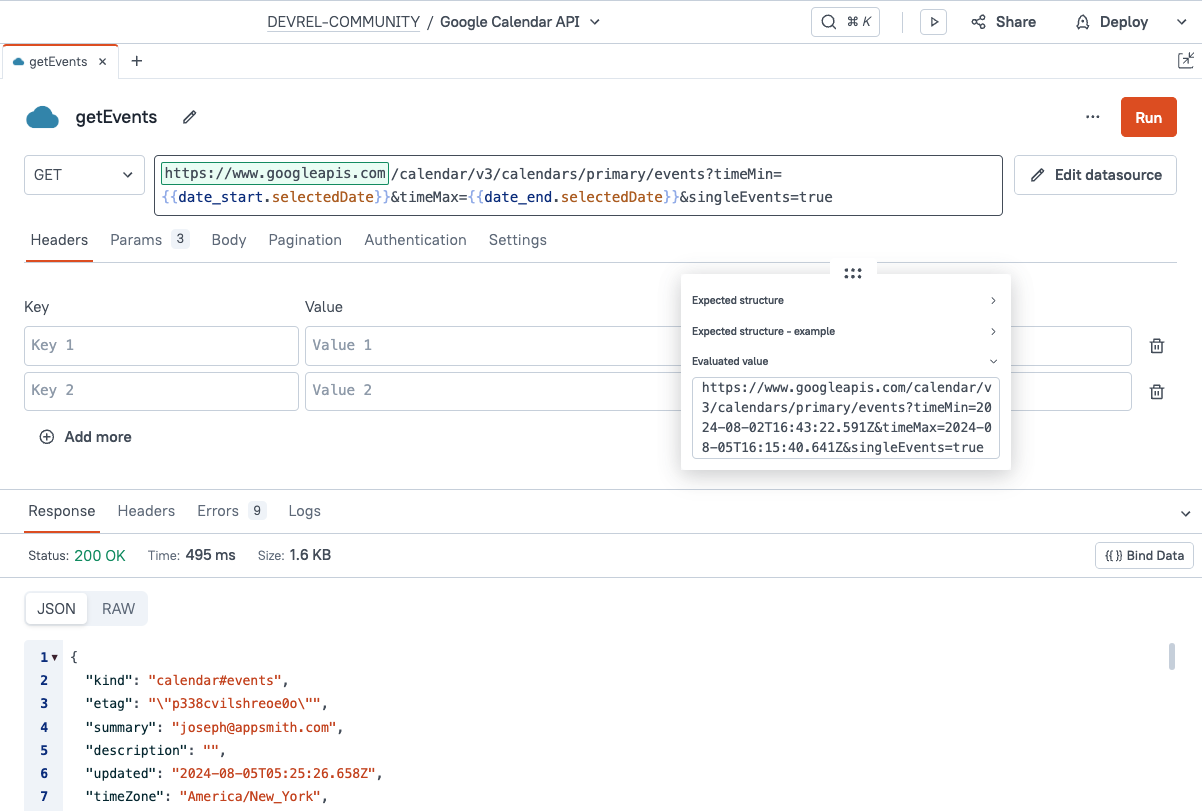
Now head back to the UI and test it out. You should now be able to filter events by the start and end date and see the results update as you change the dates.Creating an Event Form
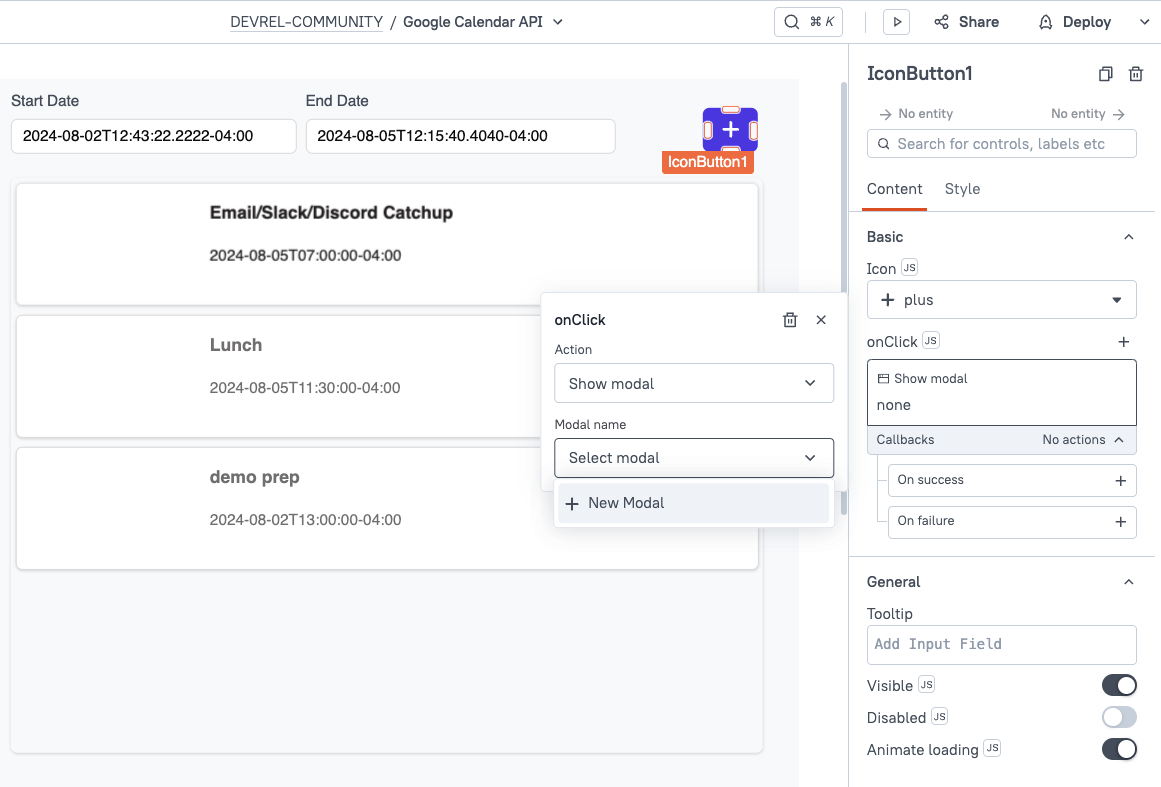
Next, add a form for creating new events. Start by adding an Icon Button and select the plus icon. Then set its onClick action to Show Modal and select + New Modal.
Drag a JSONForm into the new Modal. You can delete the two buttons that came with the modal since the JSONForm has its own Reset and Submit buttons.
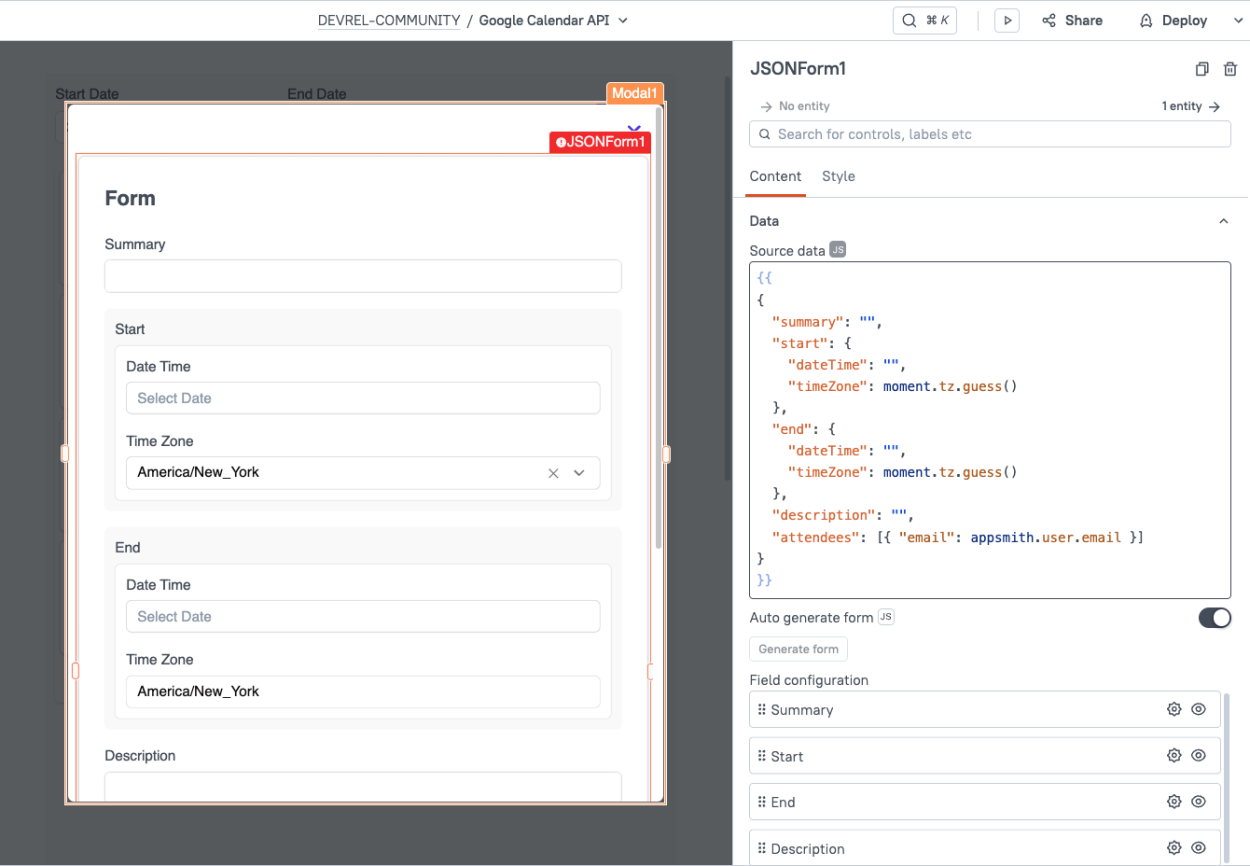
In the JSONForm's properties under Data, click the JS toggle and enter this for the Source data:
{{
{
    "summary": "",
    "start": {
        "dateTime": "",
        "timeZone": moment.tz.guess()
    },
    "end": {
        "dateTime": "",
        "timeZone": moment.tz.guess()
    },
    "description": "",
    "attendees": [{ "email": appsmith.user.email }]
}
}}
Notice how the start and end dates are objects, containing the datetime and a timezone. This is the format required by the Google Calendar API. The
moment.tz.guess()snippet will pre-fill the timezone value for the user.Next, update the settings for both of the timezone fields. The settings are nested, just the data. So first go into the settings for the
startfield, then into itstimezone.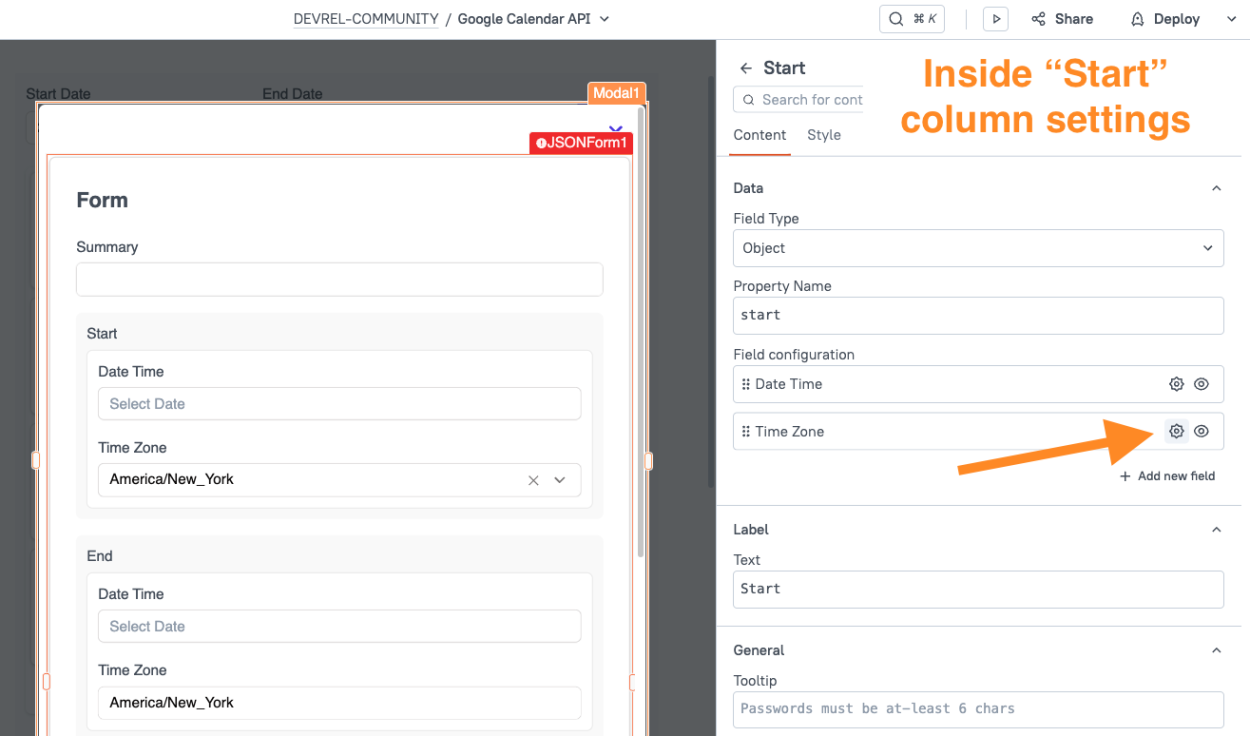
Once you're inside the TimeZone column settings, inside the Start column:
- Change the Field Type to Select
- Change the Select Options to:
{{moment.tz.names().map(o=>({label:o,value:o}))}} - Back out of the column settings and repeat step 1-2 on the
end.timezonecolumn.
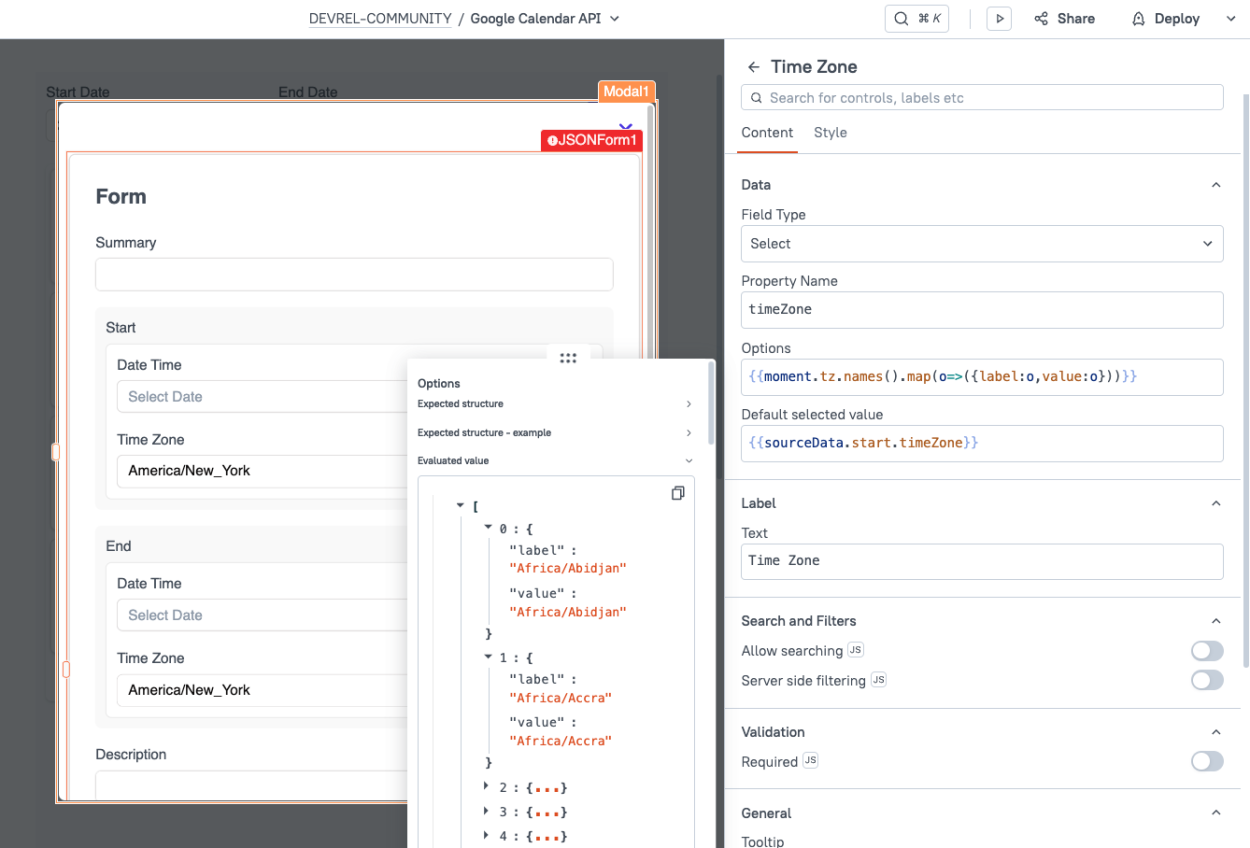
You should now have a dropdown of timezones in the JSONForm.
Saving the Event Form
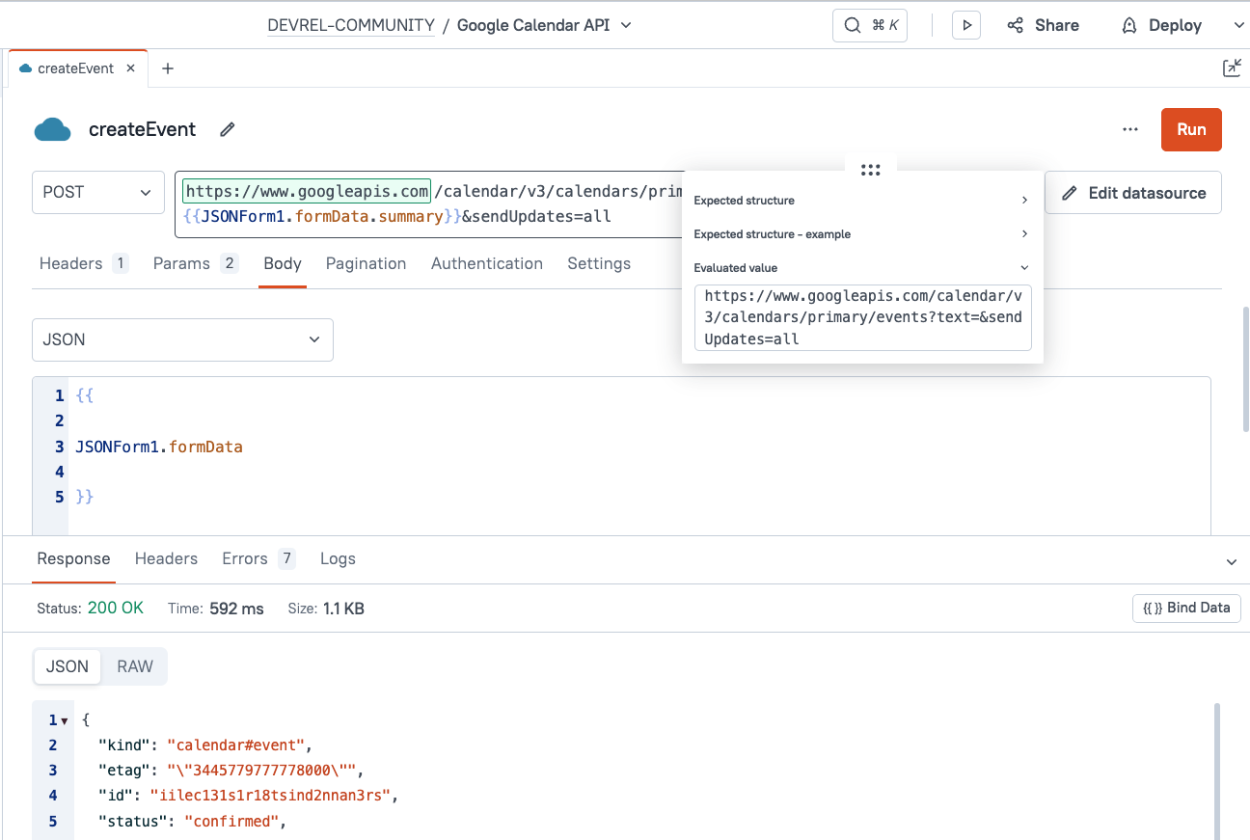
Now create a new API under the Google Calendar datasource, and name it createEvent.
Set the method to
POST, and set the URL to:/calendar/v3/calendars/primary/events?text={{JSONForm1.formData.summary}}&sendUpdates=allThe
sendUpdates=allparameter will send email notifications to all attendees.Next, set the body to:
{{
JSONForm1.formData
}}
Now go back to the UI and enter a start and end date, and a summary, so that you can see it in the API body. Click Run on the createEvent API and you should get back a 200 response with the event details.
Lastly, connect the API to the JSONForm. Start out by selecting the JSONForm and go to the Events section in the widget properties.
- Set the onSubmit Action to run the createEvent API
- Set the onSuccess callback to run the getEvents API
- In the getEvents callback, update the placeholder function with:
closeModal(Modal1.name);
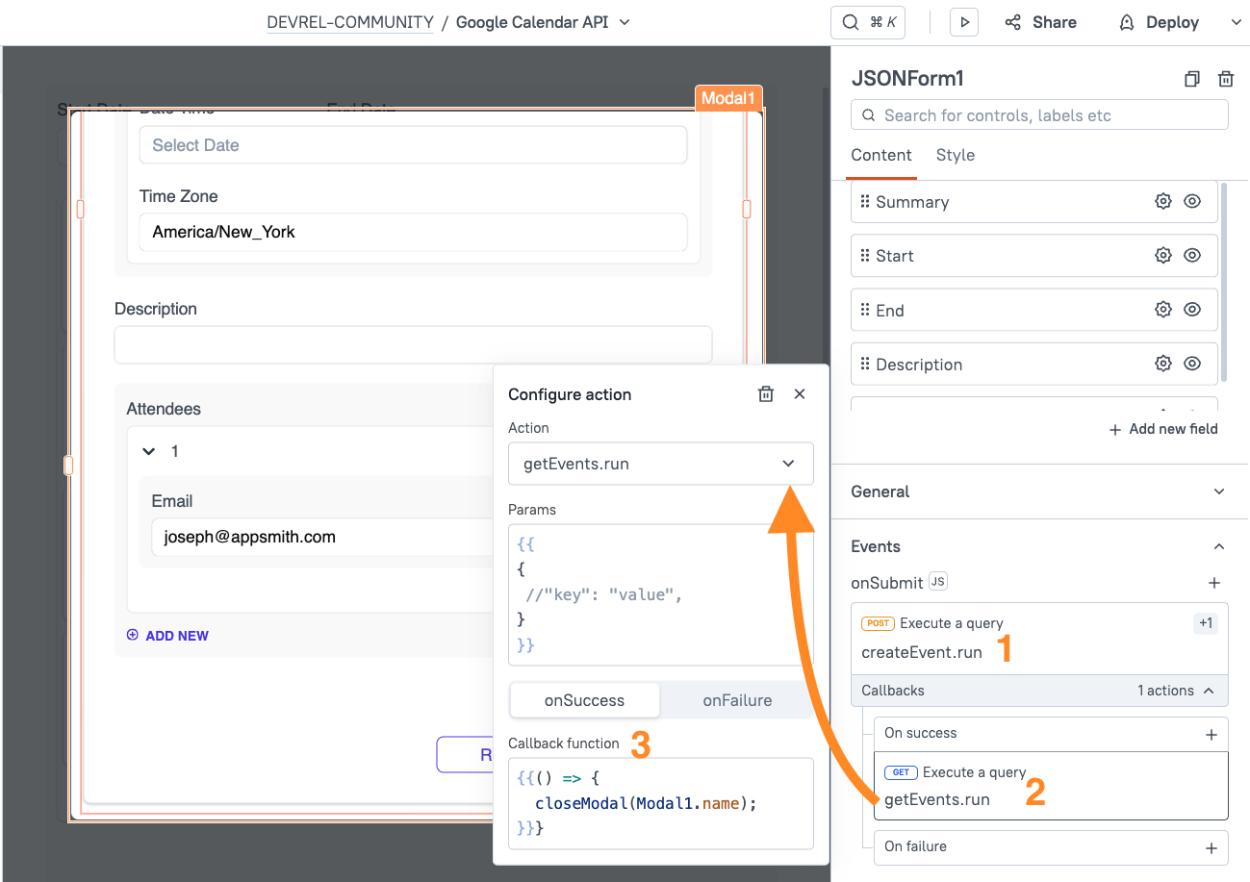
Now the Submit button should also refresh the List Widget and close the Modal.That's it! You can now list and create events using the Google Calendar API. See the Google Calendar API docs for more info on editing and deleting events.
Conclusion
Integrating with the Google Calendar API in Appsmith is easy once you have all the correct settings for the datasource. With this guide, you can quickly get started with listing and creating events from Appsmith, using an Authenticated API Datasource to securely store the credentials on your own self-hosted Appsmith server. For more API tutorials, check out the portal content by integrations page.


I created a data source via a REST API connected to the Google Calendar API in Appsmith. As mentioned, however, the data source keeps asking me to reauthorize every few days. It is getting quite boring
Hi darasabahi, it sounds like your datasource is missing the
access_type : offlinecustom header. It will work without this, but then the refresh token fails.Please try reauthorizing the datasource and add the
access_type : offlineheader under the custom auth headers section.Hello
Thanks for the tutorial.
Is there a way to make it work even in the self hosted solution ? I'm new and i just installed appsmith with docker on my personnal computer and obviously the URI will not work without a server