


Using Javascript Mutation to Create and Use Variables in Appsmith
Goal
Use an editable table widget to manage data in a mutable variable.
Overview
The mutations feature allows you to create variables inside a JSObject, which can be updated in real-time and used within a single page within the application. This is very useful for maintaining temporary data or widget states in a single page. Read the documentation here.
One big advantage of mutations over the storeValue approach is that many operations can be executed in a single or few lines. However, if you want to use a variable across pages in the same application, we recommend using the StoreValue approach.
When to use Mutations
When you need to define logic and perform complex operations only within the same page. Typical examples are Form Wizard, Progress Tracker, Slideshow or a Carousel to showcase multiple images.
How we recommend using Javascript Mutations
Let's take an example of defining CRUD operations around a table widget using a variable declared in a JSObject.
Create a variable and table
On left sidebar, click the + icon next to
Queries/JSand then selectJSObjectsand then enter the code snippet below underTableJSObject.export default { tableData: GetUsers.data, defaultTableData: { "First_Name": "", "Last_Name": "", "Date_Of_Birth": "" } }Then create a table and bind the variable using
TableJSObject.tableData.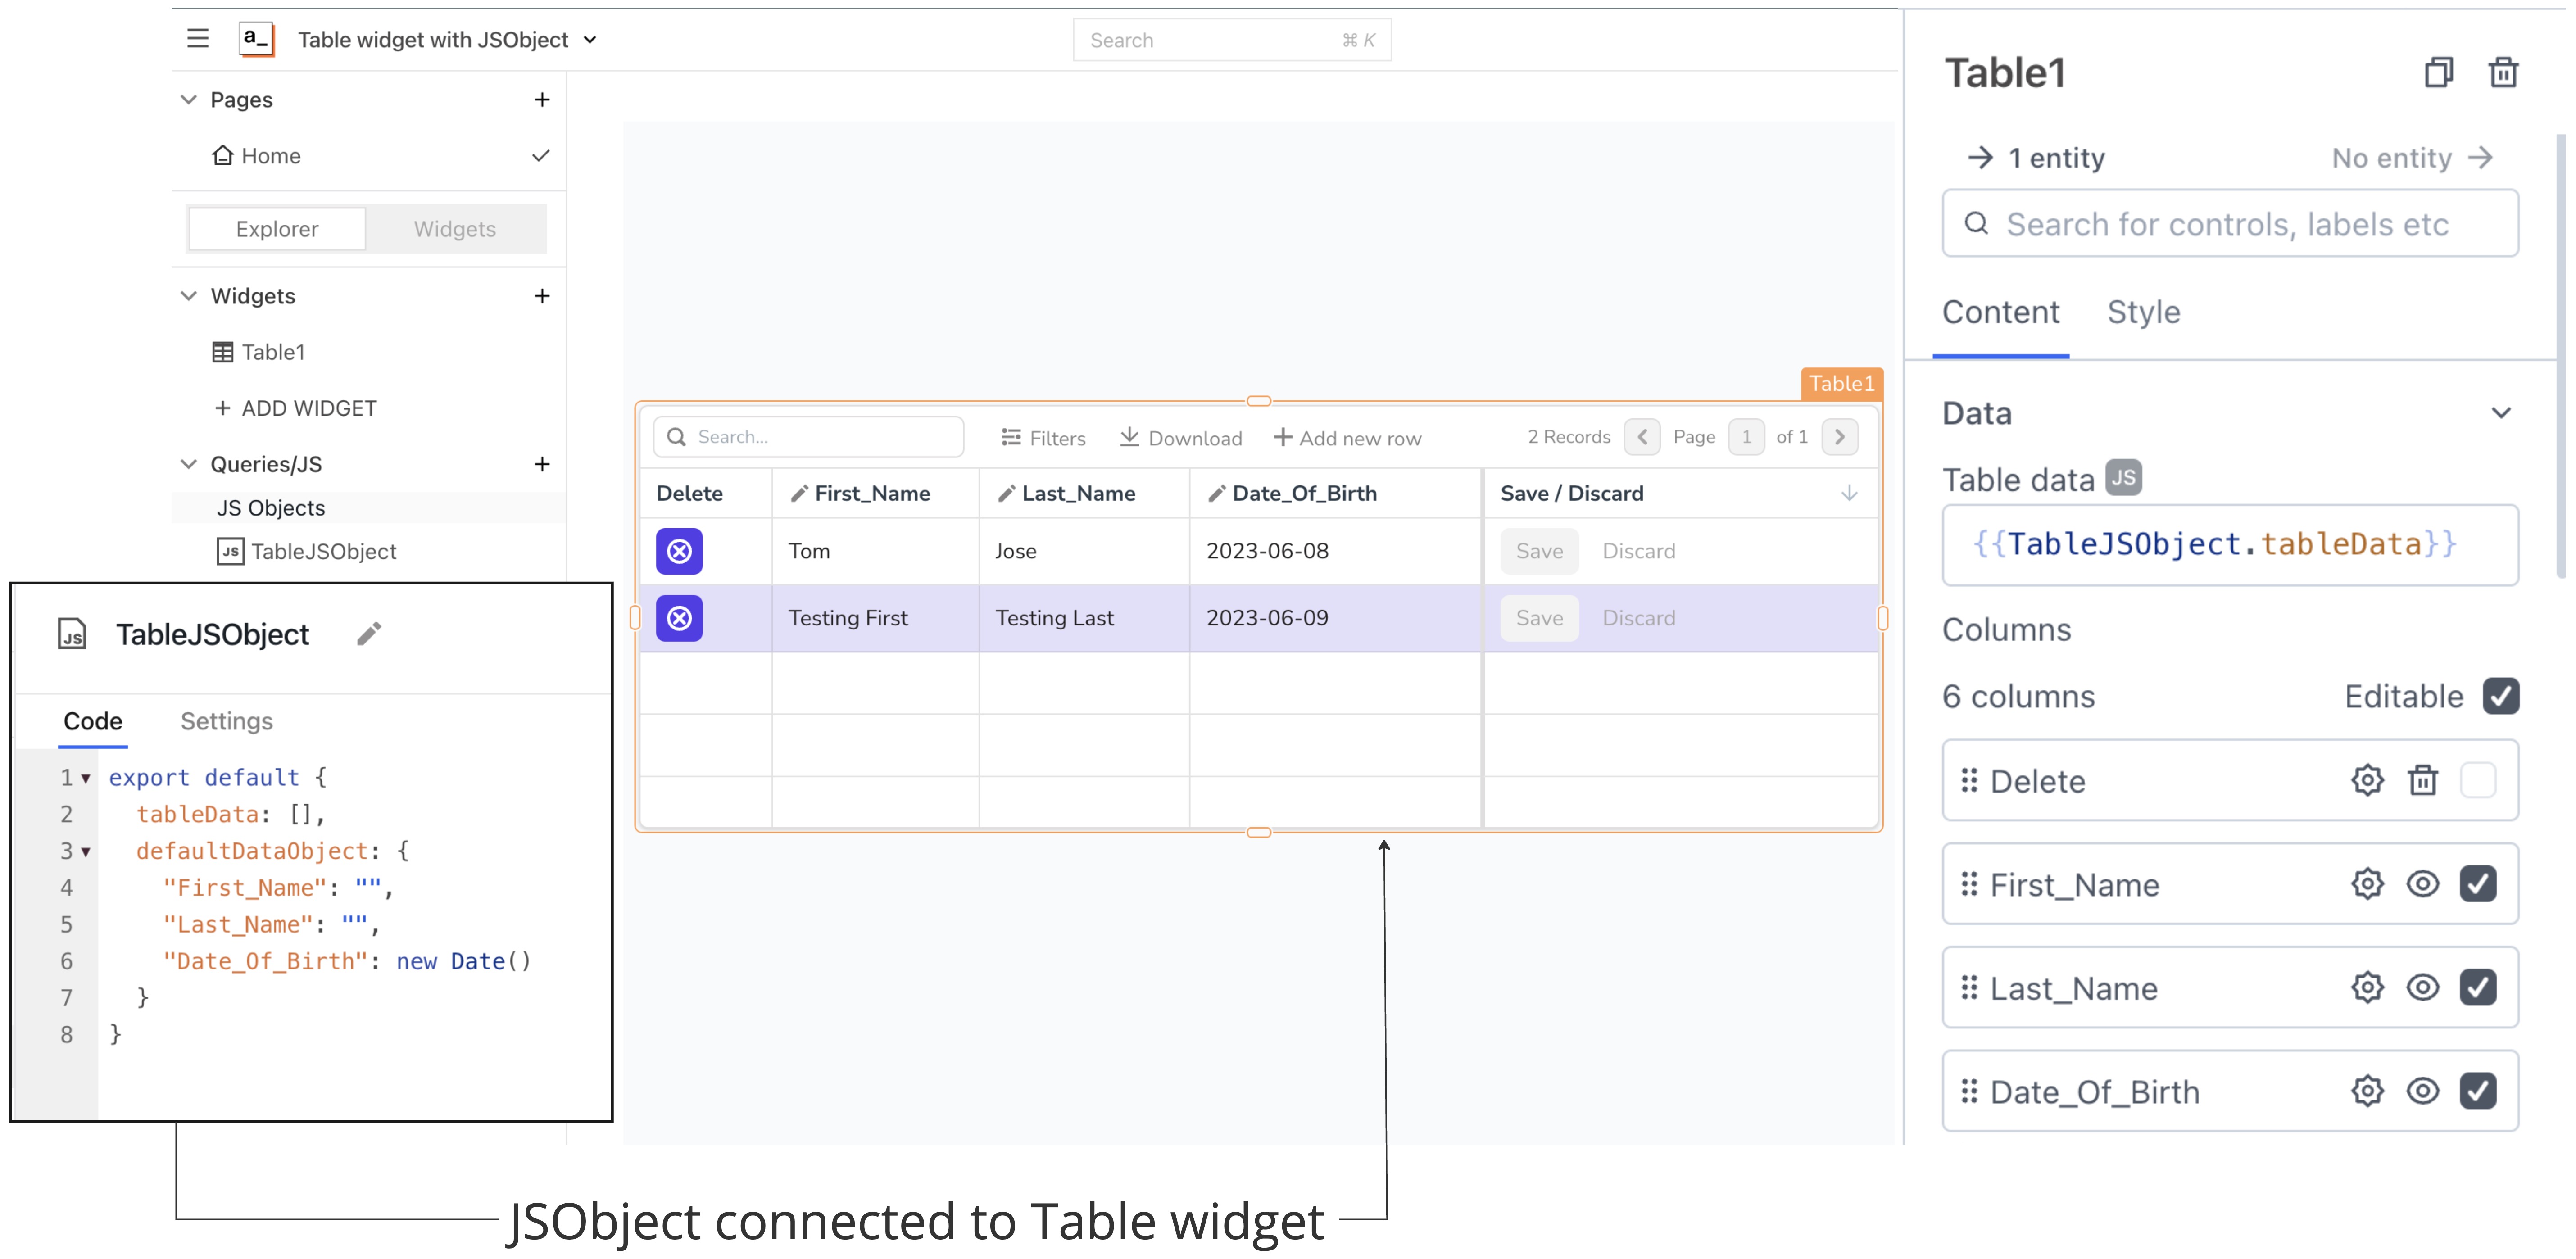
Enable adding a new row
Select the table and you will see the table's properties in the the right sidebar. Scroll down to the
Adding a rowsection and enableAllow adding a Row. In the onSave event, enter the below snippet after enabling JS option.{{TableJSObject.tableData.push(Table1.newRow)}}Also don't forget to configure the
Default Values(if any) for adding a new row.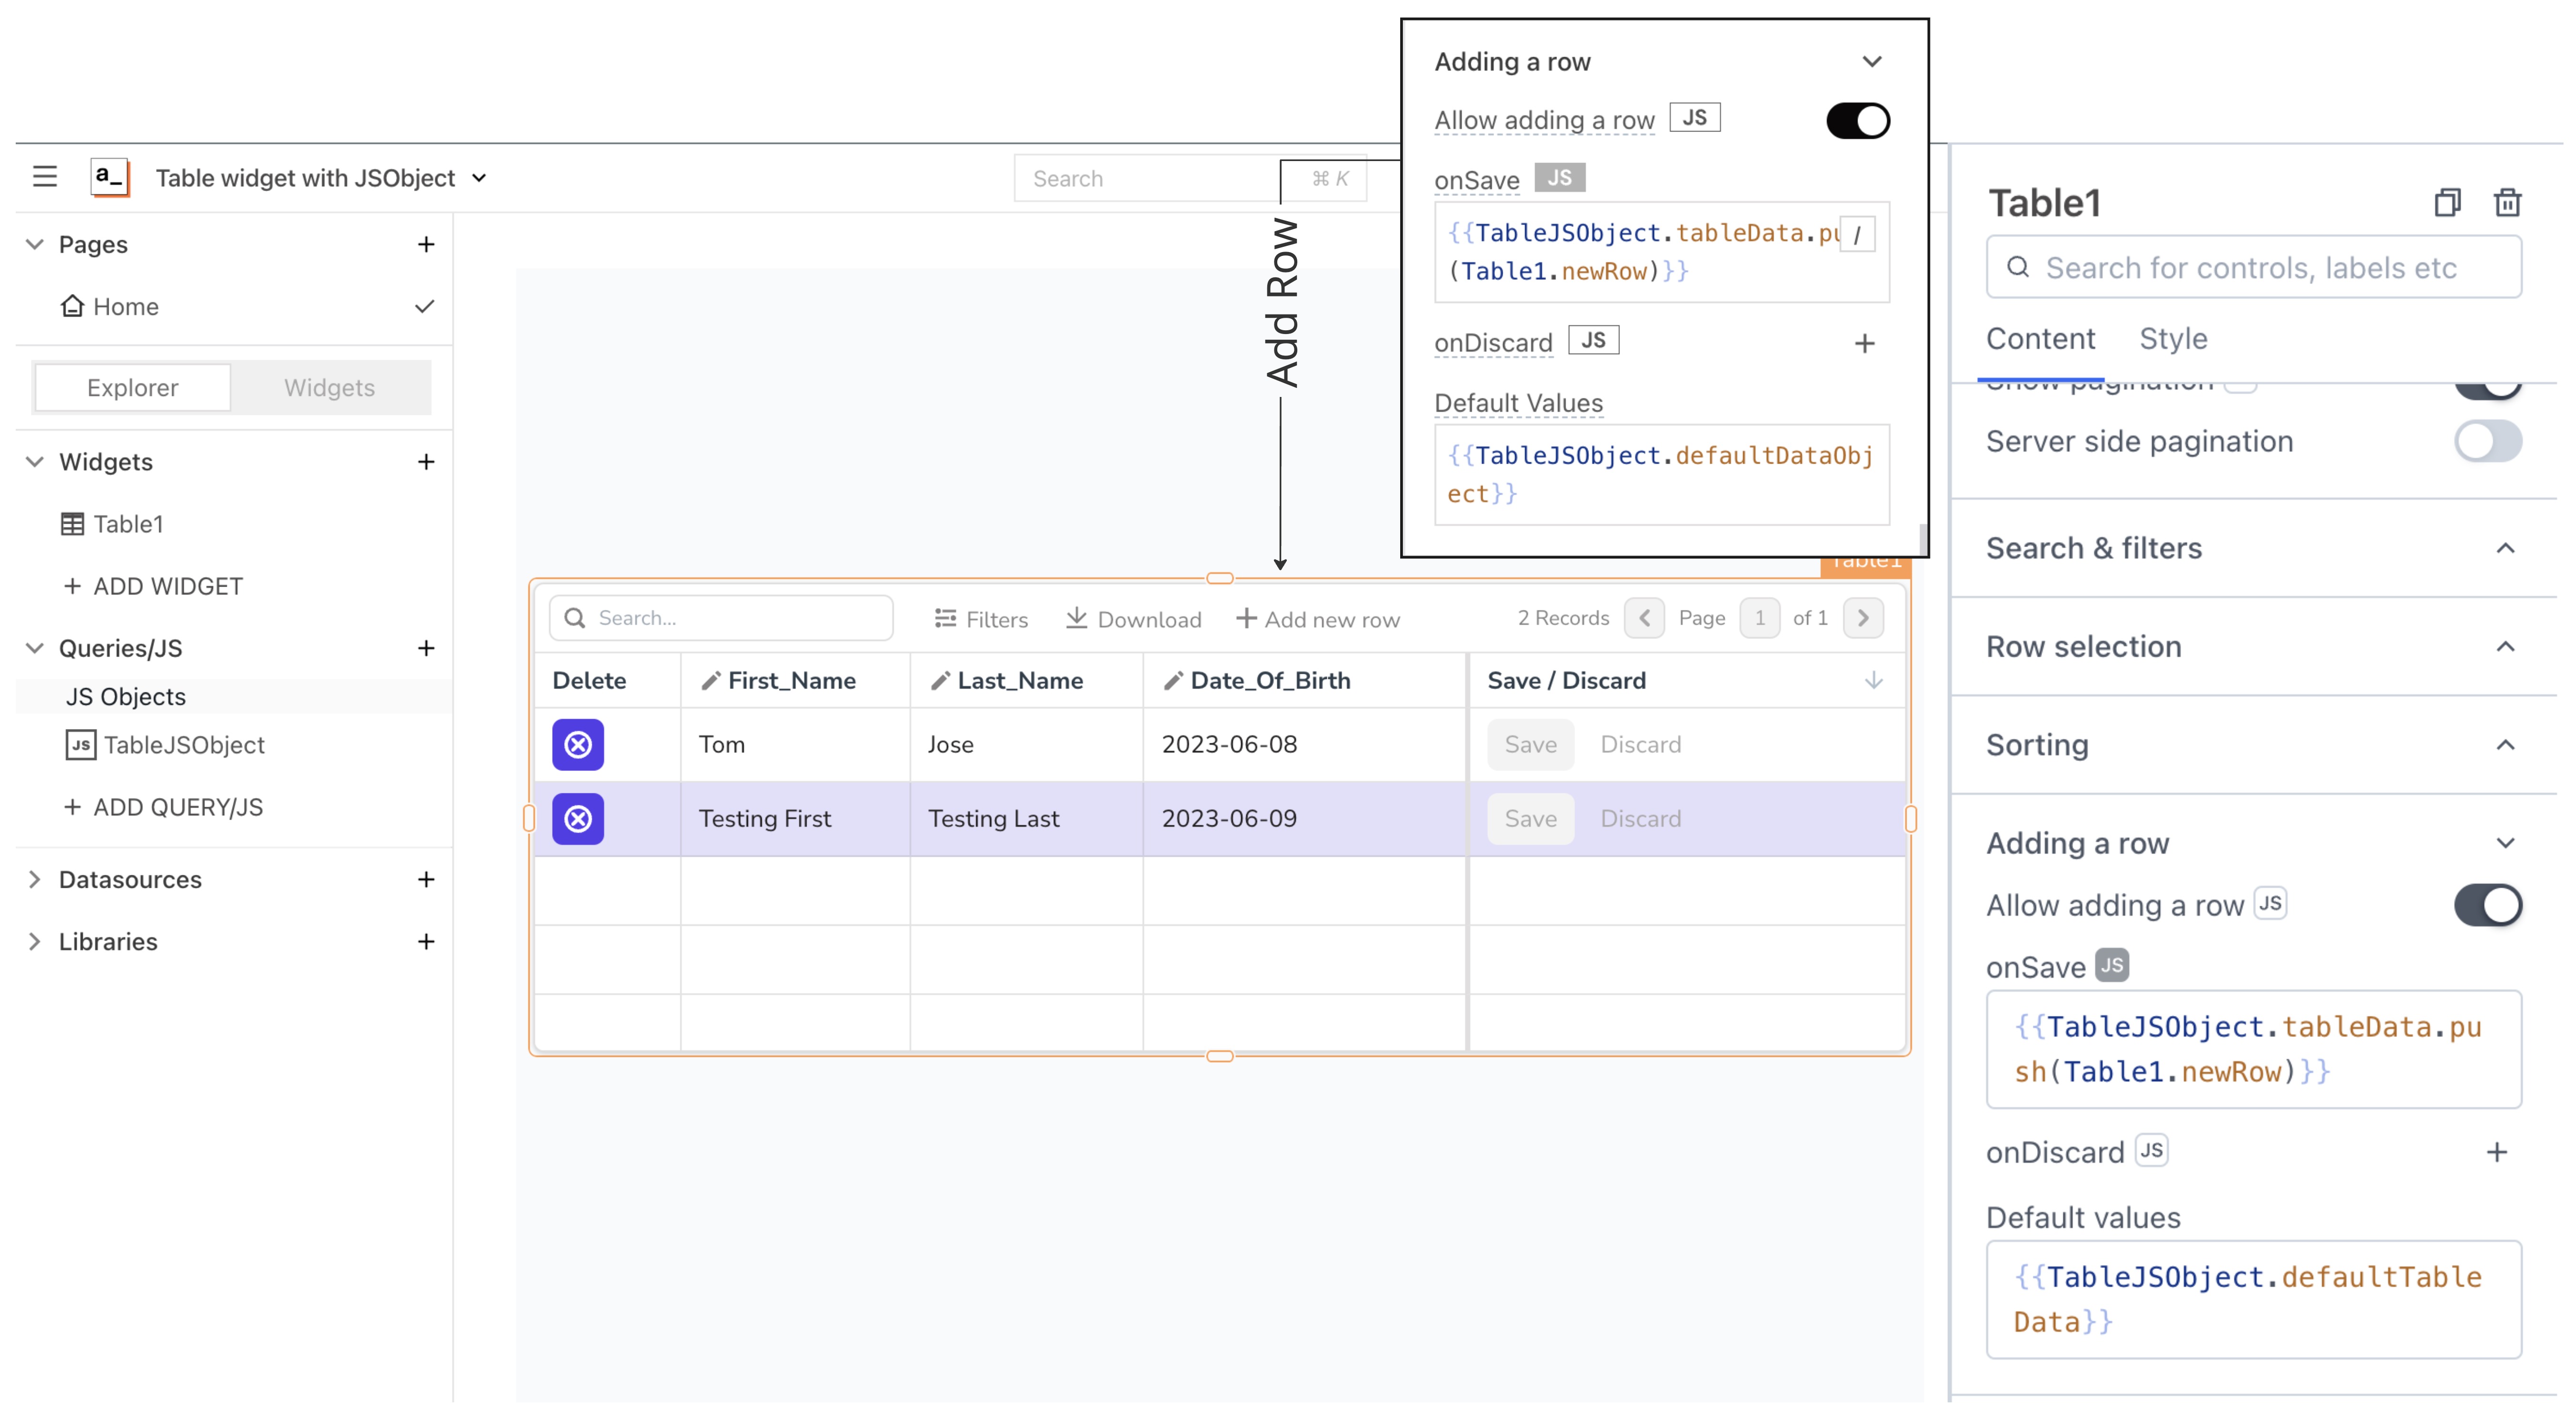
Bind to delete button
Add a new custom column called
Delete. You can set its column type to either a button/icon button. In the settings of this column, you can define the onClick event to remove the particular row from the table data, hence deleting it.
Snippet below.{{TableJSObject.tableData.splice(Table1.triggeredRowIndex, 1)}}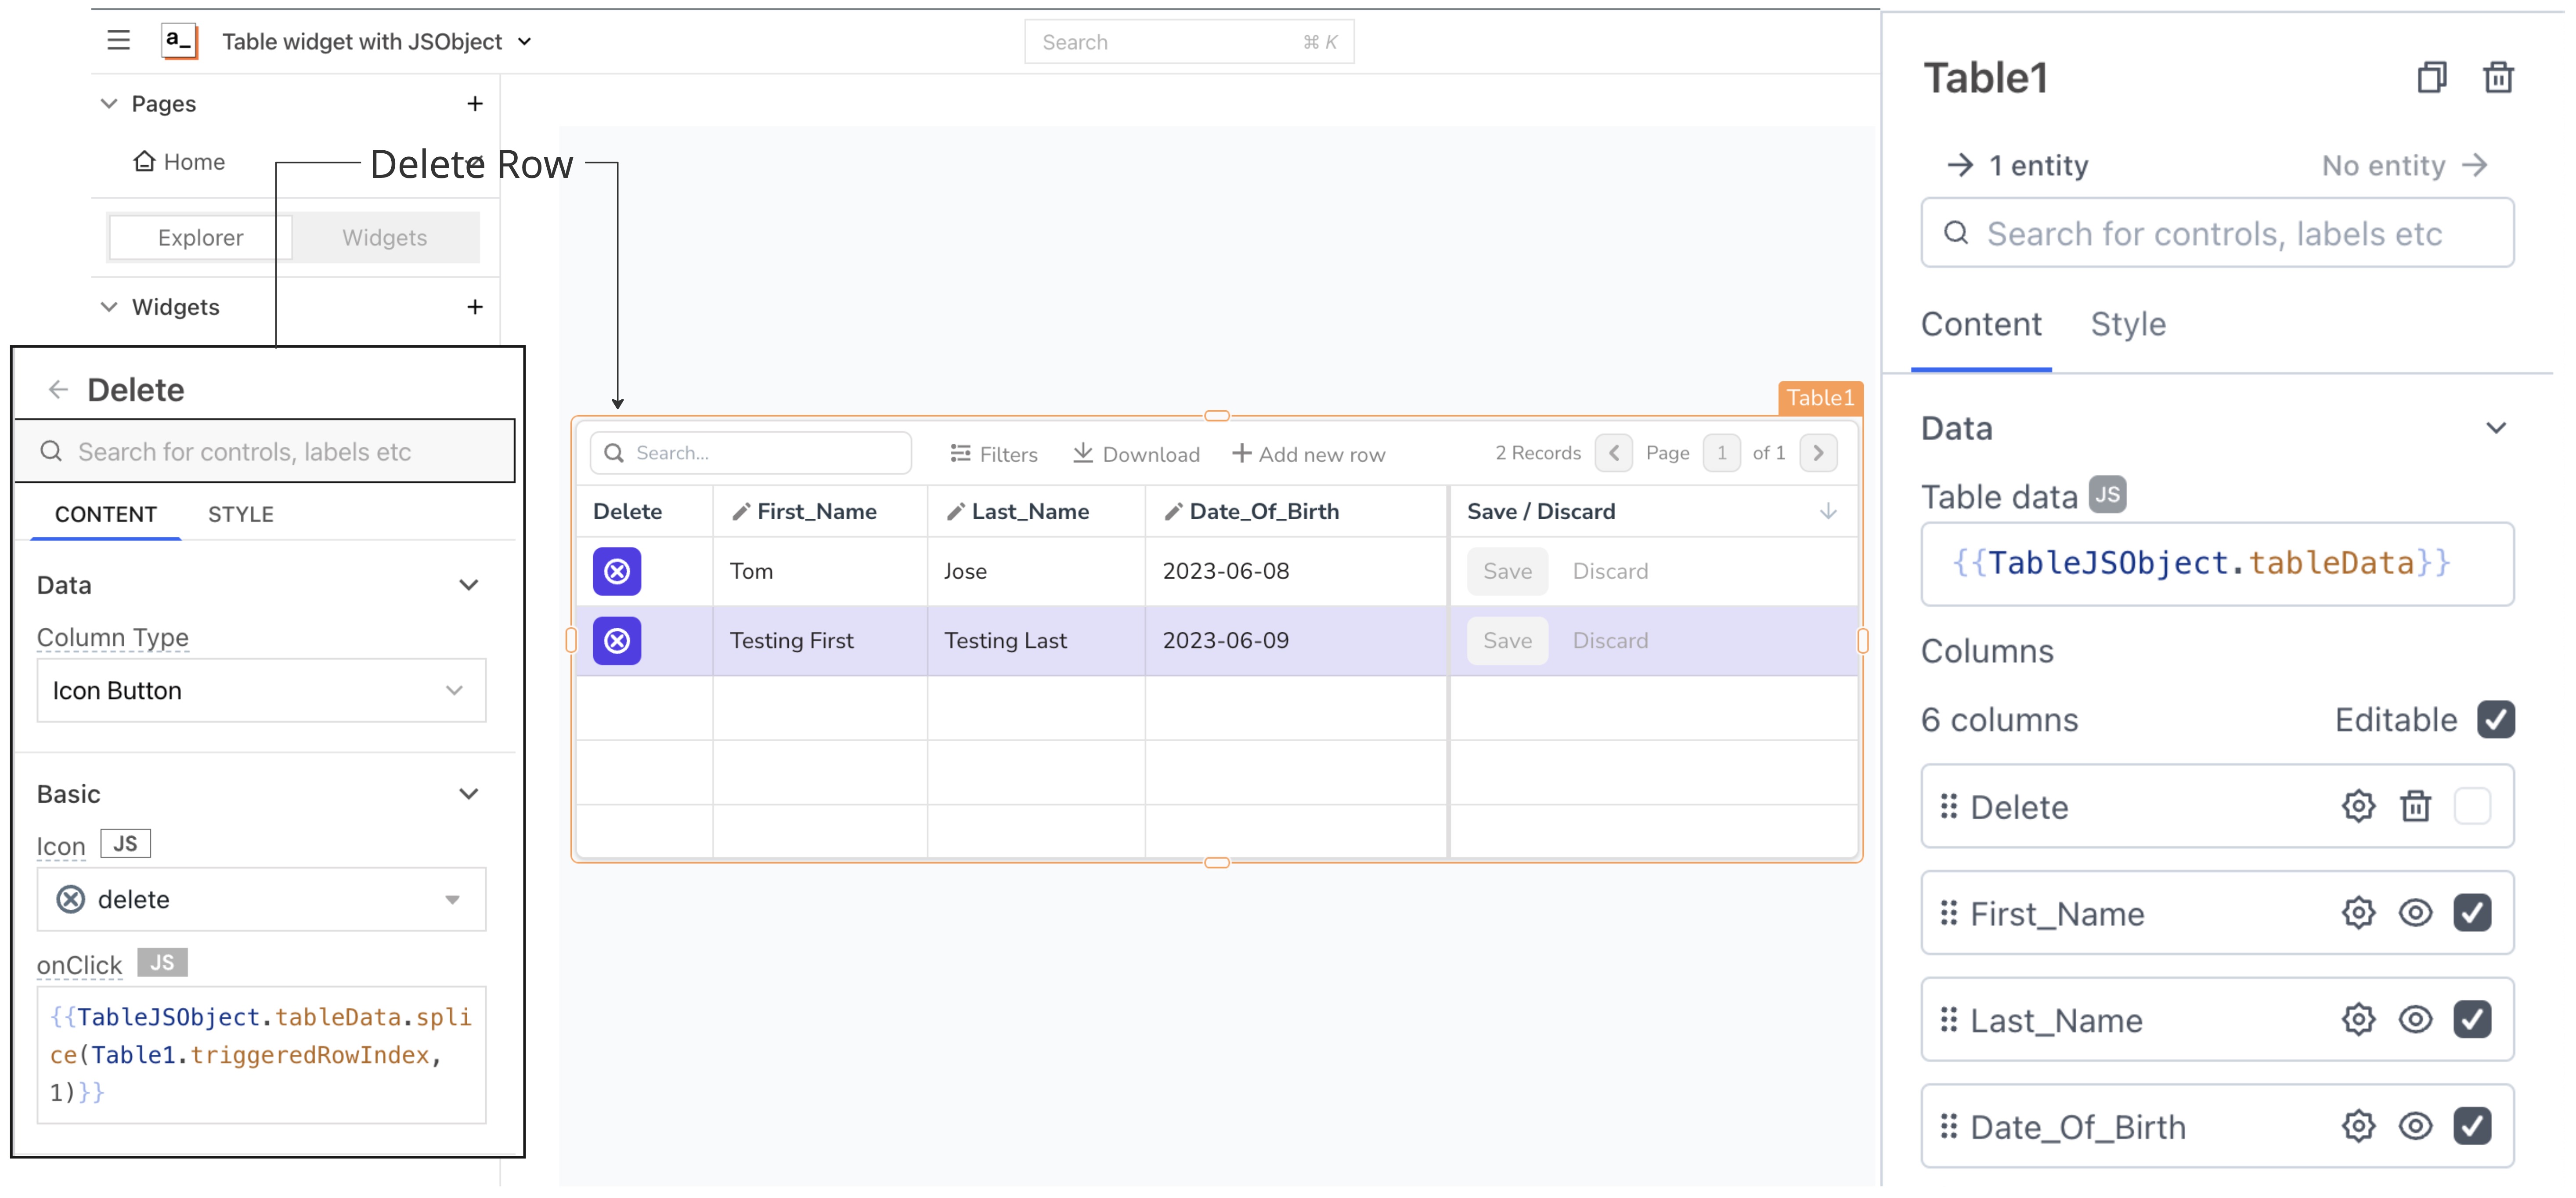
Bind to the save button
Enable the
Editablecheckbox, and choose which all fields you would want to allow editing to. This will automatically add theSave/Discardcolumn to the table. Within this column's settings, you can configure the onSave event to save all the updated rows in the Table widget into the table data.{{Table1.updatedRowIndices.forEach((item, index) => { TableJSObject.tableData[item] = Table1.updatedRows[index].allFields })}}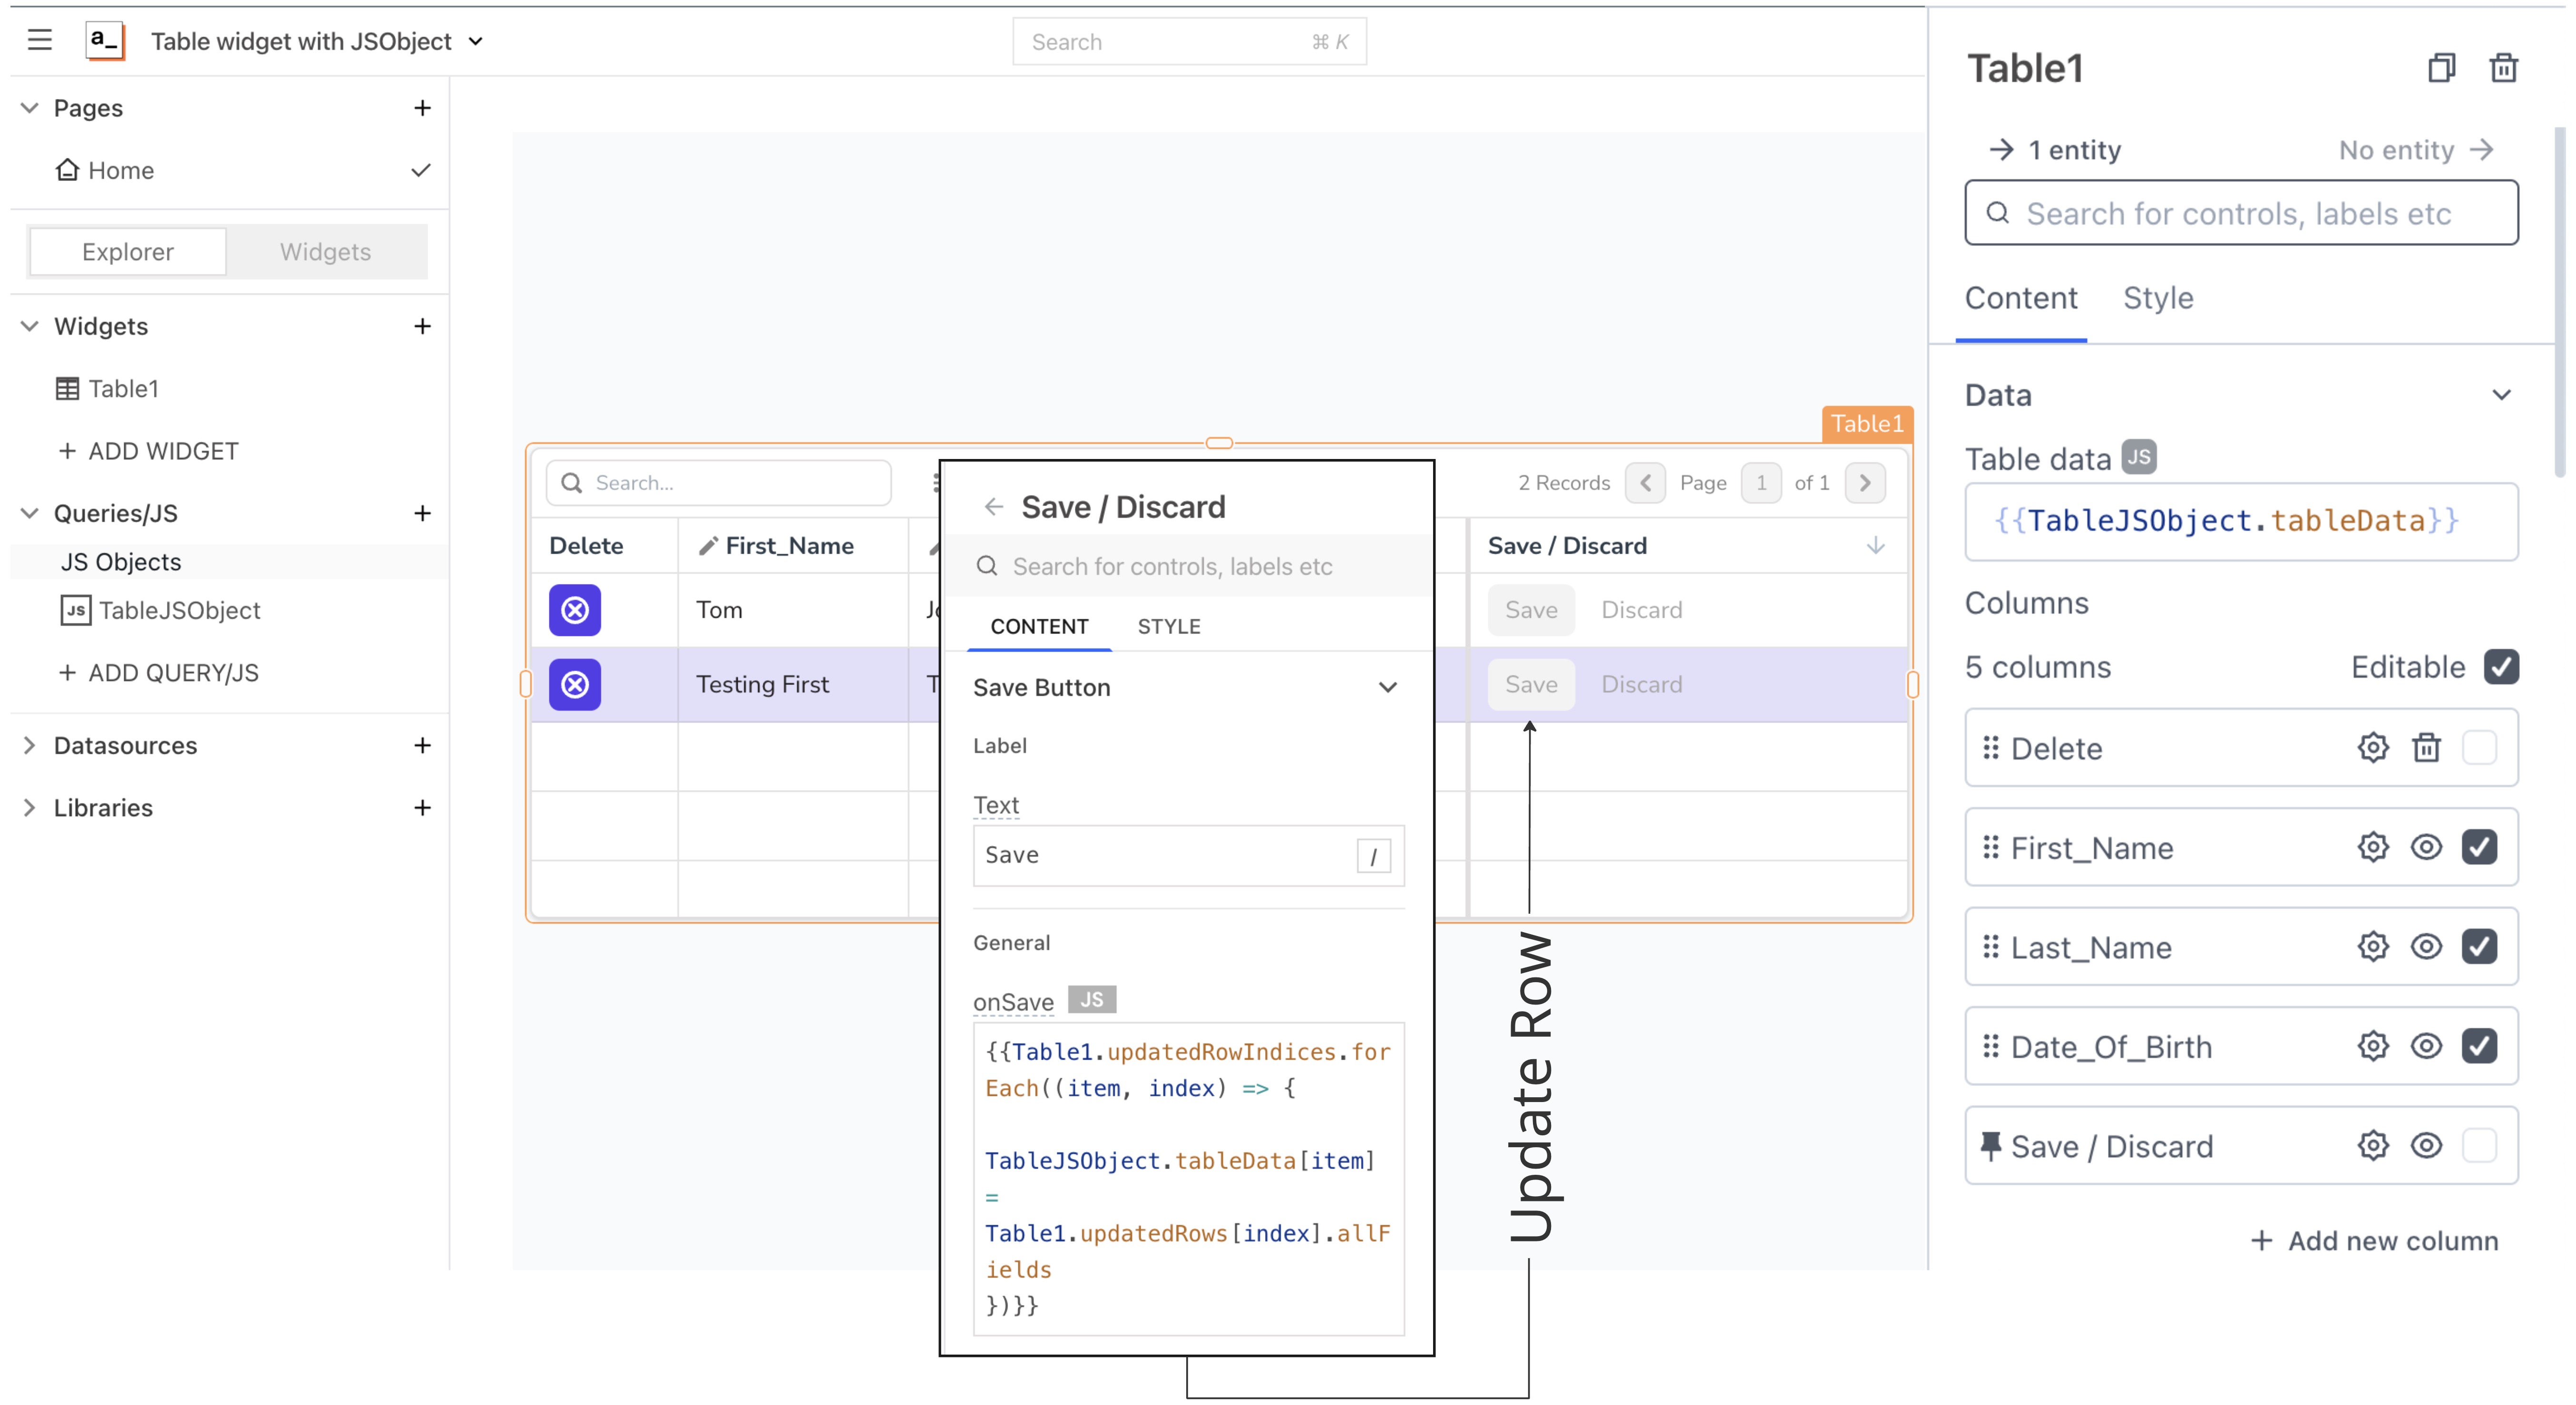
Conclusion
How easy is that? As you can see, it only takes a few lines of code to take full advantage of the powerful table widget for managing data on the page. To take this further, you could potentially sync or update the variable to an external store later.
FAQ
How do I troubleshoot if my mutations don't update the variable as expected?
If your mutations aren't updating the variable as expected, check the following:
- Ensure your syntax is correct and you're using the correct variable names.
- Verify that the JSObject is properly configured and accessible within the page.
- Make sure you're not encountering any scope issues where the variable might not be accessible from where you're trying to update it.
- Look for any errors in the Appsmith console that might indicate what's going wrong.
Can I use mutations to sync data across multiple pages in my Appsmith application?
Use the Appsmith Store approach for sharing data across multiple pages within the same application. Mutations are ideal for managing temporary data or widget states on a single page. If you need to maintain or share data across multiple pages, consider using Appsmith Store to store and retrieve values globally within your application. Alternatively, you could also consider using a URL parameter in simpler cases.
How can I extend the functionality of mutations for more complex data management scenarios?
For more complex data management scenarios, consider combining mutations with other Appsmith features, such as:
- Integrating with APIs to fetch or update data from external sources.
- Using JavaScript functions to perform more complex logic on your data before updating the variable.
- Leveraging Appsmith's support for asynchronous operations to handle data updates that depend on external data fetches or other delayed operations.