


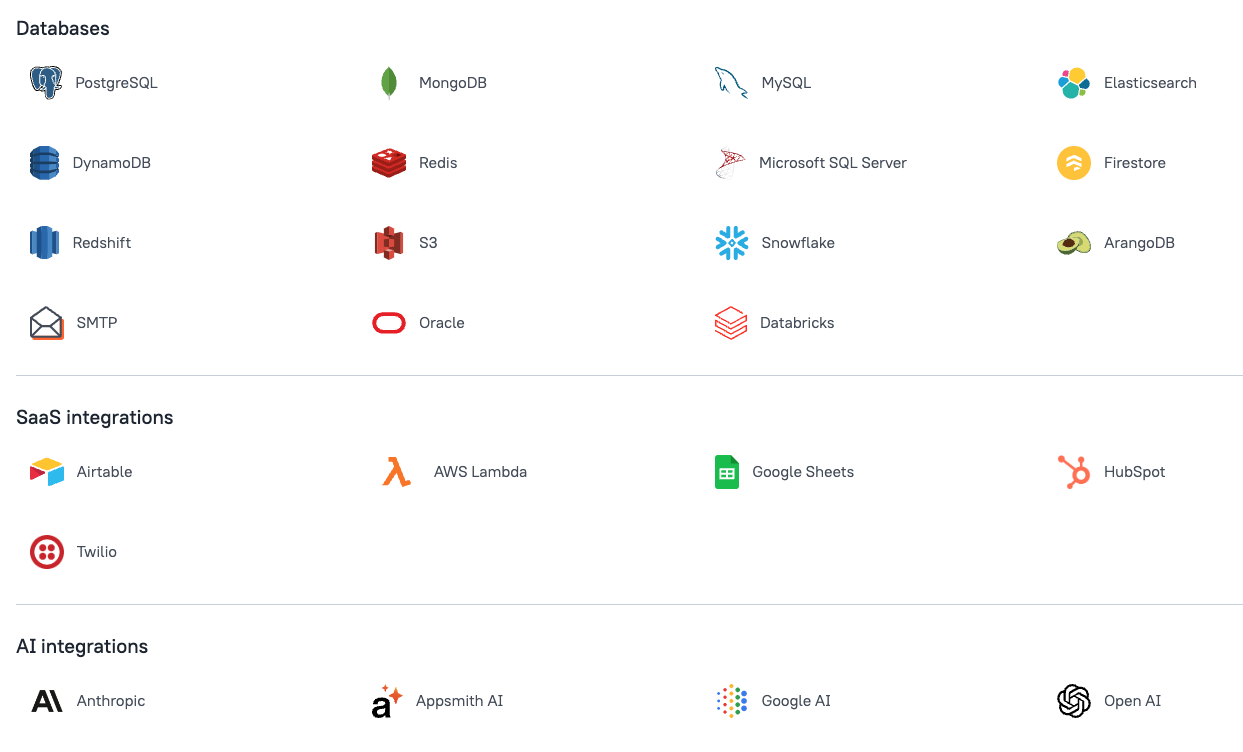
Appsmith supports over 30 different databases and APIs, including several SQL options, such as Postgres, MySQL, Microsoft SQL Server, Snowflake, Databricks, and Oracle, to name a few.
The query editor allows you to write and run SQL queries just like you would from a standard database tool, so it should be familiar and easy to use if you've worked with SQL before. There are a few new things to learn though, like how to create dynamic queries based on widget inputs or other query responses, running multiple queries in order (callbacks), and other features that are more specific to Appsmith.
This guide assumes you have a basic understanding of SQL, and focuses more on practical examples of using SQL in Appsmith. If you are new to SQL, you may want to review these other resources first:
- Understanding 'Single' vs "Double" Quotation Marks in PostgreSQL
- SQL Reserved Words
- SQL Best Practices
I'll be using PostgreSQL (Supabase) for these examples, but the same principles should apply to any of our SQL datasources in Appsmith.
Creating a Datasource
Creating an SQL datasource in Appsmith is as simple as filling out the connection setting form. The database credentials will be securely stored on your self-hosted Appsmith server, and never sent to the client's browser.
To create a new datasource:
- Open the app where you want to use the datasource
- Click the Data icon on the left sidebar
- Click the [+] at the top of the datasource list
- Select the Datasource you want to use (ie Postgres to connect to Supabase)
- Fill in the connection details and click TEST (you should see a success alert appear)
- Click SAVE
Now that the datasource is created, you can add multiple queries to your app that will all use the same connection, without actually storing the credentials in the app's definition. More on security here.
NOTE: Connection pooling is strongly encouraged if your datasource supports it. This will help with performance and stability with multiple users. See this guide for enabling connection pooling in Supabase.
Creating a query
There are several different ways to add a new query.
Blank Query
The most basic way to create a query is to start with a blank one, and there are a few different ways to go about it!
- Click the New Query button in the Query Pane, and then select your datasource, OR
- View the Datasource first, then click the [+] New Query button, OR
- Use the keyboard shortcut (
cmd-shift-+) then select Datasource
From Query Assistant [+]
You can also auto-generate queries based on our schema, without having to write out all the field names. First, create a new query using one of the methods above, then select the Schema tab of the bottom pane.

Select the table you want to use, then click the [+] plus button after the table name. From here, you can create SELECT, INSERT, UPDATE, or DELETE queries that will list out all the field names for you and add placeholders for the values.
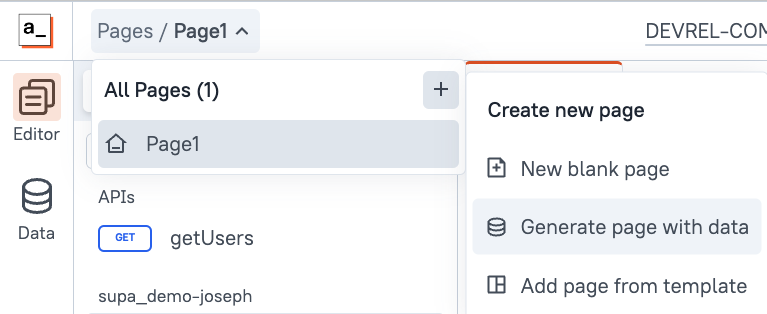
Generate CRUD page
Or you can generate all 4 CRUD queries at once using the Generate a page feature. This can be accessed by viewing the datasource, or from the Page [+] menu.
Query Settings
Next let's take a look at the query Settings tab. Here, you'll find options for running the query on page load, setting the timeout, and requesting confirmation before running.

There's also a Prepared Statements setting, which helps prevent against SQL injection by parameterising your query. This is on by default and should be kept on unless you have a specific type of query binding that isn't working with it on AND you understand the risks in disabling it. See the Prepared Statement docs for more info.
Dynamic Binding
Ok, now that we have the basics out of the way, let's talk about dynamic bindings! Instead of hard-coding every part of your queries, you can pass in values from input widgets, file pickers, camera or audio capture widgets, or use the response from another query. Appsmith uses JavaScript to reference the widgets and queries, and create business logic. You can write JavaScript anywhere in Appsmith that you can write text, by just wrapping it in double curly brackets {{}} or mustache syntax.
From Widget value
First let's look at a basic example of filtering a table based on the value in a select widget.
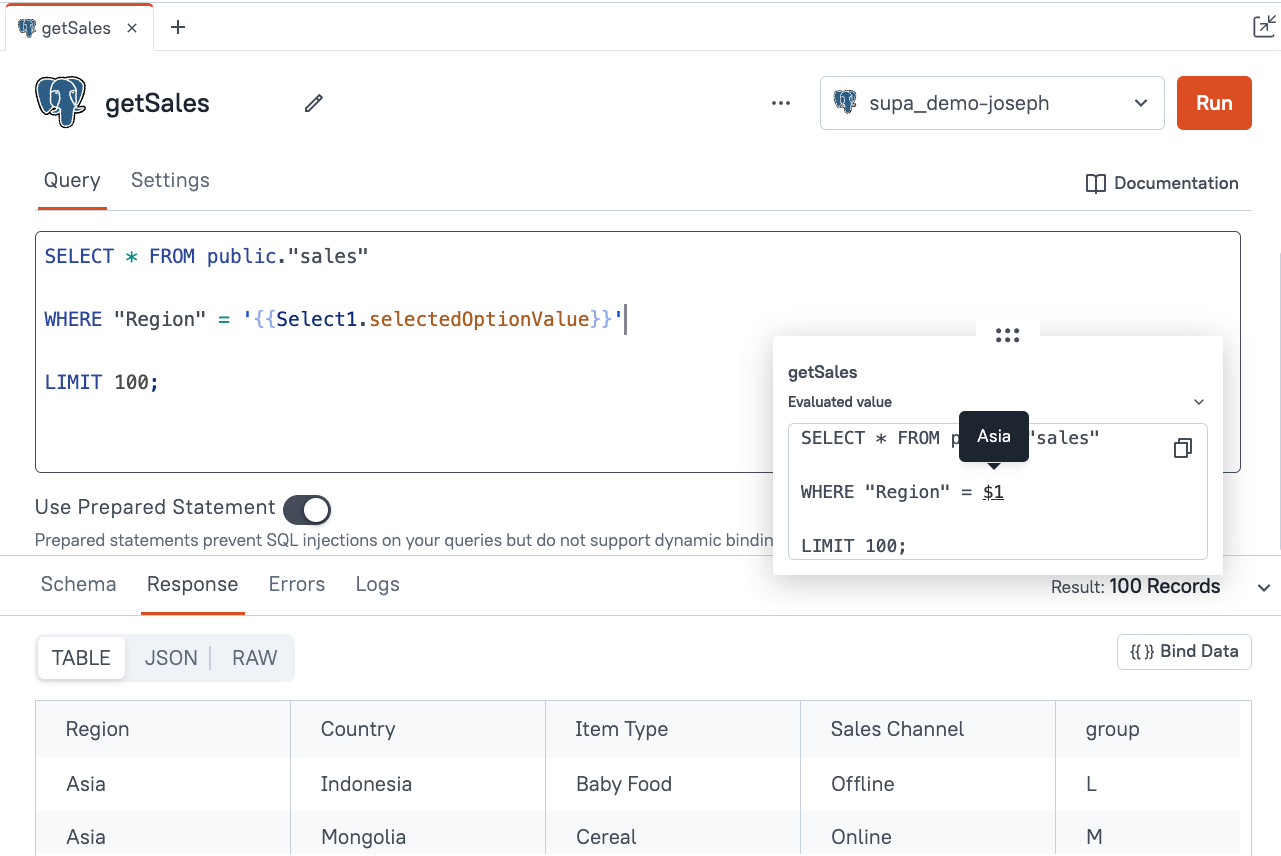
There are a few important things to note here:
- Double quotes are required on the column name Region because it is upper case
- Prepared Statements is ON, and the
$1variable shows the substituted value 'Asia' from theSelect1widget - Single quotes are added around the text value, outside of the mustache syntax
- this is optional with Prepared Statements ON, but with it OFF the query will fail unless you add the single quotes
From JSONForm
Now let's look at an insert query that references values from the JSONForm widget.
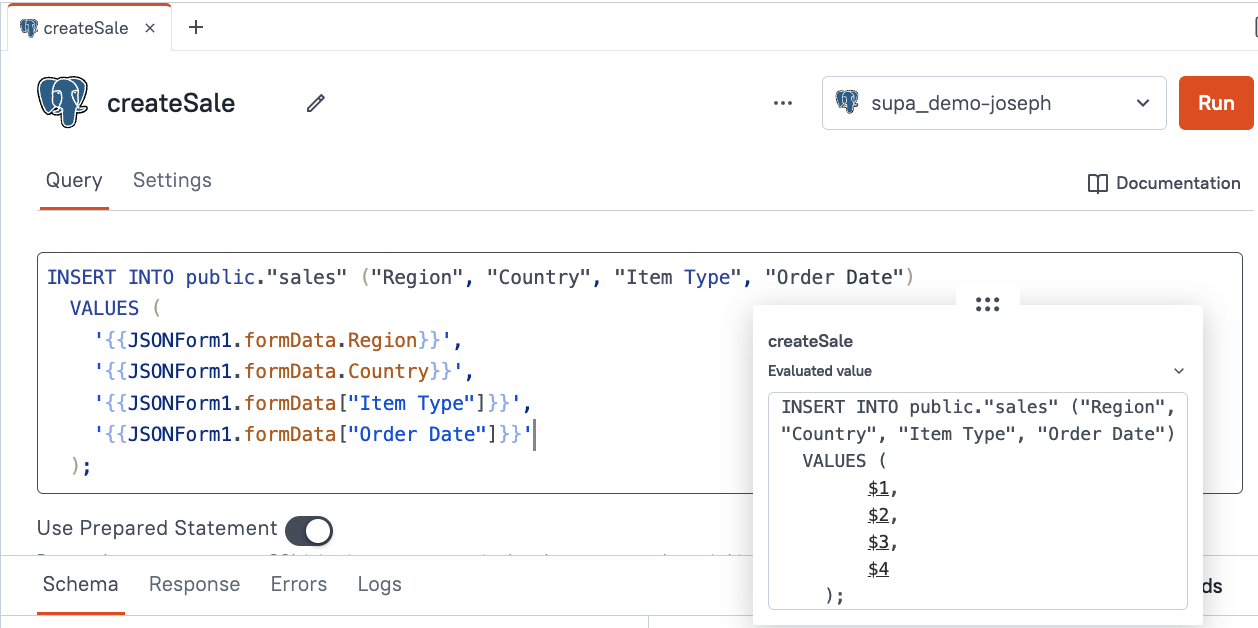
Note how each value can be accessed using the formData property inside the widget. Both dot notation and bracket notation are supported for accessing nested fields, but only bracket notation works with property names that contain spaces.
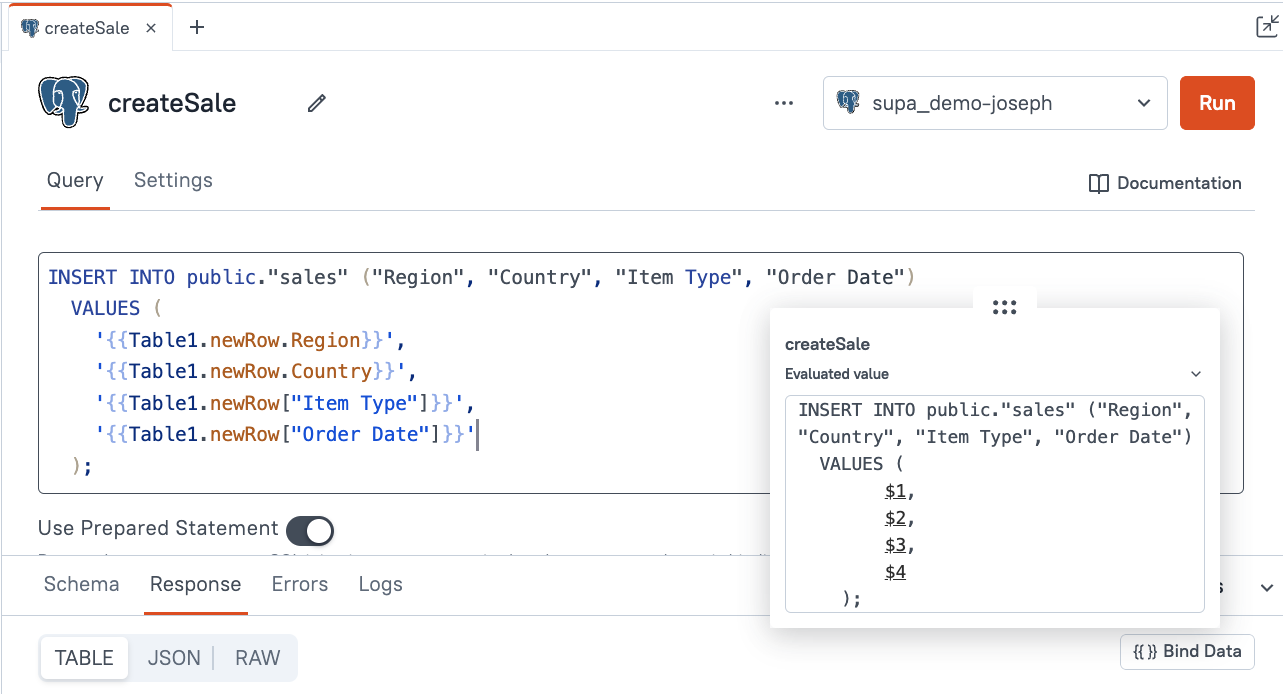
From Table newRow or updatedRow
Next we'll look at adding a row from the Table widget. Once you enable the Table widget's Inline Editing feature, the user can create a new row directly from the table widget. The values entered will be available under the table widget's newRow object. Similarly, when you enable row editing, the values will be available under Table1.updatedRow.fieldName.
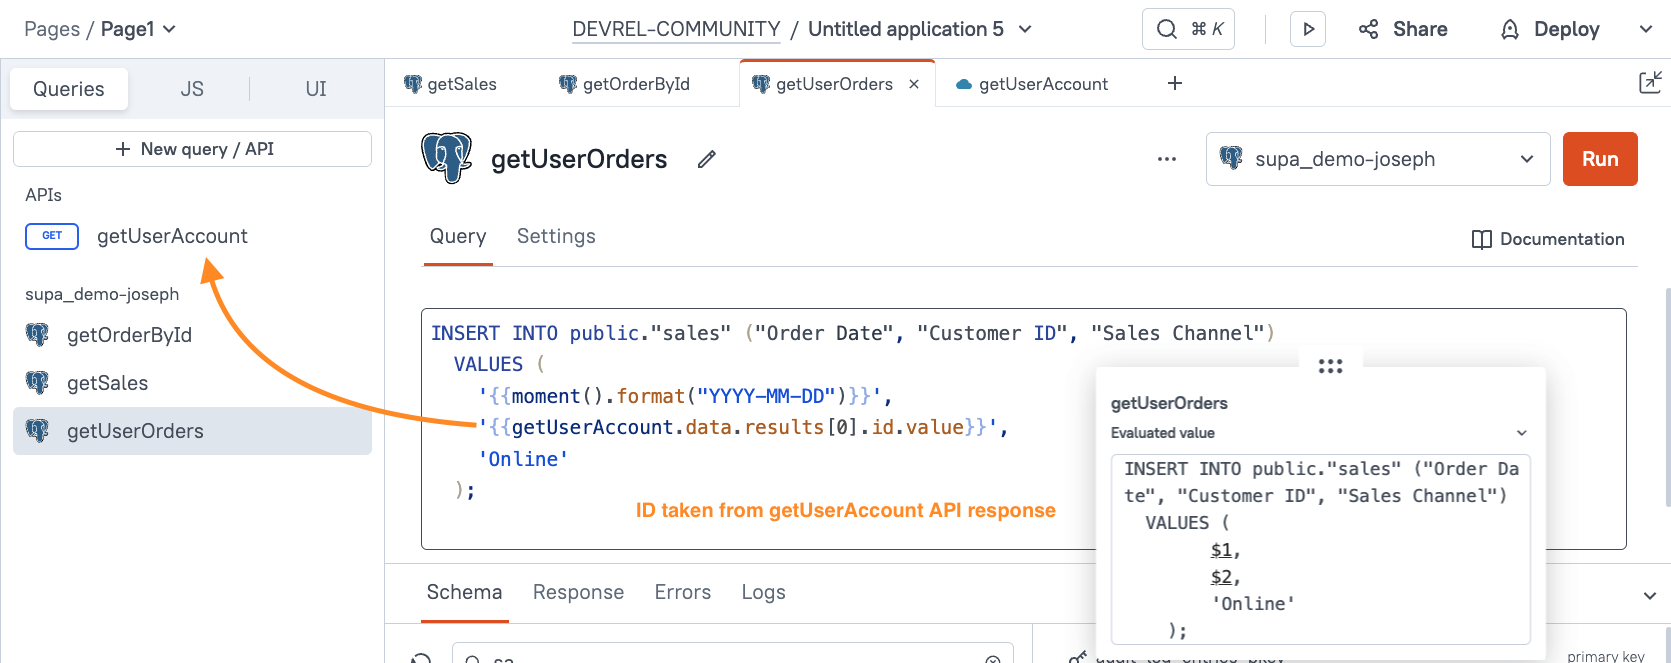
From another query response
You can also reference a value from another query or API.
Parameters
Bindings are just one way of passing dynamic data to a query or API. Next, let's check out how to pass parameters.
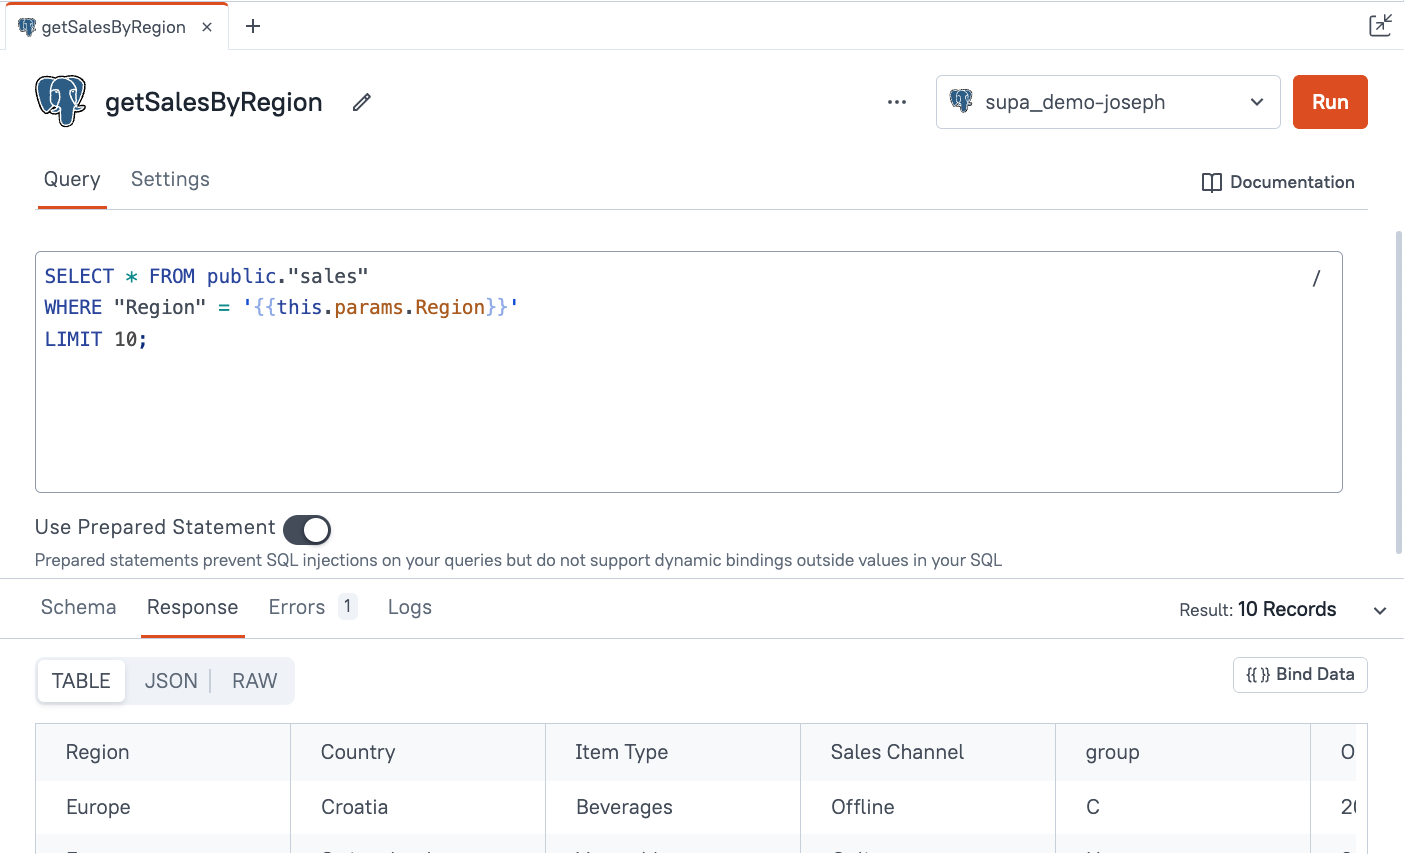
From a JavaScript function call
If you're calling a function using the functionName.run() in JavaScript, then you can also pass in parameters inside the .run() and reference them in your code using this.params.paramName.
From URL
Another way to pass parameters to a query is by using the URL parameters. The appsmith object provides context and details about the current user and environment. Individual query parameters can be accessed from the appsmith.URL.queryParams object.
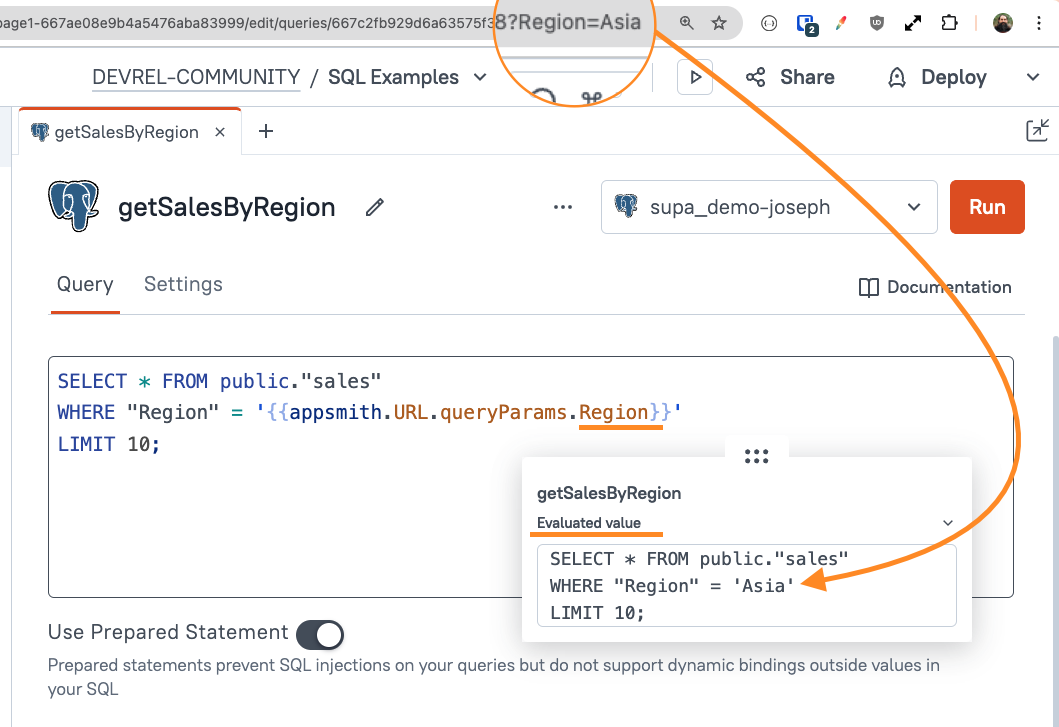
This method is often combined with the Run query on page load setting, in order to run a query using a certain parameter when the page first loads. So you can send users a link to your app with a certain query param, and then the query will run on page load with that parameter.
Callbacks
Callbacks are used to run functions in a certain order and wait for completion, and there are several different ways to use them in Appsmith.
From Widget Action Selector
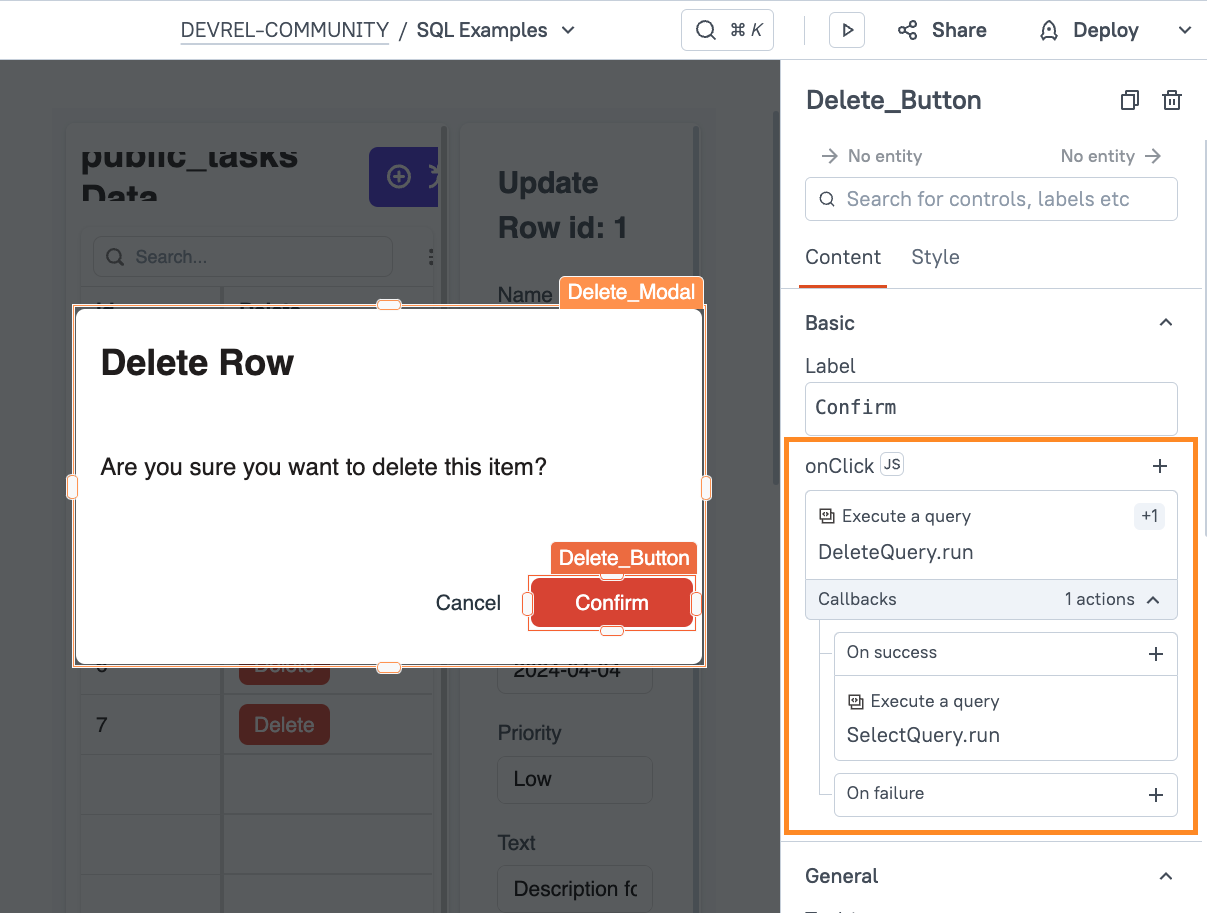
The easiest way to chain functions together is to use the Action Selector inside any widget event property. One common use case is a button that deletes a row from a table.
After the DELETE query runs, the row will be gone from the server, but it will still show in the table widget. You have to run the SELECT query again, to see the updated dataset with the row removed. But you don't want the SELECT query to run too soon, or the record may still show in the response.
The Action Selector inside any widget's event section makes it easy to chain together functions like this, with a dropdown to select what callbacks to run on success and failure.
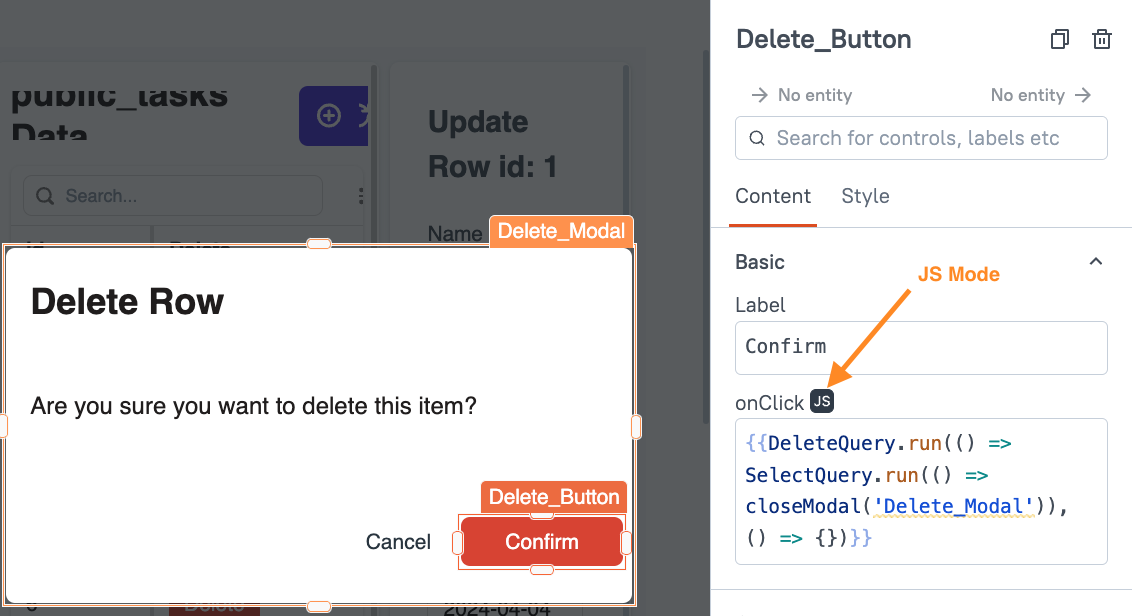
If you click the (js) toggle, you can see the JavaScript that has been written in the background by using the dropdowns to select queries to run in order.
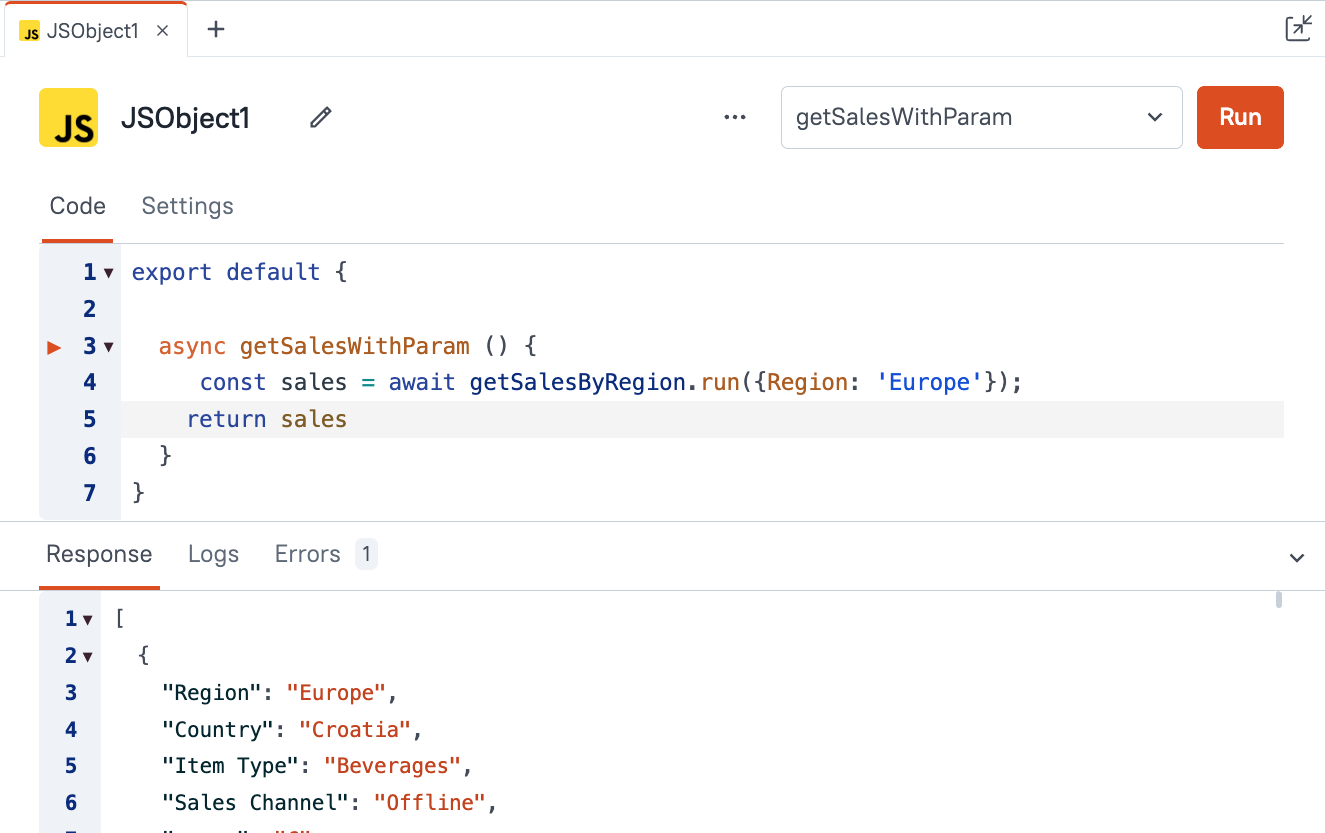
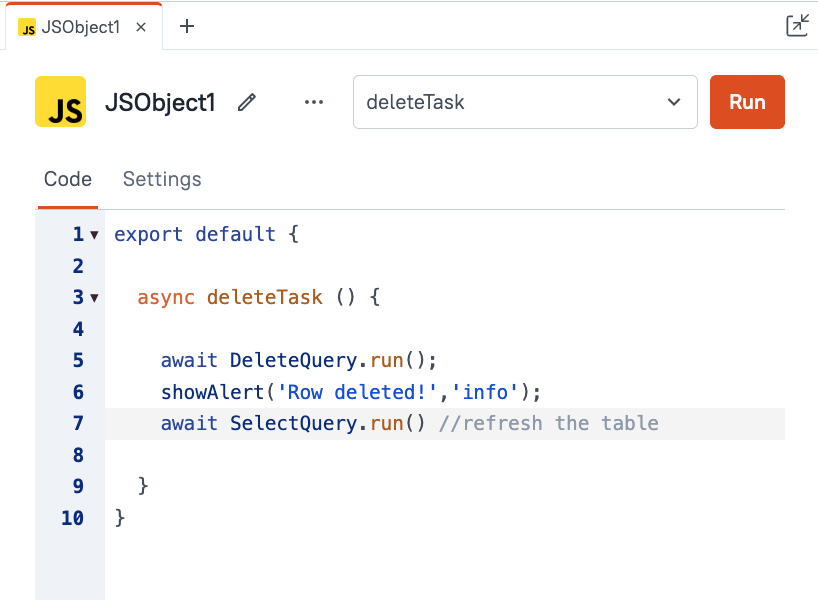
From JSObject
You can also run async functions from a JSObject, and write other logic to chain your functions together. Appsmith supports using Promises, .then(), and async/await syntax. For this examples I'll be using async/await to keep things simple.
For more info on other async methods check out How To Use JS Promises and Async/Await.
Conclusion
With support for any API and over 30 databases, Appsmith is the fastest way to build CRUD apps and internal tools to connect to your own data. To take full advantage of this powerful platform, it helps to be familiar with the various ways to create queries, pass parameters, and chain functions together. This guide has covered a wide range of options that will help you build a better user experience and write more performant apps with less code.


Thank you for this amazing post. I normally work with APIs as a data source, but is good to have this document as a reference whenever I will need to work with SQL databases.