Creating an Ideas Tracker App Using Appwrite + Appsmith - Part 1
Goal
Idea Tracker: an app to track all the side project ideas you'll start but probably never finish. In this tutorial, you will build an Idea tracker with Appwrite and Appsmith. This app aims to introduce all the concepts of using both platforms. In this first part, we'll make the UI to display ideas and create new ones, and in the second part we'll take care of the edit and delete functions.
Prerequisites
An Appwrite Account (you can create one free here) with a existing project.
An Appwrite Datasource integrated into your Appsmith App. Follow the previous step on this chapter or click here to read it.
Overview
This tutorial will introduce the following concepts:
- Setting up your first project in Appwrite
- Appwrite Databases and collections
- Appsmith Queries
- Appsmith UI Widgets
- Appsmith Deployment
Let's do this!
Create an Appwrite Database
Head to the Appwrite Console. If this is your first time using Appwrite, create an account and create your first project, but if you followed the first chapter of this series, you should already have an Appwrite app.
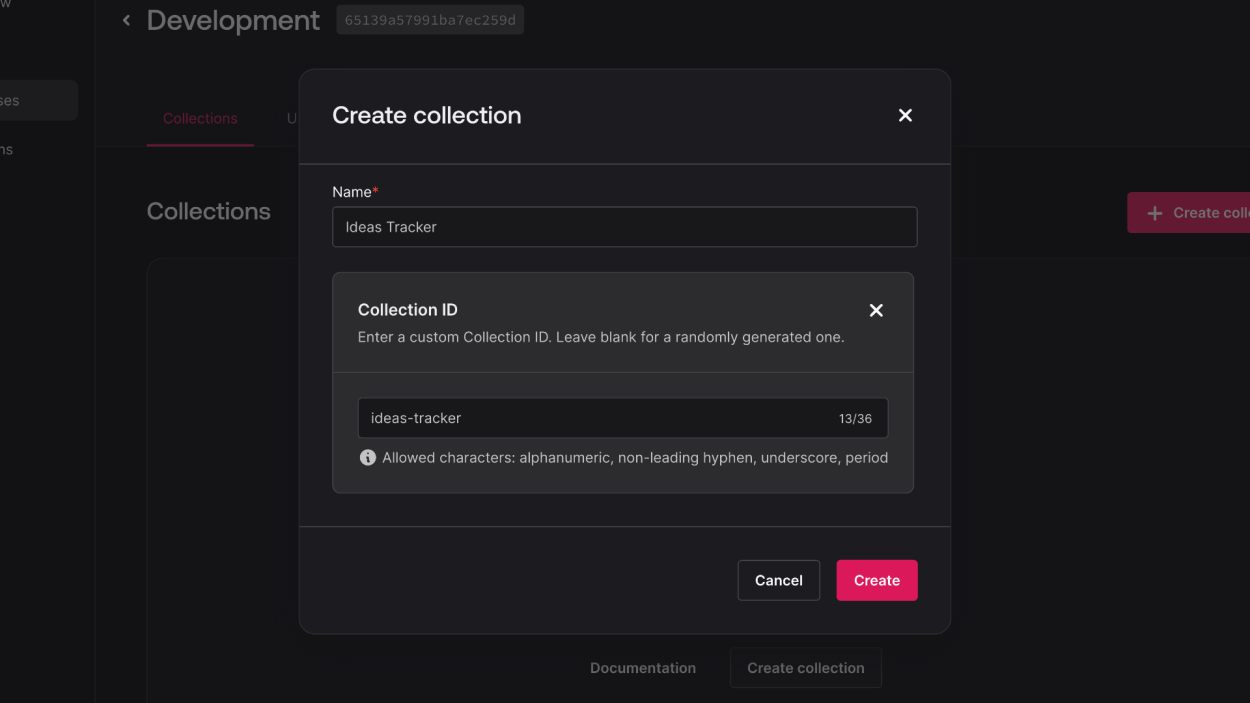
In Appwrite, data is stored as a collection of documents. Create a collection in the Appwrite Console to store your ideas.
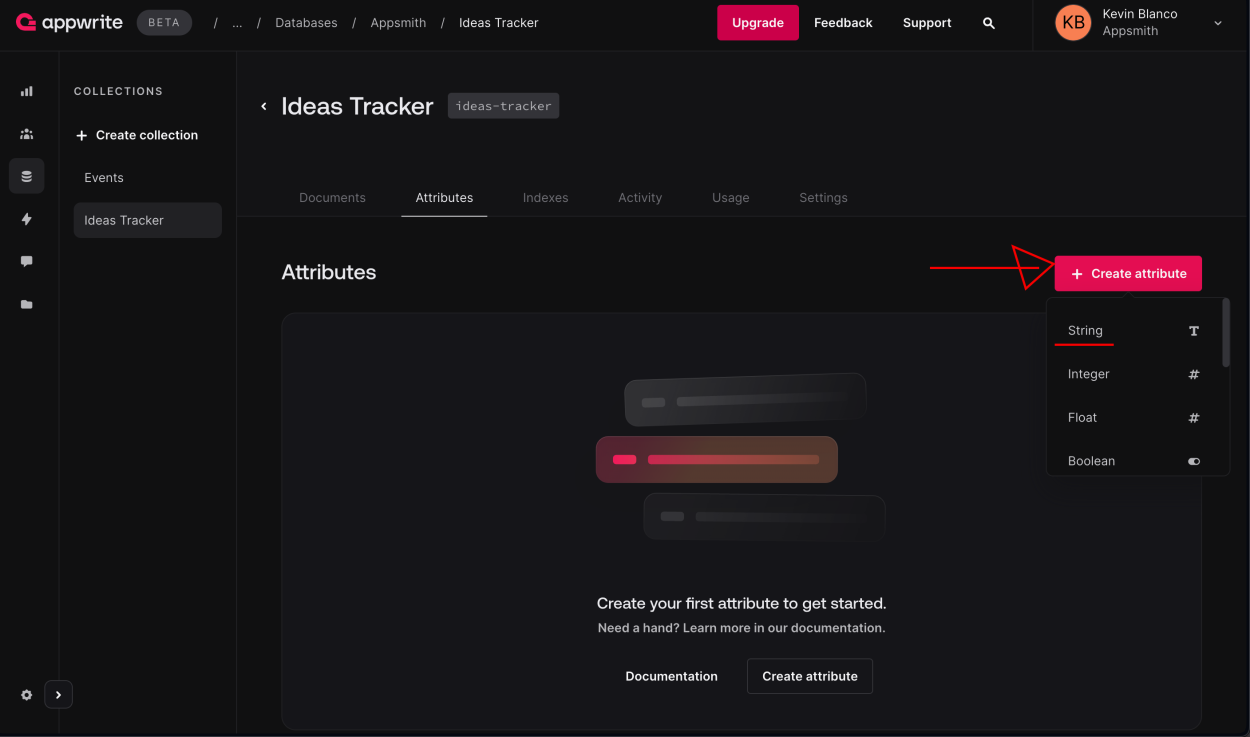
Create a new collection with the following attributes:
FIELD TYPE REQUIRED user String No title String Yes description String No 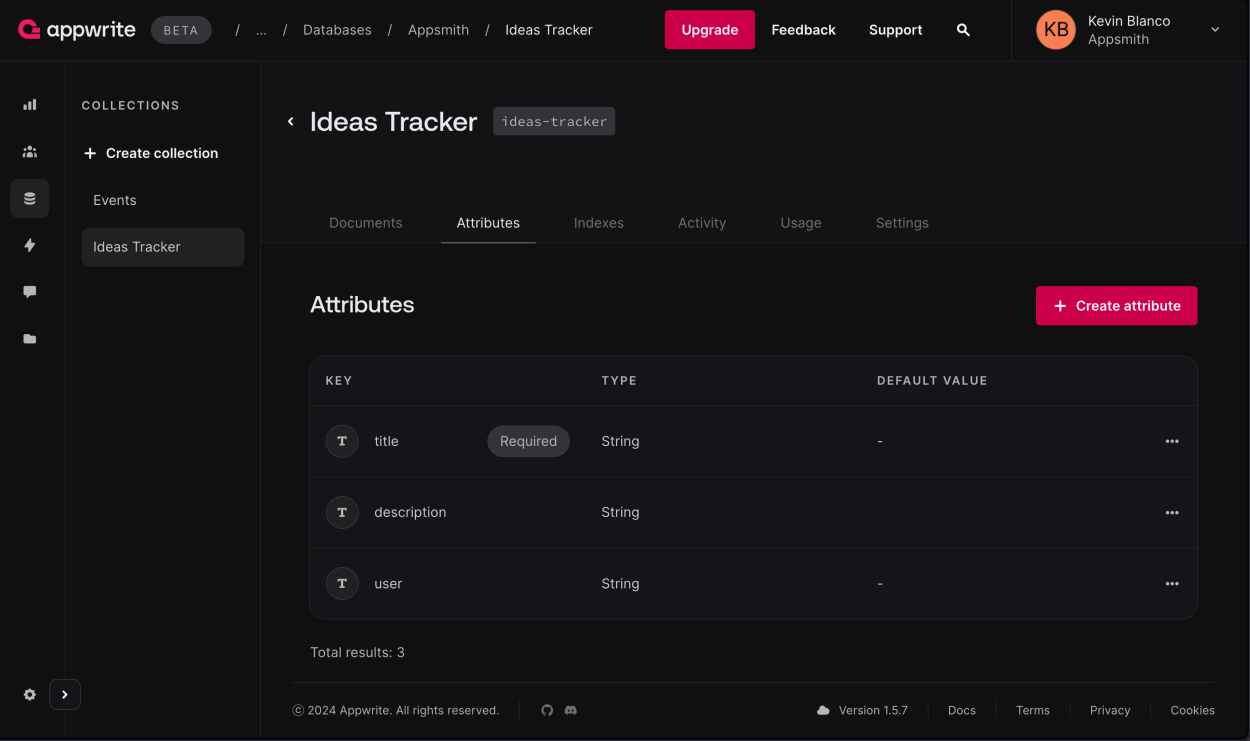
Now your database has the necessary field structure to support your app.
Create an Appsmith Query to Get the Ideas Collection
Since you should already have a datasource created on the first step of this guide here, let's go ahead a create a query to pull the ideas from Appwrite.
Head to the Editor section, and create a new Appwrite Query which is based on the Datasource we just created:
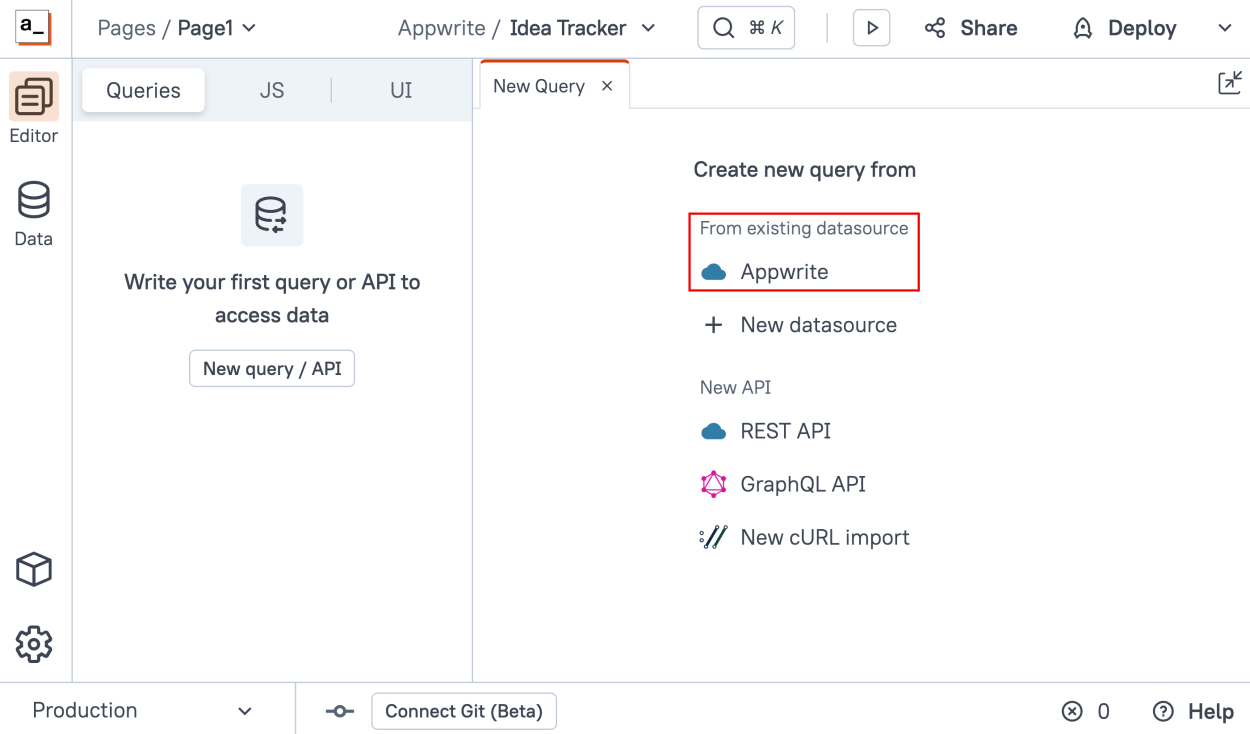
As you can see now, Appsmith will pre-fill the base URL and also it will securely inject the headers and the authentication so you don't have to worry about it.
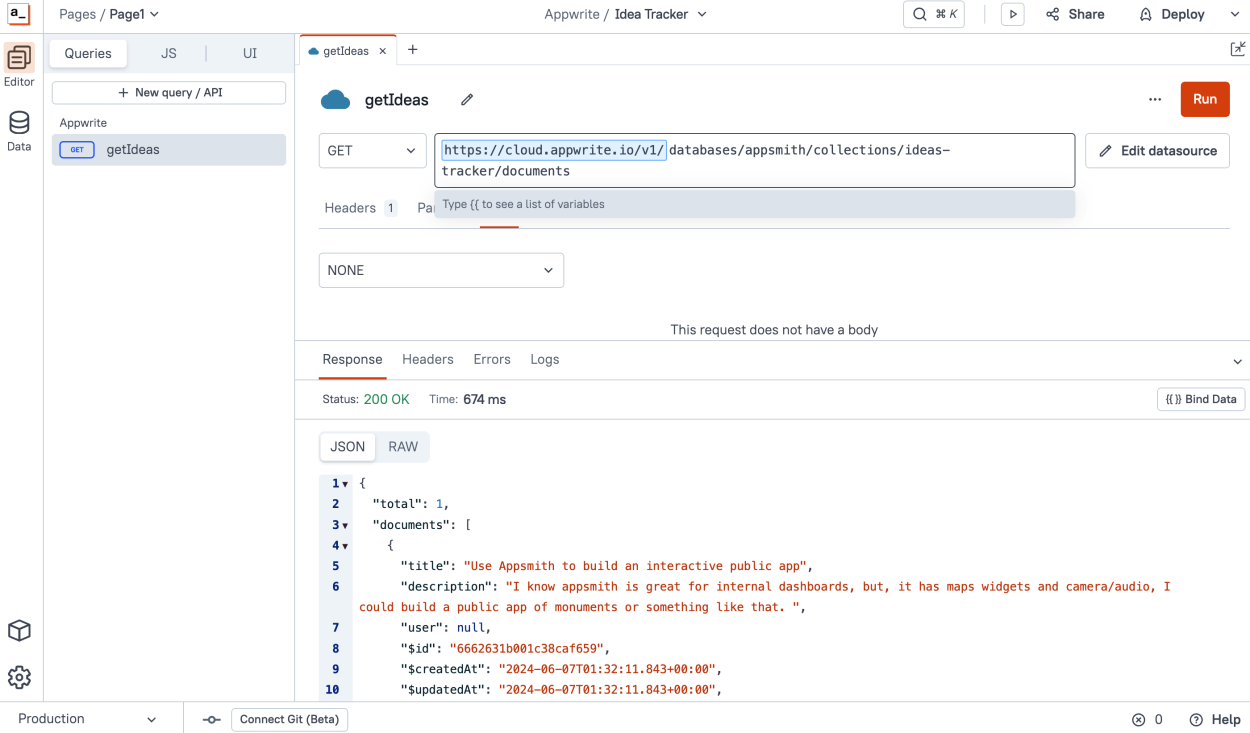
Now, let's list the documents of a given database using the /databases/{databaseId}/collections/{collectionId}/documents endpoint, in my case, my database name is appsmith and the collection name is ideas-tracker, and click "Run", as you can see, you get a succesful response from Appwrite.
Bind the Ideas to the UI
Now head to the UI tab in the Editor and find the List widget, and drag it to the Canvas
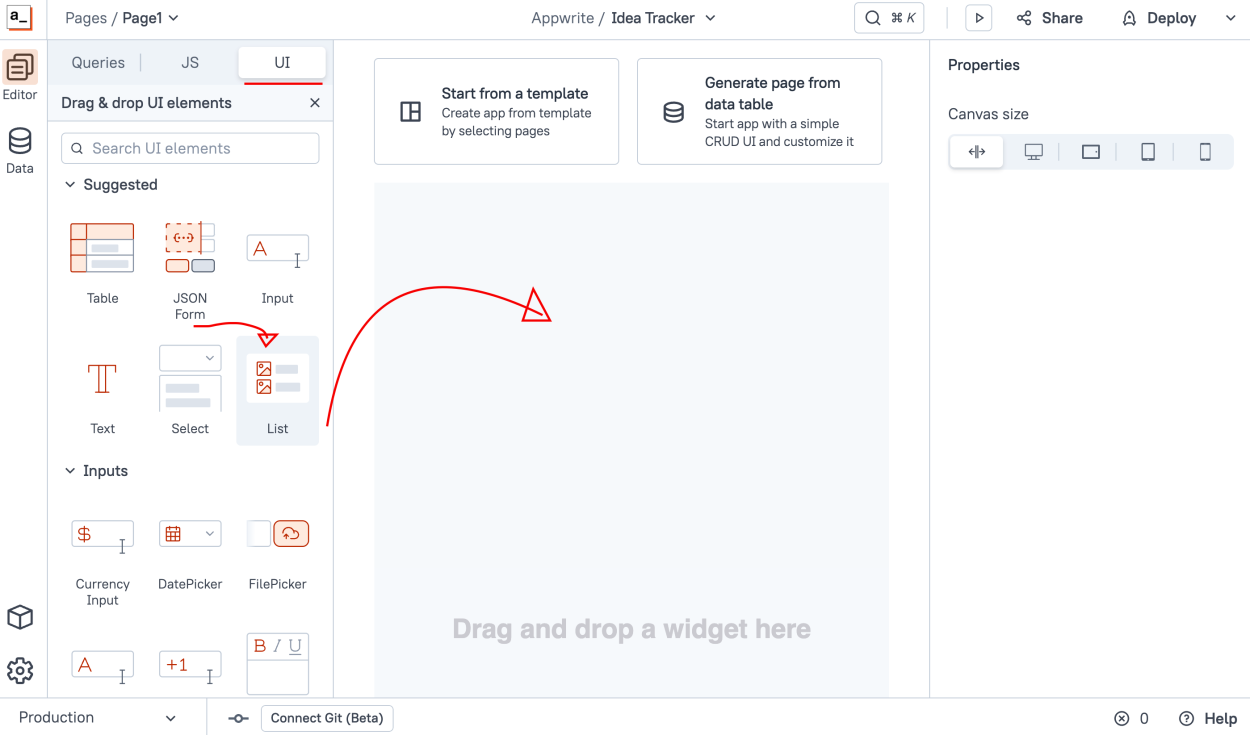
Now, select the List widget and go to the properties on the right, in the Data section let's bind the items from the API response we just built, using
{{getIdeas.data.documents}}"getIdeas" is the name we gave the query and ".data.documents" is the structure of the JSON Appwrite retrieves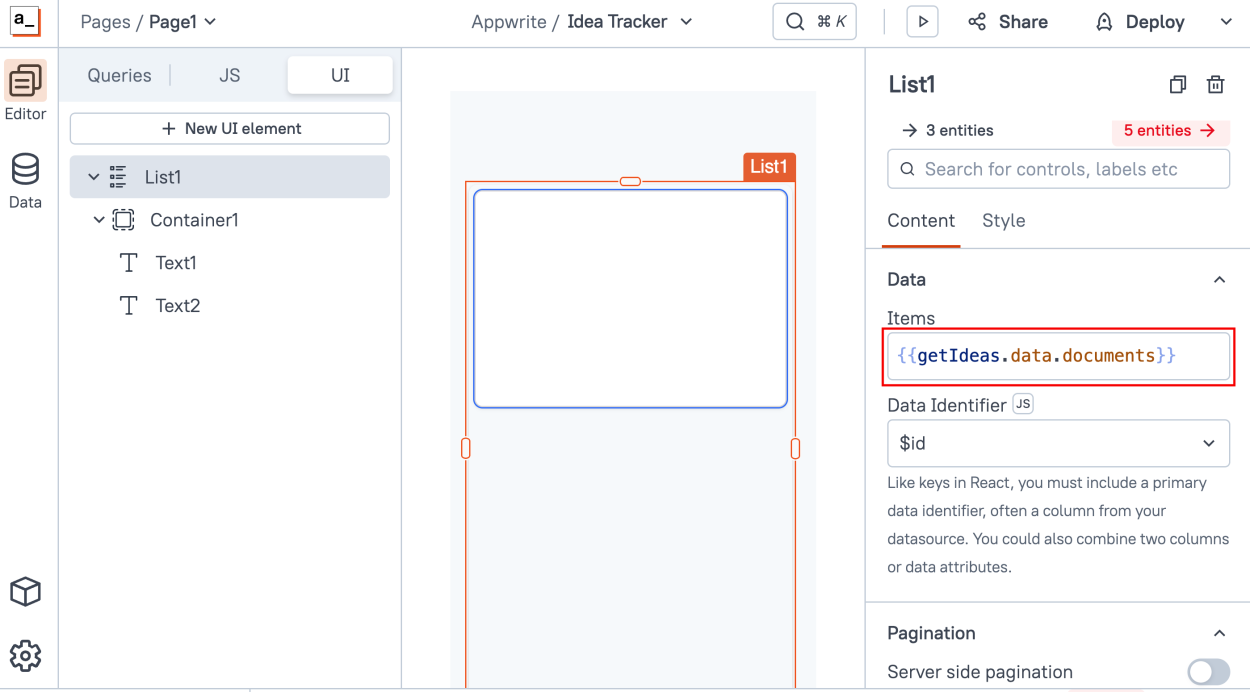
Now, drag 2 Text widgets inside the List widget, one for the title and the other one for the description, using
{{currentItem.title}}and{{currentItem.description}}respectively, and now you have a list displaying the Ideas from Appwrite!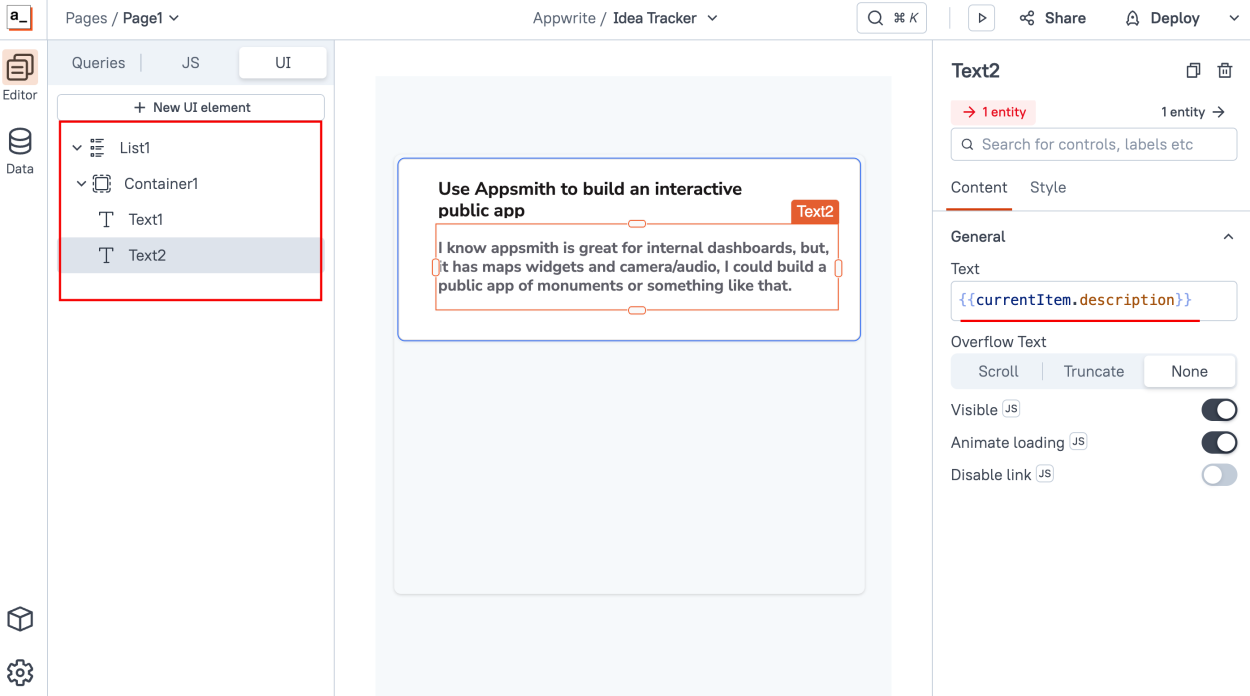
Creating New Ideas Functionality
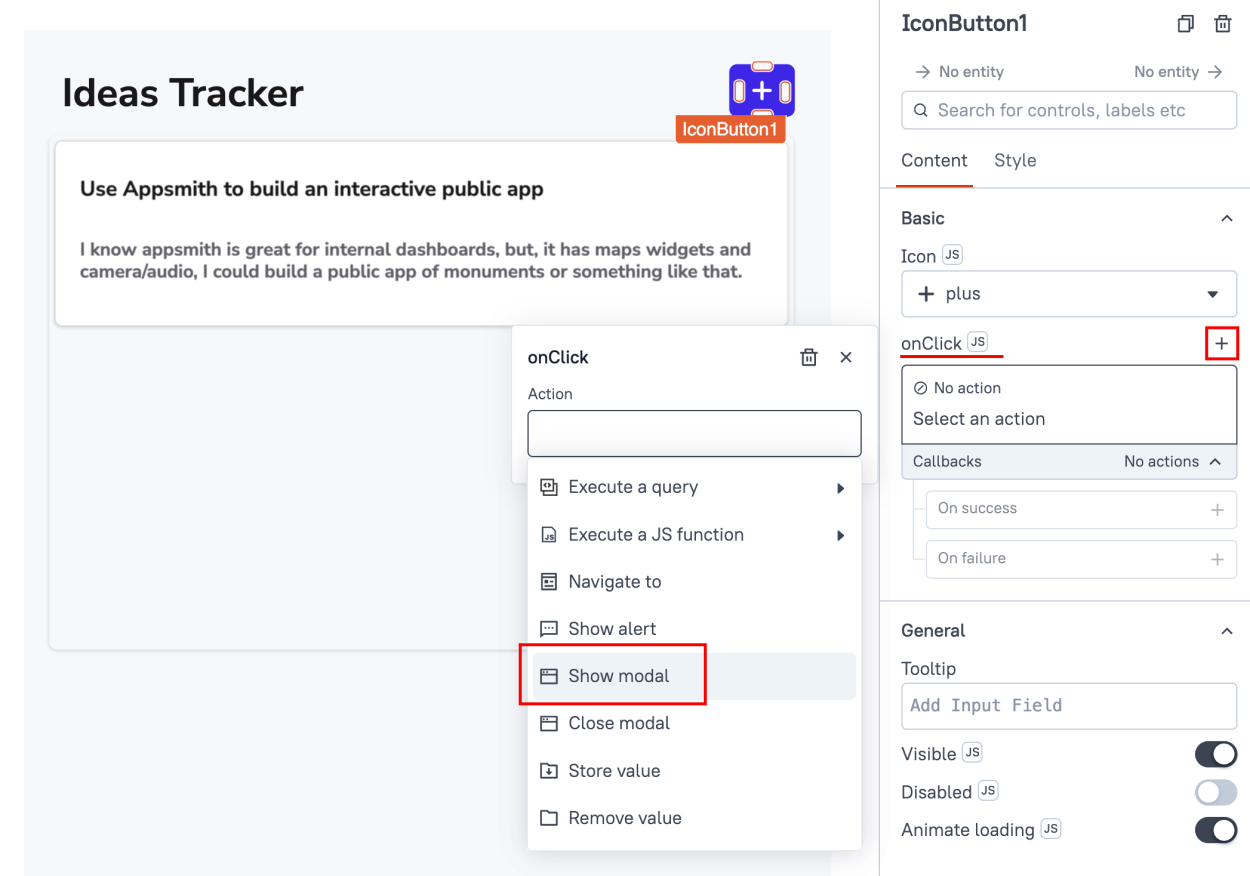
Now that we are displaying the Ideas on the tracker app, let's build the "Create" functionality. Add a new Icon Button widget to the top of the List widget.
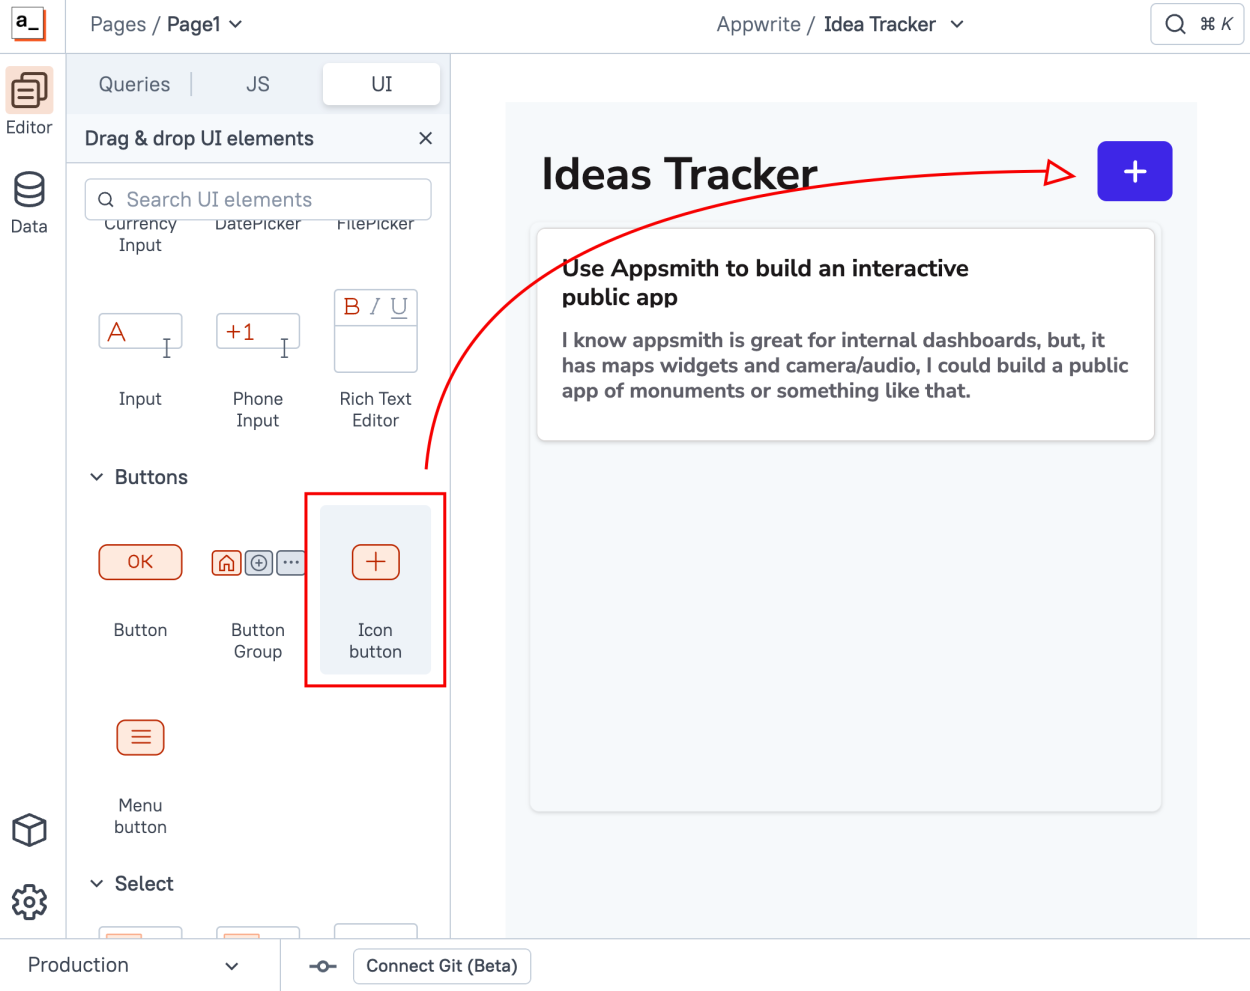
Now on that Button's properties, add a new action to the onClick event to display a new Modal Window, Appsmith will create a new blank modal window for you.
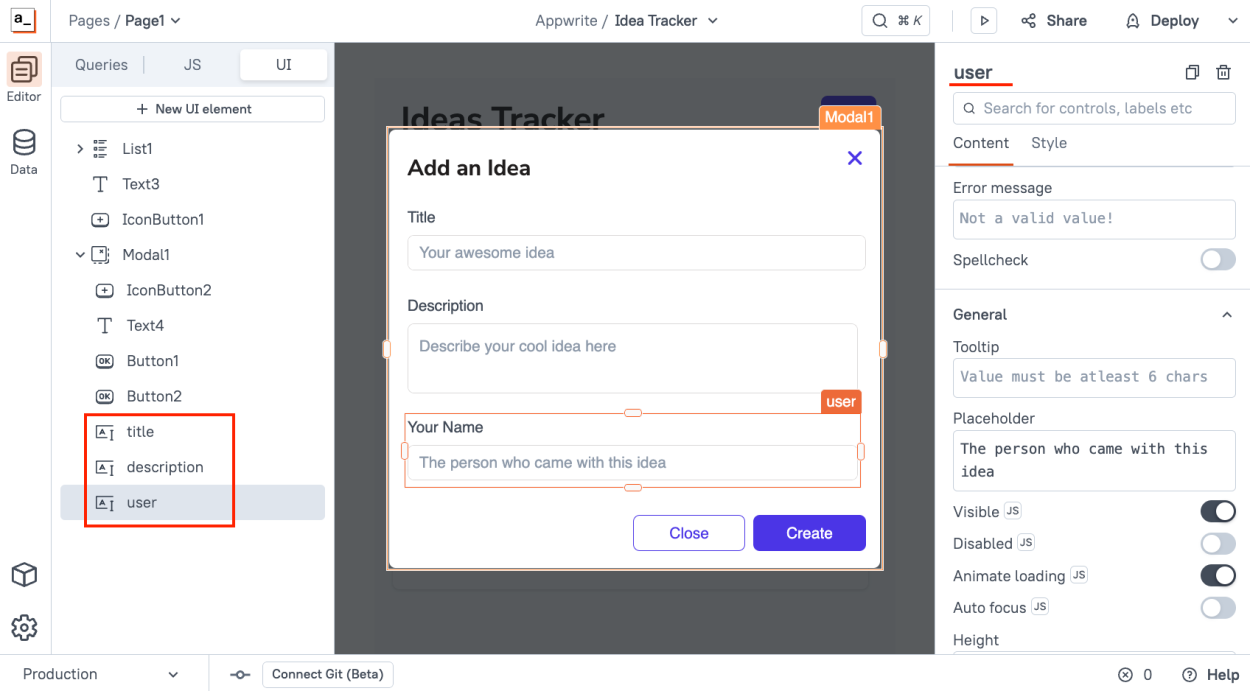
On that new Modal window, drag three Input widgets: one for the title, one for the description, and the third for the name. Make sure to edit these fields' identifiers to "title" and "description" and "name" so we can easily reference them.
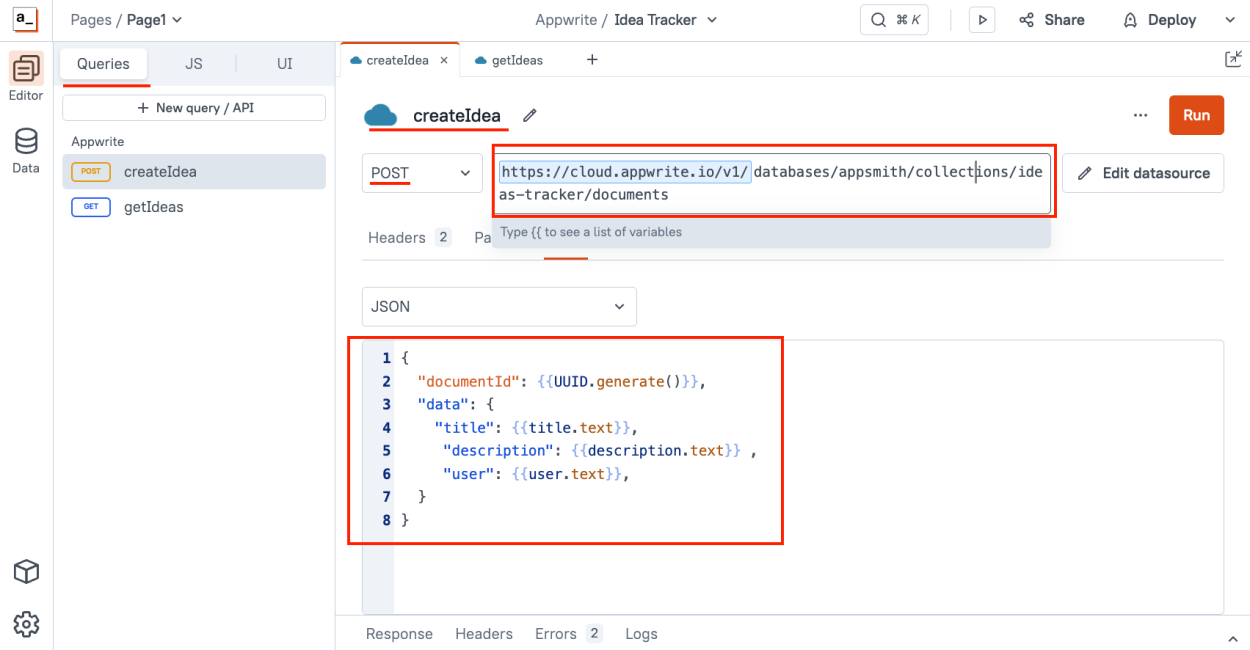
Now we created a form for users to create ideas; let's create the Query that will store these ideas back to Appwrite, go to the Queries tab on the Editor and create a New Query, select the Appwrite datasource, and now create a POST request called
createIdea.The URL is the same as the GET request
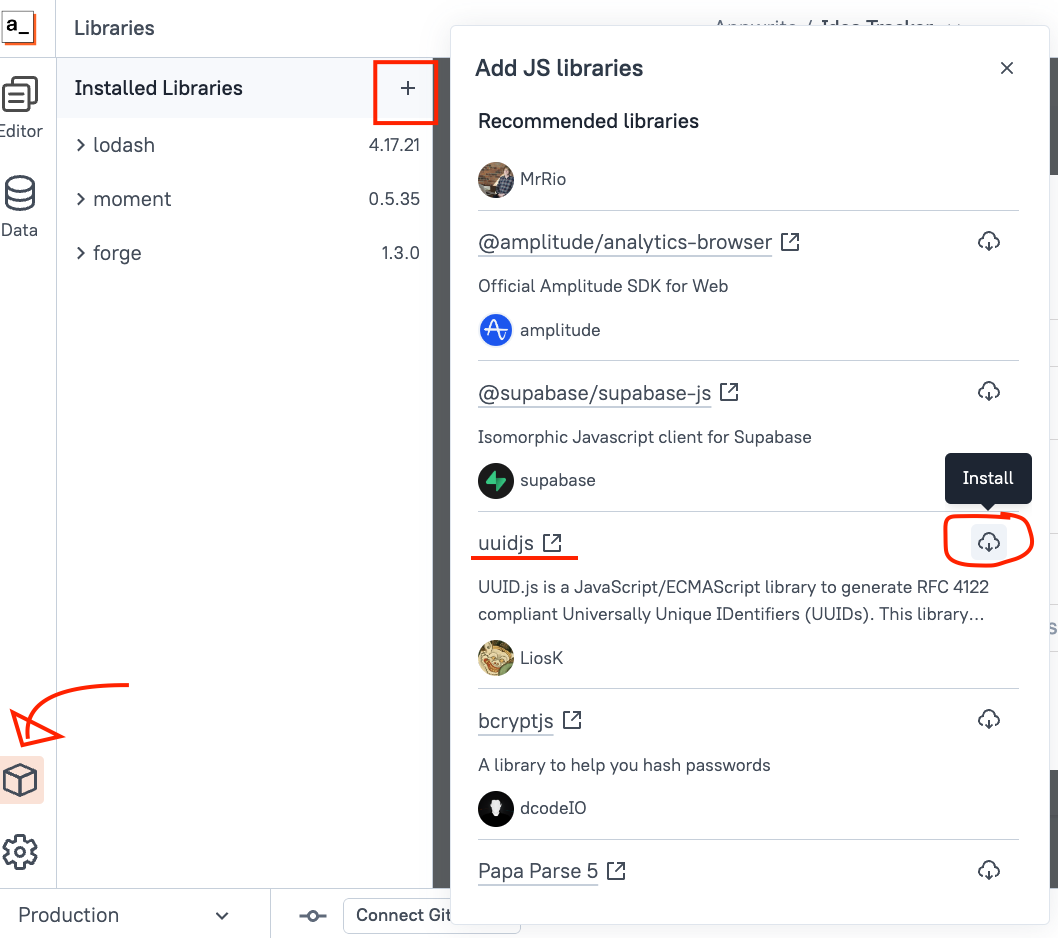
databases/appsmith/collections/ideas-tracker/documents, then go to the Body tab in the request and add the following JSON structure:{ "documentId": {{UUID.generate()}}, "data": { "title": {{title.text}}, "description": {{description.text}} , "user": {{user.text}}, } }Appwrite requires us to send back a documentID, we can easily generate using the UUIDjs library. Click on the Libraries section in the left menu, then Add a New Library, scroll to find the UUIDJS library, then click Install.
And in order to pass the values from the Modal window fields to the Query all we have to use is the powerful Appsmith data binding to get the values, we reference them using the identifier name we gave in the previous step, so your query should look like this:
So in order to test this, you can go back to the UI tab and fill in some test data on the creation form, you don't even need to deploy the app to test it out, enter some information on the form like this:
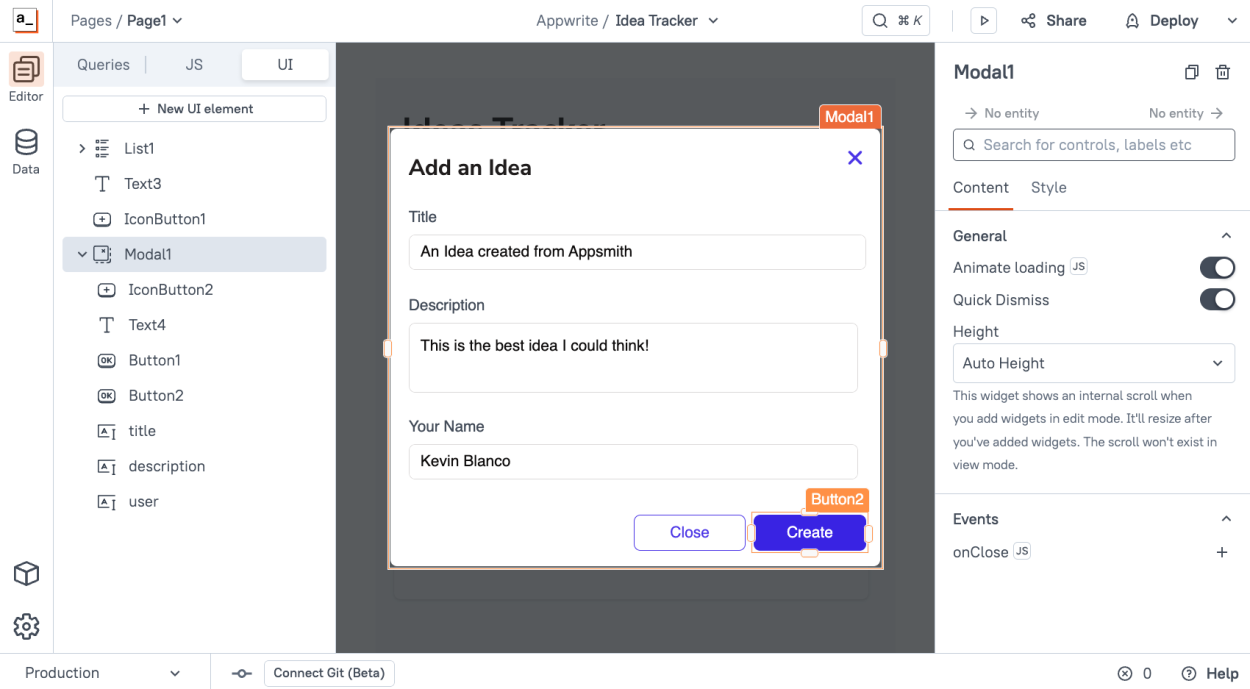
And then go back to the Query, and you'll see Appsmith will show you the Query using the data from the form, so you can preview the request before sending
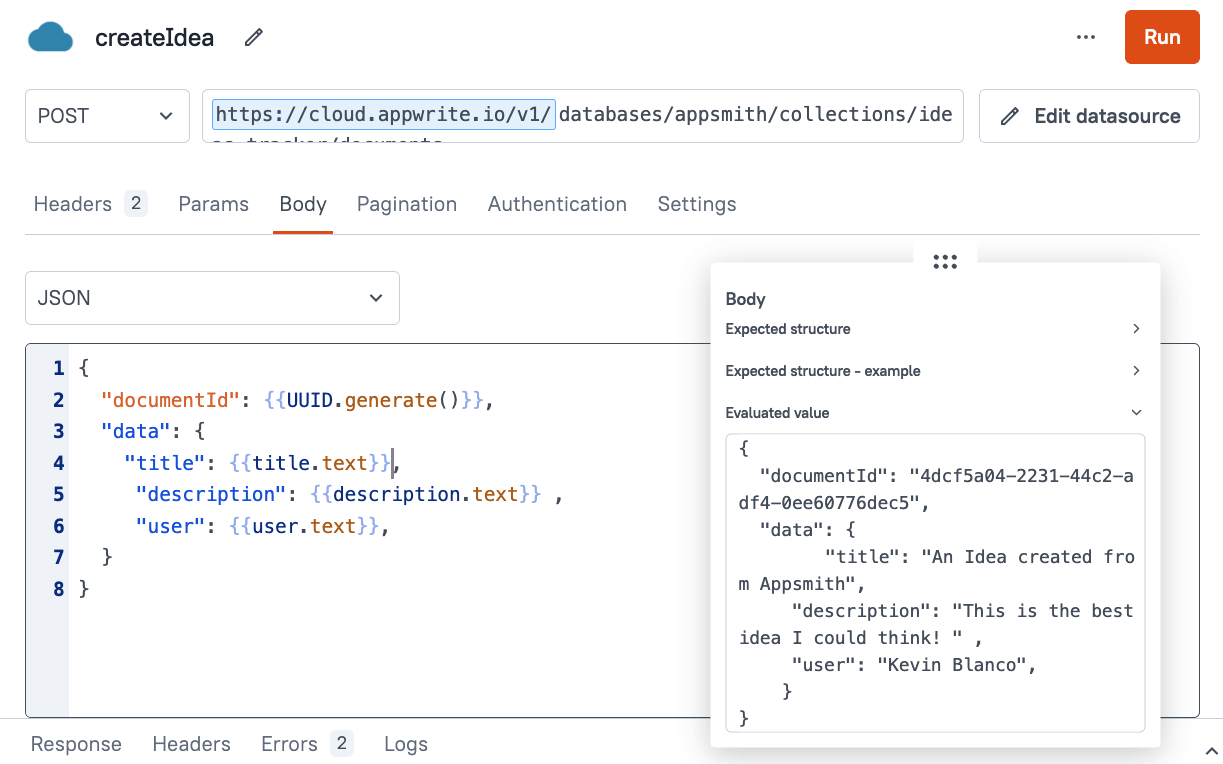
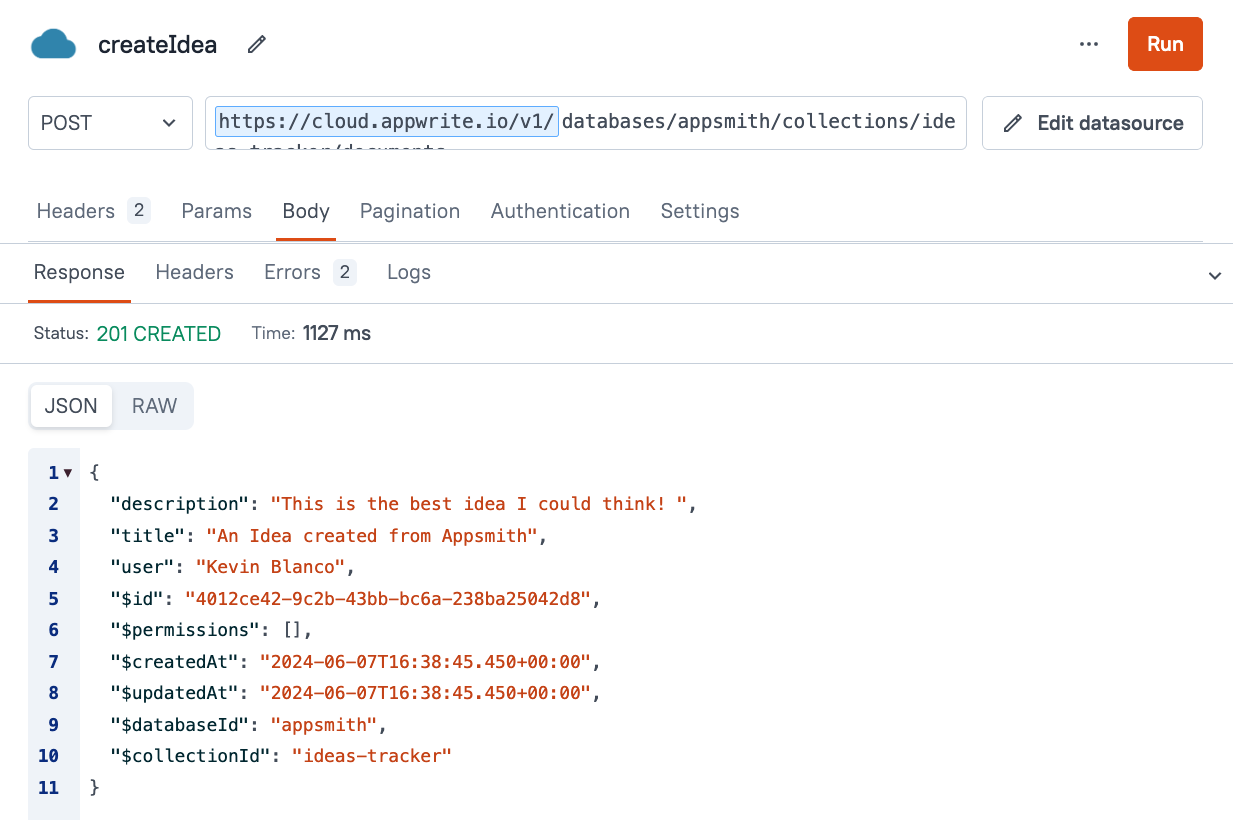
This is extremely powerful for debugging and testing, so now click on Run and you'll see a success response payload!
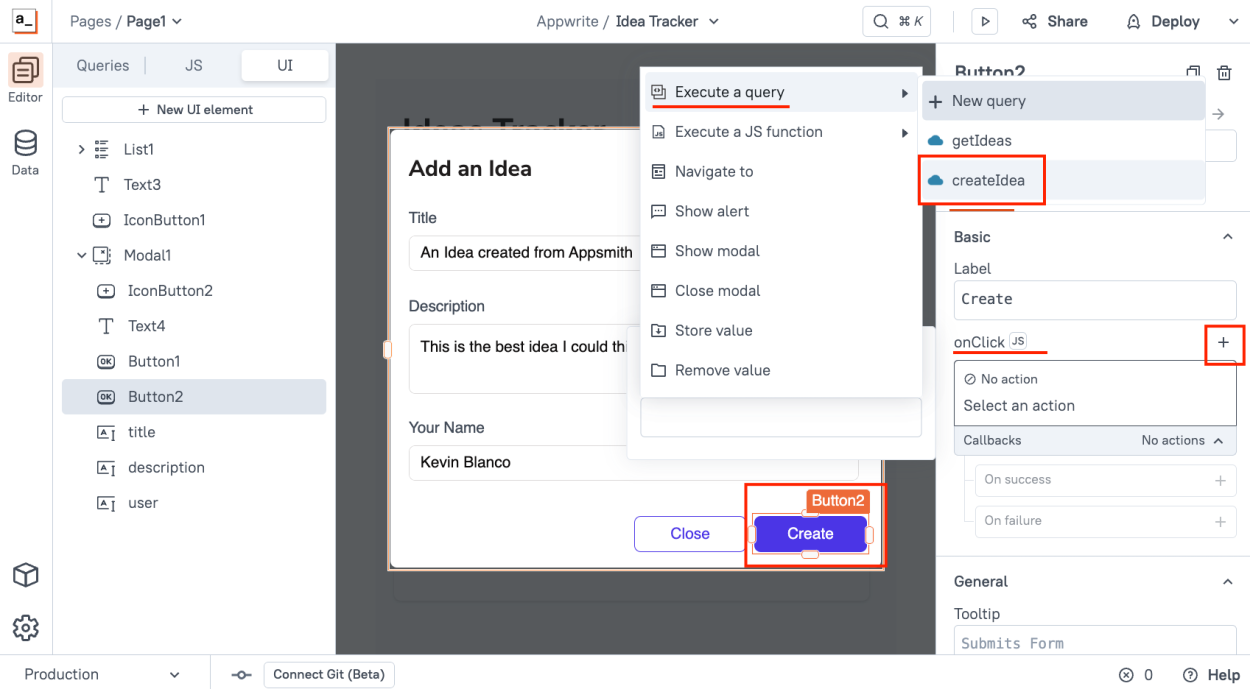
So now that we know this Query works, let's bind this Query to the UI Button, go to the UI tab and select the "Create" button in the form, and on the onClick event, add a new action, and find the Query we just created (createIdea) and just like that, now when the user fills the form and click "Create", the Query will be triggered.
Now Deploy your app and test it out! It should work like this
Conclusion
You should now have a working application that lists and creates new ideas! Awesome! we'll work on the Edit and Delete functionality in the next chapter. In case you want to try this app live, you can use it and fork it here: https://app.appsmith.com/app/idea-tracker/page1-66625d145b294e387055ce5c
