Creating an Ideas Tracker App Using Appwrite + Appsmith - Part 2
Goal
Idea Tracker: an app to track all the side project ideas you'll start but probably never finish. In this tutorial, you will build an Idea tracker with Appwrite and Appsmith. This app aims to introduce all the concepts of using both platforms. In the first part, we made the UI to display ideas and create new ones, and in this second part, we'll take care of the edit and delete functionality.
Prerequisites
An Appwrite Account (you can create one free here) with a existing project.
Complete the first part of this tutorial.
Overview
This tutorial will introduce the following concepts:
- Appsmith Query Parameters
- Appsmith UI Widgets
- Appsmith Deployment
Let's do this!
Deleting an Idea Functionality UI
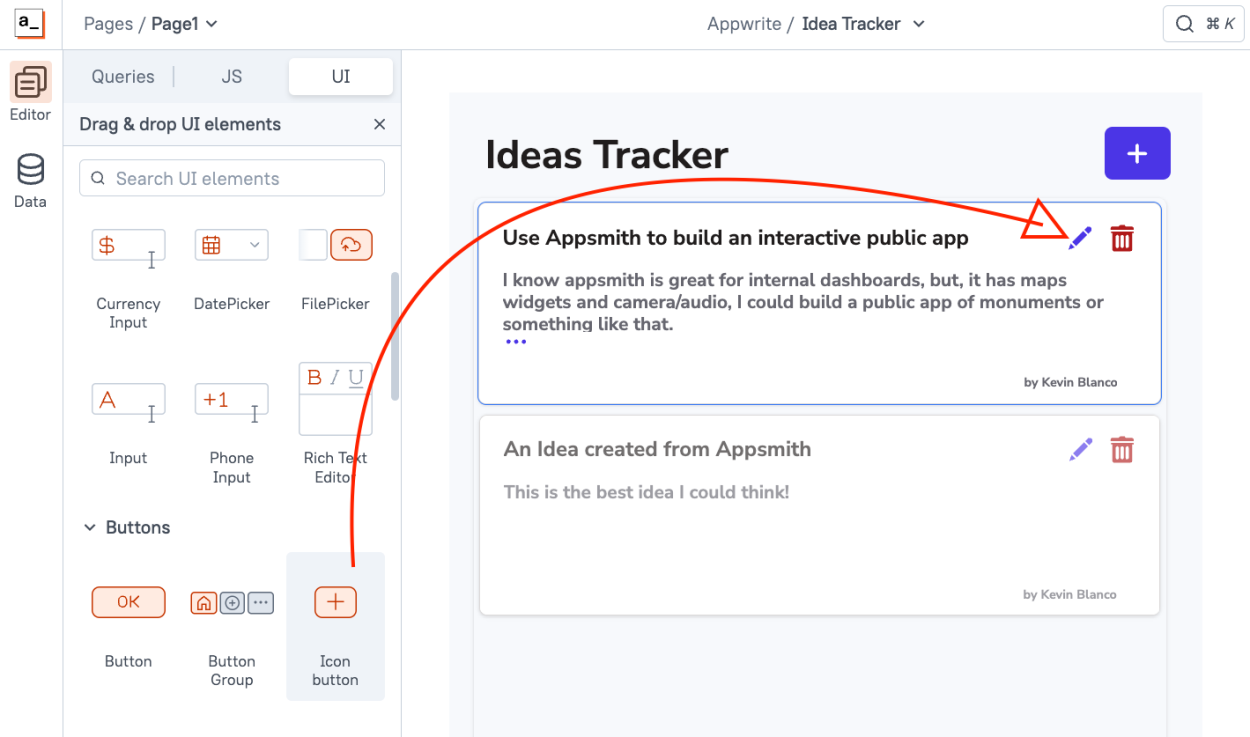
Let's implement the deleting functionality. First, drag and drop an Icon Button to the idea's List widget and select the "trash" icon to demonstrate this button is to delete an idea.

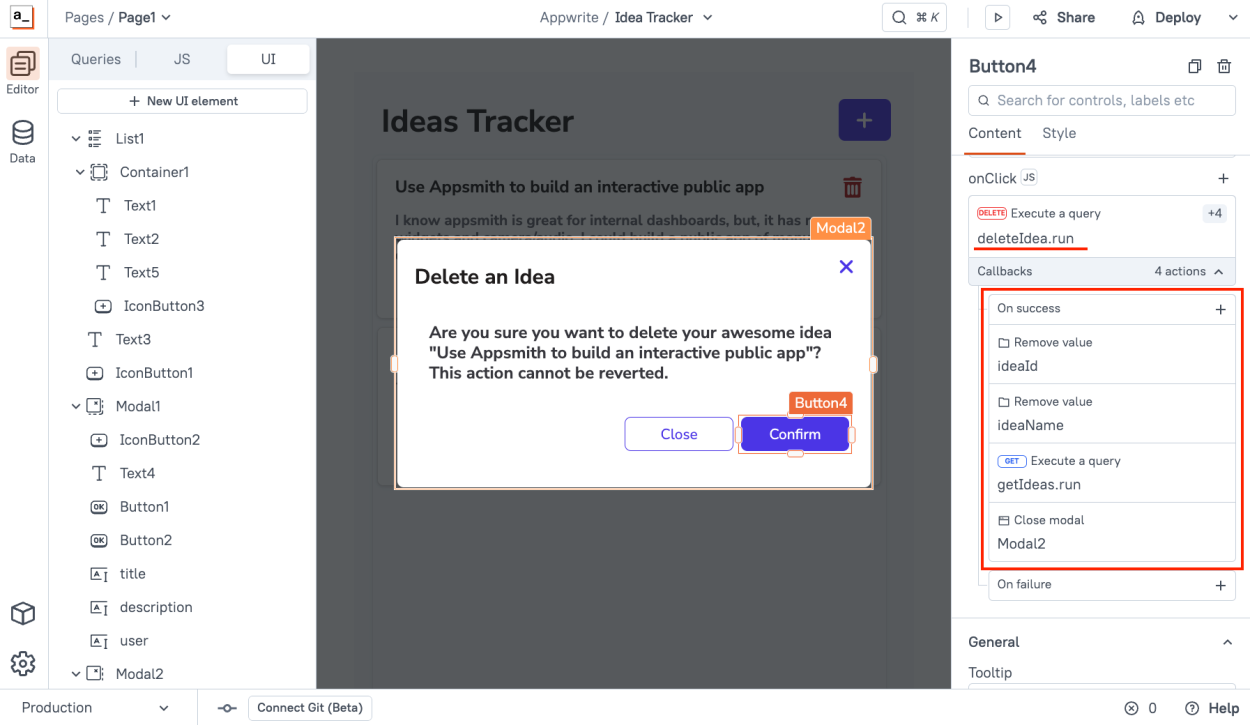
Then, add an onClick event to that icon button to display a new modal window, this new modal will serve as a confirmation to delete an individual idea, and then, on that same onClick event add another trigger which is storing values to the Appsmith Store, which stores the data in the browser's local storage as key-value pairs that represent storage objects and can be later accessed anywhere in the application
We'll add 2 values, one for the idea ID and the other one for the idea title, and we'll use these 2 values on both the modal window and on the Delete query.
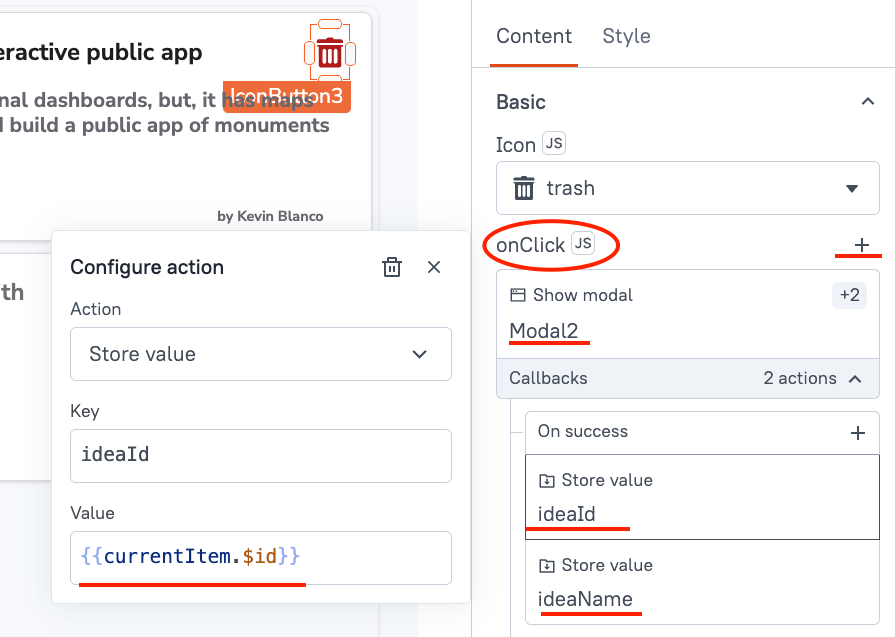
As you can see, the onClick event in the delete icon button is going to:
- Display the modal window
- Store the ideaId value referencing the
{{currentItem.$id}} - Store the ideaName referencing the
{{currentItem.title}}
Now, in the modal window, let's add a Text widget that displays a confirmation and uses
{{appsmith.store.ideaName}}. That way, we can display the idea the user is trying to delete.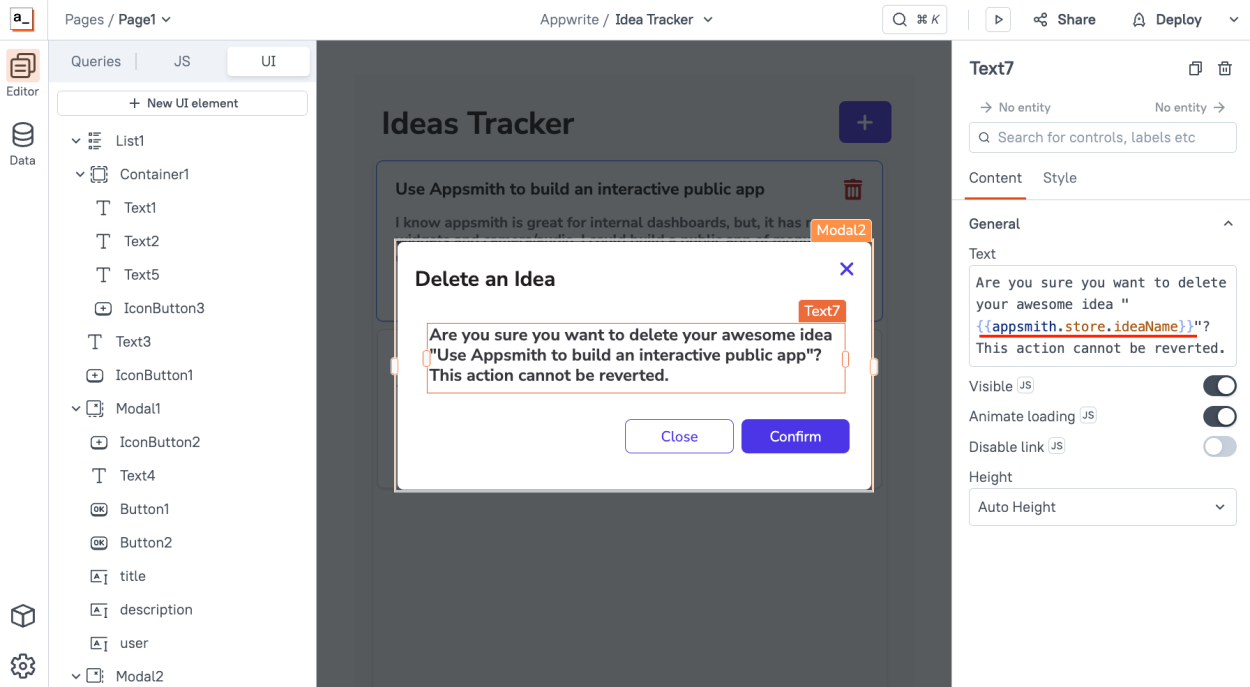
Now, we are ready to create the DELETE Query!
Deleting an Idea Functionality Query
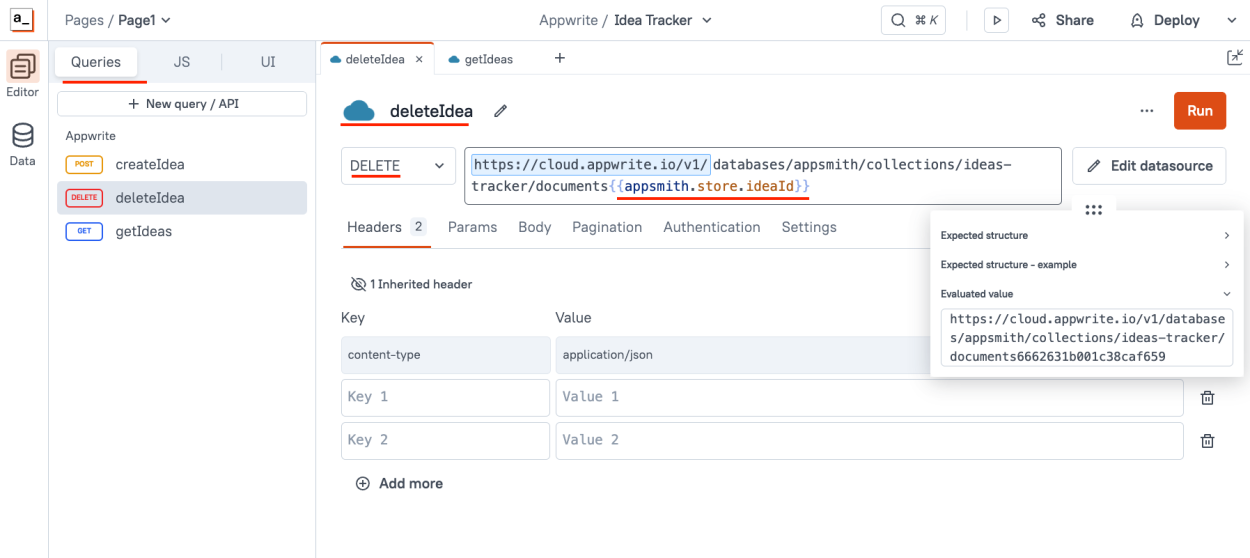
Now that we have the UI functionality ready and we are storing the id of the idea in the Appsmith store, we can use it on the delete query. In the Query tab, create a new Query using the Appwrite Datasource:
- Name it
deleteIdea - Select DELETE as the method
- Define
databases/appsmith/collections/ideas-tracker/documents/{{appsmith.store.ideaId}}as the request route.
This will reference the idea ID from the Appsmith store and pass it as a parameter in the request route.
Now that this Query is ready, let's bind it to the Modal confirmation button:
- Delete the store values from the Appsmith store
- Refresh the ideas from Appwrite to update the List widget
- Hide the modal window
And that's it! You can deploy your app again, and the Delete functionality is officially complete!
- Name it
Editing an Idea Functionality UI
Now, our final step to complete our Idea Tracker is editing a single idea! First, drag an Icon button to the UI inside the List widget and use the pencil icon to demonstrate is for editing
Now, on that button onClick event, create a new Modal window and also, store a value on the Appsmith store referencing the entire Idea object using
{{currentItem}}.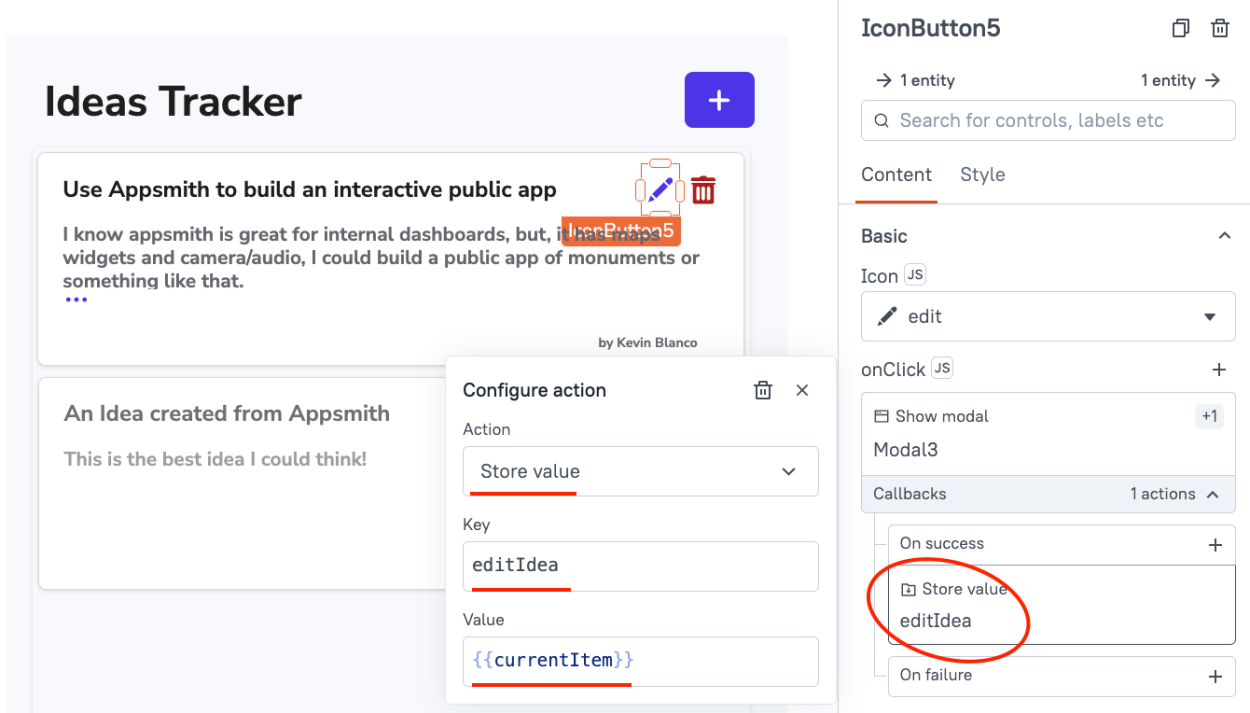
Then, on that Modal, drag 3 Input widgets - for the title, description and user, and change their id to editTitle, editDescription, and editUser respectively.
Now, on each field, we have to pre-fill it with the given idea you are editing, and since we already stored the idea on the Appsmith store, we can edit each field's Default Value and reference each idea field like this:
{{appsmith.store.editIdea.user}}like the following image: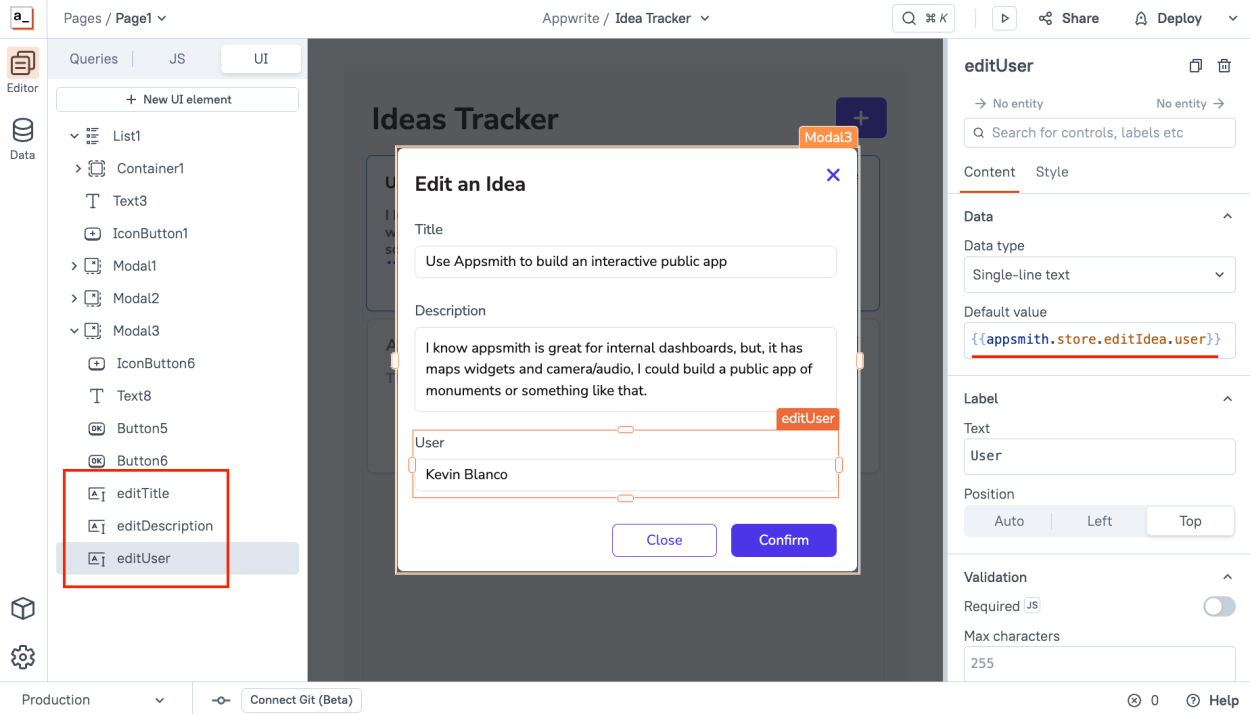
So now we have a UI that allows us to edit a given Idea and displays its data in a form for the user to edit.
Editing an Idea Functionality Query
Now that we have the UI functionality ready, we can use it on the edit query. In the Query tab, create a new Query using the Appwrite Datasource:
- Name it
editIdea - Select PATCH as the method
- Define
databases/appsmith/collections/ideas-tracker/documents/{{appsmith.store.editIdea.$id}}as the request route.
And use the following JSON for the body of the request:
{
  "data": {
		"title": {{editTitle.text}},
     "description": {{editDescription.text}} ,
     "user": {{editUser.text}},
	}
}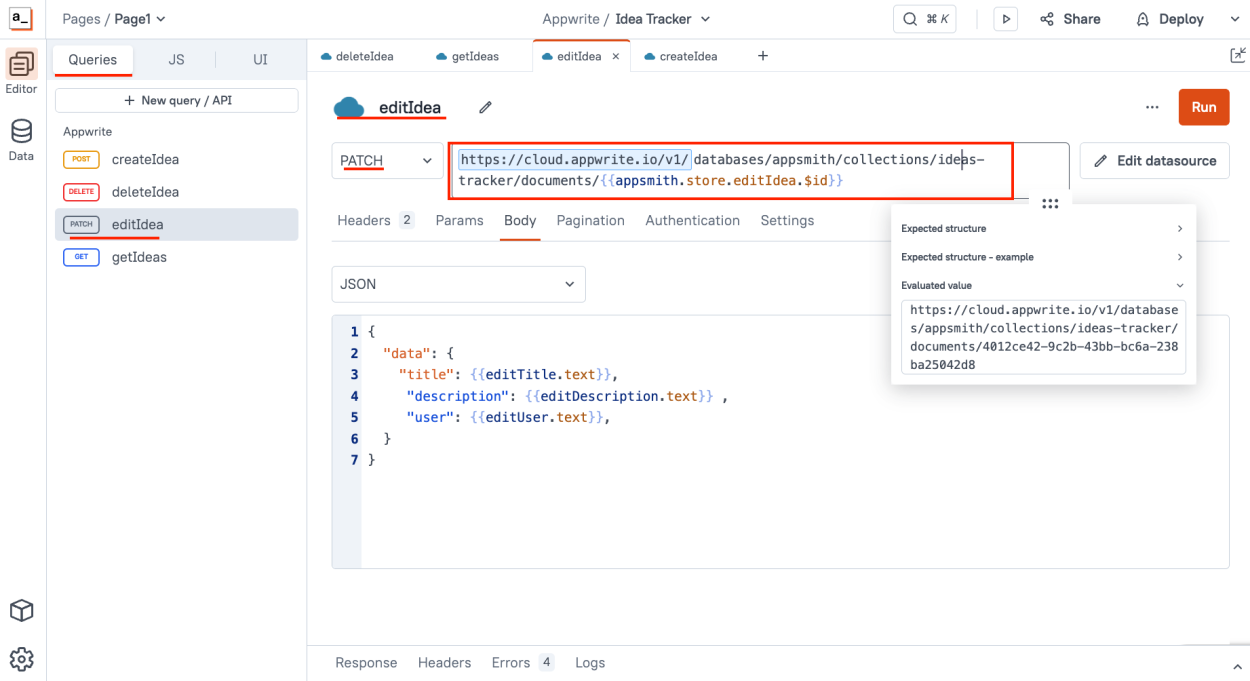
As you can see, we are grabbing the ID of the idea from the Appsmith Store, and, the new values from the Modal edit field forms.
Now, the last step, is to bind the Modal window button to this Edit Query, edit the onClick event and add the following actions:
- Call the
editIdeaquery - Delete the
editIdeastore value - Close the modal window
- Refresh the Ideas on the List by calling the
getIdeas
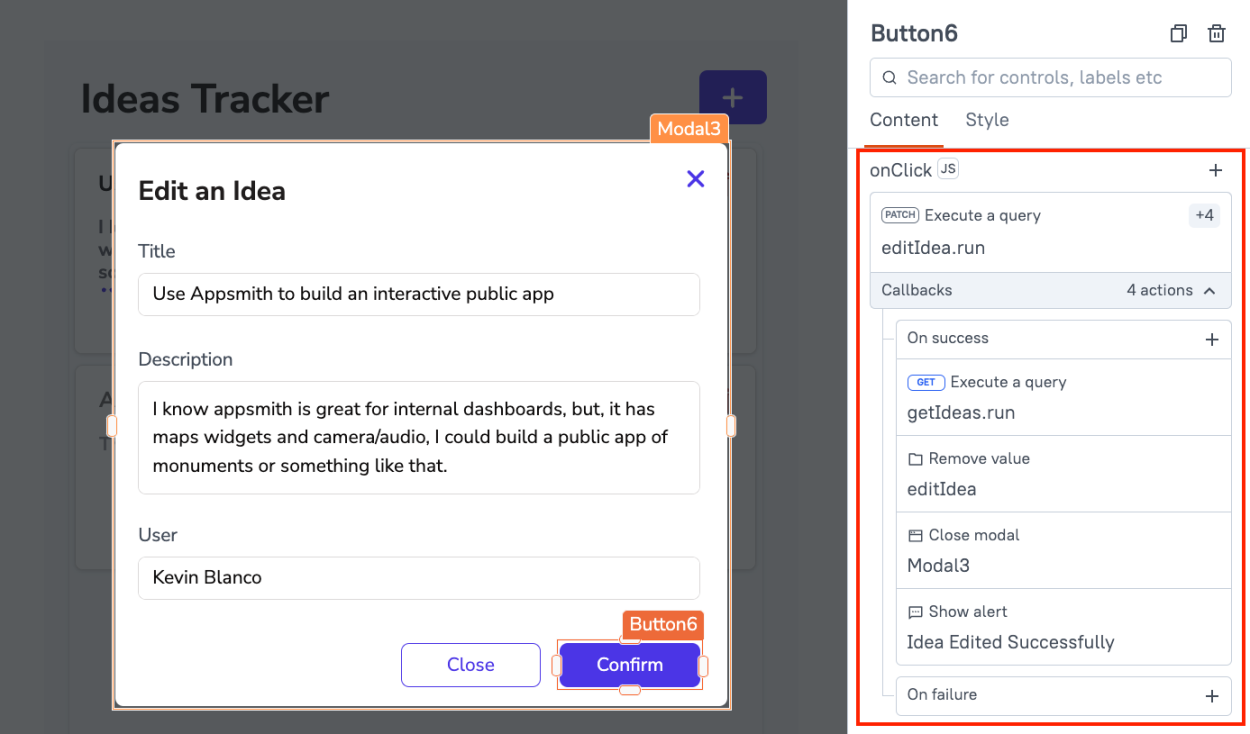
And that's it! Now deploy your app and you should be able to Edit any of your ideas!
- Name it
Conclusion
You should now have a working application that lists, edits, deletes, and creates new ideas, demonstrating how easy is to integrate Appsmith and Appwrite In case you want to try this app live, you can use it and fork it here: https://app.appsmith.com/app/idea-tracker/page1-66625d145b294e387055ce5c