


Integrating Appwrite with Appsmith
Goal
At the end of this article, you'll have an Appsmith application fully integrated with Appwrite, with the ability to work with their Databases, Functions, Files and much more.
Prerequisites
An Appwrite Account (you can create one free here) with a existing project.
An Appsmith Account.
Overview
Appwrite is an open-source backend-as-a-service platform that handles all your backend requirements, providing a robust and scalable solution for authentication, databases, file storage, and serverless functions. It allows you to focus on building outstanding user experiences without worrying about complex backend configurations, which sounds like what Appsmith does on the front end, right?
Appsmith and Appwrite form a comprehensive stack that streamlines the entire process of building enterprise dashboards and internal tools. Appwrite handles the heavy lifting of managing your backend infrastructure, while Appsmith empowers you to create stunning and interactive frontends that bring your data to life.
This article will explore integrating these two powerful platforms using the REST API. In the following chapters, you can explore how to integrate with Appwrite Databases, Functions, Files, and more using this datasource as the foundation.
Create an Appwrite API Key
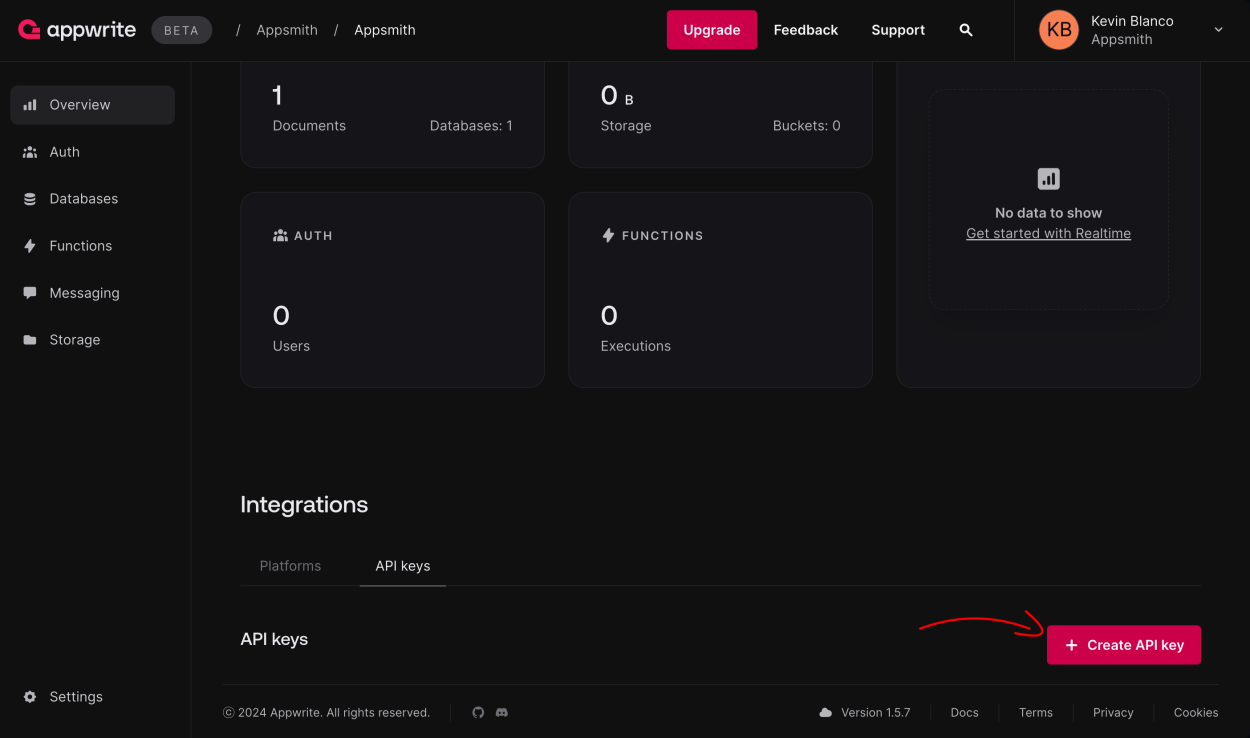
Go to your project in the Appwrite console and go to the Overview section, and find the API Keys area.
In the next screen, define your API Key name, expiration, and scopes. Depending on the type of application you want to build, you'll have to make sure to toggle on the scopes (permissions) for this API key. It is also important to only give the necessary scopes, which can be edited afterwards.
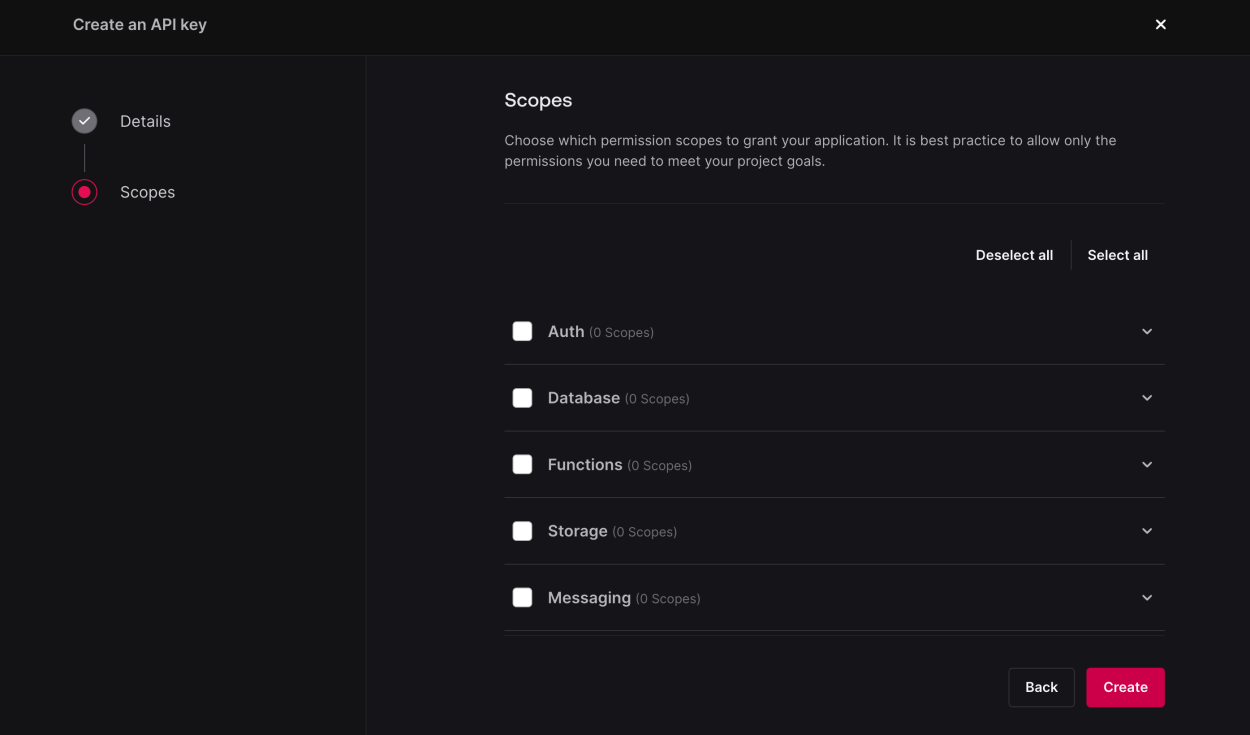
Hit Create, and you'll have your newly created API Key. You can now copy it and head on to Appsmith.
Create an Appsmith Datasource
Now that you have your API Key, go to the the Appsmith console and on your project create a new Datasource and select Authenticated API. Based on the Appwrite documentation, you'll need to pass the following headers:
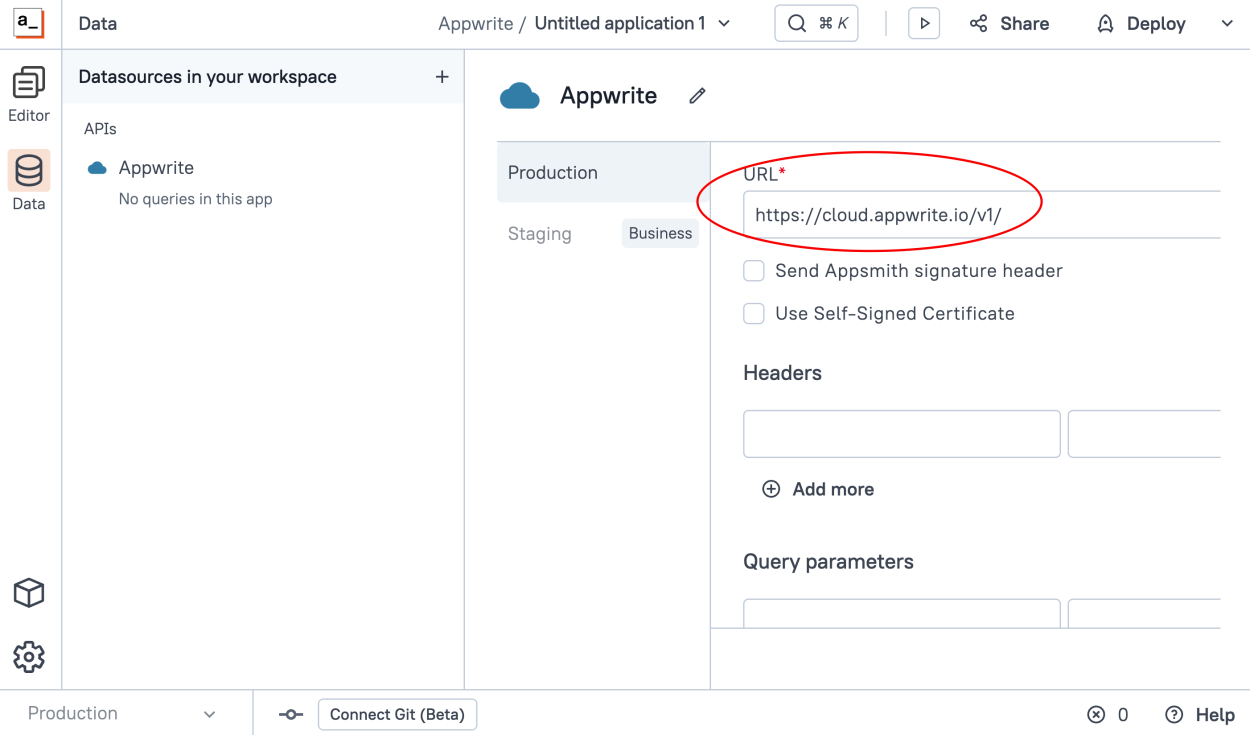
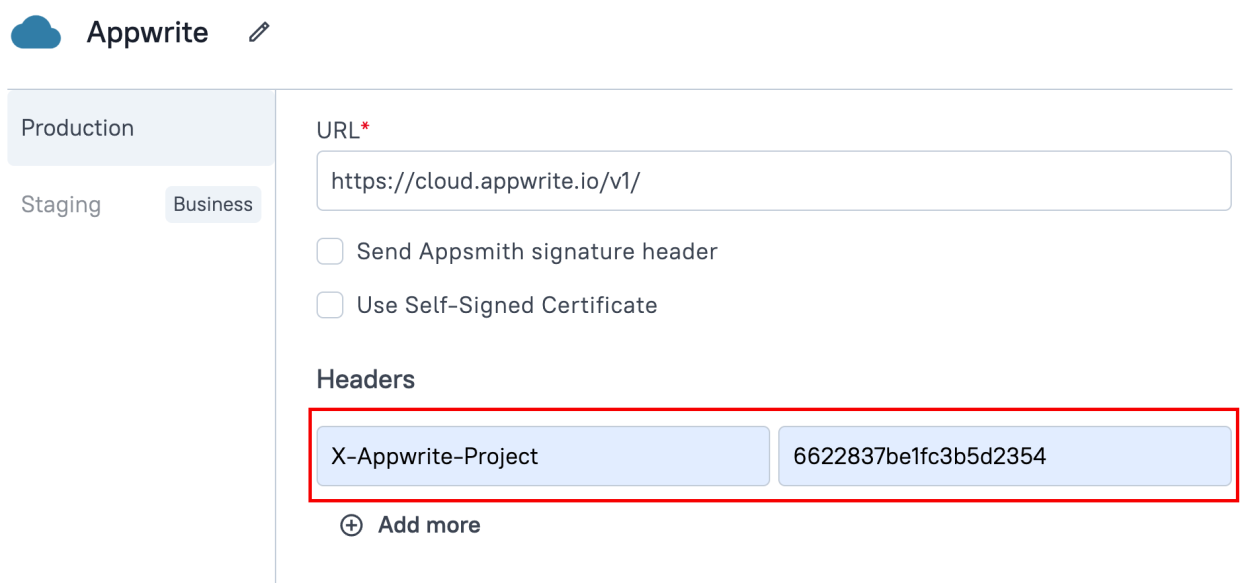
X-Appwrite-Project: [PROJECT-ID] The ID of your Appwrite project Content-Type: application/json Content type of the HTTP request. X-Appwrite-Key: [API-KEY] API key used for server authentication. So here's how you do that in the Authenticated API Datasource creation page. First, the API URL is https://cloud.appwrite.io/v1/
Then, the API key. A great advantage of using Appsmith's Authenticated API, is that this is securely encrypted stored, and will be never retrieved once saved, and is securely injected by Appsmith on your API calls.
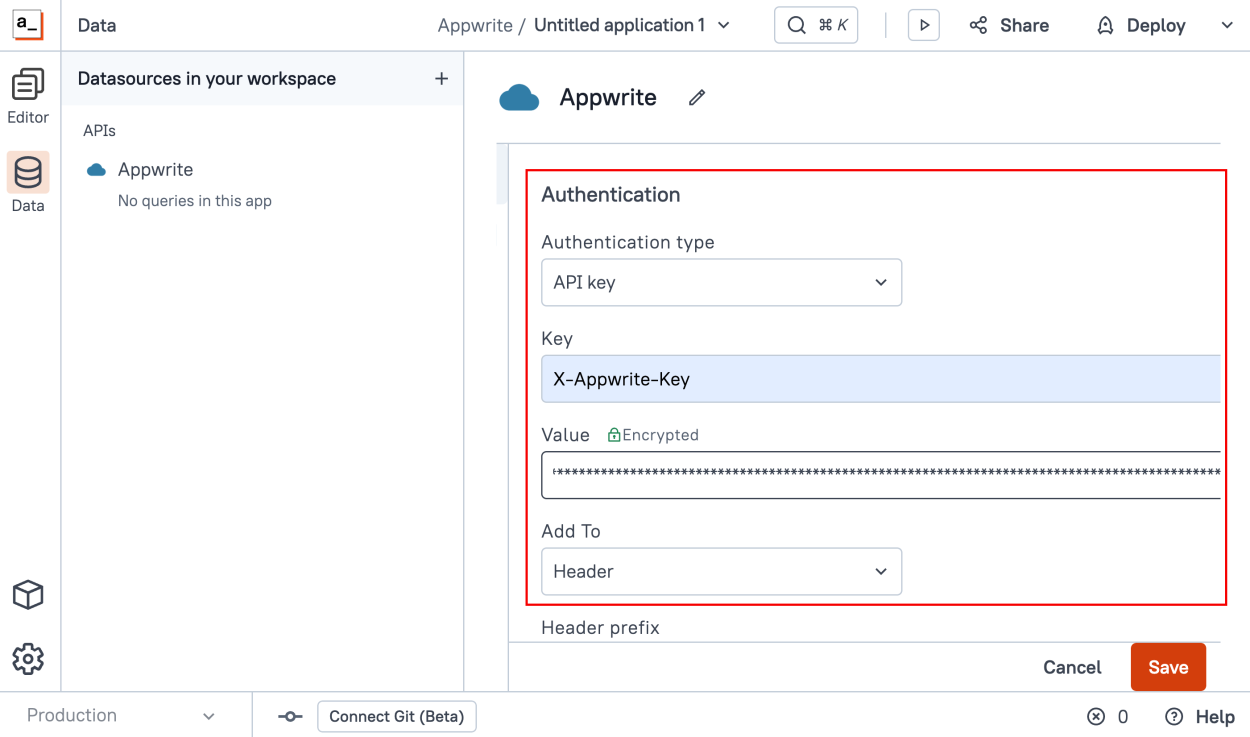
Scroll down to the Authentication section, and select API Key, and write X-Appwrite-Key in the "Key" field, and then enter the API Key you generated in the first step on the "Value" field.
Also, create a new Header on this same page for the Appwrite project ID, write X-Appwrite-Project on the "key" field and your project ID on the "value" field
Now your datasource is ready! Hit "Save" and test our Datasource by creating a new Query.
Create a new Appwrite Query
Head to the Editor section, and create a new Appwrite Query which is based on the Datasource we just created:
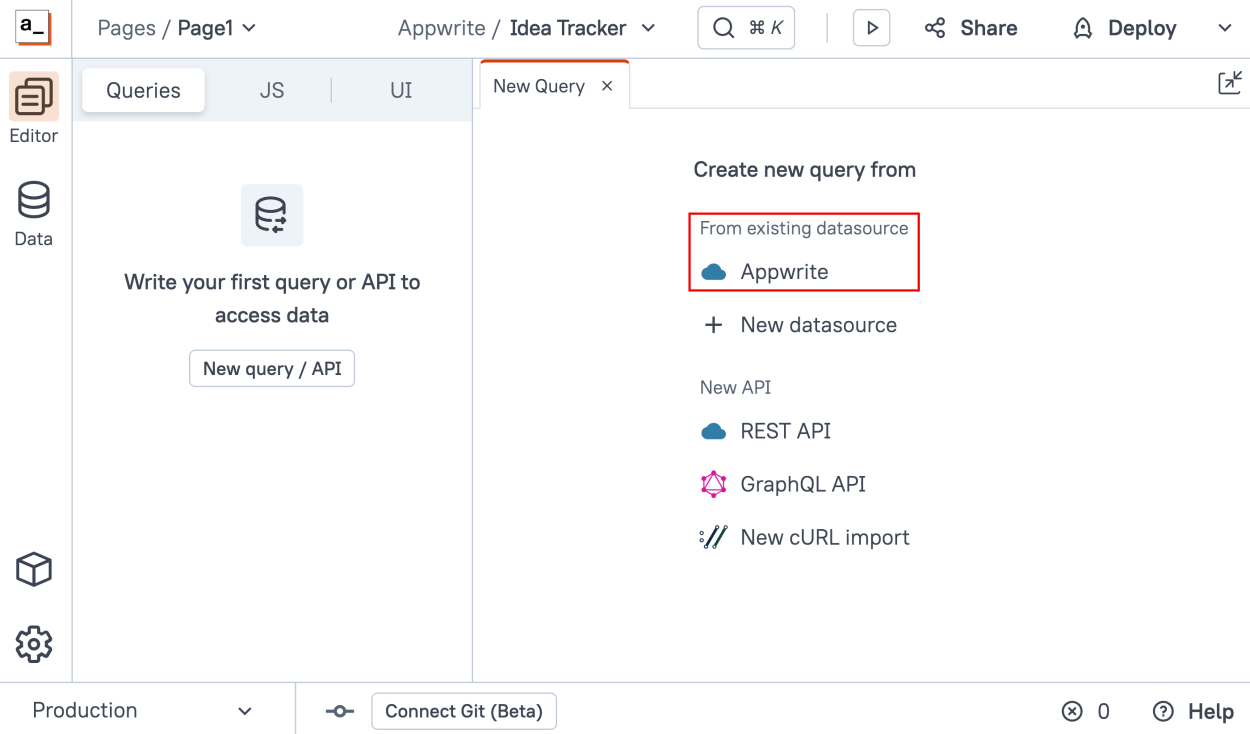
As you can see now, Appsmith will pre-fill the base URL, and also it will securely inject the headers and the authentication, so you don't have to worry about it.
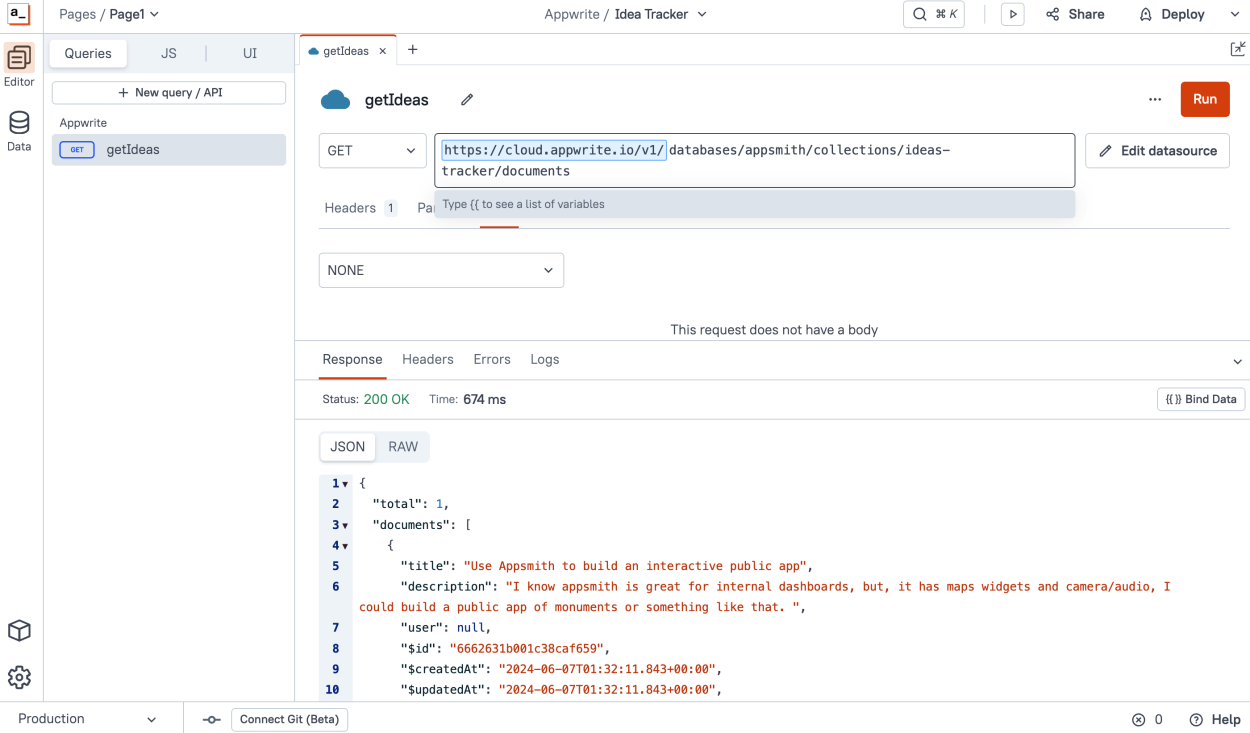
Now, let's list the documents of a given database using the /databases/{databaseId}/collections/{collectionId}/documents endpoint. In my case, my database name is appsmith and my collection name is ideas-tracker, and click "Run", as you can see, you get a successful response from Appwrite.
Conclusion
Now, you are ready to start building your application. The integration and authentication are successful, and you can bind data to your UI. In the next chapter, we'll build an Ideas Tracker application using Appsmith and Appwrite.


I'm not seeing an easy way to connect Appwrite to an existing MySQL database. I see it is discouraged in some of my Googling. Is this the case? Should I not use Appwrite as a way to connect to existing data?
In reply to I'm not seeing an easy way… by pchambless1
It looks like you can directly connect to a SQL database from Appwrite: https://github.com/appwrite/appwrite/discussions/4957
However, it does look like it is a bit of a pain and not encouraged. Appwrite wants to be the main DB all in one place. It would probably be best to either migrate the data into Appwrite, or just connect to it directly in Appsmith. Since you can connect to MySQL and Appwrite in the same app, it shouldn't be too tough.