


Running Mssql Server in Your Mac M1/M2/M3 Using Docker - Bonus Secret at the End
Goal
At the end of this tutorial, you will have MsSQL Server running on your Mac - as a gift bonus, I will show you how to expose it and connect it to a powerful UI.
Prerequisites
Docker Engine 1.8+
At least 1GB of RAM. Make sure to assign enough memory to the Docker VM if you're running on Docker for Mac or Windows.
Overview
Docker for Mac M1/M2/M3 has come a long way since late 2020, the Docker team’s effort shines in their lasts version for ARM64, which can be found here. You will need to have this latest version (or later) installed to run the SQL container successfully.
Up Next: Announcing Appsmith Managed Hosting!
Install MsSQL Docker Image
If you have the prerequisites installed and validated in your local machine, then you are ready to run the MsSQL Docker image! Open your prefered terminal and run the following command:
docker run -e "ACCEPT_EULA=1" -e "MSSQL_SA_PASSWORD=MyPass@word" -e
"MSSQL_PID=Developer" -e "MSSQL_USER=SA" -p 1433:1433 -d --name=sql mcr.microsoft.com/azure-sql-edge
Let's take a look at those environment variables:
ACCEPT_EULAconfirms your acceptance of the End-User Licensing Terms. For the Azure SQL Edge Developer EULA can be located here. Azure SQL Edge Premium EULA can be found here.MSSQL_SA_PASSWORDis the database system administrator (userid = 'sa') password used to connect to Azure SQL Edge once the container is running. Important note: This password needs to include at least 8 characters of at least three of these four categories: uppercase letters, lowercase letters, numbers and non-alphanumeric symbols.MSSQL_PIDis the Edition that the container will run with. Acceptable values:- Developer : This will run the container using the Developer Edition (this is the default if no MSSQL_PID environment variable is supplied)
- Premium : This will run the container using the Premium Edition
After this command is done, that's it! You are ready to start using it, that was easy right?
Connecting via Azure Data Studio
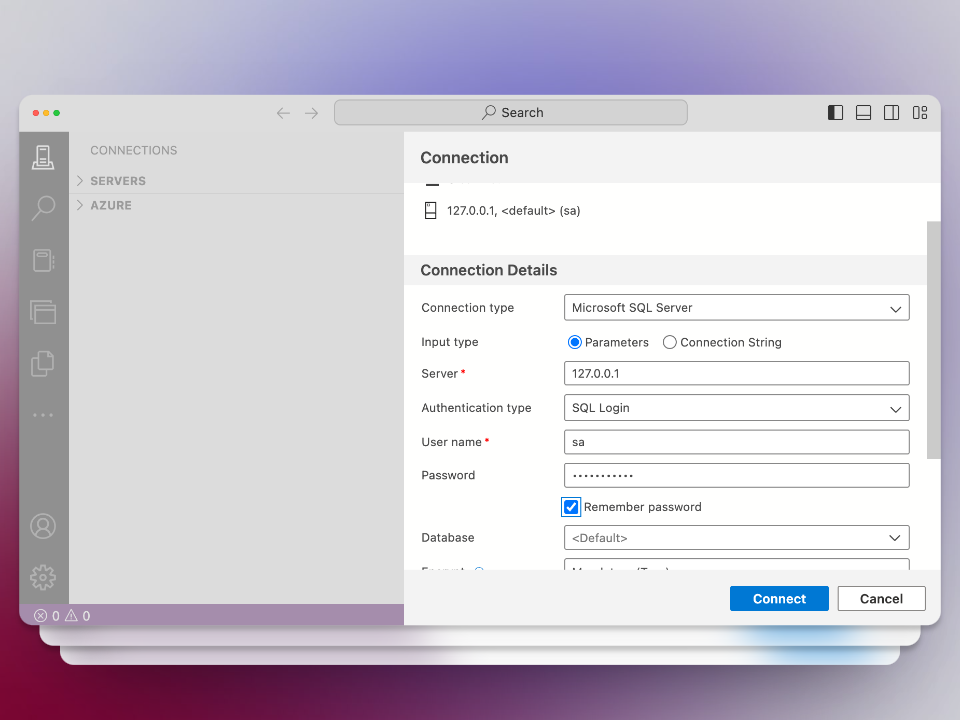
One way to connect to your instance easily is to use Azure Data Studio, a software available for Mac as well. Once you have downloaded it and installed it, you can create a new connection:

Now, you will need to put 127.0.0.1 as server, we’re already hosting the Docker container on port 1433, which is the default port for SQL. Use SQL Login and set the user to sa. Lastly, set the password you chose, which was MyPass@word from the command above:
Now you should have a working connection!
Create a Database
I recommend not using the master database and creating your own, run the following in a New Query window in Azure Data Studio and hit run:
USE master
GO
IF NOT EXISTS (SELECT [name]
FROM sys.databases
WHERE [name] = N'TestDb')
CREATE DATABASE TestDb
GO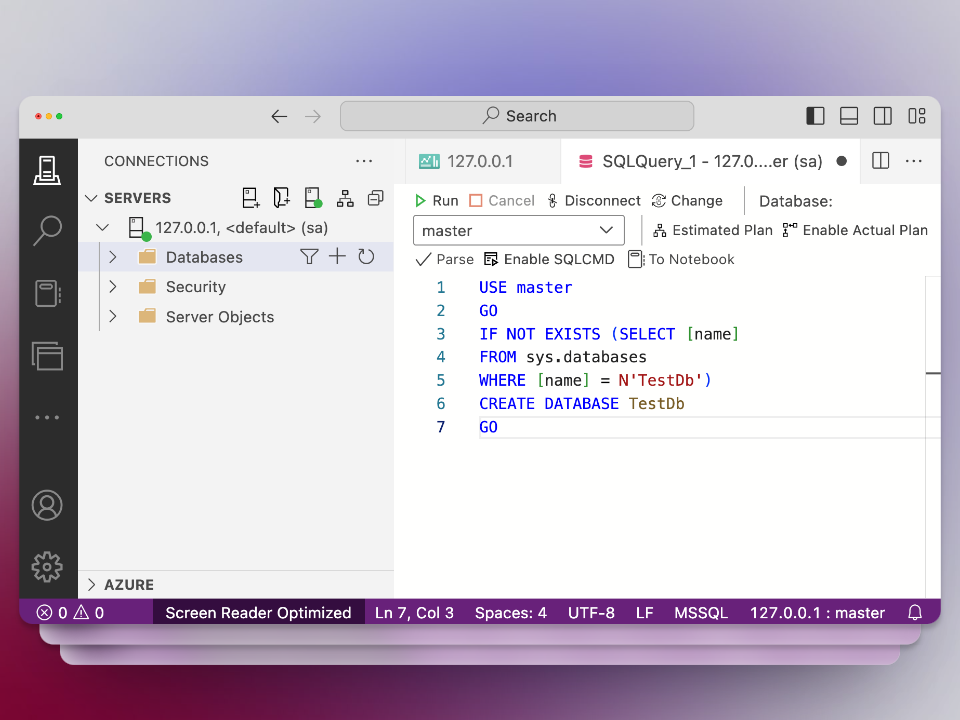
Bonus Gift - Connect it to Appsmith and create an App
Now that you have MsSQL running, you can build an app using Appsmith, the leading opensource no-code platform that empowers users to build applications with ease and efficiency on top of their data, allowing them to create powerful and scalable internal tools and dashboards quickly.
Go ahead an create a new free account at Appsmith and now let's use ngrok to expose our instance to the outside world so Appsmith can connect to it. If you do not have ngrok installed on your Mac, is really simple, just run
brew install ngrok/ngrok/ngrokand thenngrok tcp 1433And you will see something like this:
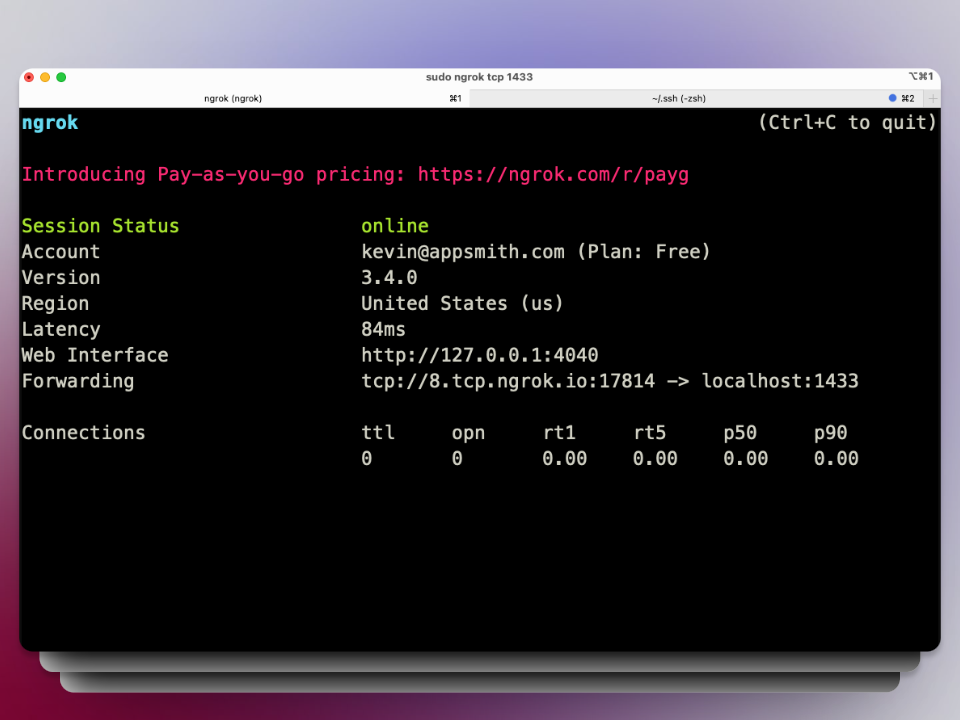
So, as you can see, the
8.tcp.ngrok.io:17814is a host that is pointing to our localhost, and we can use that to connect to MsSQL Server instance.Now, go to your Appsmith app and Add a New Datasource from the left menu and select Microsoft SQL Server
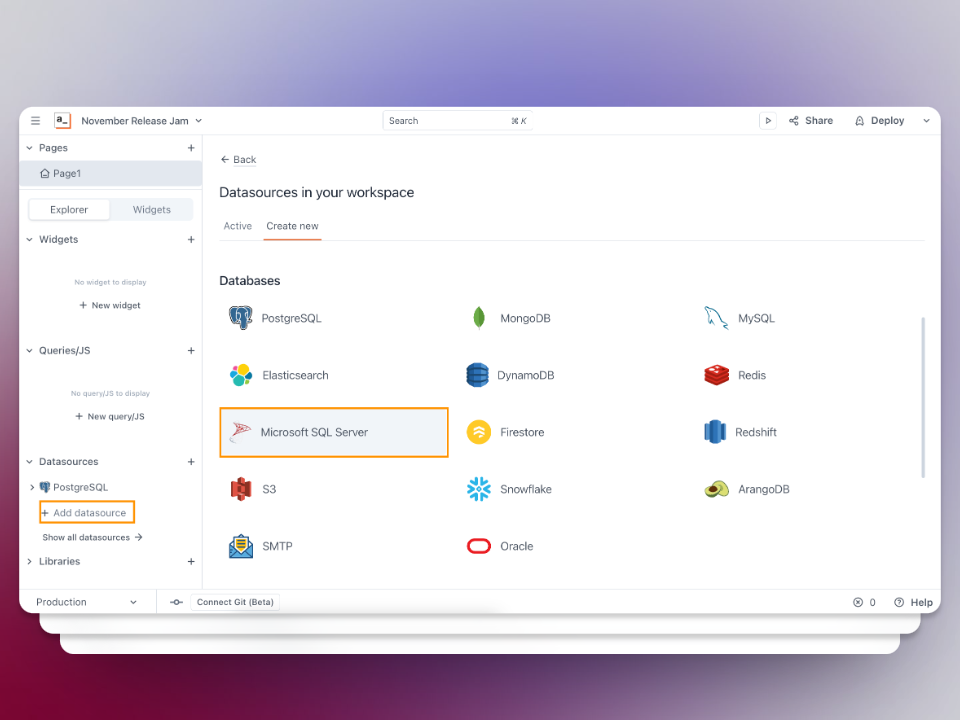
And enter the same credentials, but the host is the ngrok URL, not localhost
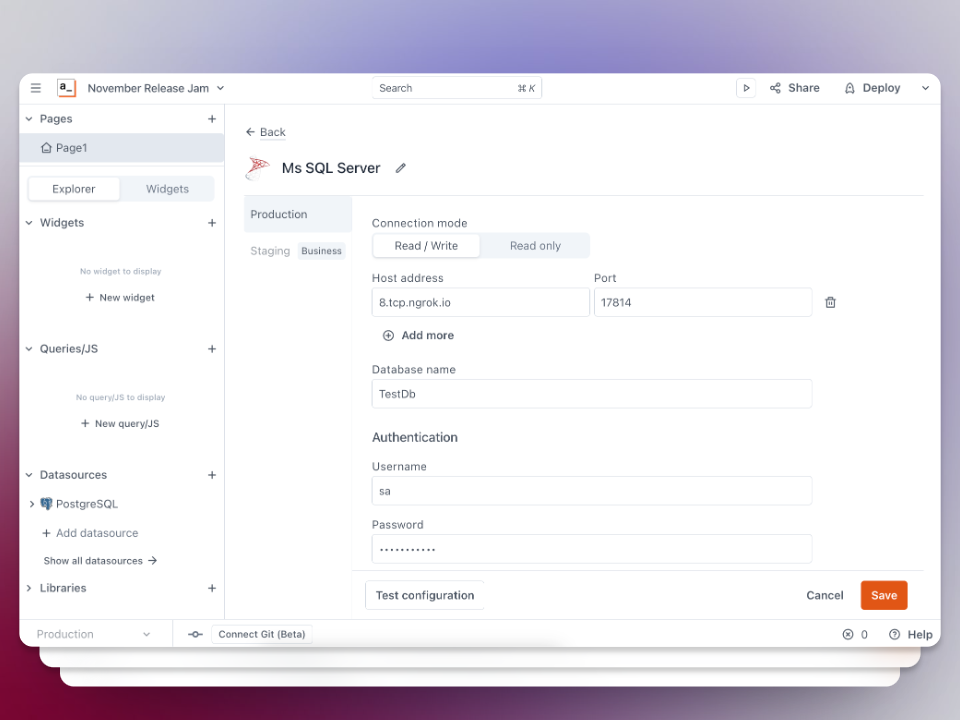
And after you hit Save, you now can start building your Appsmith app using your MsSQL Server instance, for example, we can write a query that reads the records from the TestDb database we created and showcase the data on a Table:
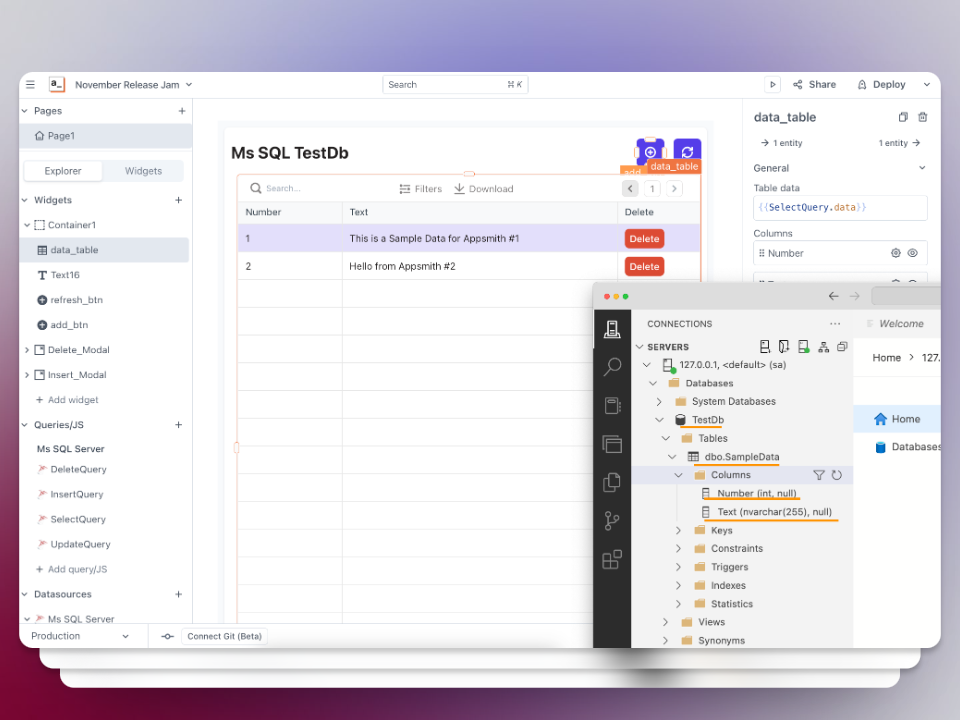
That’s it! Now, you have a functional SQL Docker container on Apple Silicon!
Conclusion
We've learned how easy is to run MsSQL Server on Mac using Docker and we took a step further building an Appsmith App using our instance as a Database.


We looked at making this scenario even easier with the new sqlcmd (https://aka.ms/sqlcmd)
Let me know if "sqlcmd create mssql" is useful for you, and/or how we can improve it!
In reply to We looked at making this… by stuartpadley
This is super useful Stuart! Thanks a lot for sharing. I will make another tutorial using this method
Thank you - this is super helpful.
One update: the password now seems to require a number, so just add a 1 to the example: "MSSQL_SA_PASSWORD=MyPass@word1"