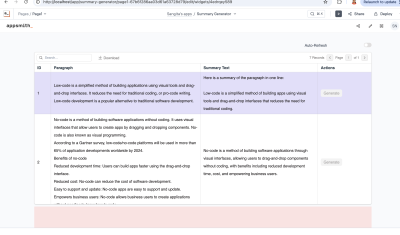

Integrating Harvest Oauth2 with Appsmith
Goal
In today's fast-paced world, efficient time tracking has become paramount for organizations striving to optimize productivity and accurately measure project timelines. One popular time-tracking tool that has gained recognition among businesses is Harvest. With its intuitive interface and comprehensive features, Harvest empowers teams to monitor and manage their time spent on various tasks seamlessly.
Prerequisites
Have a Harvest account with admin permissions. Create a free account here.
Overview
This article explores the process of integrating OAuth2 with Harvest, using Appsmith as the low-code tool of choice. Appsmith is the most powerful platform to simplify application development, allowing developers to rapidly build, integrate, and deploy applications without extensive coding. By combining the strengths of Harvest, OAuth2, and Appsmith, organizations can unlock a wealth of possibilities for efficient time tracking and improved interoperability.
Appsmith's documentation about OAuth2 can be found here: https://docs.appsmith.com/core-concepts/connecting-to-data-sources/authentication/authentication-type/oauth2-authentication but, in this article, we'll break it down and showcase it easily for you.
Create a Developer Application in Harvest
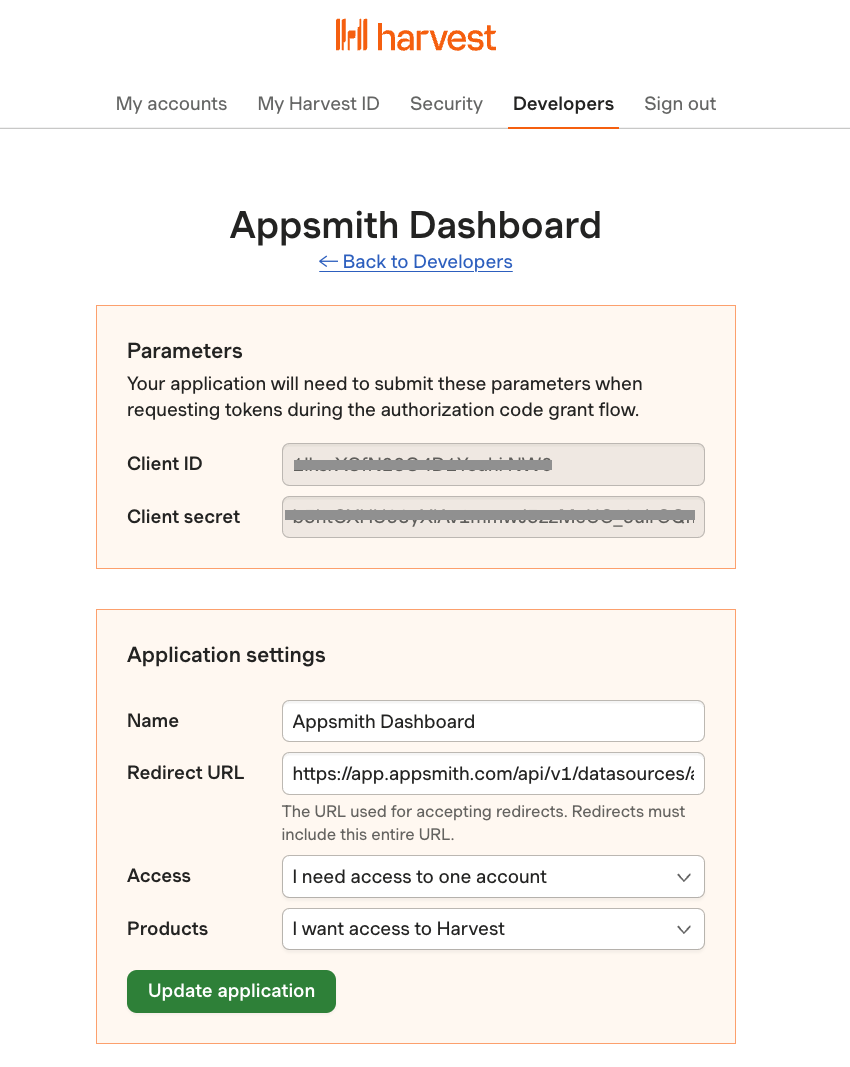
To be able to pull data from Harvest using their API, we must register a new developer application in Harvest. Go to id.getharvest.com and log in with your harvest credentials; next, you will see in the main menu an item called "Developers", by clicking there, you will see the following screen:

Here, you will click "Create new OAuth Application" and Harvest will ask you for a Name and a Redirect URL; for the name, it can be anything you want, and for the Redirect URL, make sure to type the Appsmith redirect for Authentication which is https://app.appsmith.com/api/v1/datasources/authorize. By clicking "Save" you will receive the Client ID and Client Token. Make sure to keep this tab open because you will need these values in the next steps.
And that's all we need for now on the Harvest side, let's go back to Appsmith to configure the OAuth2 authentication.
Register a New Datasource in Appsmith
Go ahead and log in to Appsmith and either create a new App or open the App you want to integrate Harvest, and on the left side menu you will see the Datasources section, click the "+" icon or "Add new Datasource" and select "Authenticated API"
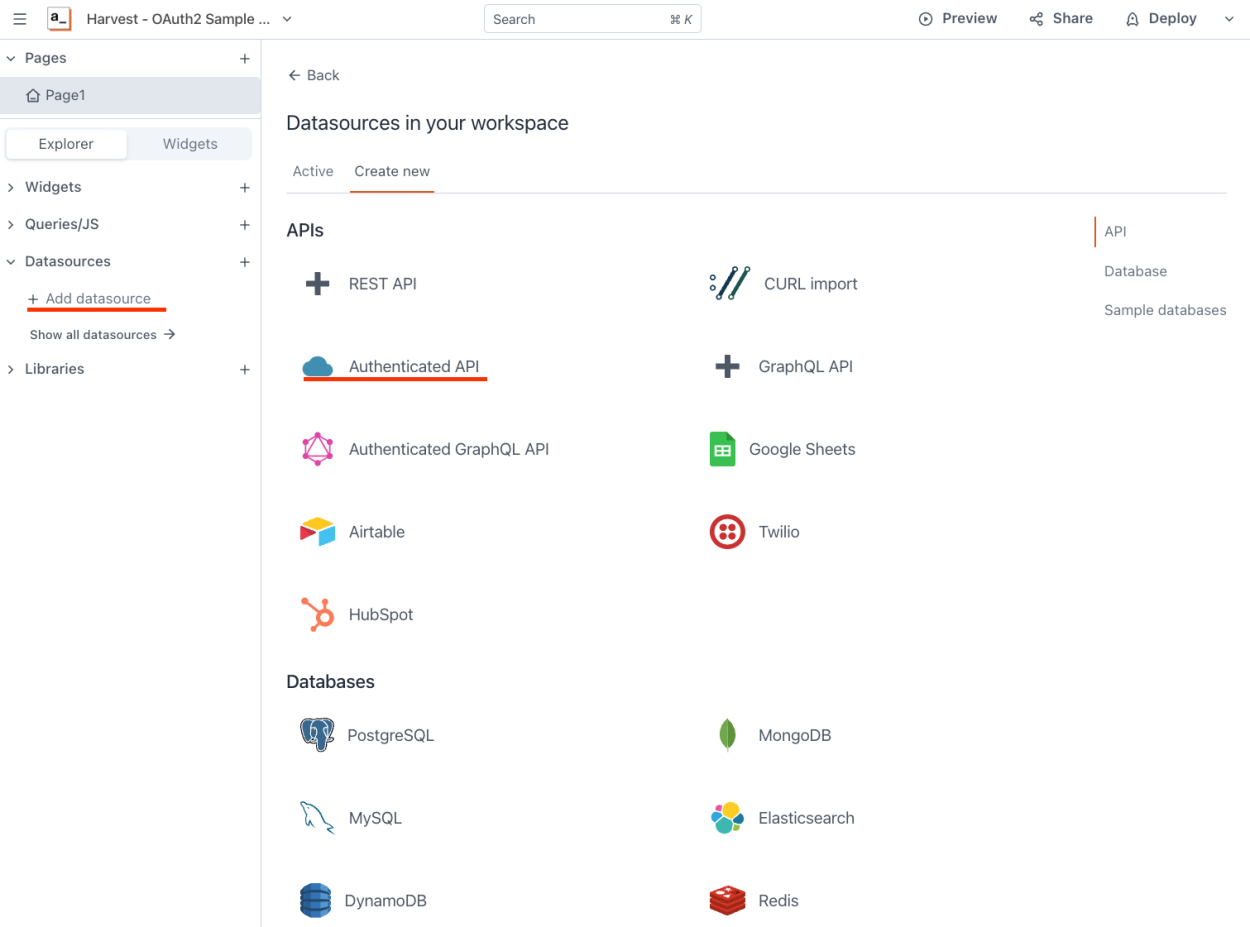
Give the datasource the name you wish, and now in the datasource URL, let's enter Harvest API's base URL, which is `https://api.harvestapp.com/v2/` and in the Authentication Type, select "OAuth 2.0", this will sleeve a new set of configurations to define.

All the information I'm about to provide is based on Harvest's API documentation, which you can find here.
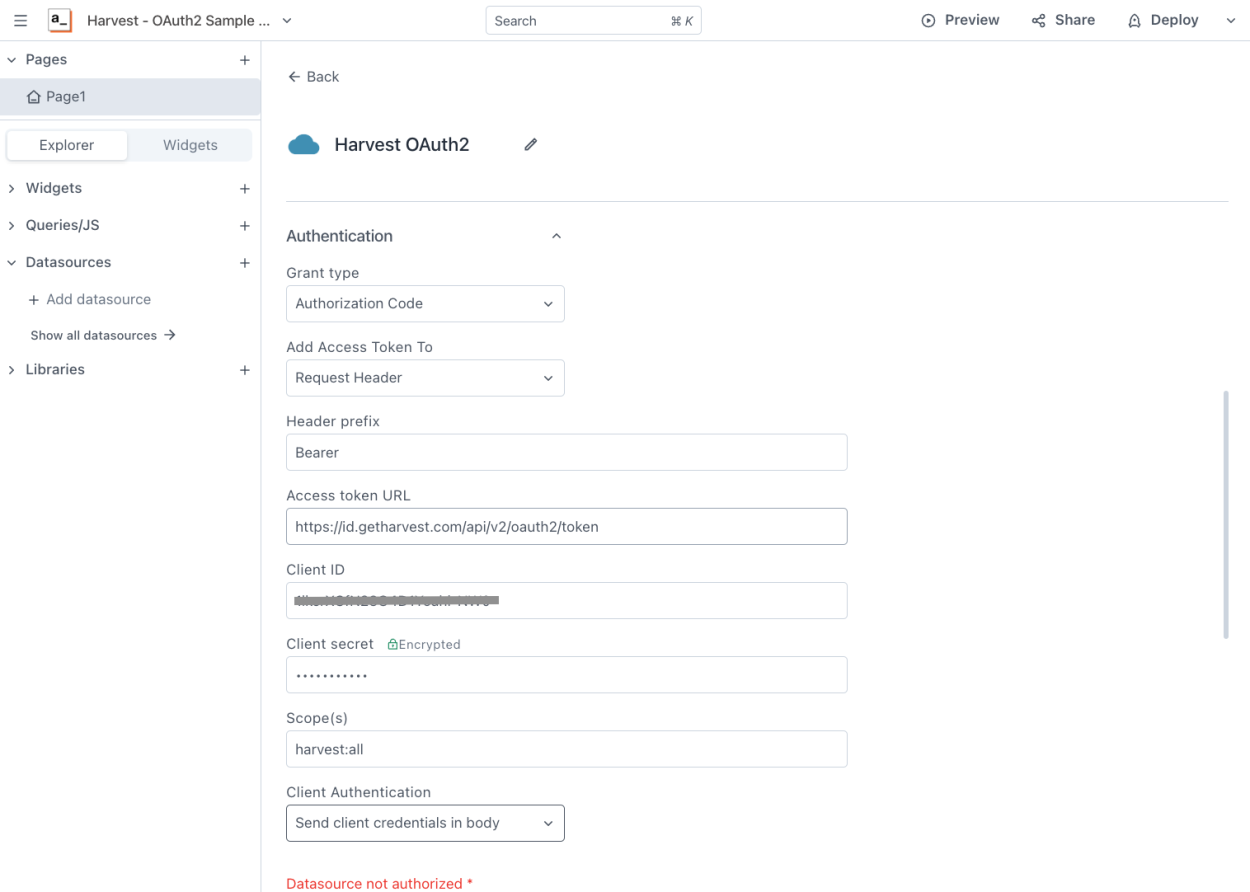
- Grant Type: You have to select "Authorization Code"
- Add Access Token To: select "Request Header"
- Header Prefix: Appsmith will automatically fill it with "Bearer" leave it like that.
- Access Token URL: Based on Harvest's docs it should be https://id.getharvest.com/api/v2/oauth2/token
- Client ID: Paste the Client ID that Harvest generated in the first step.
- Client Secret: Paste the Client secret that Harvest generated in the first step.
- Scope(s): Since when we created the OAuth2 app in Harvest we requested access just to Harvest, you have to type harvest:all. If you for whatever reason selected also Forecast permissions, make sure to define the right permission scope based on their documentation here.
- Client Authentication: Select "Send client credentials in body".
And that should be able to make it work. You can add additional headers if you want to send them for whatever reason back to Harvest, but, just with these settings the auth will work. Now, scroll down and you will see a button that says "Save and Authorize"
Now you have successfully integrated Harvest AOuth2 integration within Appsmith 🎉🎊. Something extremely great about Appsmith is that it will manage the token refreshing by reissuing a new token when it expires, you don't have to worry about it. That is awesome!
Use the newly created Datasource
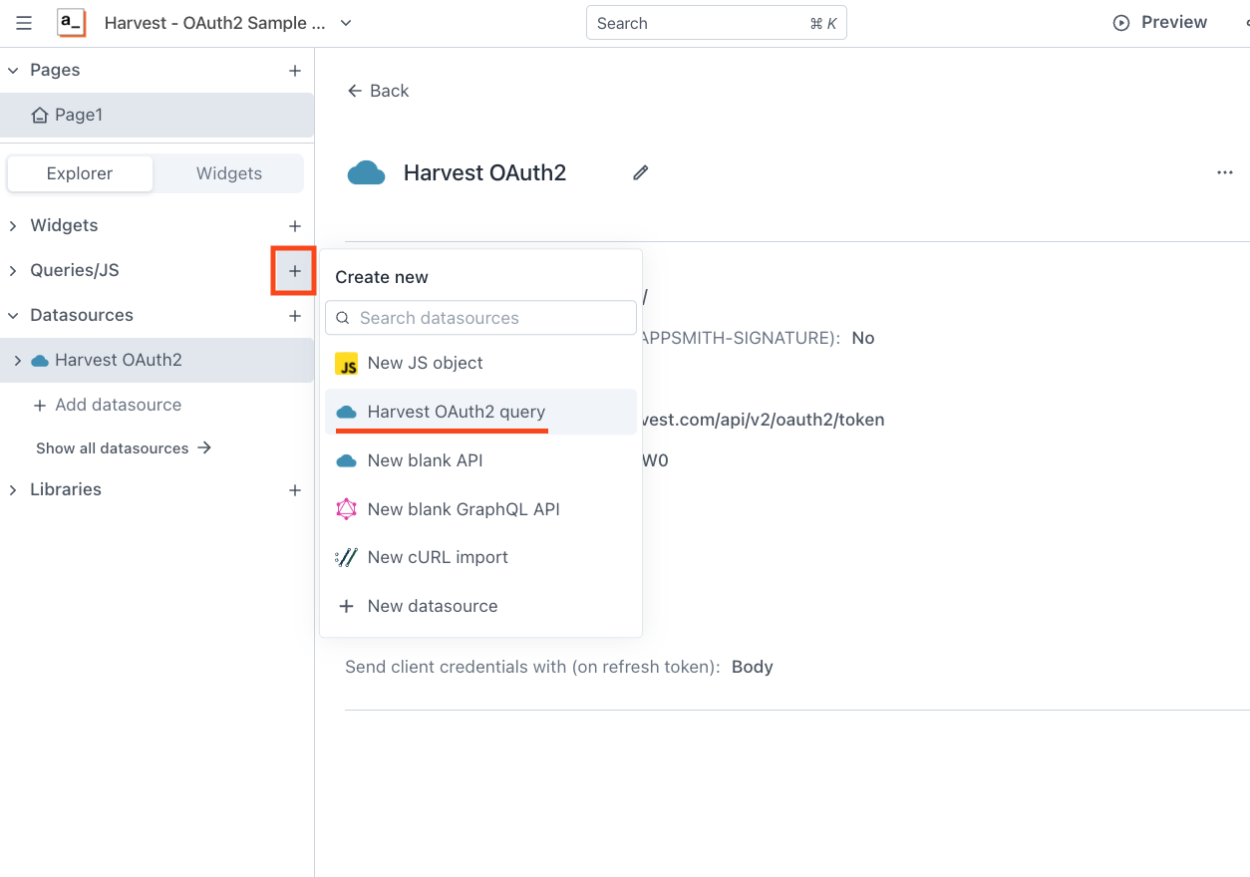
Now that we have OAuth2 successfully integrated inside Appsmith, you can go ahead and create a new Query, using the left menu "+" icon next to the Queries section and then selecting the "Harvest OAuth2 query" option.
Now Appsmith will present a very familiar query builder UI for you to define your request, and it will pre-populate the base URL based on the one we defined in the datasource. We can reference Harvest's API docs for the endpoints available to us here, for example, let's use the "/users/me" endpoint to request for the current authenticated user's data. Also, it's important to define a meaningful name for this query, in this case, I'm gonna call it "GET_User"
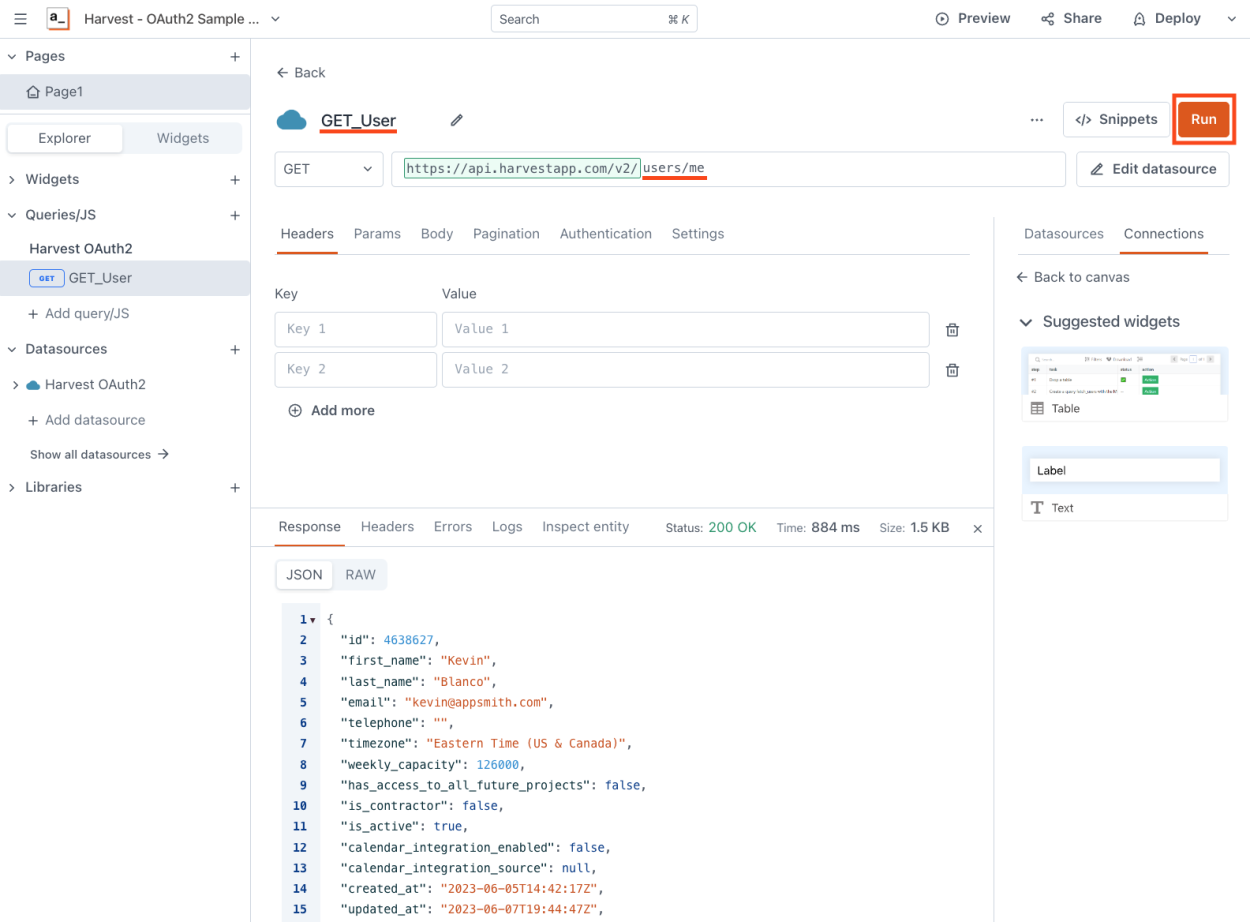
Now, the API correctly authenticates, automatically injects the token on the requests and pulls information with no problems whatsoever! So, let's bind this information into the UI.
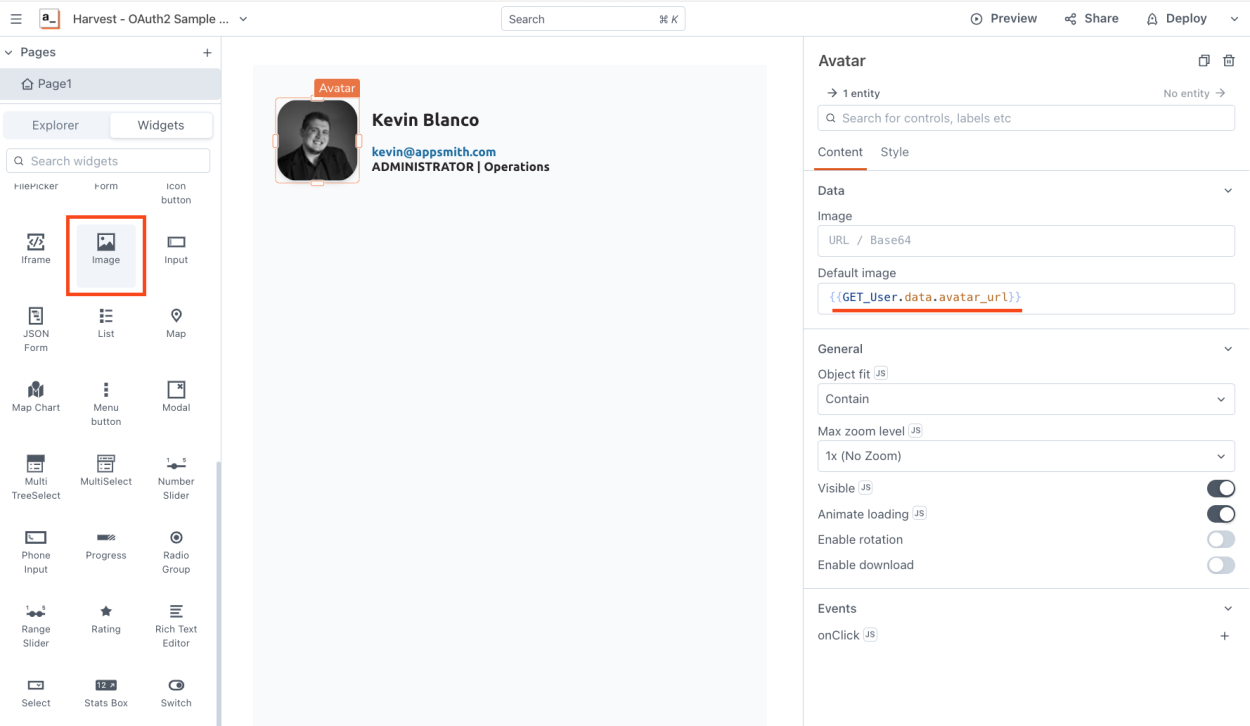
In this example, I want to show my Harvest user's profile picture, so I drag and drop an image widget inside the page canvas and in its properties, in the Default Image field, use the curly brackets to bind data, and use the name we gave the Query, so for this example, we will use {{GET_User.data.avatar_url}} and that's it! you won't have to worry about re-authenticating, getting a new fresh token, or anything like that, Appsmith got you covered!
Conclusion
We reviewed how to use Appsmith's OAuth2 and what the process of generating a new app in Harvest looks like. Now you have what it takes to start bringing all your information from Harvest into Appsmith, we would be more than happy to see what you are capable of building, and to keep it even simple for you, here you can find our Appsmith's sample forkable app!: https://app.appsmith.com/app/harvest-oauth2/page1-6488e6656fc4955838a24576
Fork it, set your Client ID and Client Secret and get rolling :)