

Integrating Supabase with Appsmith Using Oauth2
Goal
By the end of this guided tutorial, you will be able to integrate Supabase with Appsmith using oAuth2.
Prerequisites
Overview
In the ever-evolving landscape of application development, creating powerful, data-driven, and user-friendly applications while minimizing development effort is essential. Supabase and Appsmith offer an extraordinary combination that empowers developers to achieve just that. Supabase provides a robust open-source platform for building and scaling database-driven applications, while Appsmith streamlines the UI development process by enabling developers to create custom workflows with ease.
Supabase is an open-source Firebase alternative that provides real-time and secure APIs for PostgreSQL. It offers features like authentication, database management, and storage, making it an excellent backend choice for modern applications. On the other hand, Appsmith is a low-code development platform that enables developers to build internal tools and applications quickly. With its drag-and-drop interface and pre-built templates, Appsmith makes UI development efficient, while still allowing full customization with JavaScript.
Why Supabase and Appsmith Together?
- Full-Stack Development Made Easy: Combining Supabase and Appsmith, developers can take advantage of a full-stack solution that handles both frontend and backend requirements. Supabase offers a seamless API layer for database access and authentication, while Appsmith streamlines the frontend development process, resulting in a cohesive development experience.
- Real-Time Capabilities: Supabase's real-time functionality allows applications to react instantly to changes in the database, creating responsive and dynamic user experiences. When paired with Appsmith's easy-to-use interface components, developers can build applications with real-time updates without diving deep into complex frontend frameworks.
- Rapid Prototyping Scaling to Enterprise: Appsmith's drag-and-drop interface enables developers to quickly prototype and build internal tools with custom workflows. The pre-built templates and integrations offered by Appsmith make it effortless to assemble powerful UIs, reducing development time significantly allowing to reduce time-to-market, Appsmith caters to a broad range of users, allowing them to build applications without compromising on the quality or scalability.
- Open-Source and Customizable: Both Supabase and Appsmith are open-source, providing developers with the freedom to customize and extend functionality as needed. This allows teams to align the tools with their specific requirements and integrate them seamlessly into existing workflows.
OAuth2 is a widely adopted and trusted standard for authorization. By implementing OAuth2, Supabase and Appsmith ensure that only authorized users can access sensitive data and perform actions within the application, let's review the steps to easily get this integration in place.
Publish your OAuth App on Supabase
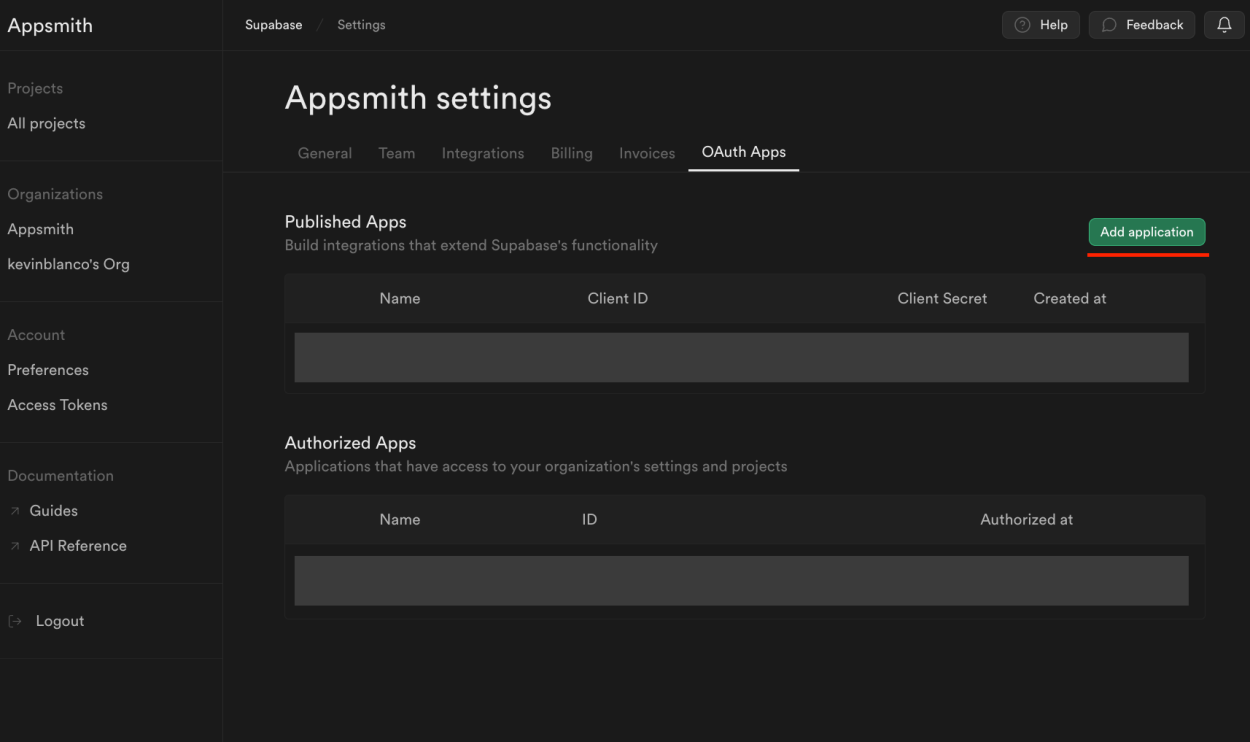
Go to your Supabase Organization settings and find a the tab called "oAuth Apps", there, click on the green button on the right for "Add Application"
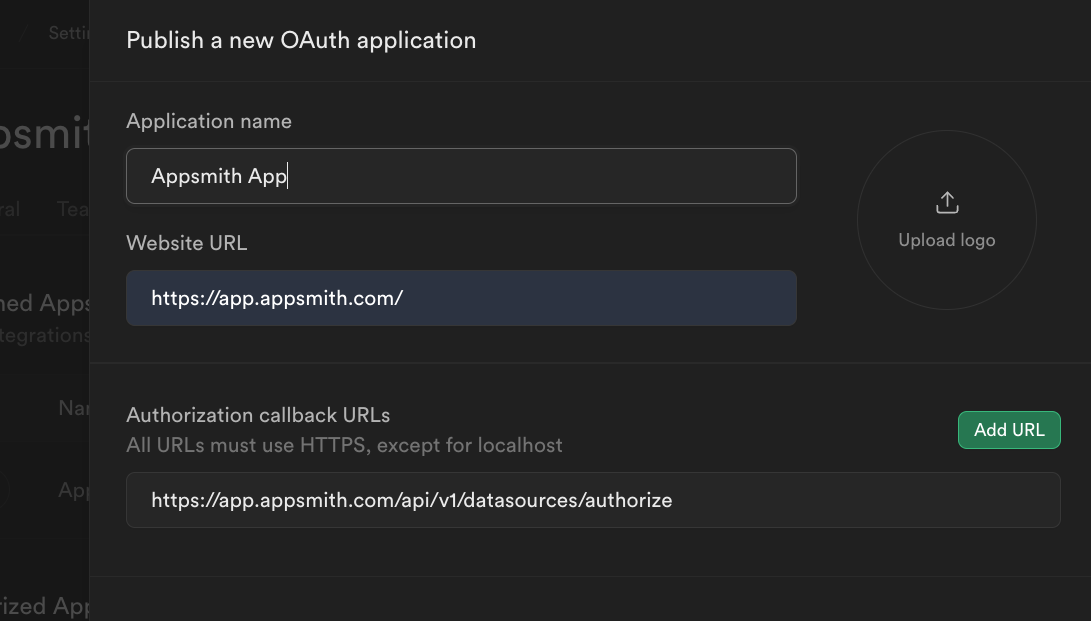
Now you will be prompted with a form to create a new oAuth2 App, first, you will enter the Application Name you want for your app, second, the App Website URL, in this case if you already have an Appsmith app you wish to integrate Supabase, use your Appsmith app URL, if not, just use "https://app.appsmith.com/", once we have our Appsmith app done, we can go back here and edit this field. Last but not least, the Authorization Callback URL, this is the URL that Supabase will callback one the authorization is approved. For all oAuth2 Appsmith apps this value is the same: "https://app.appsmith.com/api/v1/datasources/authorize"
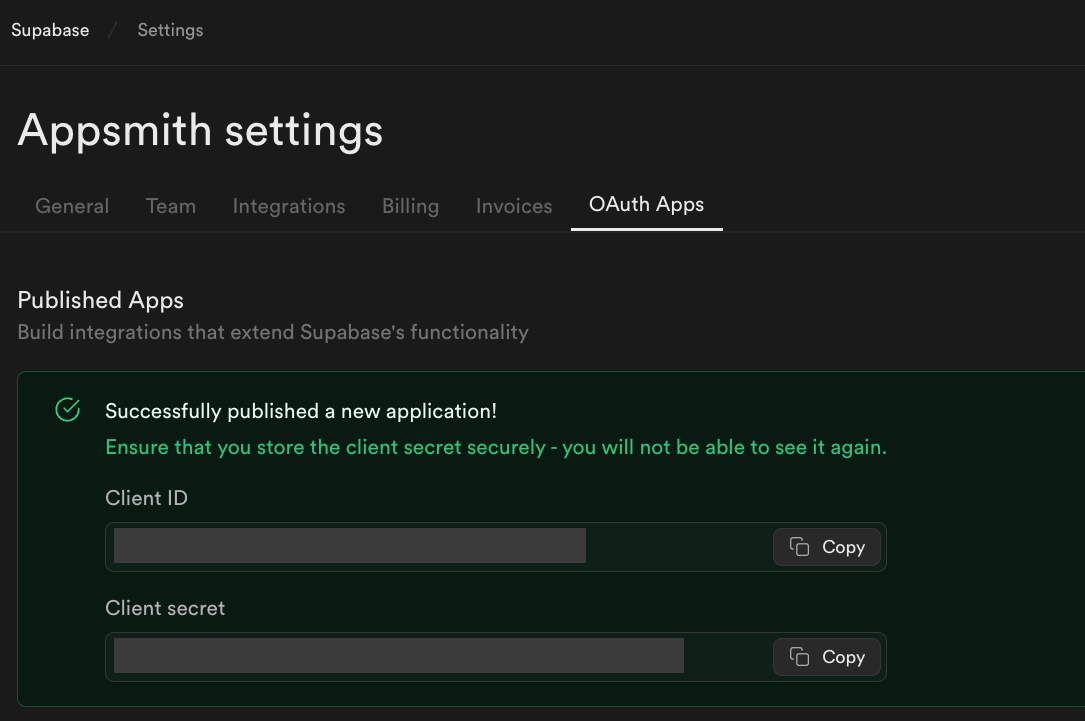
Once you hit Save, Supabase will register your oAuth2 app and it will give you the Client ID and the Client secret, it's really important that you store this 2 values someplace secure since you wont be able to see it again. Make sure to keep this tab open and copy these values someplace elese.
Now we have everything we need to integrate it with Appsmith!
Integrate Supabase as a Datasource in Appsmith
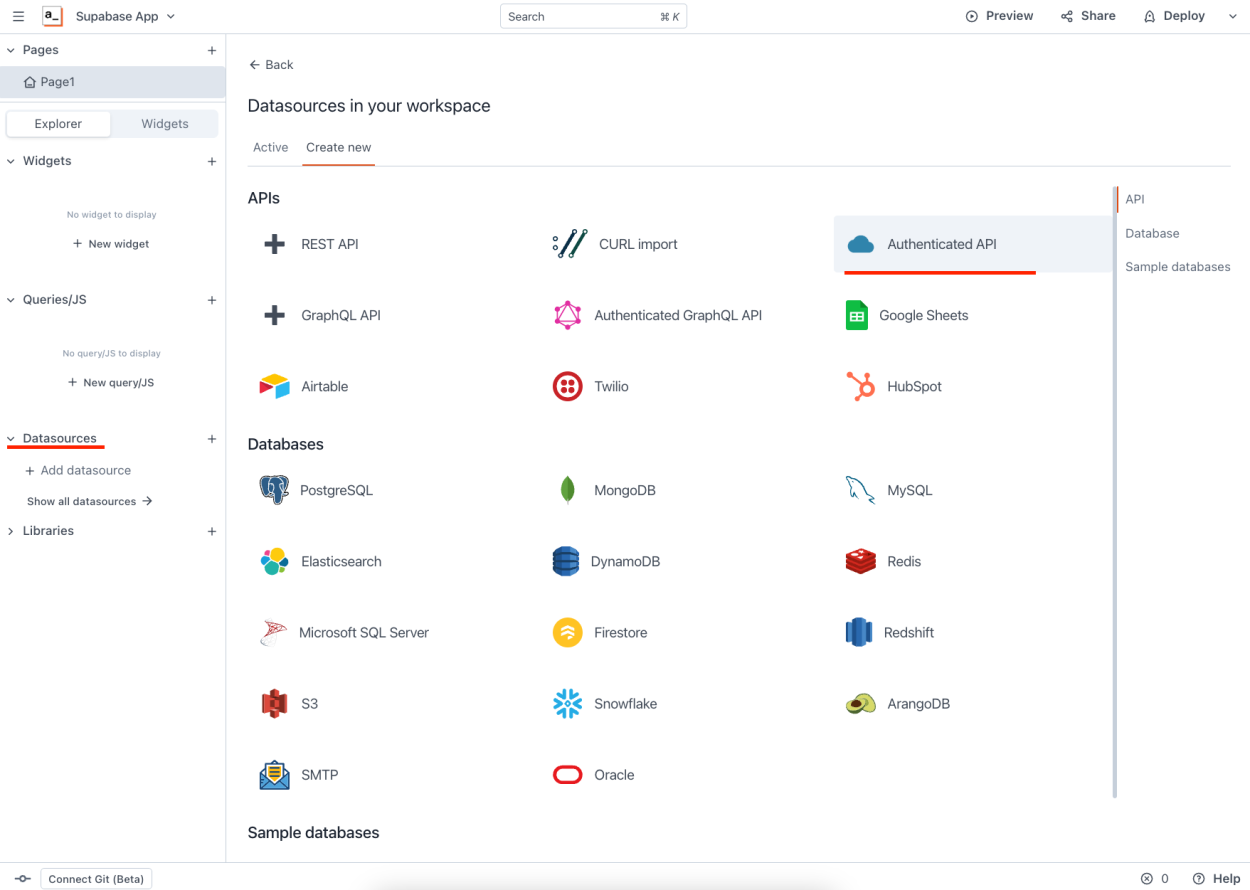
Now, let's go to your Appsmith app, it could be a new one or an existing one, and on the left menu you will see the Datasources menu, click on the "Add Datasource" option and then select "Authenticated API" as the option.
When you select this option, a section with a lot of fields is presented to you. Let's go one by one and I will tell you what you need to input on each option. All of these are based on Supabase's official developer documentation, but I'm making things easier for you 😉
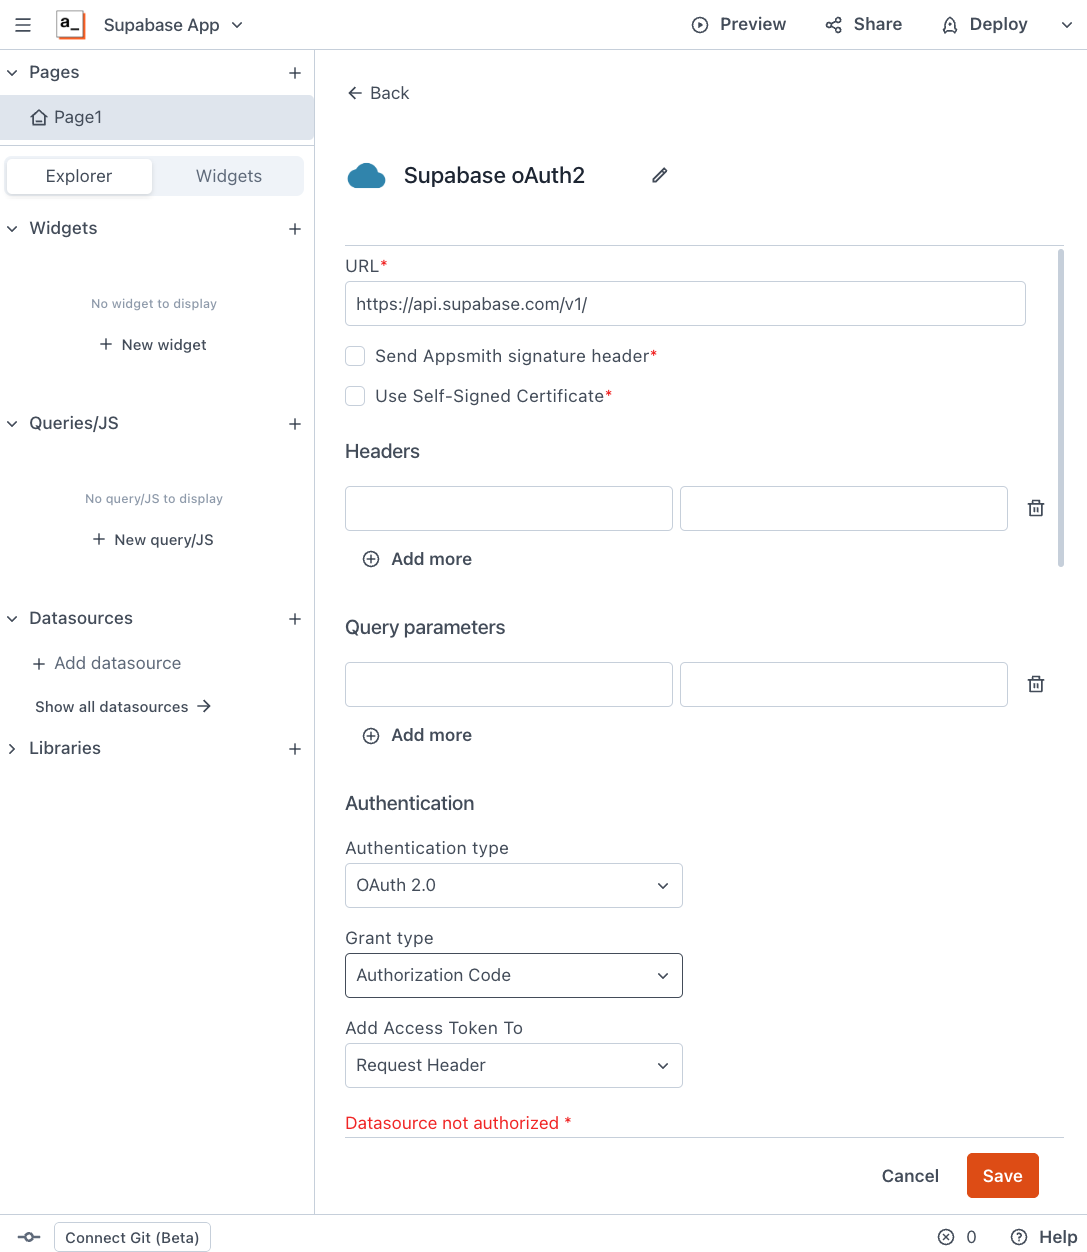
Let's do it pieces by pieces, first you will need to enter Supabase's base API, the authentication type, grant type and access token options:
- URL: https://api.supabase.com/v1/
- Authentication Type: oAuth 2.0
- Grant type: Authorization Code
- Add Access Token To: Request Header
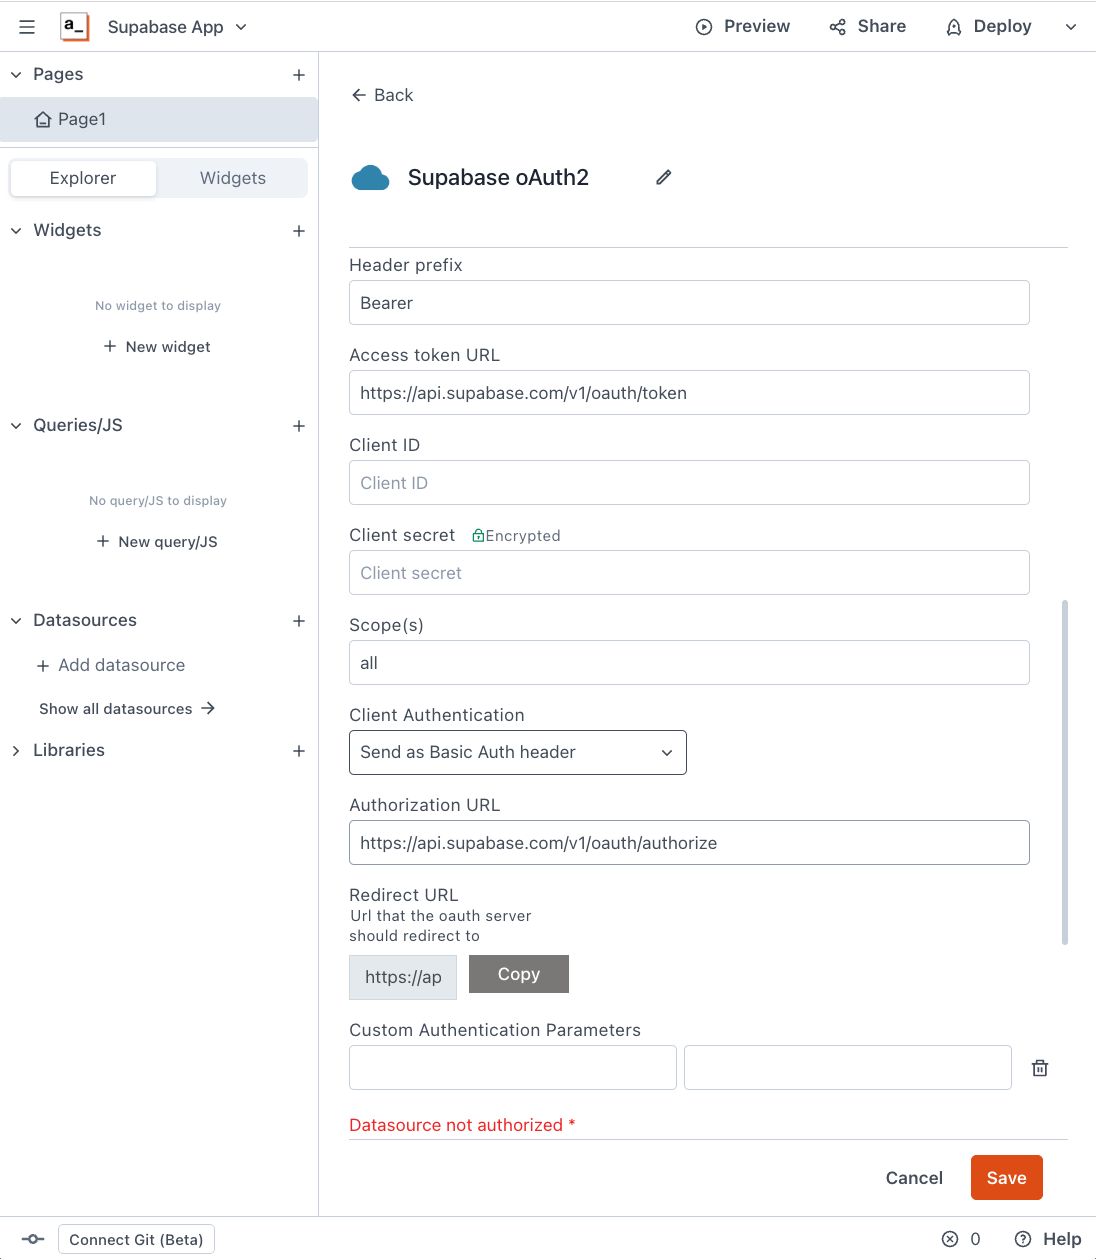
Now keep scrolling and you will see more options, let's digest the ones that unfold
- Header Prefix: Appsmith will automatically fill it with "Bearer" leave it like that.
- Access Token URL: Based on Supabase's docs it should be https://api.supabase.com/v1/oauth/token
- Client ID: Paste the Client ID that Supabase generated in the first step.
- Client Secret: Paste the Client secret that Supabase generated in the first step.
- Scope(s): Currently, Supabase only supports the "all", so let's use that one.
- Authorization URL: Based on Supabase's docs it should be https://api.supabase.com/v1/oauth/authorize
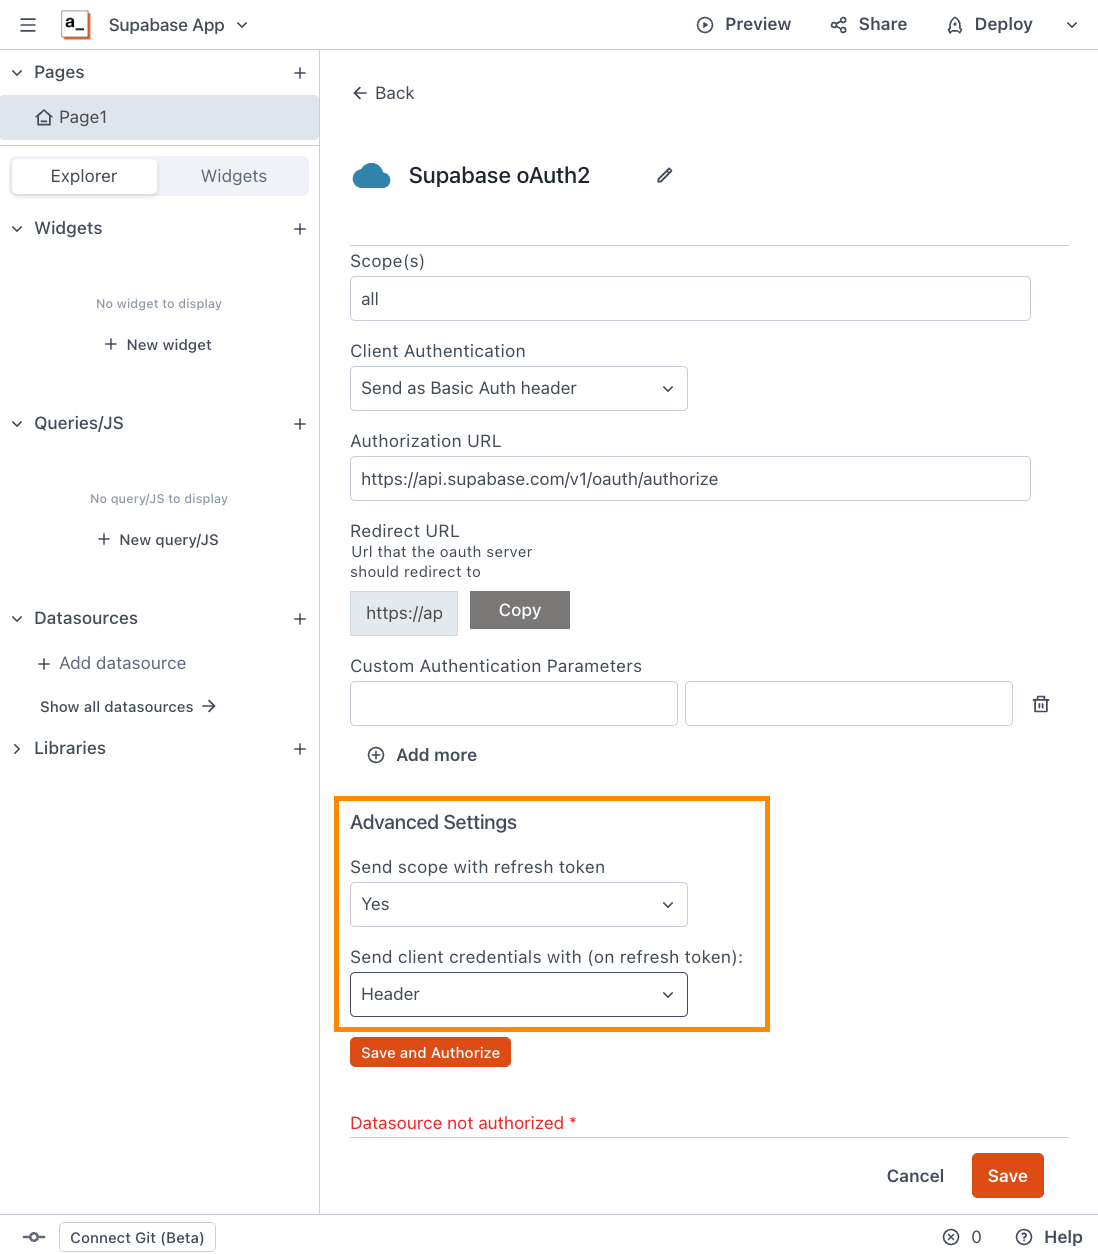
If you scroll down just a little bit more, we'll find the last options we need to set under "Advanced Settings" make sure to define:
- Send scope with refresh token: Yes
- Send client credentials with (on refresh token): Header
Now we are ready to Authorize and Get them alive!!
Authorize the Supabase App into Appsmith
Now that we have defined our oAuth2 Authentication configuration, let's hit that orange button "Save and Authorize". click it and this will take you to Supabase consent screen for your Authorization:
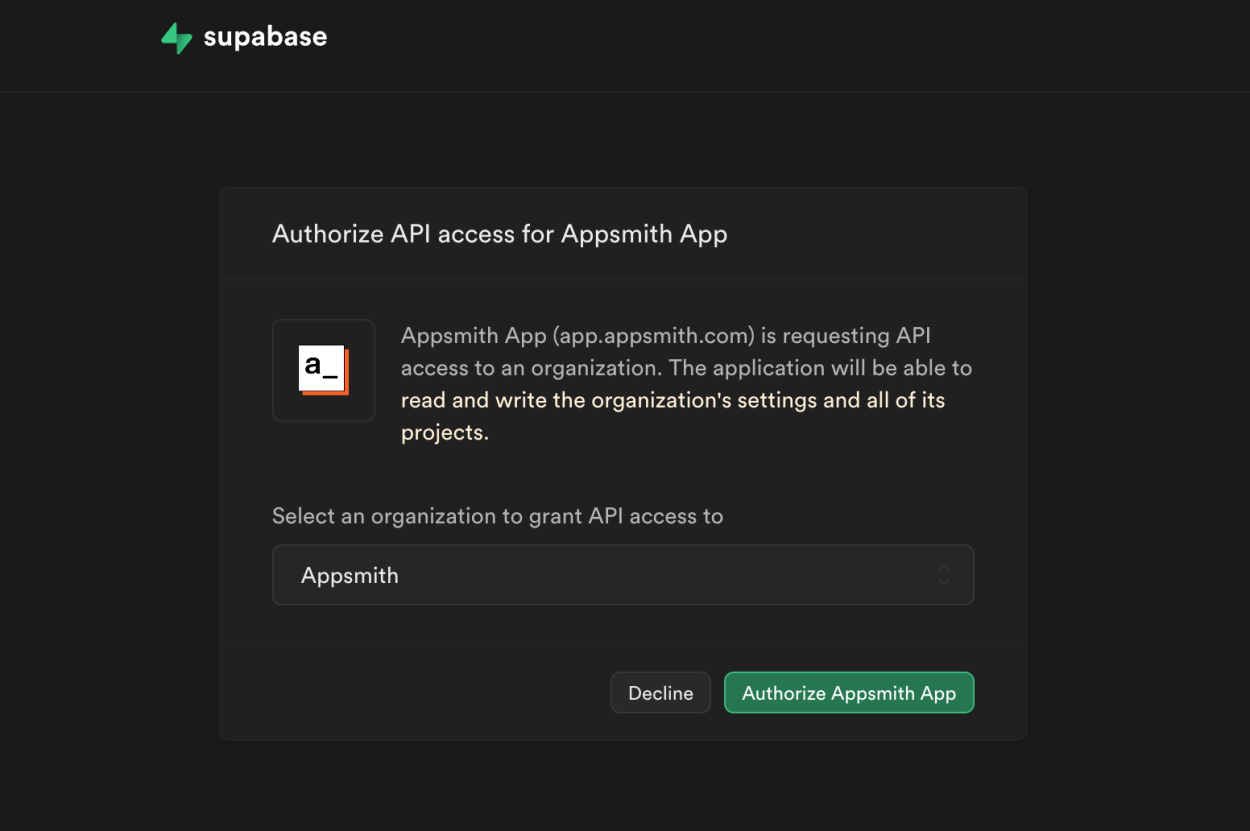
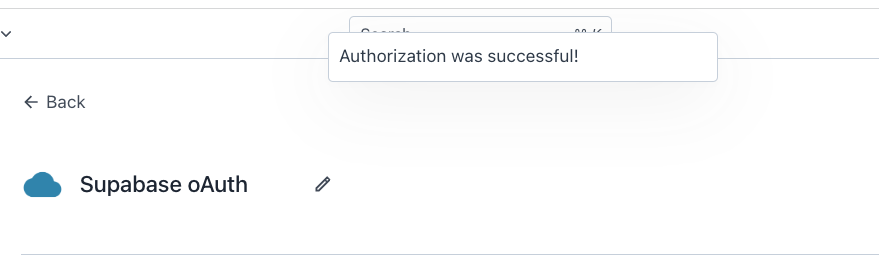
Make sure to click that green button to Authorize Our App and Supabase will redirect back to Appsmith, and you will see a notification confirming the oAuth2 Authorization is now successfully in place!
From here, we can start using any of the available Supabase APIs endpoints using this newly created Datasource, as Appsmith will automate the process of refreshing access tokens, ensuring that users do not face disruptions during their sessions.
Use the newly created Datasource
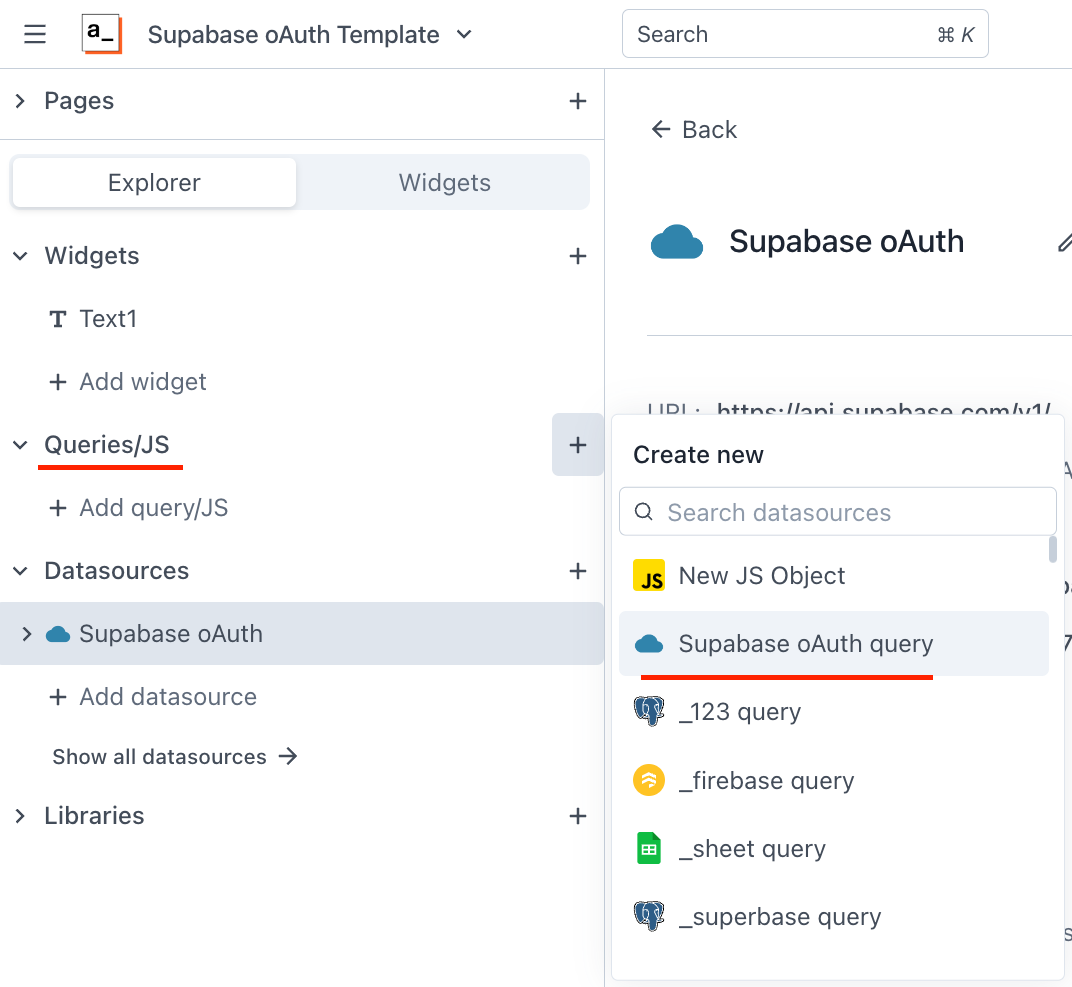
Now that we have OAuth2 successfully integrated inside Appsmith, you can go ahead and create a new Query, using the left menu "+" icon next to the Queries section and then selecting the "Supabase OAuth2 query" option.
Now Appsmith will present a very familiar query builder UI for you to define your request, and it will pre-populate the base URL based on the one we defined in the datasource. We can reference Supabase API Docs here, for example, let's use the "/projects" endpoint to request for the organization projects list. Also, it's important to define a meaningful name for this query, in this case, I'm gonna call it "SUPABASE_PROJECTS"
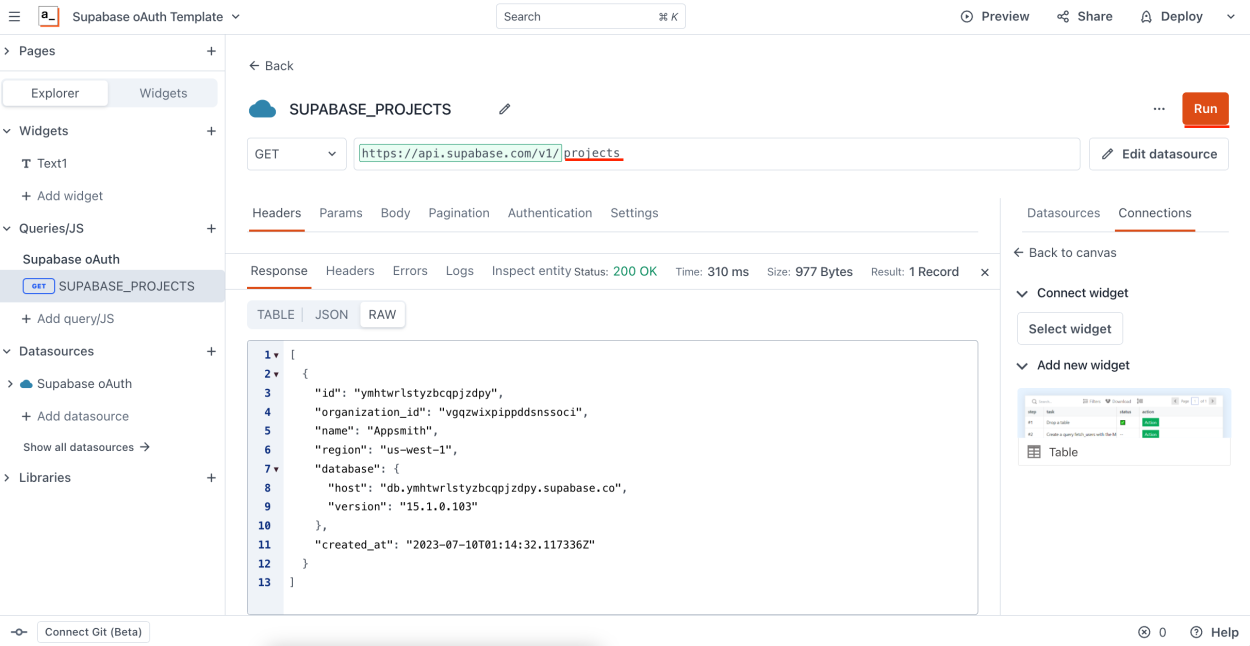
If we hit "RUN" the API will correctly authenticate, Appsmith will automatically inject the token on the requests and pulls information with no problems whatsoever! You can see the response JSON Payload and we can bind this API query to an UI table component that updates automatically from Supabase with 1 one click, selecting the "Add new Widget" -> Table widget on the right of you screen.
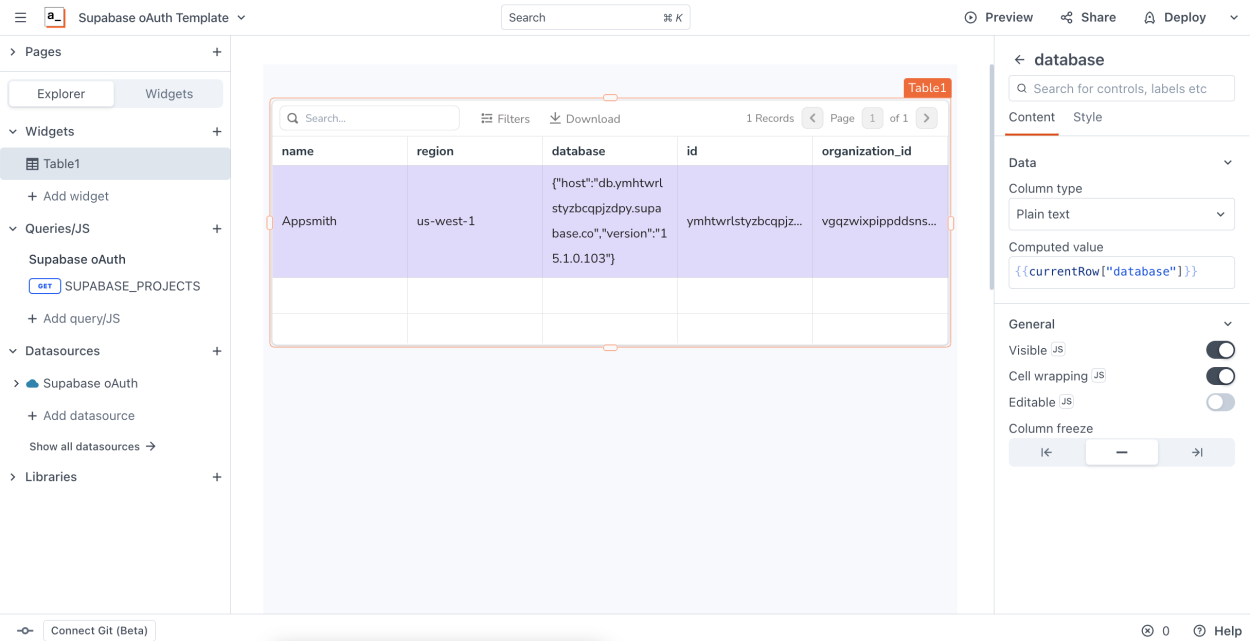
And BOOM, just like that in 3 steps we have an oAuth Integration that manages secrets, pulls data from authenticated APIs and binds data automatically to UI components, isn't this amazing? And to make things even easier for you we've created a forkable sample app that you can fork and just input your Client ID and Secret and get rolling: https://app.appsmith.com/app/supabase-app/page1-64c597755dd3482b9ab5e31e
Conclusion
Supabase and Appsmith form a powerful alliance that equips developers with the tools they need to build sophisticated applications and internal tools with ease. The real-time capabilities of Supabase coupled with the rapid UI development offered by Appsmith create a winning combination for productive development.
By implementing OAuth2 as the authentication mechanism, Supabase and Appsmith ensure the security of user data and streamline the login process with popular single sign-on providers. The result is a seamless, secure, and scalable application that empowers teams to bring their ideas to life faster and more efficiently.

I am on web and I think the UX has changed a bit. I am trying to follow with the current Ui but I have gottent to a point of confusion as I cant follow up after renaming the API as SUPABASE_PROJECTS.